
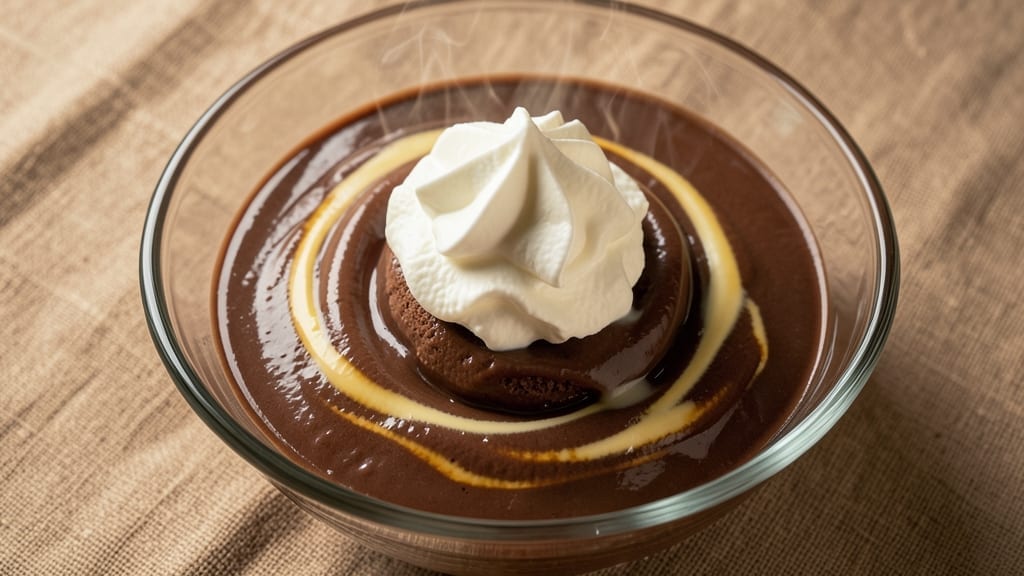
This 3-ingredient coffee ice cream recipe transforms your morning brew into velvety frozen dessert with just coffee, condensed milk, and cream—no ice cream maker required. The secret lies in the perfect balance of rich, aromatic coffee and creamy textures that develop as it freezes overnight.
I perfected this method after burning through three batches of overly icy, grainy ice cream, and now it’s my go-to for instant dessert satisfaction.
The beauty of this recipe is its simplicity: no churning, no waiting for an ice cream maker to finish its cycle, and no complicated techniques. Just combine the ingredients, pour into a container, and let the freezer work its magic.
The result? A smooth, coffee-forward treat with a creamy texture that rivals store-bought—but with none of the artificial aftertaste. It’s the kind of dessert that feels indulgent yet effortless.
By morning, you’ll have a creamy, coffee-infused ice cream with a velvety mouthfeel and deep, roasted flavor notes. The condensed milk ensures richness without overpowering the coffee, while the heavy cream adds that signature smoothness.
It’s perfect for satisfying late-night cravings or impressing guests with a dessert that takes less than five minutes to prepare.
For an extra touch, top with whipped cream, a sprinkle of cocoa powder, or a few chocolate shavings before serving. This recipe scales easily, so you can make a single serving or a pint-sized batch for sharing. Let’s get started—your freezer (and taste buds) will thank you.
Ingredients for 3 ingredient coffee ice cream
Three ingredients, zero fuss—your freezer’s about to make magic happen.
| Ingredient | Amount | Notes |
|---|---|---|
| Strong Brewed Coffee ☕ | 2 cups | Chilled, cold-brew preferred |
| Sweetened Condensed Milk 🥛 | 1 can | 14 oz can (standard size) |
| Heavy Whipping Cream 🥛 | 1 cup | Full-fat for best texture |
The coffee is your flavor foundation, so don’t cut corners here. Cold brew gives the smoothest texture, but strong regular coffee works too—just let it cool completely before mixing. Starbucks or local coffee shops often have pre-chilled options, or brew a pot the night before. If you’re using instant coffee, Folgers or Maxwell House work well, but avoid the super-cheap brands—they taste like dirt. The condensed milk? Any brand is fine, but Dutch Boy or Eagle Brand are reliable staples. Pro tip: shake the can before opening—sugar settles at the bottom.
No condensed milk? Mix 1 cup heavy cream with 1/2 cup granulated sugar—it’s not identical, but it’ll save you a trip. Running low on cream? Half-and-half works in a pinch, but the texture will be lighter. Want extra richness? Add a splash of vanilla extract or cocoa powder to the mix. The coffee should be fully cooled—hot liquid makes the ice cream grainy. If you’re worried about texture, whisk the mixture briefly before freezing. And if you’re making this ahead, pre-whip the cream slightly before combining for extra fluffiness.
This freezes beautifully—just pour into a shallow container and smooth the top. Cover with parchment paper pressed directly on the surface to prevent ice crystals. 24 hours is ideal, but it’ll be ready in 12 if you’re impatient. For serving, let it sit at room temp for 5 minutes—it’ll be firmer from the freezer. Store any leftovers in an airtight container for up to 2 weeks. Pro move: freeze in individual portions for single-serving convenience. And if it gets too hard, let it soften on the counter for 10 minutes before scooping.
Why You’ll Love This Recipe
- Here’s what sold me: that first bite hits like a latte in dessert form. The coffee’s deep, the condensed milk adds caramel sweetness, and the whipped cream gives it a velvety texture. It’s basically a coffeehouse treat, but I made it in my freezer.
- No Mixing Needed: I swear by this—just dump the ingredients into a bowl, stir once, and freeze. That’s it. No food processor, no churning, no stress. The condensed milk and cream do all the heavy lifting while you sip your coffee and pretend you’re a fancy ice cream maker.
- Rich Without Effort: Here’s what sold me: that first bite hits like a latte in dessert form. The coffee’s deep, the condensed milk adds caramel sweetness, and the whipped cream gives it a velvety texture. It’s basically a coffeehouse treat, but I made it in my freezer.
- Date Night or Lazy Sunday: Between us, this is my go-to for when I want something special but don’t feel like cooking. Serve it in tiny bowls with a sprinkle of cocoa or crushed cookies—suddenly, you’re hosting. Or, let’s be real, eat it straight from the container like I do on weekends.
Step-by-step instructions for 3 ingredient coffee ice cream
Here’s how to make this velvety, dreamy coffee ice cream with just three ingredients.
Combine the Coffee and Condensed Milk
In a medium mixing bowl, pour in the 2 cups Strong Brewed Coffee (make sure it’s completely chilled first). This cold base is crucial for preventing ice crystals later. Then open the 1 can Sweetened Condensed Milk and pour it directly into the bowl with the coffee.
Use a whisk to gently stir until the condensed milk dissolves completely and the mixture becomes smooth. You’ll notice it thickens slightly as the coffee and condensed milk blend together. This step creates the creamy foundation of your ice cream—no lumps allowed, so take your time mixing until it’s perfectly uniform.
Fold in the Heavy Whipping Cream
Next, carefully pour in the 1 cup Heavy Whipping Cream into the coffee mixture. Again, use a whisk to gently fold it in, working from the bottom up to incorporate all the cream without creating bubbles. The cream should blend smoothly into the coffee mixture, creating a thick, pudding-like consistency.
Here’s the thing—don’t overmix. You want to maintain a smooth texture without incorporating too much air. The mixture should look like a rich, thick coffee pudding at this stage. If it looks too thin, let it sit for 5 minutes to thicken slightly before proceeding.
Pour into Freezer Tray and Freeze
Transfer the mixture to a loaf pan or rectangular baking dish (about 8×4 inches) and smooth the top with a spatula. Cover the pan tightly with plastic wrap, pressing it directly onto the surface to eliminate air bubbles. This step is critical—air bubbles create ice crystals, which ruin the creamy texture.
Place the covered pan in the freezer and freeze for at least 6 hours, preferably overnight. The longer it freezes, the firmer it becomes, but 6 hours gives you that perfect scoopable consistency. I like to check it after 4 hours—if it’s still too soft, give it another 2 hours in the freezer.
Scrape and Serve
Once frozen solid, remove the ice cream from the freezer and let it sit at room temperature for 5-10 minutes before serving. This brief thawing makes it easier to scoop without breaking your ice cream scoop. Use a fork to scrape along the sides of the pan, then use an ice cream scoop to portion out the creamy treat.
Serve immediately while still slightly soft for the best texture. The finished ice cream should be rich, velvety, and intensely coffee-flavored with a perfect balance of sweetness. If it’s too hard to scoop after freezing, let it sit for another 5 minutes before trying again. Store any leftovers in an airtight container in the freezer for up to 2 weeks.
Pro Tips For Making 3 Ingredient Coffee Ice Cream
- STIR THE COFFEE DOWN: After mixing the coffee and condensed milk, stir it vigorously for 30 seconds—this breaks up the sugar crystals so they dissolve properly. I used to skip this and ended up with gritty ice cream that tasted like I’d forgotten to shake a snow globe.
- CHILL THE MIX 4 HOURS: Pop the blended mixture in the fridge for at least 4 hours (overnight is better) before churning. Cold ingredients whip faster and give you a creamier texture—trust me, your ice cream maker won’t hate you for the extra time.
- USE COLD CREAM, NOT ROOM TEMP: Straight from the fridge, heavy whipping cream whips up fluffier and holds its shape longer. I learned this the hard way when my first batch turned into a sad, soupy mess because I used warm cream straight out of the carton.
- WHIP IN STAGES: Fold the whipped cream into the coffee mixture slowly in 3 additions, mixing gently between each. Dumping it all in at once collapses the air and ruins the lightness—this isn’t a smoothie, it’s a dessert that needs patience.
Perfect pairings for these flavors
Coffee Liqueur Pairing
Elevate your coffee ice cream with a shot of Kahlúa or Tia Maria—just drizzle 1-2 teaspoons over the scoop before serving. The caramel and vanilla notes in these liqueurs complement the coffee’s bitterness beautifully.
For a boozy twist, add a splash of Baileys Irish Cream to the mix before freezing—it’ll give your ice cream a creamy, boozy depth. 🍷
Whipped Cream Toppings
Freshly whipped heavy cream or coconut whipped cream adds a light, airy contrast to the rich ice cream. I like to sweeten mine with 1 teaspoon vanilla extract and a pinch of sea salt—trust me, it takes it to the next level.
For a vegan option, use coconut cream whipped to stiff peaks. A dusting of unsweetened cocoa powder or crushed hazelnuts adds crunch and visual appeal.
Chocolate Drizzle
Melt ½ cup dark chocolate (I prefer 70% cacao) with 1 tablespoon coconut oil for a silky drizzle. The bitterness of the chocolate balances the sweetness perfectly. For extra decadence, add ½ teaspoon espresso powder to the melted chocolate.
Let it cool slightly before drizzling over the ice cream. Pro tip: Use a squeeze bottle for clean, even lines. 🍫
Crunchy Add-Ins
Toasted pecans or hazelnuts add texture and a nutty depth. Pulse ¼ cup nuts in a food processor until finely chopped, then toast in a dry pan over medium heat for 3-4 minutes until fragrant.
Let cool before sprinkling on top. For a chocolatey crunch, use crushed chocolate-covered espresso beans—they’re a game-changer for coffee lovers. 🌰
Citrus Zest Finish
A bright finish of orange zest or lemon zest cuts through the richness. Just grate ½ teaspoon zest from an organic orange or lemon and sprinkle lightly over the top.
The citrus adds a refreshing contrast to the deep coffee flavors. Pair it with a few drops of orange liqueur like Cointreau for an adult-friendly twist. 🍊
Spiced Syrup Drizzle
Heat ¼ cup heavy cream with 2 tablespoons brown sugar and a pinch of cinnamon or cardamom until dissolved. Let cool, then drizzle over the ice cream. The warm spices add a cozy, aromatic touch that pairs perfectly with coffee.
For extra warmth, add a tiny pinch of ground ginger or nutmeg** to the syrup. ✨
Nutrition facts
Frequently asked questions
Can I use instant coffee instead of brewed?
Yes, but choose a high-quality instant coffee like Folgers or Maxwell House—cheap brands can make your ice cream taste bitter. Dissolve 2 tablespoons instant coffee in 1 cup hot water first, then cool completely before mixing with the condensed milk. For extra depth, use 1 tablespoon espresso powder instead of instant.
Why did my coffee ice cream turn grainy?
Graininess happens when air bubbles form during freezing or the mixture isn’t cold enough. Always chill the coffee completely before mixing, and press plastic wrap directly onto the surface to eliminate air. For extra smoothness, whisk the mixture briefly before freezing or add 1 tablespoon corn syrup to the recipe.
Can I make this without an ice cream scoop?
Let the ice cream sit at room temperature for 10-15 minutes to soften, then use a butter knife to slice and scoop. For easier serving, freeze in a loaf pan and cut into squares. If it’s too hard, microwave for 10 seconds to soften slightly before scooping.
How do I make it less sweet?
Reduce the sweetness by using ½ cup less condensed milk and replacing it with ½ cup cold brewed coffee**. For a balanced flavor, add 1 teaspoon vanilla extract or ½ teaspoon cinnamon to enhance the coffee’s natural depth. Taste as you go—adjust gradually!
Can I add chocolate chips or mix-ins?
Yes, but fold them in only after the mixture is frozen solid and slightly softened. Stir in ½ cup chocolate chips or crushed cookies—they’ll melt slightly and create pockets of flavor. For even distribution, press mix-ins into the surface before refreezing for 1 hour. Avoid adding nuts or crunchy toppings until serving.

- 6 Egg Cake Recipe with Oil: Light as Air With Buttery Moisture - October 4, 2026
- 4 Bean Casserole Recipe: One-Pan Heartiness With Smoky Paprika Depth - October 4, 2026
- 3-Ingredient Keto Mug Cake Recipe: Microwave Magic in 2 Minutes - October 4, 2026