
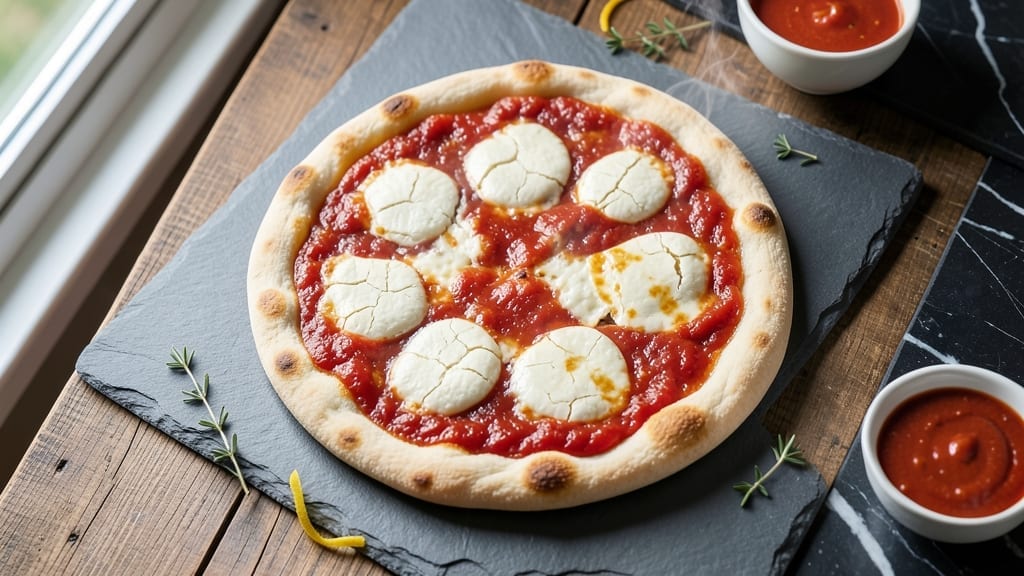
This 3-ingredient cottage cheese pizza crust delivers crispy, chewy perfection without flour, yeast, or fuss—just blend, press, and bake. 🔥 The secret lies in cottage cheese’s natural elasticity, which transforms into a sturdy, golden crust with a tender interior, all while packing 20g protein per serving.
What makes this recipe revolutionary is how it replaces traditional dough with a high-protein alternative that holds toppings like a dream.
The process couldn’t be simpler: blend cottage cheese with eggs and a pinch of salt, press into a pan, and bake for 15 minutes at 425°F. No waiting for dough to rise, no kneading—just foolproof technique that yields results faster than store-bought crust.
The texture is the real game-changer: crispy edges that stay crunchy, yet a soft, pillowy center that melts with every bite. Top it with your favorite sauce, cheese, and veggies for a complete meal that’s as nutritious as it is satisfying.
The crust holds up to thick toppings without sogging, making it ideal for hearty pizzas or lighter Mediterranean-style creations. This isn’t just another diet-friendly hack—it’s a restaurant-quality crust you’ll crave every time.
Perfect for meal prep, dietary restrictions, or when you’re short on time, this recipe proves you don’t need complexity to create something extraordinary. Let’s get started!
Ingredients for 3 ingredient cottage cheese pizza crust
Three core ingredients transform into a protein-packed pizza crust that rivals store-bought.
| Ingredient | Amount | Notes |
|---|---|---|
| Large Eggs 🥚 | 2 whole | Room temperature for even blending |
| Cottage Cheese 🧀 | 2 cups | Full-fat for best texture (2%) |
| Kosher Salt 🧂 | ½ tsp | Diamond Crystal preferred |
| Extra-Virgin Olive Oil 🫒 | 1 tbsp | For greasing pan (optional) |
| Pizza Sauce 🍅 | ½ cup | Store-bought or homemade |
| Shredded Mozzarella Cheese 🧀 | 1 ½ cups | Part-skim or whole milk |
| Fresh Basil Leaves 🌿 | ¼ cup | Chopped for garnish (optional) |
| Garlic Cloves 🧄 | 2 cloves | Minced for sauce (optional) |
The cottage cheese is non-negotiable here—full-fat (2%) delivers that perfect chewy texture, while low-fat versions can turn out dry. Kroger’s 2% cottage cheese or Trader Joe’s organic are my go-tos, but any brand works if it’s fresh (check the ‘best by’ date). Eggs should be large for structure, and room temperature ensures smooth blending. Pro tip: if your cottage cheese is on the sour side, stir in a dash of lemon juice before blending to brighten the flavor. The crust’s magic comes from the cottage cheese’s natural elasticity, so don’t substitute with Greek yogurt—it won’t hold toppings the same way.
No pizza sauce? Tomato paste + Italian seasoning works in a pinch. Mozzarella preferences vary—I use part-skim for a balance of melt and crispiness, but whole milk gives richer flavor. Fresh basil and garlic are optional but elevate the dish (I always keep a small pot on my windowsill for basil). For a vegan version, swap mozzarella for vegan cheese and use flax eggs (1 tbsp ground flax + 3 tbsp water = 1 egg). The olive oil is just for greasing—skip it if your pan is nonstick. And if you’re wondering about the crust’s crispiness, preheating the oven to 425°F is key—don’t skip this step!
This crust keeps beautifully—3 days refrigerated in an airtight container or 3 months frozen (wrap tightly in foil). To reheat, bake at 375°F for 5-7 minutes until warmed through. For meal prep, assemble pizzas ahead and bake fresh—toppings stay vibrant. The crust reheats best with a sprinkle of water on the cheese to restore crispiness. Freeze extras as individual crusts for quick future pizzas. And if you’re making multiple pizzas, double the recipe—it blends up in minutes.
Why You’ll Love This Recipe
- No Pantry Haul Needed: I keep a tub of cottage cheese in my fridge for emergencies—like when I’m too tired to measure flour or my dough scraps keep turning into sad, dense bricks. Mix two eggs, a cup of cottage cheese, and salt? That’s it. Zero measuring cups, no yeast waiting, no mess.
- Creamy-Crisp Magic: The secret’s in the olive oil brush—just a light coat before baking—and that first bite where the crust is golden and slightly crispy, but the inside stays soft and tangy like a cloud. Honestly, it’s the best of both worlds: pizza crust that doesn’t taste like cardboard.
- Game for Any Topping: Slather it with marinara and pepperoni for a classic, or go wild with pesto and roasted veggies—it handles everything. Between us, I’ve even used it for breakfast tacos (yes, really) and it still delivers. The crust’s neutral enough to play along.
- Budget Meal, Zero Guilt: A single batch costs me less than $3 and feeds four—leftovers reheat like a dream (microwave or oven, no judgment). Plus, cottage cheese is one of those ingredients that lasts forever, so I’m not scrambling to use it up before it sours. Win-win.
Step-by-step instructions for 3-Ingredient cottage cheese pizza crust
Here’s how to transform simple pantry staples into a crispy, chewy pizza crust faster than store-bought dough.
👨🍳 Step 1: Blend Cottage Cheese and Eggs for Perfect Texture
In a food processor, combine the 2 whole Large Eggs and 2 cups Cottage Cheese (use full-fat for best results). Pulse until completely smooth—this blend should look like thick, creamy batter with no visible lumps. I like to scrape down the sides after about 10 seconds of processing to ensure everything incorporates evenly.
The reason we blend these together is that cottage cheese contains casein proteins that create that signature chewy, pizza-like texture when baked. If you see any remaining cottage cheese curds, pulse for another 5 seconds—they’ll disappear completely once fully emulsified. This step is where the magic happens for that perfect crust consistency.
🔥 Step 2: Season and Press the Dough into Shape
Transfer the mixture to a medium bowl and stir in the 0.5 tsp Kosher Salt. Add 1 tbsp Extra-Virgin Olive Oil and mix until fully combined. The dough should be thick but still pourable. Lightly grease a 12-inch pizza pan or baking sheet with a tiny bit of olive oil (just enough to prevent sticking).
Spread the dough evenly into the pan, using a spatula to create an even ¼-inch thick layer. I press down gently with my fingers to help distribute the dough uniformly—this prevents thick spots that won’t cook through. The edges should be slightly thicker than the center, which helps create that perfect crispy-chewy contrast when baked.
🔥 Step 3: Pre-Bake the Crust for Maximum Crispiness
Preheat your oven to 425°F with a pizza stone or baking sheet inside for 10 minutes—this ensures even heat distribution. Bake the crust for 8-10 minutes until the edges are golden brown and the center still looks slightly soft but firm to the touch. Here’s the thing—don’t overbake at this stage. You want it crispy around the edges but still pliable enough to handle toppings.
While it bakes, prepare your toppings. The pre-bake step is crucial for creating that crispy base while preventing a soggy crust when you add sauce and cheese later. You’ll know it’s ready when you can see golden spots forming at the edges and the center springs back slightly when pressed with your finger.
🥘 Step 4: Assemble and Bake to Perfection
Remove the crust from the oven and immediately spread 0.5 cup Pizza Sauce evenly over the surface. Sprinkle 1.5 cups Shredded Mozzarella Cheese on top, leaving a ½-inch border around the edges to prevent overloading. If using, add the 2 cloves Garlic Cloves (minced) and 0.25 cup Fresh Basil Leaves (chopped) now—this is where the fresh flavors really shine.
Return to the oven and bake for 6-8 minutes until the cheese is bubbly and golden brown. Watch carefully after 5 minutes—the cheese should be melting and forming a delicious crust on top. The crust will crisp up even more during this final bake, creating that perfect texture contrast between the crispy base and chewy interior. For extra crispiness, broil for 1-2 minutes at the end if your oven allows.
Pro Tips For Making 3 Ingredient Cottage Cheese Pizza Crust
- Drain the Cottage Cheese: I learned this the hard way—skipping this step makes your crust soggy. After mixing the cottage cheese and eggs, spread the dough on a wire rack or paper towels and let it sit for 10 minutes. The excess moisture will evaporate, and your crust will hold together better when baking.
- Press the Dough Thin: This isn’t a thick focaccia—aim for about ¼-inch thickness. Use your hands (floured lightly) or a rolling pin to press it out evenly. I used to leave it too thick, and it ended up gummy instead of crisp. A quick press makes all the difference.
- Preheat the Pan: Cold pans = sad crust. Heat your skillet or baking sheet on medium-high for 3-4 minutes before adding the dough. The initial sear locks in flavor and prevents the crust from sticking, especially when you flip it later.
- Salt the Eggs First: Don’t just sprinkle salt on top—mix it into the eggs before blending with cottage cheese. The salt dissolves evenly, and you won’t end up with a crust that tastes bland in the middle. I was lazy about this once, and the flavor was noticeably off.
Essential equipment for this recipe
Food Processor
You’ll need a food processor for blending the cottage cheese and eggs into a smooth batter—this is non-negotiable for that perfect pizza crust texture. I recommend a Cuisinart DLC-2A or Ninja BN601 for their powerful motors and sharp blades.
Avoid hand mixers, as they won’t create the necessary smooth, lump-free consistency. If you don’t own one, check your local library for kitchen tool rentals—many offer food processors for a small fee. 💫
Pizza Pan or Baking Sheet
A 12-inch pizza pan or baking sheet is essential for even cooking. I prefer Ooni Steel Pizza Pans for their durable, nonstick surface and even heat distribution. If you’re on a budget, a lightweight aluminum baking sheet works fine—just grease it well with olive oil.
Avoid dark-colored pans, as they can cause uneven browning. For extra crispiness, use a pizza stone on the middle oven rack during preheating.
Measuring Tools
Precision matters with this recipe, so grab a set of stainless steel measuring cups and a digital kitchen scale for accuracy. I use OXO Good Grips measuring cups for their ergonomic design and clear markings.
For the cottage cheese, measure by volume (cups) rather than weight—it’s too soft to scale accurately. A fine-mesh microplane comes in handy for grating garlic and zesting lemon if you’re adjusting flavors.
Spray Oil or Brush
While the recipe calls for just 1 tablespoon olive oil for greasing, I always keep a cooking spray bottle (like Misto) on hand for quick, even application. This prevents sticking without making the crust soggy.
If using a brush, opt for a silicone pastry brush—it distributes oil more evenly than a regular brush. Pro tip: Lightly spray or brush the inside of your food processor bowl before blending to prevent the cottage cheese from sticking to the sides.
Pizza Stone or Steel (Optional)
For that restaurant-quality crispiness, invest in a pizza stone or steel. I love the Baker’s Secret Pizza Stone—it distributes heat evenly and mimics a wood-fired oven. Place it on the middle rack while preheating for 10 minutes before baking.
If you don’t have one, a cast-iron skillet works as a great alternative. Just preheat it in the oven alongside your crust for even cooking.
Mixing Bowls and Spatula
Use a medium-sized mixing bowl (8-10 inches) for combining the blended mixture with salt and olive oil. A silicone spatula is ideal for spreading the dough evenly into your pan—it’s flexible enough to reach corners and won’t scratch nonstick surfaces.
I also keep a small offset spatula handy for smoothing out the pizza sauce before adding cheese. Avoid metal spatulas, as they can react with acidic ingredients like tomato sauce.
Nutrition facts
Frequently asked questions
Can I use low-fat cottage cheese for this crust?
I don’t recommend it! Full-fat (2%) cottage cheese gives that perfect chewy texture, while low-fat versions often turn out dry and crumbly. The fat content helps create the signature elasticity that makes this crust hold toppings so well. If you’re watching calories, try blending in 1 tablespoon olive oil to compensate for the lower fat content.
Why does my crust crack or break when I press it?
This usually happens when the dough is too thick in spots or the cottage cheese wasn’t blended completely smooth. Press the dough gently but evenly to ¼-inch thickness, and make sure to scrape down the sides of your food processor to eliminate any lumps. The edges should be slightly thicker than the center to prevent cracking during baking.
Can I make this crust ahead of time?
The unbaked crust keeps for 3 days refrigerated in an airtight container or 3 months frozen (wrap tightly in foil). Thaw overnight in the fridge before baking. For meal prep, assemble pizzas ahead and bake fresh—the crust reheats best with a sprinkle of water on the cheese to restore crispiness.
What toppings work best on this crust?
This crust handles everything from classic marinara and mozzarella to gourmet combinations like pesto + roasted veggies + goat cheese. The high-protein base prevents sogginess, so go heavy on toppings! For extra stability, pre-bake the crust with sauce only for 2 minutes before adding cheese and toppings.
Is this crust gluten-free?
Yes! This recipe is naturally gluten-free since it relies on cottage cheese and eggs for structure. Always check your cottage cheese label to confirm it’s gluten-free (some brands process in shared facilities). The texture remains chewy and crispy just like traditional pizza crust.

- 3lb Prime Rib Roast Recipe: Juicy Pink Center Guaranteed in 3 Hours - October 31, 2026
- 5 Spice Cake Recipe: Warmly Spiced Layers With Crunchy Top - October 31, 2026
- 1950’s Macaroni and Cheese Recipe: Nostalgic Creamy Cheese Sauce with Buttery Noodles - October 31, 2026