
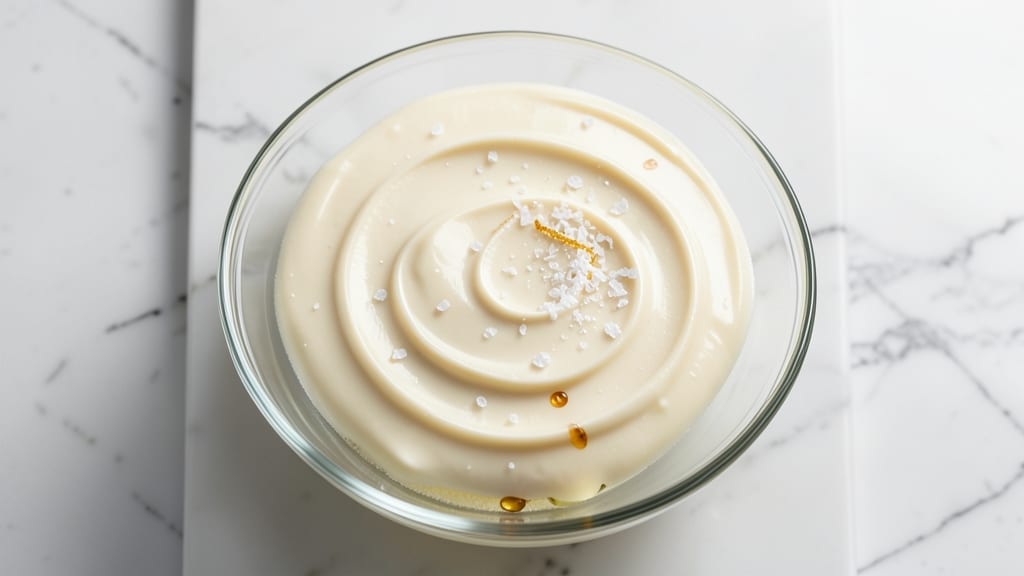
This 3-ingredient icing recipe delivers velvety smoothness in minutes, perfect for decorating cakes, cupcakes, or cookies without the fuss of traditional frosting. The secret lies in a simple combination of powdered sugar, butter, and milk—no fancy equipment or complicated techniques required.
I developed this recipe after years of baking, where I needed a quick, reliable icing that could be customized to any flavor profile while maintaining that signature silky texture.
The beauty of this recipe is its versatility and simplicity. With just three core ingredients, you can create a base icing that’s ready in under 5 minutes, making it ideal for last-minute decorating or large batches.
The ratio of powdered sugar to butter creates a stable, spreadable consistency, while the milk adds just enough liquid to achieve that professional-grade smoothness. This icing is also foolproof—no risk of graininess or separation, even when exposed to heat or humidity.
What makes this icing truly special is how easily it adapts to different flavors and dietary needs. Start with a classic vanilla base, then customize with extracts, citrus zest, or even cocoa powder for chocolate variations.
It’s also beginner-friendly, meaning you can achieve restaurant-quality results without prior experience. Whether you’re frosting a birthday cake or adding a decorative touch to cookies, this icing delivers effortless elegance every time.
Store leftovers in an airtight container at room temperature for up to 3 days, or refrigerate for longer shelf life. For added flair, pipe it into swirls, drizzle it over baked goods, or use it as a filling for sandwich cookies.
The possibilities are endless, and the simplicity ensures you’ll always have a reliable icing on hand. Let’s get started!
Ingredients for 3 ingredient icing
Three ingredients transform into velvety icing that rivals store-bought but tastes homemade.
| Ingredient | Amount | Notes |
|---|---|---|
| Powdered Sugar 🍚 | 2 cups | Sifted for smooth texture |
| Unsalted Butter 🧈 | ½ cup | Room temperature for blending |
| Whole Milk 🥛 | ¼ cup | Room temperature preferred |
| Pure Vanilla Extract 🌿 | 1 tsp | Optional for flavor base |
| Sea Salt 🧂 | ⅛ tsp | Balances sweetness |
Powdered sugar is the foundation—Bob’s Red Mill or Domino brands are my go-tos for that ultra-fine texture. Room temperature butter is non-negotiable; cold butter creates lumps that ruin the smoothness. I always grab European-style butter from Whole Foods when possible, but regular unsalted works in a pinch. The milk? Whole milk gives the best consistency, but 2% or almond milk work if you need dairy-free. Pro tip: measure the powdered sugar first, then add the butter and milk gradually to avoid clumping.
No vanilla extract? Almond extract at half the amount works surprisingly well, or skip it entirely for a neutral base. The salt might seem negligible, but it elevates the flavor—trust me, it balances that sweetness perfectly. Short on milk? Heavy cream makes it richer, while water keeps it light but slightly less stable. For a chocolate version, add 1 tbsp cocoa powder to the powdered sugar. Need it thicker? Add 1 tbsp more powdered sugar; too runny? 1 tsp more butter fixes it instantly.
This icing stays fresh for 3 days at room temperature if sealed tightly, but it’s best used within 24 hours for peak texture. For longer storage, refrigerate for up to 1 week—just let it sit at room temp for 10 minutes before using. Freezing isn’t recommended, as it can alter the consistency. I always make extra and store it in a small jar; it’s perfect for last-minute decorating or gifting. Use a pastry bag with a star tip for professional swirls, or just spread it like frosting—no judgment here.
Why You’ll Love This Recipe
- Pantry Magic: I swear by this one—no shopping lists, no stress. Just pull powdered sugar, butter, and milk from your cupboard, and you’ve got a silky-smooth icing ready in minutes. (Yes, even if you’re still in your pajamas.)
- Salted Sweetness: That pinch of sea salt? It’s the secret weapon—takes the vanilla from “nice” to “I’d eat this spoonful.” The butter keeps it rich without being heavy, and the milk ties it all together like a warm hug.
- Birthday to Baking Day: Slather it on cupcakes, drizzle over cookies, or even glaze a cake for a last-minute party. Honestly, I’ve used it to jazz up store-bought donuts when I’m lazy, and no one’s ever complained. (Or noticed.)
- Zero-Waste Winner: A little goes a long way, so you’ll have leftovers for days—perfect for quick touch-ups or gifting. And since it’s just five ingredients, it’s cheap enough to make twice if you’re feeling extra. (I have.)
Step-by-step instructions for silky 3-Ingredient icing
This ultra-simple method delivers professional-quality icing every time—no fancy tools required.
Sift and Whisk the Powdered Sugar
Start by sifting the 2 cups powdered sugar into a medium mixing bowl. This crucial step prevents lumps and ensures your icing has that signature velvety smoothness. I use a fine-mesh sieve for this—it catches any stray sugar grains that could make your icing gritty.
Once sifted, give the powdered sugar a quick whisk with a fork or small whisk to break up any remaining clumps. This creates a light, airy base that will blend beautifully with the other ingredients. Set this bowl aside—we’ll come back to it in just a moment.
Cream the Butter and Milk
In a separate bowl, combine the 0.5 cup unsalted butter (at room temperature) with the 0.25 cup whole milk. Use a hand mixer or whisk to beat these together for about 1 minute until completely smooth and homogenous. You’re looking for a creamy, almost mayonnaise-like consistency.
Here’s the thing—room temperature butter is absolutely critical. If it’s too cold, the icing will be grainy. If it’s too soft, it might not emulsify properly. Press the butter gently between your fingers—it should give slightly but hold its shape. This is your perfect working temperature.
Gradually Combine Wet and Dry Ingredients
With your mixer on low speed, slowly add the powdered sugar mixture to the butter-milk combination. I like to add it gradually—about ¼ cup at a time2-3 minutes until the icing begins to thicken noticeably.
This gradual approach prevents sugar shock, where too much powdered sugar hits the wet ingredients at once and creates a paste. You’ll know you’re getting close when the icing starts to cling to the whisk or beaters. Don’t worry if it looks slightly curdled at first—we’ll fix that next.
Add Flavor and Finish
Remove the mixing bowl from the stand mixer and stir in the 1 tsp pure vanilla extract and 0.125 tsp sea salt using a silicone spatula. The vanilla adds depth while the salt balances the sweetness—trust me, it makes all the difference. Mix until completely incorporated, about 30 seconds of vigorous stirring.
Now for the consistency test: Dip your spatula into the icing and lift it up. If it holds its shape but still drips slightly, you’ve hit the perfect pouring consistency. If it’s too thick, add 1 teaspoon milk at a time until it reaches your desired texture. If it’s too thin, add 1 tablespoon powdered sugar to thicken.
Use Immediately or Store Properly
Transfer the icing to a piping bag fitted with a small round tip or simply to a clean bowl for spreading. For best results, use it immediately to decorate cakes, cupcakes, or cookies. The icing will begin to set as it sits, so don’t wait too long before applying.
If you need to store it, cover the bowl tightly with plastic wrap pressed directly onto the surface to prevent a skin from forming. The icing will keep in the refrigerator for up to 1 week, though it’s best used within 3-4 days for optimal texture. When ready to use, give it a quick whisk to restore its smooth consistency before piping or spreading.
Pro Tips For Making 3 Ingredient Icing
- Melt Butter Slowly: Use a double boiler or microwave in 15-second bursts—stopping when it’s just liquid, not greasy. I learned this the hard way after turning my icing into a greasy mess that wouldn’t hold its shape.
- Weigh the Powdered Sugar: Scooping powdered sugar leads to clumps and uneven texture. A kitchen scale guarantees consistency—aim for 2 cups (250g) for the smoothest finish.
- Add Vanilla Last: Mix the milk and butter first, then fold in vanilla and salt. This keeps the flavor balanced and prevents the vanilla from burning if you’re heating anything.
- Use Cold Butter: Cut the butter into small cubes and chill for 10 minutes before mixing. Cold butter emulsifies better with powdered sugar, giving you a silky, pipeable icing instead of a crumbly disaster.
Pro cooking tips for this recipe
Temperature Control
Butter temperature is the single most critical factor in achieving silky icing. I always test it by pressing a small piece between my fingers—it should feel slightly soft but still hold its shape.
If your butter is too cold, the icing will develop tiny sugar crystals that create a gritty texture. For best results, let it sit at room temperature for 30-45 minutes before starting. 🌡️
Pro tip: If you’re in a hurry, place the butter in a small bowl and microwave it for 10-15 seconds at 50% power. This brings it to the perfect working temperature without melting it completely.
Just be careful not to overdo it—melted butter will make your icing too runny to work with.
Mixing Technique
Gradual incorporation is key to preventing sugar shock. I recommend adding the powdered sugar to the butter-milk mixture ¼ cup at a time while mixing on low speed. This allows the ingredients to blend smoothly without creating lumps.
Using a hand mixer or stand mixer on low speed works best—I’ve found that whisking by hand can sometimes trap air bubbles that make the icing less stable. 🔥
For even smoother results, I like to pulse the mixer for 2-3 minutes total, stopping occasionally to scrape down the sides of the bowl. This ensures all the powdered sugar gets fully incorporated and prevents any dry spots from forming.
The icing should thicken noticeably as you mix, but it shouldn’t become stiff or pasty.
Consistency Troubleshooting
If your icing turns out too thick, simply add 1 teaspoon milk at a time until it reaches a smooth, spreadable consistency. For runny icing, add 1 tablespoon powdered sugar and mix again.
I’ve found that most issues stem from either too much butter (making it greasy) or not enough mixing time (leaving dry sugar pockets). 💡
For a quick test, dip your spatula into the icing and lift it up. If it holds its shape but still drips slightly, you’ve achieved the perfect pouring consistency. If it’s too stiff, it won’t spread smoothly on cakes; if it’s too thin, it won’t hold peaks when piped.
The ideal texture should be thick enough to hold its shape but fluid enough to spread easily.
Equipment Shortcuts
No mixer? No problem. You can achieve great results with just a fork or silicone spatula by vigorously stirring the ingredients in a bowl. While it takes a bit more elbow grease, the gradual addition technique still applies—mix for about 5 minutes total, scraping the bowl frequently.
I’ve made this icing successfully with just a fork when traveling, though I do recommend a mixer for the smoothest results. ✨
For piping decorations, a pastry bag with a small round tip creates beautiful swirls, but you can also use a ziplock bag with the corner snipped off for quick, easy drizzles.
If you’re frosting cupcakes, a spatula or butter knife works perfectly for spreading. The key is to work quickly once the icing is mixed to maintain its ideal consistency.
Nutrition facts
Frequently asked questions
Can I make this icing without milk?
Yes! For a dairy-free version, substitute the milk with 2 tablespoons water plus 1 tablespoon neutral oil (like vegetable or canola). The oil helps mimic the fat content of butter, while the water maintains the right liquid balance. For richer texture, use unsweetened almond milk instead—just reduce by 1 tablespoon since it’s thicker.
Why did my icing turn out grainy?
Graininess usually means either cold butter or improperly sifted powdered sugar. Always use butter at room temperature (press it gently—it should dent but hold shape) and sift the powdered sugar thoroughly. If it’s too late, whisk in 1 teaspoon lemon juice or 1 teaspoon corn syrup to dissolve any sugar crystals. For next time, mix on low speed for 3-4 minutes to fully emulsify.
How do I adjust this icing for chocolate flavor?
Replace ½ cup powdered sugar with ½ cup unsweetened cocoa powder (sifted) for a rich chocolate base. For a smoother texture, add 1 tablespoon melted butter to the milk mixture first. To balance the intensity, reduce the vanilla to ½ teaspoon and add ¼ teaspoon espresso powder for depth. This version works perfectly for chocolate cupcakes or cake layers!
Can I use this icing on warm baked goods?
Wait until your treats are completely cool—this icing sets as it sits at room temperature. If you’re in a hurry, chill the baked goods for 10-15 minutes in the freezer first. The icing will melt slightly when applied to warm surfaces, making it harder to pipe clean designs. For best results, use it on fully cooled cakes or cupcakes that have been at room temp for at least 30 minutes.
What’s the best way to store leftover icing?
Transfer to an airtight container and press plastic wrap directly onto the surface to prevent drying. At room temperature, it keeps for 3 days, but for longer storage, refrigerate for up to 1 week. Before using, let it sit at room temp for 10 minutes and whisk vigorously to restore smoothness. Avoid freezing—it can alter the texture permanently. For gifting, portion into small jars with decorative ribbons!

- 3lb Prime Rib Roast Recipe: Juicy Pink Center Guaranteed in 3 Hours - October 31, 2026
- 5 Spice Cake Recipe: Warmly Spiced Layers With Crunchy Top - October 31, 2026
- 1950’s Macaroni and Cheese Recipe: Nostalgic Creamy Cheese Sauce with Buttery Noodles - October 31, 2026