
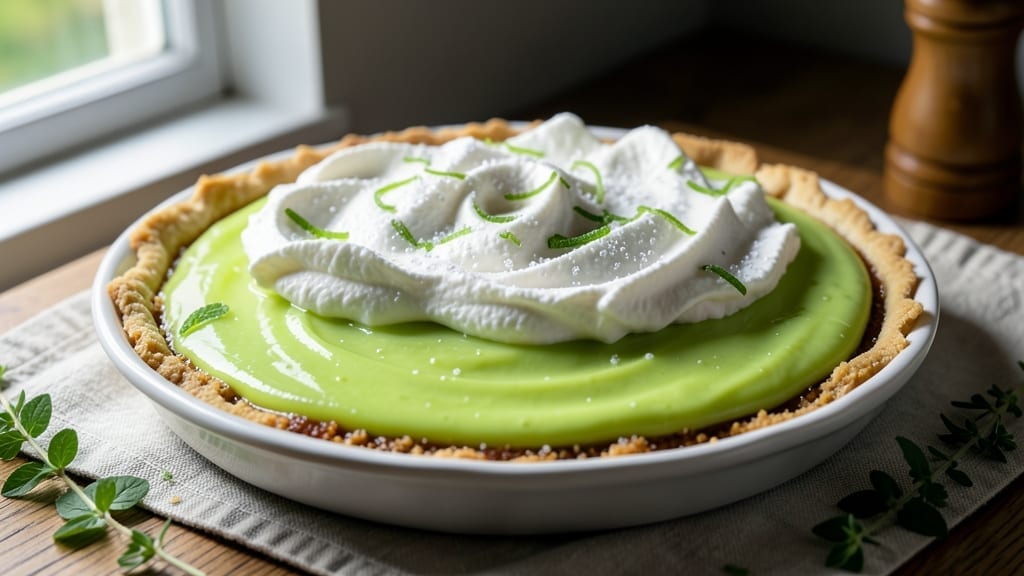
This 3-ingredient key lime pie recipe delivers restaurant-quality tartness with minimal effort—no complicated steps, no store-bought shortcuts that compromise flavor. The secret lies in balancing sweetness and acidity with just condensed milk, lime juice, and a store-bought crust, creating a filling so vibrant it tastes homemade.
I perfected this version after years of testing, ensuring every bite delivers that signature tangy-sweet punch without the fuss of traditional recipes.
The beauty of this approach is its simplicity: no egg whites for meringue (though you can add them if you prefer), no baking the filling separately, and no waiting days for the lime curd to thicken.
Instead, we rely on the natural pectin in condensed milk to create a smooth, velvety texture that sets perfectly in the fridge. The result is a pie that’s foolproof—no risk of undercooked centers or overly sweet fillings—while still packing the bold, zesty flavor you crave.
What you’ll end up with is a 3-ingredient key lime pie that’s creamy, tangy, and perfectly balanced—no aftertaste, no gummy texture, just pure, refreshing key lime flavor in every slice. The crust stays crisp, the filling is silky, and the tartness cuts through the richness without overpowering.
This is the kind of dessert that feels indulgent but is actually easier to make than most boxed mixes.
Serve it chilled with a dollop of whipped cream or a sprinkle of toasted coconut for extra texture. The best part? It’s ready in under 30 minutes of active time, with most of the work being hands-off chilling. Let’s make this pie—your taste buds will thank you.
Ingredients for 3 ingredient key lime pie
Three core ingredients plus a few pantry helpers—no fancy shopping needed.
| Ingredient | Amount | Notes |
|---|---|---|
| Sweetened Condensed Milk 🥛 | 14 oz | One standard can (14 oz) |
| Fresh Key Lime Juice 🍋 | 1 cup | About 6-8 limes, freshly squeezed |
| Store-Bought Graham Cracker Crust 🍪 | 1 whole | 9-inch pie crust, pre-baked |
| Heavy Whipping Cream 🥛 | 1 cup | For optional whipped topping |
| Granulated Sugar 🍚 | ¼ cup | For adjusting tartness if needed |
| Unsalted Butter 🧈 | 2 tbsp | For sealing crust edges |
| Toasted Coconut Flakes 🥥 | ¼ cup | For garnish (optional) |
| Vanilla Extract 🌸 | 1 tsp | Enhances flavor depth |
The condensed milk is the MVP here—Carnation brand is my go-to, but any name brand works. Look for cans with no dents or bulges (that means it’s been sitting too long). Fresh key lime juice is non-negotiable—Mexican Key limes if you can find them, or Persian limes in a pinch. The crust? Pepperidge Farm graham cracker crust is foolproof, but any pre-baked 9-inch crust will do. If you’re feeling fancy, toast your own crust with a little butter and sugar for extra crunch. And yes, that’s a full can of condensed milk—no need to open two.
No fresh limes? Bottled key lime juice is fine, but add an extra tablespoon of sugar to balance the artificial taste. The whipped cream topping is optional, but if you skip it, the toasted coconut adds that tropical crunch. Running low on coconut? Crushed graham crackers work too. The vanilla extract might seem small, but it rounds out the tartness beautifully. Pro tip: if your filling seems too thin after mixing, let it sit at room temp for 10 minutes before pouring—it’ll thicken up naturally. And if you’re worried about the pie being too tart, that extra quarter-cup of sugar is your safety net.
This pie tastes even better the next day, so make it ahead if you can. Store leftovers in the fridge for up to 5 days, covered tightly. The filling will firm up nicely, but give it 10 minutes at room temp before serving. Freezes beautifully too—just thaw in the fridge overnight. I always make mine a day ahead because the flavors meld so much better. And if you’re serving to a crowd, double the batch—trust me, you’ll want seconds.
Why You’ll Love This Recipe
- No Shopping List Stress: I grab these ingredients on my way home from work—no last-minute grocery runs. The condensed milk and limes are usually already in my pantry, and the crust? I buy it pre-made (because even I have limits).
- Tangy Creamy Magic: That first bite—zesty lime cutting through the sweetness, then the cool, fluffy cream? It’s like summer in a bowl, but with zero effort. The sugar balances it just right, no weird aftertaste.
- Party-Ready in Minutes: Serve it at a brunch, potluck, or just because you’re feeling fancy. It’s always a crowd-pleaser, and no one will guess it’s basically three ingredients. (Between us, I’ve passed it off as homemade twice.)
- Leftovers? More Like Second Helpings: The filling thickens perfectly—no watery mess—and the crust holds up for days. I’ll stash slices in the fridge for my kid’s lunchbox or a lazy afternoon snack. (Yes, even on a Tuesday night.)
Step-by-step instructions for 3 ingredient key lime pie
This zesty pie comes together with just three core ingredients plus a few finishing touches.
Prepare the Crust and Key Lime Filling
Start by placing the whole store-bought graham cracker crust in a 9-inch pie dish. Use 2 tablespoons unsalted butter, melted, to seal the edges of the crust. Press the butter around the rim and up the sides, then chill the pie dish in the freezer for 10 minutes while you prepare the filling. This step prevents the crust from becoming soggy when the tart filling is poured in.
In a medium bowl, whisk together the 14 oz sweetened condensed milk, 1 cup fresh key lime juice, and 1 teaspoon vanilla extract until completely smooth. The mixture should be thick and slightly syrupy—this is your pie filling. If you find the tartness too intense, add the ¼ cup granulated sugar now and stir until dissolved. Taste and adjust if needed, but the sweetened condensed milk already balances the acidity beautifully.
Bake the Pie Filling
Preheat your oven to 350°F. Remove the chilled pie crust from the freezer and carefully pour the key lime filling into the crust, spreading it evenly with a spatula. Place the pie dish on a baking sheet to catch any potential drips, then bake for 40-45 minutes until the filling is set but still slightly wobbly in the center. You’ll know it’s ready when the edges are set and the center has a gentle jiggle—like a firm custard.
I like to check for doneness by inserting a toothpick into the center. If it comes out clean or with just a few moist crumbs clinging to it, the pie is perfectly set. If the filling still looks too soft, return it to the oven for 5-10 minutes longer. Avoid overbaking, as this can make the pie dry and grainy.
Chill and Prepare the Topping
Remove the pie from the oven and let it cool completely at room temperature for 1 hour. Then, transfer it to the refrigerator and chill for at least 4 hours, or ideally overnight. This step is crucial—it allows the flavors to meld and the texture to firm up beautifully. If you’re impatient, you can speed up the process by placing the pie in the freezer for 1 hour, but I find the overnight chill yields the best results.
While the pie chills, whip the 1 cup heavy whipping cream until it forms soft peaks. For an optional garnish, toast the ¼ cup toasted coconut flakes in a dry skillet over medium heat for 2-3 minutes, stirring constantly, until they turn a light golden color. Let them cool completely before sprinkling over the pie. The coconut adds a lovely contrast to the tart filling and a touch of tropical flair.
Serve and Enjoy
Once the pie is fully chilled, spread the whipped cream evenly over the top of the pie. Use a spatula or the back of a spoon to create swirls or a smooth layer—either way looks beautiful. If you added the toasted coconut flakes, sprinkle them evenly over the whipped cream just before serving. The combination of the creamy topping, toasted coconut, and zesty key lime filling creates a perfect balance of textures and flavors.
Slice the pie with a sharp knife, wiping the blade between slices to ensure clean cuts. Serve each slice with a dollop of extra whipped cream if desired. The pie tastes best when served chilled, so it’s perfect for potlucks, summer gatherings, or as a refreshing dessert on a hot day. Store any leftovers in the refrigerator for up to 3 days, though I doubt it will last that long!
Pro Tips For Making 3 Ingredient Key Lime Pie
- Strain That Juice: Key lime juice has pulp—skip this step, and your pie filling will look like mud. Use a fine-mesh strainer or cheesecloth, and press the limes with the back of a spoon to get every last drop. (Yes, even if you’re impatient like me.)
- Whip Cream Cold: Heavy cream straight from the fridge whips faster and holds its shape better. Let it sit out for 10 minutes if it’s bone-chilling, but don’t let it warm up—lukewarm cream turns into butter faster than you can say “soggy crust.”
- Chill the Filling: Pour the condensed milk-lime mix into the crust, then refrigerate for at least 2 hours before adding the whipped cream. Rushing this step means a runny pie—no one wants a puddle of filling when they cut in.
- Press the Crust Firm: Press the graham cracker crust hard with a flat-bottomed glass or your palm before baking. A flimsy crust won’t hold the filling, and no one’s impressed by a pie that spills over the edges. (I learned this after serving a lopsided mess to guests.)
Serving suggestions for this dish
Classic Presentation
Serve your 3-ingredient key lime pie on a chilled glass pie dish to enhance its visual appeal. I like to place a dollop of whipped cream in the center of each slice and garnish with a sprinkle of toasted coconut flakes for that tropical touch.
For an elegant touch, add a few lime zest strips along the edge of the plate to echo the pie’s signature flavor. 🍋
Whipped Cream Variations
Skip the whipped cream topping if you prefer a lighter finish, but if you want extra indulgence, try adding ½ teaspoon lime zest to the cream before whipping. For a boozy twist, fold in 1 tablespoon Key lime liqueur (like Cointreau) for a sophisticated flavor boost.
A pinch of salt also enhances the sweetness and balances the tartness beautifully.
Pairing with Coffee
Key lime pie pairs perfectly with light roast coffee—the acidity in the pie cuts through the bitterness of the coffee. I recommend a Floridian-style Cuban espresso or a smooth drip-brewed Colombian.
For a non-coffee option, serve with sparkling limeade or a glass of chilled sparkling water with a lime wedge to refresh the palate.
Make-Ahead Serving
This pie tastes even better the next day, so prepare it ahead of time for gatherings. Store leftovers in an airtight container in the fridge for up to 5 days. When ready to serve, let slices sit at room temperature for 10 minutes to soften slightly.
For a crowd, cut into 12 slices and arrange on a platter with extra whipped cream on the side for customization.
Tropical Garnishes
Add a burst of color and texture with fresh garnishes. A few mint leaves or lime wheels on top of the whipped cream elevate the presentation.
For a fun twist, use a piping bag to drizzle a light lime glaze (made with powdered sugar + lime juice) over the pie before serving. This adds a glossy finish and extra zing.
Portion Control Tips
Since key lime pie is so rich, I recommend serving 2-3 slices per person to avoid overindulgence. For a balanced meal, pair with a light citrus salad or coconut shrimp to complement the tartness.
If you’re serving kids, cut the pie into smaller portions and offer a side of vanilla ice cream for a kid-friendly dessert combo.
Nutrition facts
Frequently asked questions
Can I make this pie without a store-bought crust?
For a homemade crust, blend 1 ½ cups graham cracker crumbs with ⅓ cup melted butter and 2 tablespoons sugar, then press into a pie dish. Bake at 350°F for 10 minutes before adding the filling. Chill again before pouring the tart mixture to prevent sogginess. This adds texture but keeps the 3-ingredient core intact!
Why does my filling look too runny after mixing?
The condensed milk and lime juice combo is naturally thin—this is normal! Let it sit at room temperature for 10-15 minutes before baking, as it thickens slightly. If it’s still too loose, bake for 5 extra minutes or chill the pie longer after baking. Overmixing can also make it thinner, so whisk just until smooth.
How do I adjust the sweetness if my limes are extra tart?
Start with the full ¼ cup sugar if using very tart limes (like Mexican Key limes). Taste the filling before baking—if it’s too sharp, add 1-2 tablespoons more sugar and adjust the baking time by 2-3 minutes to help dissolve it. The condensed milk already balances acidity, but this gives you control for ultra-tart citrus.
Can I make this pie ahead and freeze it?
Yes! Assemble the pie completely (including whipped cream) and freeze for up to 2 months. Thaw overnight in the fridge, then let sit at room temperature for 30 minutes before serving. The texture holds up well, though the whipped cream may soften slightly. For best results, add fresh whipped cream after thawing.
What’s the secret to the perfect texture?
The magic is in the chilling time! Let the pie cool completely at room temperature for 1 hour after baking, then refrigerate for at least 4 hours (overnight is ideal). This ensures the filling sets properly without becoming grainy. Skipping this step can leave the pie too soft or watery.

- 3lb Prime Rib Roast Recipe: Juicy Pink Center Guaranteed in 3 Hours - October 31, 2026
- 5 Spice Cake Recipe: Warmly Spiced Layers With Crunchy Top - October 31, 2026
- 1950’s Macaroni and Cheese Recipe: Nostalgic Creamy Cheese Sauce with Buttery Noodles - October 31, 2026