
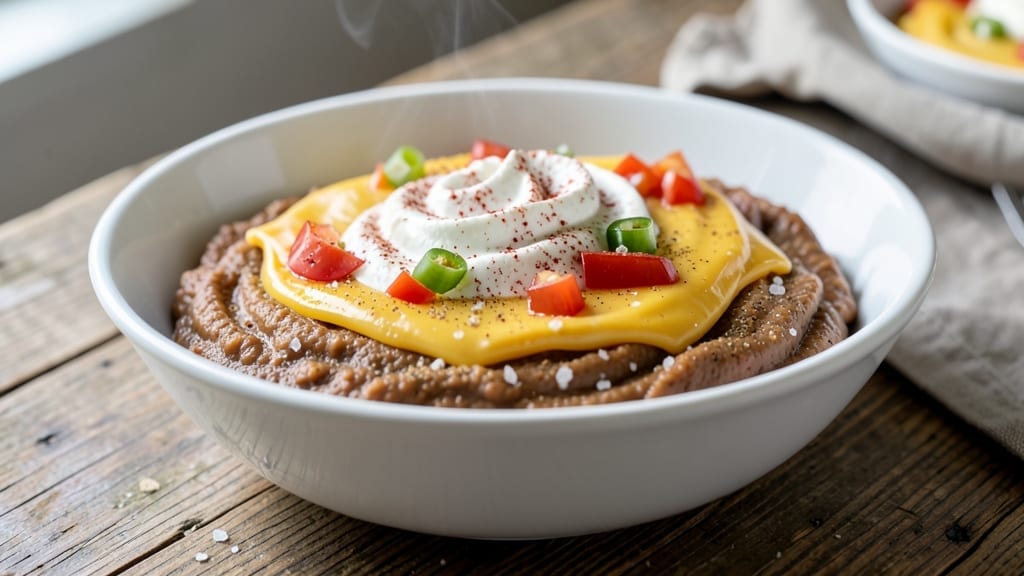
This 3-layer bean dip recipe transforms humble pantry staples into a smoky, spiced showstopper that disappears faster than you can say “tortilla chips.” 🔥 The secret lies in balancing creamy refried beans, melted cheddar, and a tangy sour cream-salsa topping—each layer building on the last for a dip that’s rich, flavorful, and impossible to resist.
I developed this after years of testing dips that either fell apart or tasted bland, and this version delivers restaurant-quality texture and depth with minimal effort.
The magic happens in the layering: start with a base of smoky refried beans spiced with cumin and chili powder, then blanket it with melted cheddar for gooey perfection, and finish with a bright sour cream-salsa mix that cuts through the richness. No baking required—just assemble, chill, and serve.
The dip stays creamy and cohesive, with each bite offering a perfect harmony of textures and flavors, from the velvety beans to the crispy chip crunch.
What you’ll end up with is a crowd-pleasing appetizer that’s hearty enough to serve as a main (especially with cornbread) but light enough for a party spread. The smoky spices linger on your palate, while the tangy topping keeps things fresh.
It’s the kind of dish that turns casual gatherings into memorable events—without requiring a single step beyond mixing and chilling.
Best of all, this dip keeps beautifully for up to 5 days in the fridge, making it ideal for meal prep or hosting. Serve it with tortilla chips, veggie sticks, or even warm tortillas for dipping. Here’s how to assemble it like a pro—no shortcuts, just foolproof flavor.
Ingredients for 3 layer bean dip
Six servings of smoky, creamy, tangy layers—just assemble, chill, and serve.
| Ingredient | Amount | Notes |
|---|---|---|
| Refried Beans 🌽 | 1 ½ cups | Canned or homemade, well-seasoned |
| Sharp Cheddar Cheese 🧀 | 1 ½ cups | Shredded, aged for best flavor |
| Sour Cream 🥛 | ½ cup | Full-fat for creaminess |
| Salsa 🍅 | ½ cup | Medium or hot, chunky preferred |
| Ground Cumin 🌿 | 1 tbsp | Toasted for deeper flavor |
| Chili Powder 🌶️ | 1 tbsp | Smoked variety for extra depth |
| Garlic Powder 🧄 | 1 tsp | Freshly ground preferred |
| Salt 🧂 | ½ tsp | Diamond Crystal preferred |
| Black Pepper 🌶️ | ¼ tsp | Freshly cracked for best flavor |
| Lime Juice 🍋 | 1 tbsp | Freshly squeezed for brightness |
| Tortilla Chips 🍟 | 2 cups | For serving, lightly crushed |
| Cornbread 🍞 | 4 pieces | Optional for serving as main |
| Vegetable Oil 🫒 | 1 tbsp | For greasing serving dish |
The refried beans are the foundation, so don’t skimp on quality. Canned beans like Bush’s or Goya work perfectly, but homemade (with a splash of lard or oil) adds depth. Look for beans with visible spices—no powdered seasoning packets here. The cheddar should be sharp and aged; Kraft or store-brand shredded gets clumpy and lacks flavor. For the spices, Penzeys or bulk bins are ideal, but the grocery store works too. Toast your cumin in a dry pan for 30 seconds—that nutty aroma makes all the difference.
No sour cream? Greek yogurt thinned with a splash of milk works in a pinch. Salsa too mild? Add a dash of hot sauce or extra lime juice. Running low on chips? Pita chips or even sliced baguette add a nice crunch. The lime juice is crucial—bottled won’t cut it. Freshly zested lime adds a pro touch, but the juice alone works. For extra smokiness, swap half the chili powder for smoked paprika. And if you’re serving this as a main, warm cornbread is a must—it soaks up the dip beautifully.
Assemble the dip in a greased 8×8-inch baking dish for easy serving. Chill for at least 2 hours—this lets the flavors meld and the cheddar melt just right. Store leftovers in an airtight container for up to 5 days, though it rarely lasts that long. For parties, double the recipe—this disappears fast. Freeze extras in portions for quick appetizers later. The chips stay crispy for hours if stored separately in a sealed container.
Why You’ll Love This Recipe
- No-Fuss Assembly: I swear by this recipe because it’s the kind of thing you can make while scrolling through your phone. Just spread the refried beans, sprinkle that sharp cheddar (the kind that melts like a dream), dollop the sour cream, and top with salsa—no fancy techniques, no stress.
- Smoky Creamy Magic: That ground cumin in the beans? It’s the secret weapon. Warm, earthy, and just a little bit spicy—it cuts through the richness of the cheese and sour cream while the salsa adds a bright, tangy finish. Every bite has this perfect balance of textures and flavors.
- Party in a Bowl: Between us, this dip is my go-to for game day, potlucks, or just when I need to feed a crowd without slaving in the kitchen. It’s hearty enough to stand alone with tortilla chips but also works as a side for tacos or grilled meats. (Yes, even on a Tuesday night.)
- Budget-Friendly Leftovers: Here’s what sold me—this recipe costs next to nothing to make, and the leftovers? They’re just as good the next day. I’ll often double it and save half for snacking later, or even freeze a portion for lazy days. Plus, you’re using pantry staples, so no wasted ingredients.
Step-by-step instructions for smoky spiced bean dip
Layer by layer, we’ll build this showstopping dip that delivers smoky depth and creamy texture.
👨🍳 Step 1: Season the Refried Beans
In a medium bowl, spread out the 1.5 cups refried beans and gently stir in the 1 tbsp ground cumin, 1 tbsp chili powder, 1 tsp garlic powder, 0.5 tsp salt, and 0.25 tsp black pepper. I like to use my fingers to work the spices into every nook of the beans—this ensures even distribution. The spices should smell deeply aromatic, with warm cumin and smoky chili notes dominating.
Let the seasoned beans sit while you prepare the next layer. This resting time allows the spices to meld slightly with the beans’ natural flavors. If using canned beans, make sure they’re well-seasoned to begin with—this is your flavor foundation.
🥘 Step 2: Prepare the Cheese Layer
In a separate small bowl, combine the 1.5 cups sharp cheddar cheese with the 0.5 cup sour cream and 1 tbsp lime juice. Use a fork to mash the cheese slightly until it forms a smooth, spreadable consistency—this prevents a grainy texture in your final dip. The lime juice brightens the rich cheddar, cutting through its sharpness while adding a subtle tang.
Here’s the thing—don’t overmix. You want just enough blending to create cohesion, but still some texture. The cheese should look like a thick, creamy paste rather than a smooth sauce. Taste a small spoonful and adjust seasoning if needed—this is your flavor calibration step.
🍳 Step 3: Assemble the Layers in a Serving Bowl
Lightly grease a medium serving bowl with 1 tbsp vegetable oil—this prevents sticking when you go to scoop out portions later. Spread the seasoned refried beans evenly across the bottom of the bowl, creating a ½-inch thick layer. Press down gently with a rubber spatula to compact the beans slightly.
Next, spread the cheese mixture evenly over the bean layer, creating another ¼-inch thick layer. The cheese should cover all the beans completely. In a small bowl, mix the 0.5 cup salsa with any remaining spices from the bean mixture—this creates your topping layer. Spread this salsa mixture over the cheese, creating a final ⅛-inch thick layer.
⏰ Step 4: Chill and Set for Perfect Texture
Cover the bowl tightly with plastic wrap and refrigerate for at least 2 hours—I prefer 3-4 hours for the best results. This chilling time allows the flavors to meld completely and the layers to set properly. The dip should firm up enough to hold its shape when scooped, but still be creamy rather than firm.
Real talk: Don’t skip this step. The chilling process is what transforms this from a simple dip into a restaurant-quality showstopper. The cheese will develop a velvety texture, the beans will hold their seasoning, and the salsa will create a vibrant topping that contrasts beautifully with the creamy layers below.
🍽️ Step 5: Serve with Crunchy Toppings
Before serving, lightly crush the 2 cups tortilla chips in a bag with a rolling pin—just enough to create texture without turning them into dust. Arrange the cornbread pieces on a serving platter alongside the dip. Scoop the chilled dip into small bowls or directly onto the cornbread for serving.
Top each serving generously with the crushed tortilla chips—this adds the perfect crunch contrast to the creamy dip. The chips should be distributed evenly so every bite delivers that satisfying texture combination. Serve immediately while the chips are still crisp and the dip is at its perfect temperature—just slightly cool from the refrigerator.
Pro Tips For Making 3 Layer Bean Dip
- Warm the Beans First: Take your refried beans out of the fridge and microwave them for 30 seconds before layering. Cold beans won’t mix well with cheese and will make your dip grainy—this simple step guarantees a smooth, creamy base every time.
- Shred Cheese Fresh: Skip the pre-shredded cheese—it’s coated with anti-caking agents that make your dip look dry and clumpy. Use a box grater or knife to shred sharp cheddar yourself, then sprinkle it hot over the beans so it melts into a glossy, cohesive layer.
- Press the Layers: After adding each layer (beans, cheese, sour cream), use a spoon or your fingers to gently press down. This keeps everything compact and prevents the sour cream from turning into a sad, watery puddle on top—especially important if you’re prepping ahead.
- Salsa on Top Only: Don’t mix salsa into the layers—it’ll make your dip soggy and dilute the flavors. Spoon it on after baking, right before serving, so every bite gets that fresh, tangy kick without turning the whole thing into a sauce.
Flavor customization for this 3 layer bean dip
Spice Level Control
Adjust the heat to your crowd’s tolerance by tweaking the chili powder and salsa. For mild dips, reduce chili powder to ½ tbsp and use mild salsa with added 1 tbsp honey to balance.
For medium heat, keep the recipe as written but add ½ tsp cayenne to the bean layer. For spicy kick, swap ½ cup of the salsa for jalapeño slices mixed with 1 tbsp lime juice—this adds fresh heat that stands out against the creamy layers. 🌶️
Cheese Variations
Swap out sharp cheddar for Monterey Jack (creamy texture) or pepper jack (mild heat). For a vegetarian-friendly option, use nutritional yeast mixed with cashew cream (blend ½ cup soaked cashews with ¼ cup water)—this adds a cheesy umami without dairy.
If you love gooey textures, fold ¼ cup cream cheese into the cheese layer for extra richness. Always shred cheese fresh for best results!
Tangy Topping Twists
Replace the sour cream-salsa mix with Greek yogurt + diced cucumber for a refreshing twist. For smoky depth, blend ¼ cup chipotle in adobo into the salsa layer.
Try avocado crema (blend ½ avocado with ¼ cup sour cream and 1 tbsp lime juice) for a silky, green-topped dip. Each variation changes the flavor profile—experiment to match your taste or dietary needs! 🍋
Protein-Packed Additions
Boost nutrition by folding ½ cup cooked black beans or crumbled bacon into the bean layer. For a Mexican-inspired touch, sprinkle ¼ cup chopped cilantro and 2 tbsp crumbled cotija cheese on top before serving.
If you’re making this for a high-protein meal, serve with turkey or chicken tortilla chips instead of standard chips. These additions keep the dip hearty while maintaining its creamy texture.
Dietary Adaptations
Make this vegan by using refried black beans (check for no lard), vegan cheddar, and cashew cream instead of sour cream. For gluten-free dips, ensure your salsa and chips are certified gluten-free.
If avoiding dairy, tofu cream (blend ½ block silken tofu with 1 tbsp lemon juice) works well as a cheese substitute. Always check labels—hidden dairy or gluten can sneak in unexpectedly! 🌱
Seasonal Flavor Swaps
In summer, add diced mango or pineapple to the salsa layer for sweet-tangy contrast. For fall, fold ½ cup roasted butternut squash purée into the bean layer and top with pumpkin seeds.
In winter, boost warmth with 1 tsp cinnamon in the bean layer and a drizzle of maple syrup in the salsa. Spring calls for herbaceous notes—mix 1 tbsp chopped chives into the cheese layer for brightness.
Nutrition facts
Frequently asked questions
Can I make this bean dip ahead of time?
This dip actually tastes even better when made a day ahead. Store the assembled (but unchilled) layers in an airtight container in the fridge for up to 24 hours before chilling. The flavors meld beautifully overnight, and it’s perfect for parties—just assemble in the morning and serve chilled. Pro tip: Cover each layer separately with plastic wrap to prevent sogginess.
What if I don’t have sour cream?
No problem! For the cheese layer, use Greek yogurt (full-fat for best texture) or mayonnaise thinned with a splash of milk. For the topping layer, swap sour cream with crème fraîche or even thinned cream cheese (mix with a little milk). The dip will still be creamy and delicious—just slightly tangier if you use yogurt.
Why does my dip look separated or watery?
This usually happens when the cheese melts too much or the beans are too wet. To fix it: spread the cheese layer thinner (⅛-inch instead of ¼-inch) and chill for 4+ hours to firm it up. For watery beans, drain canned beans well or use homemade refried beans with less liquid. The key is proper layer thickness and adequate chilling time.
Can I bake this dip instead of chilling?
Technically yes, but it’s not recommended. Baking can make the cheese layer rubbery and dry out the beans. If you must bake, cover loosely with foil and bake at 350°F for 15 minutes—but chilling is the superior method. The cold sets the layers perfectly without altering the textures. For a baked version, try a 7-layer dip recipe instead.
How do I make this vegan?
Swap the cheddar for vegan cheddar shreds (like Violife) and use refried black beans (check for no lard). For the sour cream layer, blend ½ cup soaked cashews with ¼ cup water and 1 tbsp lemon juice until smooth. The texture will be slightly different but still creamy. Vegan salsa works perfectly—just ensure no hidden dairy in ingredients.

- 3lb Prime Rib Roast Recipe: Juicy Pink Center Guaranteed in 3 Hours - October 31, 2026
- 5 Spice Cake Recipe: Warmly Spiced Layers With Crunchy Top - October 31, 2026
- 1950’s Macaroni and Cheese Recipe: Nostalgic Creamy Cheese Sauce with Buttery Noodles - October 31, 2026