
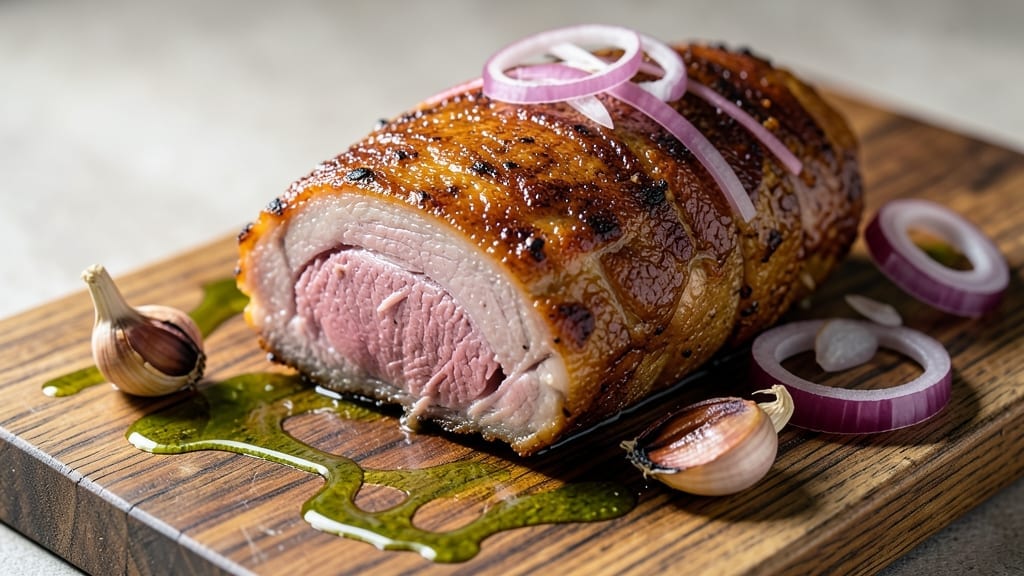
Transforming a tough 3 lb bottom round roast into melt-in-your-mouth tenderness doesn’t require hours—just the right technique. This method combines dry-brining, high-heat searing, and low-and-slow roasting to deliver restaurant-quality results in your home oven.
The secret lies in patience and precision, ensuring every bite is juicy and flavorful without the usual wait. Start with a dry brine overnight to enhance natural flavors and moisture retention, then sear the roast to lock in juices before slow-roasting at a controlled temperature.
This approach guarantees tender meat that falls apart easily, making it perfect for meal prep or family dinners. The process is straightforward but yields professional-level outcomes, proving that great beef doesn’t require complicated methods.
By the time you’re done, you’ll have a perfectly cooked roast with a caramelized crust and juicy, fork-tender meat inside. The aromas alone will have everyone at the table anticipating the first bite. Serve with classic sides like roasted vegetables or mashed potatoes to complete the meal.
This recipe is designed for reliability—no guesswork, no overcooking. Whether you’re feeding a crowd or prepping for the week, the results are consistently impressive. Let’s get started on creating a roast that steals the show without the fuss.
Ingredients for 3 lb bottom round roast
Six simple ingredients transform tough bottom round into melt-in-your-mouth perfection.
| Ingredient | Amount | Notes |
|---|---|---|
| Bottom Round Roast 🥩 | 3 lb | Trim excess fat for even cooking |
| Kosher Salt 🧂 | 2 tbsp | Diamond Crystal preferred for precision |
| Freshly Ground Black Pepper 🌶️ | 1 ½ tbsp | Cracked peppercorns for best flavor |
| Garlic Cloves 🧄 | 6 cloves | Smashed for even infusion |
| Extra-Virgin Olive Oil 🫒 | 2 tbsp | High-quality for searing |
| Yellow Onion 🧅 | 1 whole | Thickly sliced for aromatics |
| Fresh Rosemary 🌿 | 1 sprig | Fresh sprigs for herbaceous notes |
| Fresh Thyme 🌿 | 2 sprigs | Leaves only, finely chopped |
| Beef Broth 💧 | 1 cup | Low-sodium preferred |
| Red Wine 🍷 | ½ cup | Bold Cabernet Sauvignon recommended |
| Butter 🧈 | 4 tbsp | Unsalted, softened for basting |
| Fresh Parsley 🌿 | ¼ cup | Chopped for garnish |
The bottom round is your canvas here—look for well-marbled cuts at Whole Foods or your local butcher. If the roast has a thick fat cap, trim it down to 1/4-inch for even cooking. The salt is non-negotiable: Diamond Crystal kosher dissolves better than table salt. I always buy mine in bulk from Costco—it lasts forever and makes a huge difference in texture. Fresh herbs? Trader Joe’s has the best selection of pre-bundled sprigs, but if you’re growing your own, rosemary and thyme from the garden have the deepest flavor. The beef broth should be low-sodium—you’re adding enough salt already.
No red wine? Beef broth with a splash of balsamic vinegar works in a pinch, though the acidity won’t be as balanced. Fresh herbs? Dried thyme at one-third the amount gets you close, but nothing beats the fresh stuff. The olive oil matters here—avoid the cheap stuff. A good California extra-virgin will give you that fruity depth during searing. For the garlic, if you’re not comfortable smashing cloves, mince them finely—just don’t skip it. The butter should be unsalted so you control the seasoning. If you’re prepping ahead, soften it at room temperature before basting to avoid temperature shock to the meat.
This roast keeps beautifully—3-4 days in the fridge, 3 months frozen. For maximum tenderness, let it rest 30 minutes before slicing against the grain. I always make extra because the leftovers reheat like a dream—wrap tightly in foil and reheat in a 350°F oven for 20 minutes. The aromatics (onion, garlic, herbs) can be prepped a day ahead and stored in the fridge, saving you time on cooking day. If freezing, portion into individual servings for easy meal prep.
Why You’ll Love This Recipe
- No-Fuss Roast Night: I swear, this takes less effort than ordering takeout. Just sear the roast in olive oil, slap on crushed garlic and salt, then let the oven do the work—no basting, no fuss, no stress.
- Garlic Kiss Magic: That first bite? Crispy crust, tender inside, and a punch of garlic so good it’ll make you want to hug your kitchen. Honestly, the olive oil and garlic transform this lean cut into something unforgettable.
- Leftover Hero: Sunday dinner turns into Monday lunch without a second thought. Slice it thin for sandwiches, dice it for tacos, or just reheat with a sprinkle of salt—it’s that versatile.
- Budget Win: Three pounds of bottom round feeds a crowd for less than steak night. Between us, this is how I stretch my grocery budget without sacrificing flavor—every time.
Step-by-step instructions for perfectly tender bottom round roast
Here’s how to transform tough bottom round into melt-in-your-mouth perfection without marathon cooking.
Prep the Roast for Maximum Tenderness
Start by trimming any excess fat from the 3 lb bottom round roast, leaving about ¼ inch thickness. This ensures even cooking and prevents greasy bark. Pat the meat completely dry with paper towels—this step is non-negotiable for crispy edges later.
In a small bowl, combine the 2 tbsp kosher salt and 1.5 tbsp freshly ground black pepper. Rub this generously over all sides of the roast, pressing firmly so the seasoning adheres. Let it sit uncovered on a wire rack in the refrigerator for at least 4 hours or overnight. This dry-brining process breaks down muscle fibers, creating that signature fork-tender texture we’re after.
Sear the Roast for Deep Flavor
Heat a Dutch oven over medium-high heat until smoking hot. Add the 2 tbsp extra-virgin olive oil and let it shimmer for 30 seconds. Place the roast fat-side down and sear for 5 minutes without moving it—this creates a flavorful crust. Flip and sear the other side for another 5 minutes. You’ll know it’s ready when the meat releases easily from the pan with a gentle wiggle.
Remove the roast and set it aside. In the same Dutch oven, add the thickly sliced 1 whole yellow onion, smashed 6 cloves garlic, and the sprig of fresh rosemary. Cook for 3 minutes until the onions soften slightly and release their sweet aroma. This aromatic base will infuse the roast as it cooks.
Slow Cook with Moisture Control
Return the roast to the Dutch oven, fat-side up. Pour in the 1 cup beef broth and 0.5 cup red wine, then add the 2 sprigs fresh thyme. The liquid should come about halfway up the sides of the roast. Bring to a gentle simmer over medium heat, then immediately reduce to the lowest setting possible—just enough to maintain a bare bubble at the surface.
Cover tightly and cook for 3 hours. Here’s the secret: check the internal temperature every 30 minutes starting at the 2-hour mark. When it reaches 185°F, your roast is ready. The slow cooking breaks down collagen while the liquid keeps it moist. If the liquid reduces too much, add a splash of water to maintain the steam.
Rest and Finish with Butter
Transfer the roast to a cutting board and tent loosely with foil. Let it rest for 30 minutes—the most important step for juicy slices. During this time, preheat your oven to 375°F. Remove the thyme sprigs from the Dutch oven and strain the cooking liquid through a fine-mesh sieve into a measuring cup.
Return the roast to the oven and baste with the 4 tbsp softened butter, basting every 5 minutes for 15 minutes total. This creates a glossy finish. Remove from oven and let rest another 15 minutes before slicing against the grain into ½-inch thick slices. The finished roast should be fork-tender with a beautiful caramelized crust.
Pro Tips For Making 3 Lb Bottom Round Roast
- SEAR IN TWO STAGES: Bottom round’s lean nature means it’ll release a ton of liquid when you sear it whole—so start by browning it on all sides over medium-high heat (about 3-4 minutes per side), then move it to a cooler part of the pan to render fat without steaming. I learned this the hard way after watching my first batch turn into a sad, greasy mess.
- SMASH THOSE GARLIC CLOVES: Don’t just chop those garlic cloves—smash them with the flat side of your knife first. This releases more flavor and ensures they crisp up nicely instead of turning to mush. (Yes, it’s extra work, but your roast will taste like it came from a restaurant.)
- DON’T SKIP THE DRY BRINE: Salt the roast at least 12 hours ahead (or overnight if you’re patient). The bottom round soaks up salt like a sponge, which keeps it juicy and lets the crust form properly. I used to rush this, and my roast always ended up tough—now I treat it like a good steak.
- USE A MEAT THERMOMETER: Bottom round’s safe zone is 130–135°F for medium-rare (140–145°F for medium). Guessing leads to dry meat. Stick it in the thickest part, wait 10 seconds, and pull it out when it hits your target—no more, no less. (I know, I know, but trust the process.)
Best sauces and condiments for this 3 lb bottom round roast
Classic Red Wine Reduction
The red wine and beef broth you simmer with the roast create a rich sauce that’s perfect for drizzling over slices. After removing the roast, strain the cooking liquid through a fine-mesh sieve into a saucepan. Reduce over medium-high heat for 8-10 minutes until it thickens slightly—about 1 cup remaining.
Finish with 1 tbsp butter and a pinch of salt. This sauce adds depth to every bite and pairs beautifully with the caramelized crust. 🍷
Garlic-Herb Butter Baste
For a quick finishing touch, melt 4 tbsp butter with 2 minced garlic cloves and 1 tsp chopped fresh thyme in a small saucepan over low heat. Keep warm while the roast rests, then spoon over slices before serving.
This adds a luxurious, herbaceous finish that complements the roast’s natural flavors. I love using this for special occasions—it feels restaurant-worthy. 🧈
Creamy Horseradish Sauce
For a tangy contrast, whip together ½ cup sour cream, 2 tbsp prepared horseradish cream, 1 tbsp Dijon mustard, and a pinch of salt. This bright, creamy sauce cuts through the richness of the roast.
Serve on the side for dipping or drizzle lightly over slices. I recommend Hellmann’s Horseradish Cream for the perfect balance of heat and creaminess. 🌶️
Smoky Chipotle Glaze
Blend ½ cup ketchup, 2 tbsp apple cider vinegar, 1 tbsp brown sugar, 1 tsp smoked paprika, and 1 chipotle pepper in adobo sauce until smooth. Simmer for 5 minutes to thicken, then drizzle lightly over sliced roast.
This adds a smoky, slightly sweet contrast that’s perfect for BBQ-style meals. Store-bought adobo sauce works great—I use Herdez brand. 🔥
Simple Pan Jus
After searing the roast, deglaze the Dutch oven with 1 cup beef broth and 1 tbsp balsamic vinegar. Scrape up any browned bits with a wooden spoon, then simmer for 5 minutes until reduced by half.
Strain and serve as a pan sauce. This method uses ingredients you already have and creates a rich, flavorful accompaniment without extra effort. 🥄
Fresh Herb Oil
Infuse 1 cup extra-virgin olive oil with 2 tbsp chopped fresh parsley, 1 tbsp chopped fresh rosemary, and 3 minced garlic cloves. Let sit at room temperature for 1 hour** before straining.
Drizzle lightly over sliced roast for a bright, aromatic finish. This works beautifully with the red wine reduction or as a standalone topping. 🌿
Nutrition facts
Frequently asked questions
Can I use this recipe for a larger or smaller roast?
For a 2 lb roast, reduce cooking time by 45-60 minutes and use 1 tbsp less salt. For 4+ lbs, add 30 minutes to the slow cook and increase liquid by ½ cup. The key is maintaining 185°F internal temp—adjust time, not heat. Always dry-brine for at least 4 hours regardless of size.
Why does the recipe call for dry-brining overnight?
The overnight dry-brine is crucial for breaking down tough muscle fibers in bottom round. Salt draws out moisture, then reabsorbs it during cooking, creating juicy meat. For 4+ hours, the seasoning penetrates deeply, while overnight gives maximum tenderness. Skip this step, and you’ll end up with chewier results—worth the wait!
What if my roast doesn’t reach 185°F in 3 hours?
If your roast is 175°F after 3 hours, cover and cook 30 more minutes at the same low heat. Never exceed 325°F—higher temps dry out the meat. For stubborn tough spots, slice thinner (¼-inch) or shred for tacos. The 185°F target ensures collagen melts into gelatin for fork-tender results.
Can I substitute red wine with something else?
Yes! Use ½ cup beef broth + 1 tbsp balsamic vinegar for similar acidity, or ½ cup apple cider + 1 tsp Worcestershire sauce for depth. Avoid white wine—it lacks the bold flavor red wine contributes. The liquid should still cover half the roast for even cooking.
How do I store leftovers safely?
Cool the roast to room temperature within 2 hours, then refrigerate in an airtight container for 3-4 days. For longer storage, freeze portions in 1-serving bags for up to 3 months. Reheat to 165°F in a 350°F oven for 20 minutes with a splash of broth to revive moisture. Never reheat above 325°F—it dries out the meat.

- 3lb Prime Rib Roast Recipe: Juicy Pink Center Guaranteed in 3 Hours - October 31, 2026
- 5 Spice Cake Recipe: Warmly Spiced Layers With Crunchy Top - October 31, 2026
- 1950’s Macaroni and Cheese Recipe: Nostalgic Creamy Cheese Sauce with Buttery Noodles - October 31, 2026