
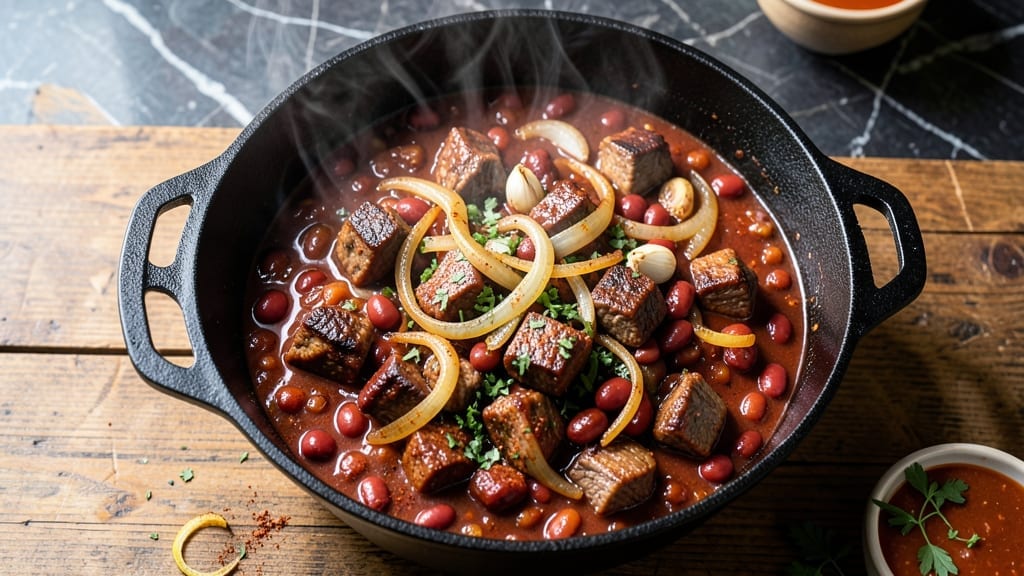
A 3 lb chili recipe that delivers deep, smoky flavor and improves overnight is the ultimate crowd-pleaser—perfect for game days, potlucks, or cozy weeknights. The secret lies in slow-cooked beef, layered spices, and a rich tomato base that melds into a velvety texture.
This version scales effortlessly for six servings, balancing hearty ingredients with bold seasoning for a chili that’s both comforting and impressive.
What sets this recipe apart is the two-stage cooking process: browning the meat first develops deep, caramelized flavors, while a long simmer (3-4 hours) transforms tough cuts into tender, melt-in-your-mouth pieces.
The spices—cumin, chili powder, and smoked paprika—are toasted in oil to release their aromatics, ensuring every spoonful bursts with warmth. Pre-chopped onions and garlic save time without sacrificing depth, making this a foolproof method for busy cooks.
By the final hour, the chili thickens naturally as the liquid reduces, creating a sauce that clings to each bite. The result? A pot of chili so rich and flavorful it tastes even better the next day, with textures that range from tender beef to al dente kidney beans.
Serve it with crusty bread, shredded cheese, or sour cream to round out the meal.
For those who love customization, this recipe adapts easily to slow cookers or Instant Pots, with adjustments for time and pressure. Whether you’re feeding a family or hosting a gathering, this chili delivers restaurant-quality satisfaction with minimal effort. Let’s get started!
Ingredients for 3 lb chili
Six hearty ingredients form the foundation of this restaurant-quality chili.
| Ingredient | Amount | Notes |
|---|---|---|
| Chuck Roast 🥩 | 3 lb | Trimmed of excess fat, cut into 1-inch cubes |
| Yellow Onion 🧅 | 2 whole | Diced small, about 2 cups |
| Garlic Cloves 🧄 | 6 cloves | Minced fine, about 2 tbsp |
| Canned Tomato Sauce 🍅 | 2 cups | San Marzano preferred, no salt added |
| Kidney Beans 🌾 | 1 lb | Drained and rinsed, or 2 cans |
| Chili Powder 🌶️ | 2 tbsp | High-quality, not pre-mixed |
| Ground Cumin 🌿 | 1 ½ tbsp | Toasted for depth of flavor |
| Smoked Paprika 🌶️ | 1 ½ tbsp | For authentic smoky aroma |
| Cayenne Pepper 🔥 | ½ tsp | Adjust for heat preference |
| Black Coffee ☕ | 1 cup | Cold brew or regular, enhances depth |
| Dark Brown Sugar 🍯 | 1 tbsp | Balances acidity, not white sugar |
| Vegetable Oil 🫒 | 2 tbsp | For browning meat, high smoke point |
| Beef Broth 💧 | 2 cups | Low-sodium preferred, homemade or quality brand |
| Salt 🧂 | 1 ½ tsp | Diamond Crystal preferred, kosher salt |
| Black Pepper 🌶️ | 1 tsp | Freshly ground for best flavor |
The chuck roast is non-negotiable here—its marbling and collagen create that signature melt-in-your-mouth texture. Costco or Whole Foods carry excellent cuts, but any reputable butcher will have chuck roast labeled for stews. For best results, trim excess fat before cubing, but leave some for flavor. The onions and garlic? Pre-chopped saves time without sacrificing flavor—just make sure they’re finely diced. If you’re using dried beans instead of canned, soak them overnight for perfect texture. For the tomato sauce, San Marzano is worth the investment—its sweetness and low acidity make all the difference in a rich chili.
No chili powder? Mix 1 tbsp each of ground cumin and smoked paprika with 1 tsp cayenne for a close substitute. The coffee isn’t just for caffeine—it deepens the chili’s complexity, but espresso powder at half the amount works in a pinch. Using canned beans? Drain and rinse thoroughly to avoid a watery chili. For the broth, low-sodium is critical—you can always add more salt at the end. The brown sugar balances acidity beautifully, but maple syrup at the same amount gives a slightly different depth. If you’re watching sugar, reduce to 0.5 tbsp and add 0.5 tsp apple cider vinegar instead.
This chili tastes even better the next day as flavors meld—plan accordingly. Store in an airtight container in the fridge for up to 5 days, or freeze portions for 3 months. For freezing, portion into quart-sized bags and flatten to save space. When reheating, add 1-2 tbsp of broth or water to restore texture. The chili thickens as it sits, so if it seems too thick after reheating, stir in a splash of liquid. Leftovers make fantastic lunches—just reheat and serve with your favorite toppings. The beans will hold their shape beautifully, and the meat stays tender.
Why You’ll Love This Recipe
- No-Fuss Ingredients: I swear by this combo—just chop one onion and mince a few garlic cloves. The chuck roast does all the work once it’s in the pot, and the canned tomato sauce? That’s my shortcut to restaurant-quality depth.
- Deep, Smoky Richness: Between the slow-cooked beef and the kidney beans soaking up all that flavor, every spoonful has that perfect balance—tender meat, hearty beans, and a sauce that clings like it’s been simmering for hours. (It has, but you didn’t have to babysit it.)
- Leftovers That Save Me: This recipe makes way more than I need for one night, and honestly? The second day is even better. I freeze half for lazy Mondays, and the rest gets repurposed into tacos or nachos—no one ever complains.
- Budget-Friendly Feast: A 3 lb chili feeds my family of four (plus my dog, who’s not allowed but still watches) for under $15. The chuck roast stretches, the beans bulk it up, and I’m not crying over grocery costs when the pot’s this full. Win.
Step-by-step instructions for deep smoky chili
This method builds rich, layered flavor through precise timing and technique.
Sear the Chuck Roast for Maximum Depth
Heat a large Dutch oven over medium-high heat until a drop of water sizzles instantly. Add the 2 tablespoons vegetable oil and swirl to coat the bottom evenly. Working in batches if needed, add the 3 lb chuck roast cut into 1-inch cubes and sear undisturbed for 3-4 minutes until deeply browned on all sides.
This initial searing creates the Maillard reaction that forms the foundation of your chili’s deep, complex flavor. Don’t rush this step—crowding the pan will steam the meat instead of browning it. Once all pieces are golden brown, transfer them to a plate and set aside. You’ll notice the meat releases easily when properly seared.
Develop the Flavor Base with Aromatics
In the same Dutch oven, add the 2 whole yellow onion diced small and cook for 5-6 minutes until softened and beginning to caramelize. Add the 6 cloves garlic minced fine and cook for 30 seconds until fragrant—you should smell that sweet garlic aroma immediately.
Stir in the 2 tablespoons chili powder, 1.5 tablespoons ground cumin, 1.5 tablespoons smoked paprika, 0.5 teaspoon cayenne pepper, 1.5 teaspoons salt, and 1 teaspoon black pepper. Cook for 1 minute until the spices are toasted and the mixture smells intensely aromatic. This step builds the spice foundation that will infuse the entire chili.
Build the Sauce with Coffee and Tomatoes
Pour in the 2 cups canned tomato sauce, 1 cup black coffee, 1 tablespoon dark brown sugar, and 2 cups beef broth. Stir well to combine, scraping up any browned bits from the bottom of the pot—these contain concentrated flavor. Return the seared chuck roast to the pot and bring everything to a gentle simmer over medium-low heat.
Here’s the thing—coffee enhances the depth of the chili’s flavor profile while balancing the acidity of the tomatoes. The sugar helps caramelize the spices slightly, creating a more complex taste. Let the mixture simmer uncovered for 1 hour until the meat is tender enough to pierce with a fork but still holds its shape. This initial cooking time ensures the meat breaks down properly while developing flavor.
Incorporate Beans and Finish Cooking
Add the 1 lb kidney beans (drained and rinsed) to the pot and stir gently to combine. Increase heat to medium-low and simmer uncovered for an additional 1.5 to 2 hours, stirring occasionally. The chili should reduce slightly and develop a thick, rich consistency.
You’ll know it’s ready when the flavors meld perfectly and the chili reaches a thick, stew-like consistency. The beans will absorb the rich meaty broth, creating a hearty texture. Taste and adjust seasoning if needed—adding a pinch more salt or cayenne can enhance the flavor at this stage. The chili will continue to improve overnight as the flavors meld further.
Rest and Serve for Optimal Texture
Remove the chili from heat and let it rest at room temperature for 10 minutes. This resting period allows the flavors to fully integrate and the chili to thicken slightly. For best results, cover and refrigerate overnight—the flavors will deepen and intensify, making each bite even more complex.
When ready to serve, reheat gently on the stove over low heat, stirring occasionally, until warmed through. The chili should be thick enough to coat the back of a spoon but still spoonable. Serve with crusty bread or cornbread to soak up every last drop of that rich, smoky goodness.
Pro Tips For Making 3 Lb Chili
- Brown the Chuck Deep: Chuck roast won’t tenderize properly if it’s just seared on one side—cut it into 1.5-inch chunks first, then brown in batches over medium-high heat. The crust forms faster this way, and you’ll end up with richer flavor without burning the onions.
- Mince That Onion: I used to chop onions roughly, but finely minced yellow onion dissolves into the chili instead of sitting as chunks. Pulse it in a food processor for 10 seconds—it caramelizes better and spreads flavor evenly. (Yes, even if you’re impatient like me.)
- Simmer Slow and Low: After adding the tomato sauce and beans, reduce heat to a gentle simmer—barely bubbling. I learned this the hard way when my chili turned mushy and watery after an hour. Low and slow keeps the beans intact and lets the meat stay tender.
- Toast the Beans First: Drain and rinse the kidney beans, then spread them on a dry skillet for 2–3 minutes until lightly browned. This cuts the beany taste and adds a toasty depth that makes the chili taste more complex. (Sounds weird, but it works.)
Flavor customization for 3 lb chili
Spice Level Control
Adjust the heat to your preference by modifying the cayenne pepper. For a mild chili, reduce to ¼ teaspoon or omit entirely. If you love spice, increase to 1 teaspoon and add ½ teaspoon chipotle powder for smoky heat.
I often start with ½ teaspoon cayenne and taste as the chili simmers—this lets you fine-tune without overdoing it. 🌶️
Sweet and Smoky Balance
Swap the dark brown sugar for maple syrup or honey to adjust sweetness levels. For a deeper caramelized flavor, add 1 teaspoon molasses during the final 30 minutes of cooking.
If your chili tastes too sweet, balance it with a splash of apple cider vinegar—just ½ teaspoon makes a noticeable difference. 🍯
Meat Variations
Replace the chuck roast with ground beef (80/20 blend) for a quicker cook time (2 hours total). For extra richness, add ½ lb Italian sausage (remove casing) during the final 1 hour of simmering.
If using turkey or chicken, reduce cook time to 1.5 hours and add ½ teaspoon thyme to complement the poultry. 🥩
Vegetarian Adaptation
Swap the meat for 1 lb portobello mushrooms (diced) and 1 can lentils (drained). Boost umami with 1 tablespoon soy sauce and 1 teaspoon liquid smoke.
For protein, add 1 cup crumbled tempeh (pan-fried) during the last 30 minutes. This version keeps the hearty texture while being completely plant-based. 🌱
Regional Twists
For a Texas-style chili, add ½ cup diced tomatoes and 1 teaspoon oregano early in cooking. A Carolina-inspired version swaps kidney beans for black-eyed peas and includes ½ teaspoon mustard powder.
For a Southwestern touch, stir in ½ cup corn kernels and ¼ cup diced bell peppers during the final 30 minutes. 🗺️
Creamy Finish Options
Stir in ½ cup sour cream or ¼ cup Greek yogurt during the last 10 minutes for a tangy contrast. For extra richness, top each serving with 2 tablespoons shredded cheddar and let it melt slightly.
A spicy cream cheese swirl (mix ¼ cup cream cheese with 1 tbsp hot sauce) adds a modern twist. 💛
Nutrition facts
Frequently asked questions
Why does this chili recipe call for coffee?
The coffee isn’t just for caffeine—it deepens the chili’s complex flavor profile by adding subtle bitterness and richness. The acidity helps balance the sweetness from the brown sugar while enhancing the smoky notes from the paprika. For a non-coffee version, use 1 cup strong black tea or add ½ teaspoon instant espresso powder instead.
Can I make this chili in a slow cooker or Instant Pot?
For a slow cooker, brown the meat first, then combine all ingredients and cook on low for 6-7 hours or high for 3-4 hours. For an Instant Pot, use the high pressure setting for 30 minutes after browning, then natural release. The Instant Pot version will be ready in about 45 minutes total. Both methods yield tender meat and rich flavor!
How do I fix a chili that’s too thin or too thick?
For a thin chili, simmer uncovered for 15-20 minutes to reduce the liquid. If it’s still too thin, mix 1 tablespoon cornstarch with 2 tablespoons cold water and stir it in. For a thick chili, add ½ cup beef broth or water, stirring well. The key is to adjust gradually—chili thickens as it cools, so don’t overcorrect.
What’s the best way to store and reheat leftovers?
Store chili in an airtight container in the fridge for up to 5 days or freeze for 3 months. To reheat, warm over low heat on the stove, stirring occasionally. Add 1-2 tablespoons broth or water if it seems too thick after reheating. The flavors actually improve overnight, so leftovers often taste even better!
Can I use dried beans instead of canned?
Yes, but you’ll need to soak them first. For kidney beans, soak 1 cup dried beans in water for 8 hours or overnight, then drain and rinse. Add them to the chili during the final 1.5 hours of cooking. Dried beans take longer to soften, so plan accordingly. For best texture, don’t skip the soaking step—it removes anti-nutrients that can make beans tough.

- 6 Egg Cake Recipe with Oil: Light as Air With Buttery Moisture - October 4, 2026
- 4 Bean Casserole Recipe: One-Pan Heartiness With Smoky Paprika Depth - October 4, 2026
- 3-Ingredient Keto Mug Cake Recipe: Microwave Magic in 2 Minutes - October 4, 2026