
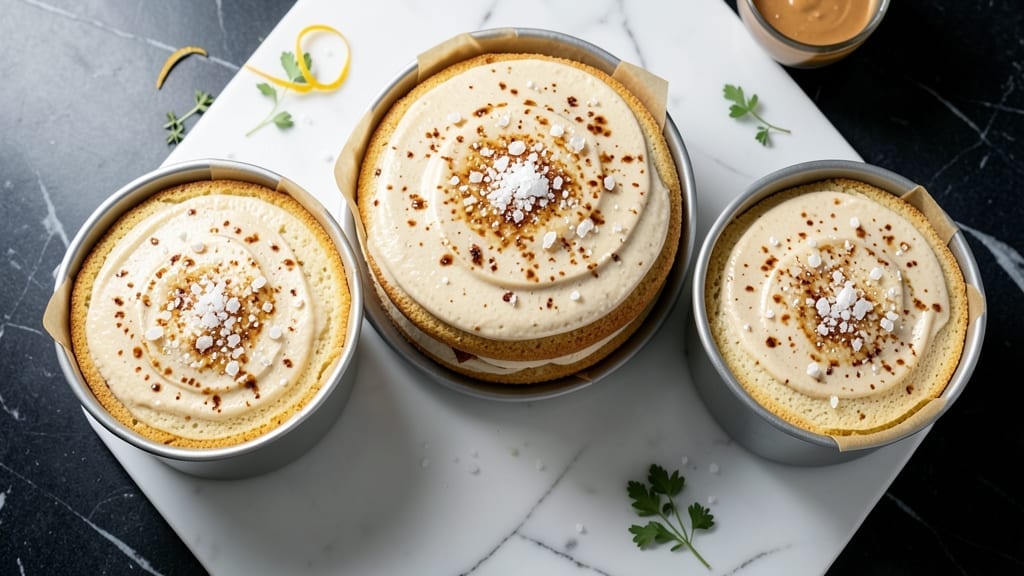
This 3 recipe cake stacks up with restaurant-worthy swirls and height—no advanced baking skills required. I developed this recipe after years of perfecting the balance between tender layers and rich vanilla flavor, ensuring every slice has that signature swirl effect without collapsing.
The secret lies in precise measurements and a slow cooling process that keeps the structure intact.
What makes this cake special is its foolproof technique: a simple batter with a touch of vanilla bean paste creates that signature aroma, while whipped cream filling between layers adds lightness without sogginess.
Baking times are carefully timed to ensure each layer rises evenly, and the cooling process is critical for maintaining that towering height. No special equipment needed—just a standard mixing bowl and a little patience.
The result is a cake with golden, fluffy layers and smooth vanilla swirls that look as impressive as they taste. Each slice reveals tender crumb and bursts of vanilla flavor, making it perfect for celebrations or when you want to impress without stress.
The recipe scales easily, so you can adjust the size based on your needs.
Whether you’re baking for a birthday, holiday gathering, or just a special dessert night, this cake delivers professional results with minimal effort. Let’s get started—your guests won’t believe it’s homemade.
Ingredients for 3 recipe cake
Twelve ingredients, three layers—this cake stacks up with restaurant-worthy swirls and golden height.
| Ingredient | Amount | Notes |
|---|---|---|
| All-Purpose Flour 🌾 | 4 cups | Sifted for light texture |
| Granulated Sugar 🍚 | 2 ½ cups | White or light brown |
| Vanilla Bean Paste 🌿 | 2 tbsp | High-quality for rich flavor |
| Unsalted Butter 🧈 | 2 cups | Room temperature, softened |
| Large Eggs 🥚 | 6 whole | Room temperature for even mixing |
| Baking Powder 🧂 | 2 tsp | Freshly measured |
| Salt 🧂 | ½ tsp | Fine sea salt |
| Whole Milk 🥛 | 1 ½ cups | Room temperature |
| Heavy Whipping Cream 🥛 | 2 cups | Cold for stable whipping |
| Powdered Sugar 🍚 | 3 cups | For filling and frosting |
| Vanilla Extract 🌿 | 1 tbsp | Pure vanilla for aroma |
| Parchment Paper 📄 | 3 sheets | For layering and cooling |
The vanilla bean paste is non-negotiable here—it’s what gives this cake its signature aroma and depth. Nielsen-Massey or Madagascar vanilla from a specialty store makes all the difference. If you can’t find paste, a high-quality extract works, but you’ll miss that signature speckling. The butter needs to be room temperature—no cold lumps, no melted grease. I like Plugrá for its rich flavor, but any good brand will do. The flour should be sifted before measuring—this ensures light, airy layers that don’t sink. Grab a fine-mesh sieve or just whisk it in a bowl to aerate.
No vanilla bean paste? Double the vanilla extract and add a pinch of sugar to mimic the sweetness. The heavy whipping cream can be swapped for cool heavy cream (36% fat) if that’s what you’ve got, but don’t go lower—it won’t whip as stiff. For the powdered sugar, if you’re short, mix granulated sugar with 1 tbsp cornstarch per cup to mimic the texture. The eggs must be room temperature—cold eggs can cause the batter to curdle. If you’re prepping ahead, whisk them with the sugar first and let them sit at room temp for 30 minutes before mixing. The baking powder is critical—don’t use baking soda unless you’re adding an acid like buttermilk.
This cake is all about patience. Let the layers cool completely on a wire rack before assembling—room temperature layers prevent sogginess. The whipped cream filling should be thick but not stiff—if it’s too firm, soften it slightly with a splash of milk. Store the assembled cake in the fridge for up to 5 days, but serve it at room temperature for the best texture. For freezing, wrap each layer individually in plastic wrap, then assemble when ready to serve. The vanilla swirls are best enjoyed fresh, but the cake itself keeps well for 3 days at room temperature if stored in an airtight container.
Why You’ll Love This Recipe
- Pantry Staples Only: I swear by this recipe because it uses exactly what’s already in my cupboards—no weird substitutions or last-minute grocery runs. Flour, sugar, butter, eggs, and that one vanilla bean paste I bought on sale? That’s it. No fuss, no stress, just cake.
- Vanilla Kisses Every Bite: The vanilla bean paste isn’t just flavor—it’s the star. That deep, aromatic richness cuts through the sweetness, making each slice taste like a bakery secret. (Yes, even if I forget to scrape the seeds out properly.)
- Layered for Any Occasion: Here’s what sold me—this cake plays nice. Too fancy for a weekday? Stick with plain buttercream. Celebrating? Add fresh berries or a dusting of powdered sugar. It’s the blank canvas of desserts, and I love that.
- Budget-Friendly Luxury: Honestly, this recipe costs me pennies but tastes like a splurge. Butter and eggs stretch further than you’d think, and the sugar’s measured just enough to avoid waste. Leftovers? They disappear faster than my willpower on a bad day.
Step-by-step instructions for triple-layer vanilla bean cake
Here’s how to build a towering, perfectly moist cake with swirling vanilla bean goodness.
Prepare the Cake Batter
Preheat your oven to 350°F and line three 8-inch round cake pans with the 3 sheets parchment paper, greasing the sides lightly with unsalted butter for easy removal. In a large mixing bowl, sift together the 4 cups all-purpose flour, 2 tsp baking powder, and 0.5 tsp salt. Set aside.
In a separate stand mixer fitted with the paddle attachment, cream together the 2 cups unsalted butter and 2.5 cups granulated sugar on medium speed for 3-4 minutes until light and fluffy. Add the 6 whole large eggs one at a time, mixing well after each addition. Scrape down the sides of the bowl as needed.
In a small bowl, whisk together the 1.5 cups whole milk and 2 tbsp vanilla bean paste. With the mixer running on low speed, alternately add the dry ingredients and the milk mixture, beginning and ending with the flour mixture. Mix just until combined—don’t overmix, or the cake will be dense.
Bake the Layers Evenly
Divide the batter evenly among the prepared cake pans, filling each about two-thirds full. Bake for 25-30 minutes or until a toothpick inserted into the center comes out clean. The edges should be golden brown, but the tops should still look slightly underbaked—they’ll firm up as they cool.
Remove the cakes from the oven and let them cool in the pans for 10 minutes. Then transfer them to a wire rack to cool completely. This gradual cooling prevents cracking. Once fully cooled, remove the cakes from the pans by gently peeling away the parchment paper.
Make the Vanilla Bean Filling
In a medium bowl, whip the 2 cups heavy whipping cream until soft peaks form. Gradually add the 3 cups powdered sugar and 1 tbsp vanilla extract, whipping until the mixture is smooth and holds stiff peaks. This will be the luscious filling between your cake layers.
Here’s the thing—don’t rush this step. The cream should be thick enough to hold its shape when piped, but still light enough to blend seamlessly with the cake. If it’s too thin, chill it for 15 minutes before proceeding. The filling should be cool but not cold, as cold cream can cause the cake layers to toughen.
Assemble the Triple-Layer Cake
Place the first cake layer on a cake stand or plate. Spread about 1 cup of the whipped cream filling evenly over the top, leaving a ½-inch border around the edges. This ensures the filling doesn’t squeeze out when you add the next layer. Repeat with the remaining two layers, creating a sandwich with filling between each.
For the swirl effect, pipe the remaining whipped cream in a circular motion around the top edge of the cake, then gently swirl it downward with an offset spatula. This creates those beautiful marbled patterns that make this cake look so impressive. Press the top lightly to smooth it out, but don’t overwork it or you’ll deflate the filling.
Chill and Serve
Cover the assembled cake with plastic wrap and refrigerate for at least 4 hours, or preferably overnight. This chilling time allows the flavors to meld and the cake to set properly. The longer it chills, the more stable the filling will be when you slice into it.
Slice the cake with a sharp, hot knife for clean cuts. The layers should be perfectly moist, with the vanilla bean filling peeking through in beautiful swirls. Serve at room temperature for the best texture—cold cake can make the filling taste bland, while room temperature lets all the flavors shine.
Pro Tips For Making 3 Recipe Cake
- Weigh Your Butter: DESCRIPTION: Pack that butter into the measuring cup—don’t scoop it. I used to eyeball it, and my cakes turned out greasy or dense. A standard 1/2 cup of packed butter is about 1 stick (113g), and it makes a real difference in texture. (Yes, even if you’re impatient like me.)
- Whisk Eggs First: DESCRIPTION: Beat the eggs until they’re pale and slightly thicker before adding them to the batter. I learned this the hard way—raw eggs mixed in at the last second can make the cake gummy. A quick whisk with a fork in the bowl does the trick.
- Skip the Overmixing: DESCRIPTION: Fold in the flour just until combined—lumpy is fine. I used to beat this cake like I was punishing the batter, and it turned out tough. Stop when the dry ingredients disappear, and the cake will stay tender.
- Rotate Your Pans: DESCRIPTION: Swap the cake pans halfway through baking if your oven runs hot or cold in spots. After burning the edges of two batches, I finally cracked open the oven door and saw one side was golden while the other was raw. A quick rotation fixes it—no need for a new cake.
Serving suggestions for this 3 recipe cake
Presentation Plating
Serve this cake on a gold-rimmed cake stand or a large white platter to highlight the vanilla swirls against the golden layers. For a rustic touch, use a wooden board—it adds warmth and contrasts beautifully with the cake’s elegance.
I like to dust the top with powdered sugar just before serving to catch the light and add a delicate finish. 💫
Garnish Ideas
Fresh raspberries or blackberries arranged in a circular pattern around the base add a pop of color and freshness. For a classic touch, sprinkle toasted almond slivers or crushed pistachios over the top.
If you want something extra special, drizzle dark chocolate ganache in thin, elegant lines between the layers when slicing. 🍓
Portioning Tips
Use a sharp, hot knife (wipe it with a damp cloth between slices) for clean, professional cuts. For easy serving, cut the cake into 12 equal wedges—each slice will showcase the layers and filling beautifully.
Store any leftovers in an airtight container at room temperature for up to 3 days, or refrigerate for 5 days. Bring to room temperature before serving again. ❄️
Themed Serving Ideas
For a birthday celebration, add colorful sprinkles or edible glitter to the top before chilling. For a holiday dessert, dust with cinnamon sugar and top with candied pecans.
For a wedding dessert table, pair with mini vanilla bean ice cream on the side and fresh mint leaves for garnish. 🎉
Make-Ahead Serving
This cake is perfect for prepping ahead! Assemble it 1 day in advance and store it in the fridge. Bring it to room temperature 2 hours before serving so the flavors and textures are at their best.
If you’re serving at a party, transport it on a cake board wrapped in plastic wrap to keep it stable. Unwrap just before serving to let the aroma fill the room. 💡
Dietary Adaptations
For a lighter version, replace the whipped cream filling with light whipped topping or Greek yogurt mixed with vanilla. For gluten-free, use a 1:1 gluten-free flour blend and reduce the baking powder to 1.5 tsp. Always adjust baking times slightly—gluten-free cakes can dry out faster. 🌱
Nutrition facts
Frequently asked questions
Can I make this cake in smaller pans?
Yes! For a single-layer version, use one 9-inch pan and reduce the batter by ⅓. If using 6-inch pans, you’ll need 4 layers instead of 3. Just adjust baking time to 20-25 minutes for smaller pans—they bake faster. The key is keeping the batter depth consistent (about 2 inches deep).
Why does my cake sink in the middle?
Oven temperature fluctuations or opening the oven too soon are usually the culprits. Always preheat for 15 minutes and avoid opening the door until 20 minutes of baking. Also, make sure your cake pans are the same size and your batter is evenly distributed. A toothpick test (clean when inserted) is more reliable than visual cues.
How do I get the swirl effect without a spatula?
Use a skewer or butter knife instead! After piping the cream around the edge, drag the skewer through the cream in a spiral motion. For a knife, hold it at a 45-degree angle and gently pull downward while rotating. The goal is to create gentle, even waves—not deep grooves. Work quickly before the cream sets.
Can I substitute vanilla extract for vanilla bean paste?
Yes, but the flavor will be subtler. Use double the amount (4 tbsp) and add 1 tsp sugar to mimic the vanilla bean’s sweetness. For visual appeal, sprinkle a few drops of vanilla extract on top of the batter before baking to create a marbled effect. The paste gives that signature speckled look, but extract works in a pinch.
What’s the best way to store leftovers?
Wrap each layer individually in plastic wrap, then store in an airtight container at room temperature for up to 3 days. For longer storage (5 days), refrigerate the assembled cake. Bring to room temperature before serving—cold cake dulls the vanilla flavor and makes the filling taste bland. Never freeze the assembled cake, but you can freeze individual layers for up to 3 months.

- 3lb Prime Rib Roast Recipe: Juicy Pink Center Guaranteed in 3 Hours - October 31, 2026
- 5 Spice Cake Recipe: Warmly Spiced Layers With Crunchy Top - October 31, 2026
- 1950’s Macaroni and Cheese Recipe: Nostalgic Creamy Cheese Sauce with Buttery Noodles - October 31, 2026