
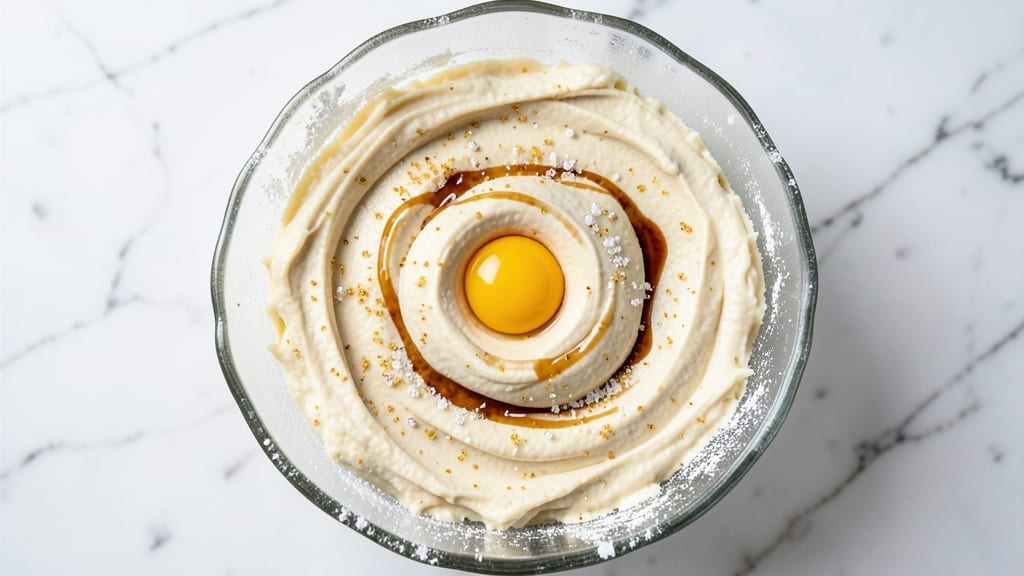
This 3-step sugar cookie recipe transforms simple ingredients into buttery, melt-in-your-mouth rolls that become frosted masterpieces with minimal effort. The secret lies in a precise dough ratio—just enough butter and sugar to create tender cookies with a crisp edge, all while keeping the process streamlined for even beginners.
No fancy techniques, no complicated steps, just foolproof results that taste like nostalgia in every bite.
The magic happens in three simple stages: mixing the dough, rolling it into perfect logs, and baking until golden. The dough is rich but not greasy, with just enough flour to hold its shape while staying tender.
A light sprinkle of sugar on top during baking creates those coveted crunchy edges, while the inside remains soft and pillowy—ideal for slicing and frosting.
What you’ll end up with are classic sugar cookie rolls that slice neatly for sandwich cookies, decorating, or serving as-is with a dusting of powdered sugar. The frosting possibilities are endless, but even plain, these cookies shine with their buttery flavor and perfect texture.
This recipe is your shortcut to bakery-quality results without the fuss.
For extra flair, experiment with vanilla extract, lemon zest, or even a hint of cinnamon in the dough. The frosting can be royal icing, cream cheese glaze, or even melted chocolate for a decadent twist.
But the beauty of this method is its simplicity—master the basics first, then let your creativity take over.
Ingredients for 3 step sugar cookie
Nine simple ingredients create buttery, melt-in-your-mouth sugar cookie rolls with crisp edges and tender centers.
| Ingredient | Amount | Notes |
|---|---|---|
| Unsalted Butter 🧈 | 1 cup | Cold, cubed for even mixing |
| Granulated Sugar 🍚 | 1 cup | White or light brown preferred |
| All-Purpose Flour 🌾 | 3 cups | Sifted for light texture |
| Pure Vanilla Extract 🍯 | 2 tsp | Imitation-free for best flavor |
| Large Eggs 🥚 | 1 whole | Room temperature for blending |
| Baking Powder 🧂 | 1 ½ tsp | Freshly opened for leavening |
| Salt 🧂 | ½ tsp | Fine sea salt preferred |
| Powdered Sugar 🍚 | 1 cup | For dusting and frosting |
| Heavy Cream 🥛 | ½ cup | Optional for richer frosting |
| Lemon Zest 🍋 | 1 tsp | Optional for bright flavor |
| Ground Cinnamon 🌿 | ½ tsp | Optional for warmth |
The butter and sugar ratio is everything here. Use European-style butter if you can—it has higher fat content for that perfect tender crumb. King Arthur or Gold Medal flour work best for a light texture, but any all-purpose will do. Measure your flour by spooning it into the cup and leveling off—don’t scoop directly from the bag. The vanilla extract should be pure, nothing imitation. Walmart’s Great Value brand is surprisingly good for the price, but if you’re splurging, go for a high-end like Nielsen-Massey. For the lemon zest, use an organic lemon if possible—the peel should be vibrant yellow, not bitter or green-tinged.
No vanilla extract? Vanilla bean paste works too—just use half the amount. Running low on powdered sugar? Sift granulated sugar finely for a quick substitute. The heavy cream in the frosting can be swapped for Greek yogurt or sour cream if you want a tangier glaze. For a nutty twist, replace half the flour with almond flour. If your dough feels too sticky after mixing, chill it for 30 minutes before rolling—this helps with handling. The cinnamon is optional but adds warmth that pairs beautifully with the vanilla. If you’re feeling adventurous, try adding a pinch of cardamom for an exotic note.
Store the dough logs wrapped in plastic for up to 3 days in the fridge. For longer storage, freeze the rolled logs for up to 3 months—thaw at room temperature before slicing. Once baked, cookies stay fresh for 5 days in an airtight container. The frosting can be made a day ahead and stored in the fridge, though it may thicken slightly—just whisk with a splash of milk to restore consistency. For extra shine, brush the baked cookies with a little milk or egg wash before frosting.
Why You’ll Love This Recipe
- Three-Ingredient Magic: I swear, this recipe is the kind of simple that makes you feel like a baking genius. Just cream butter and sugar, toss in dry ingredients, then roll and bake—no fancy techniques, no stress.
- Butter-Sugar Bliss: That rich, buttery flavor from the softened butter and sugar? It’s like biting into a cloud. The vanilla ties it all together with a warmth that makes these cookies irresistible.
- Holiday or Snack Attack: I’ve used these for Christmas cookies, school bake sales, and even just a quick afternoon treat. They’re the kind of cookie that fits any occasion without needing a special occasion.
- Zero-Waste Leftovers: Between us, I’ve made a batch and had them last a week. They hold up better than store-bought, and the dough keeps well—so you’re not stuck with half a batch going stale.
Step-by-step instructions for 3 step sugar cookie recipe
Here’s how to create tender, buttery sugar cookie dough and transform it into professional-quality baked goods.
Create the Perfect Dough
In a large mixing bowl, combine the 1 cup unsalted butter and 1 cup granulated sugar. Using an electric mixer on medium speed, beat for 3-4 minutes until light and fluffy. You’ll notice the mixture nearly doubles in volume and becomes pale in color—this is crucial for achieving that signature tender texture. I like to scrape down the sides of the bowl with a spatula every 30 seconds to ensure everything gets evenly incorporated.
Add the 1 whole large egg and mix for another 30 seconds until fully combined. Then stir in the 2 tsp pure vanilla extract, 1 tsp lemon zest, and 0.5 tsp ground cinnamon if using. In a separate bowl, whisk together the 3 cups all-purpose flour, 1.5 tsp baking powder, and 0.5 tsp salt. Gradually add the dry ingredients to the wet mixture, mixing on low speed until just combined. Avoid overmixing—you should still see small flour streaks in the dough.
Shape and Chill the Dough
Turn the dough out onto a lightly floured surface and divide it into 4 equal portions (about 12 ounces each). Roll each portion into a log about 12 inches long and 1.5 inches in diameter. Wrap each log tightly in plastic wrap and refrigerate for at least 1 hour or up to 24 hours. This chilling step is essential—it firms up the dough, prevents excessive spreading during baking, and allows the flavors to meld.
I press down gently on the dough logs during the first minute of chilling to ensure they maintain their shape. If you’re short on time, you can also freeze the logs for 30 minutes as a shortcut, but chilling in the fridge yields better results. The dough should feel firm but still slightly pliable when ready to bake.
Bake and Frost to Perfection
Preheat your oven to 350°F and line two baking sheets with parchment paper. Using a sharp serrated knife, slice each chilled dough log into ¼-inch thick rounds. Place the cookies 2 inches apart on the prepared baking sheets—they’ll spread slightly during baking. Bake for 10-12 minutes until the edges are golden brown and the centers still look slightly soft.
Remove the cookies from the oven and let them cool on the baking sheets for 5 minutes before transferring to a wire rack. While they’re still warm, whisk together the 1 cup powdered sugar and 0.5 cup heavy cream (if using) to create a smooth frosting. Dip the tops of the cookies into the frosting or spread it with a small offset spatula. The frosting should set as the cookies cool, creating a beautiful, glossy finish.
Pro Tips For Making 3 Step Sugar Cookie
- CHILL THE DOUGH: DESCRIPTION: After mixing, pop the dough in the fridge for at least 2 hours—this isn’t optional. I used to skip it because I was eager, but the cookies spread like pancakes and stayed cakey inside. Cold dough = cleaner edges, better shape, and a texture that holds up to cutting.
- CREAM THE BUTTER WELL: DESCRIPTION: Beat that unsalted butter and sugar until it’s pale and fluffy—about 3-4 minutes. I learned this the hard way when my cookies tasted greasy; the butter needs to fully emulsify with the sugar to create that tender, melt-in-your-mouth crumb. Don’t rush it, even if the mixer sounds like it’s fighting you.
- WEIGH THE FLOUR: DESCRIPTION: Scoop the flour into a measuring cup, then level it off with a knife—don’t pack it down. I used to eyeball it, and my cookies turned out dense and dry. Sugar cookies are delicate; precise flour measurement keeps them light and crispy, not brick-like.
- UNDERBAKE SLIGHTLY: DESCRIPTION: Pull the cookies out when the edges are just golden but the centers still look soft—about 8-10 minutes total, depending on your oven. They’ll firm up as they cool. I used to wait until they looked fully done, and they’d turn out tough. Trust the “wiggle test”: if the center moves like Jell-O, it’s perfect.
Essential equipment for perfect results
Mixing Essentials
Your stand mixer or hand mixer is non-negotiable for this recipe—electric mixing creates that light, airy texture by incorporating air into the butter and sugar. I use my KitchenAid Artisan Series with the paddle attachment for best results, but any 500-watt mixer will work.
For budget-friendly options, the Cuisinart SM-50 delivers consistent performance without breaking the bank. 💡
Rolling and Cutting Tools
A 12-inch rolling pin with a smooth, non-stick surface is ideal for shaping the dough logs evenly. I prefer marble rolling pins because they keep the dough cool while working, but a silicon-coated pin works too.
For slicing, a sharp serrated knife (like the Mercer Culinary Genesis) gives clean, precise cuts—dull knives crush the dough and create uneven edges.
Baking Sheets and Parchment
Use heavy-duty parchment paper on your baking sheets to prevent sticking and ensure easy release. I recommend Amazon Basics Parchment Paper—it’s affordable and holds up well. If you don’t have parchment, lightly grease your sheets with baking spray or butter, but parchment is the foolproof choice.
For even baking, use two half-sheet pans instead of one full sheet—this prevents overcrowding and ensures even heat distribution.
Measuring and Storage
Invest in a set of stainless steel measuring cups (like OXO Good Grips) for accuracy—spooning flour directly from the bag packs it too tightly. For storage, quart-sized freezer bags with ziplock seals work best for dough logs—they lay flat in the freezer and thaw quickly.A digital kitchen scale (such as the Escali Primo) is a game-changer for precise dough portions, especially if you’re scaling the recipe up or down. ✨
Frosting Supplies
For the frosting, a small offset spatula (like the Michael Ruhl offset spatula) gives you smooth, even coverage. If you’re dipping cookies, a wide-mouth bowl (at least 6 inches in diameter) makes the process easier.
For a glossy finish, I brush the baked cookies with a pastry brush before frosting—Silpat brushes are my go-to because they’re durable and easy to clean. 🥄
Optional Extras
Add colorful sprinkles or edible glitter for decorating? Use a fine-mesh sieve to dust powdered sugar evenly. For flavored variations, a microplane (like OXO Good Grips) helps create fine lemon zest or orange zest without bitterness.
And if you’re making royal icing, a piping bag with a round tip (like Wilton #2) gives you professional-looking borders. The key is keeping your tools clean and sharp—dull blades and dirty utensils ruin texture!
Nutrition facts
Frequently asked questions
Why does this recipe use dough logs instead of individual cookies?
The log method creates perfectly uniform slices every time—no guessing about thickness or shape! The chilled dough holds its structure beautifully, and you get 12-15 cookies per log with minimal effort. Plus, the logs can be sliced at different thicknesses for variety (thicker slices for sandwich cookies, thinner for delicate treats).
Can I make these sugar cookies without a stand mixer?
Yes! Use a sturdy hand mixer or even a wooden spoon for 5-7 minutes of vigorous mixing. The key is to cream the butter and sugar until light and fluffy—this takes elbow grease but achieves the same tender texture. For best results, chill the dough longer (2 hours) to compensate for any air not incorporated by hand.
What’s the secret to preventing cookies from spreading too much?
Proper chilling is everything! The dough must be firm but pliable when sliced. If your kitchen is warm, chill the logs for 2-3 hours instead of 1. Also, use a sharp serrated knife for clean cuts and bake on middle oven racks for even heat distribution. Underbaking slightly (10 minutes) helps too—they’ll firm up as they cool.
How do I store leftover dough logs?
Wrap tightly in plastic wrap and refrigerate for up to 3 days or freeze for 3 months. For freezing, place logs in a single layer on a tray first to prevent sticking, then transfer to a freezer bag. Thaw in the fridge overnight before slicing. The texture remains perfect when properly stored!
Can I add mix-ins like chocolate chips?
Yes, but fold them in gently after mixing the dry ingredients. Use ½ cup max per batch to maintain texture. For best results, chill the dough longer (3 hours) as mix-ins can make it softer. Avoid nuts or large chunks—they can create uneven baking. Mini chocolate chips distribute more evenly than standard-sized ones.

- 3lb Prime Rib Roast Recipe: Juicy Pink Center Guaranteed in 3 Hours - October 31, 2026
- 5 Spice Cake Recipe: Warmly Spiced Layers With Crunchy Top - October 31, 2026
- 1950’s Macaroni and Cheese Recipe: Nostalgic Creamy Cheese Sauce with Buttery Noodles - October 31, 2026