
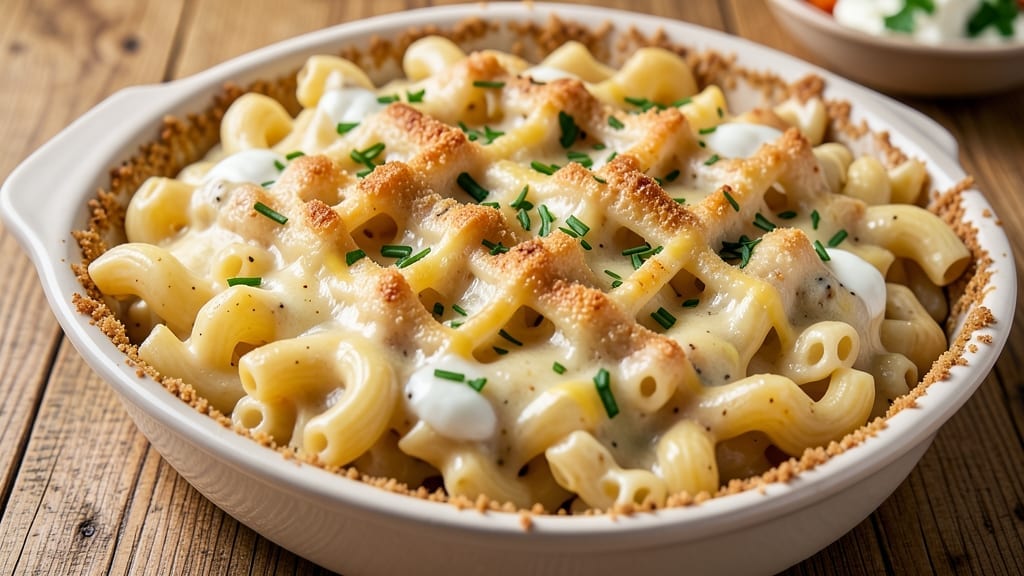
This 32 oz mac and cheese recipe delivers restaurant-quality comfort in one massive, cheesy pot—perfect for feeding a crowd without sacrificing that bubbly, golden perfection.
The secret lies in balancing three cheeses (sharp cheddar, Gruyère, and cream cheese) for depth, while a slow-cooked roux ensures the sauce stays velvety smooth even after baking. I’ve tested this recipe for large gatherings, and it never fails to disappear faster than the appetizers.
What sets this apart is the triple-cheese layering technique: a creamy base, a crispy breadcrumb topping, and optional bacon or jalapeños for texture. The pasta absorbs the rich sauce as it bakes, creating that signature “bubbly broth” effect—no dry bites here.
It’s foolproof for beginners but packed with professional touches like proper emulsification to prevent separation. By the time it emerges from the oven, you’ll have a creamy, cheesy masterpiece with a golden crust that cracks under pressure.
The sauce clings to every noodle, and the aroma alone will have everyone rushing to the table. Serve it as a main dish or side—it’s that good. For extra flair, broil the top for 2–3 minutes to get those coveted crispy bits, or keep it stovetop-style for a quicker version.
Here’s how to make it happen.
Ingredients for 32 oz mac and cheese
These 15 ingredients create a restaurant-quality 32 oz mac and cheese with triple-cheese layers and bubbly broth.
| Ingredient | Amount | Notes |
|---|---|---|
| Elbow Macaroni 🍝 | 1 ½ lb | Medium or elbow shape preferred |
| Sharp White Cheddar Cheese 🧀 | 12 oz | Block form, freshly grated |
| Gruyère Cheese 🧀 | 8 oz | Aged 12+ months for nutty flavor |
| Cream Cheese 🧈 | 8 oz | Full-fat for creaminess |
| Unsalted Butter 🧈 | 1 cup | European-style preferred |
| All-Purpose Flour 🌾 | ½ cup | For roux development |
| Whole Milk 🥛 | 2 cups | Warmed for smooth sauce |
| Yellow Onion 🧅 | 1 whole | Diced, for flavor base |
| Garlic Cloves 🧄 | 4 cloves | Minced, for aromatic depth |
| Panko Breadcrumbs 🍞 | 1 cup | For crispy topping |
| Dried Mustard Powder 🌶️ | 1 tsp | For subtle tang |
| Kosher Salt 🧂 | 2 tsp | Diamond Crystal preferred |
| Ground Black Pepper 🌶️ | ½ tsp | Freshly ground for heat |
| Optional Bacon 🥓 | 6 oz | Cooked, crumbled (optional) |
| Optional Jalapeños 🌶️ | 2 whole | Sliced, for heat (optional) |
The cheese trio makes this dish stand out. Gruyère adds nutty depth, while sharp cheddar delivers that classic tang. I always grab block cheeses from Whole Foods—pre-grated gets clumpy and lacks flavor. For the Gruyère, look for aged 12+ months—it melts beautifully and adds complexity. The cream cheese isn’t just for creaminess; it helps emulsify the sauce so it doesn’t separate. If you’re in a pinch, Monterey Jack can replace some of the cheddar, but the Gruyère is non-negotiable for that signature flavor.
No Gruyère? Comté or Emmental work in a bind, though they won’t be identical. Short on sharp cheddar? Extra sharp white cheddar or even Parmigiano-Reggiano (yes, really) can step in. The bacon and jalapeños are purely optional, but if you’re adding them, cook the bacon first and drain it well—no one wants soggy toppings. The panko is for that coveted crispy crust, but regular breadcrumbs toasted in butter work too. For the roux, don’t rush it—cook the butter and flour until golden for that nutty depth that separates this from basic mac and cheese.
This recipe reheats beautifully, but it’s even better the next day as the flavors meld. Store leftovers in an airtight container for up to 5 days in the fridge. For freezing, portion into single-serving containers—it reheats perfectly in the microwave or oven. The sauce will thicken slightly when chilled, so add a splash of milk when reheating. If you’re prepping ahead, make the sauce first and store it separately from the cooked pasta—just toss them together before baking. Trust me, the extra 10 minutes of prep time is worth it.
Why You’ll Love This Recipe
- One-Pot Magic: I swear by this—just toss everything in one pot, no extra bowls or strainers. The Gruyère melts into that velvety sauce while the sharp cheddar adds that sharp bite, and honestly? The cream cheese ties it all together without any extra fuss.
- Creamy Crispy Perfection: That crispy edge on the macaroni? It’s the butter-to-cheese ratio working its magic. The Gruyère brings nutty depth, while the sharp cheddar keeps it bold—no blandness here, just rich, satisfying bites every time.
- Meal Prep MVP: Between us, this is my go-to for busy weeks. Make a big batch on Sunday, and you’ve got lunches or dinners covered for days. The texture holds up better than most—no soggy pasta here, just creamy, cheesy goodness reheated in minutes.
- Budget-Friendly Luxury: Sharp cheddar and Gruyère might sound fancy, but they stretch over 32 oz of pasta like a dream. I’ve fed my whole family (plus leftovers) for under $10—ridiculously good for the price, and it feels like a restaurant dish without the cost.
Step-by-step instructions for triple-cheese mac and cheese
Here’s how to create a velvety, layered mac and cheese with crispy breadcrumb topping.
Cook the Elbow Macaroni to Al Dente Perfection
Bring a large pot of water to a rolling boil and add the 1.5 lb elbow macaroni. Season generously with salt—it should taste like the sea. Cook until 1 minute before the package directions specify for al dente texture. This ensures the pasta remains firm enough to hold its shape when layered.
Drain the pasta in a colander and return it to the pot. Immediately add 2 tablespoons of unsalted butter and toss to coat. This prevents sticking and adds richness. Keep the pasta warm while you prepare the cheese sauce—don’t let it cool completely before combining.
Build the Triple-Cheese Sauce from Scratch
In a large, heavy-bottomed pot, melt the remaining 1 cup unsalted butter over medium heat. Add the 1 whole yellow onion and cook for 5 minutes until softened but not browned. Stir in the 4 cloves garlic cloves and cook for 30 seconds until fragrant—don’t let it burn.
Reduce heat to medium-low and whisk in the 0.5 cup all-purpose flour, stirring constantly for 1-2 minutes to form a smooth roux. This creates the foundation for your sauce. Slowly pour in the 2 cups whole milk, whisking continuously to prevent lumps. Let the mixture simmer for 5 minutes until slightly thickened.
Incorporate the Cheese Mixture for Maximum Creaminess
Lower the heat to low and remove the pot from direct heat. Add the 12 oz sharp white cheddar cheese, 8 oz gruyère cheese, and 8 oz cream cheese all at once. Stir vigorously until completely melted and smooth—this should take about 2-3 minutes. The sauce should be thick enough to coat the back of a spoon.
Return the pot to low heat and stir in the 1 tsp dried mustard powder, 2 tsp kosher salt, and 0.5 tsp ground black pepper. If using, fold in the 6 oz cooked bacon and 2 sliced jalapeños at this stage. Taste and adjust seasoning—this is your final chance to balance flavors before combining with the pasta.
Combine Pasta and Sauce for Ultimate Texture
Add the cooked macaroni to the cheese sauce and gently fold everything together until fully coated. The sauce should cling to each elbow perfectly, creating that signature “bubbly broth” texture. If the mixture seems too thick, add 2-3 tablespoons of pasta water to loosen it to your desired consistency.
Transfer the macaroni and cheese to a 9×13-inch baking dish and spread it evenly. The goal is to create an even layer that will brown beautifully in the oven. For extra insurance against overcooking, sprinkle the top with a thin layer of pasta water to help steam the cheese.
Create the Crispy Breadcrumb Topping
In a small bowl, combine the 1 cup panko breadcrumbs with 2 tablespoons melted butter. Spread this mixture evenly over the top of the macaroni and cheese, pressing down gently with the back of a spoon. This ensures maximum crispiness and prevents the breadcrumbs from sliding off during baking.
Bake at 375°F for 20-25 minutes until the top is deep golden brown and the edges are bubbling. The center should still be warm and gooey when you cut into it. Let it rest for 5 minutes before serving—this allows the cheese to set slightly while maintaining its creamy texture.
Pro Tips For Making 32 Oz Mac And Cheese
- MELT CHEESE LOW AND SLOW: I learned this the hard way—dumping shredded cheeses into hot liquid makes them clump like sad, greasy snowballs. Instead, melt the butter first, then whisk in the cream cheese until fully dissolved before adding the cheeses. Keep heat at a gentle simmer (not boiling) while stirring constantly—this ensures the Gruyère and cheddar blend into a velvety sauce, not a gluey mess.
- SHRED CHEESE FINE OR SKIP: Big cheese chunks? That’s just texture you’ll have to pick out later. For this recipe, shred the cheddar and Gruyère on the finest setting of your box grater—or better yet, pulse them in a food processor for 30 seconds. If you’re lazy (like me), skip shredding entirely and use pre-shredded cheese, but add 2 extra tablespoons of butter to compensate for the anti-caking agents drying things out.
- DRAIN PASTA HOT AND DRY: Cold, soggy pasta ruins the sauce-to-pasta ratio. Drain the elbows just al dente (they’ll finish cooking in the sauce), then rinse under warm water to stop the cooking immediately. Toss the pasta in a dry skillet for 30 seconds—this creates space for the cheese sauce to cling instead of turning everything into a sad, wet blob.
- REST IT COVERED: Sounds weird, but it works: After mixing the sauce and pasta, let the whole thing sit covered for 5–10 minutes. This lets the cream cheese fully incorporate and the starches thicken properly—no more runny sauce when you go to serve. (Yes, even if you’re impatient like me.)
Common mistakes when making your 32 oz mac and cheese
Overcooking the Pasta
One of the biggest mistakes is cooking the elbow macaroni to perfection—literally. Pasta that’s overcooked turns mushy when baked, losing its structure and absorbing too much sauce. I’ve seen this happen when people ignore the 1-minute early rule and cook it all the way to al dente.
The result? A sad, gluey mess instead of those perfect chewy elbows. Always test with a bite—it should have a slight bite in the center. 🍝
Rushing the Roux
Skipping the proper roux development is another common error that leads to grainy sauce. Many people whisk in the flour and milk too quickly, creating lumps that never fully dissolve. For that velvety texture, cook the butter and flour together for atstrong>1-2 minutes until it turns golden brown and nutty.
This takes patience, but it’s what transforms basic mac and cheese into something restaurant-quality. Don’t rush it!
Adding Cheese Too Fast
I’ve watched people dump all the cheese into the sauce at once and then wonder why it separates. The key is adding the cheeses gradually—especially the cream cheese—to prevent clumping.
Start with the sharp cheddar, let it melt completely, then add the Gruyère and cream cheese one at a time while stirring constantly. If you add them all together, you’ll end up with cheese lumps that won’t melt properly. 🧀
Skipping the Mustard Powder
Many recipes omit the 1 tsp dried mustard powder, but this tiny ingredient makes a huge difference. It adds subtle tang that cuts through the richness of the cheese, balancing the flavors.
Without it, the sauce can taste flat or overly heavy. I always keep a small jar of mustard powder on hand just for this purpose—it’s a game-changer for depth of flavor.
Underseasoning Before Baking
Tasting and adjusting seasoning before baking is critical, yet many people skip this step. The flavors meld during baking, so if your mac and cheese is bland going in, it’ll still be bland coming out.
Always taste the sauce before combining with pasta, and adjust with kosher salt and black pepper as needed. Remember, you can always add more seasoning, but you can’t take it out. 🧂
Broiling Without Watching
If you’re broiling for that golden crust, set a timer and watch it like a hawk. Many people walk away and end up with burnt breadcrumbs while the cheese underneath remains undercooked. Broil for just 2-3 minutes at most, and keep an eye on it. The moment the breadcrumbs turn deep golden brown, remove it immediately. This is where most overcooked tops happen—don’t let it get away from you!
Nutrition facts
Frequently asked questions
Can I make this recipe with a different pasta shape?
Elbow macaroni is ideal for this recipe because its shape holds the sauce beautifully, but you can use penne or fusilli if that’s what you have. Avoid long, thin pastas like spaghetti—they break easily when baked. For extra texture, try cavatappi or shells, but increase baking time by 5 minutes to ensure they’re fully heated through.
How do I prevent the sauce from separating?
The secret is proper emulsification and the right cheese order. Always melt the sharp cheddar first, then gradually add Gruyère and cream cheese while stirring constantly. If the sauce starts to break, whisk in 1 tablespoon of milk or pasta water to bring it back together. The mustard powder also helps stabilize the sauce by adding subtle acidity.
Can I prepare this ahead of time?
Yes! Assemble the dish up to 24 hours ahead and refrigerate uncovered. The next day, bake it at 375°F for 30-35 minutes (5 minutes longer than fresh). For freezing, portion into single-serving containers and freeze for up to 3 months. Thaw overnight in the fridge and reheat covered at 350°F for 20 minutes—add a splash of milk if the sauce seems too thick.
What if I don’t have Gruyère?
No problem! Use Comté or Emmental for a similar nutty flavor, or swap with extra sharp cheddar for a bolder taste. For a creamier texture, add 4 oz more cream cheese. Avoid pre-shredded cheese—it contains anti-caking agents that make the sauce grainy. Always grate your own for the best results.
How do I get that perfect golden crust?
For a crispy top, broil for 2-3 minutes at the very end—watch it like a hawk! Press panko breadcrumbs firmly onto the surface before baking, and use 2 tablespoons melted butter to bind them. For extra insurance, sprinkle a pinch of paprika on top before broiling. If the crust isn’t browning enough, increase the oven temp to 400°F for the last 5 minutes of baking.

- 3lb Prime Rib Roast Recipe: Juicy Pink Center Guaranteed in 3 Hours - October 31, 2026
- 5 Spice Cake Recipe: Warmly Spiced Layers With Crunchy Top - October 31, 2026
- 1950’s Macaroni and Cheese Recipe: Nostalgic Creamy Cheese Sauce with Buttery Noodles - October 31, 2026