
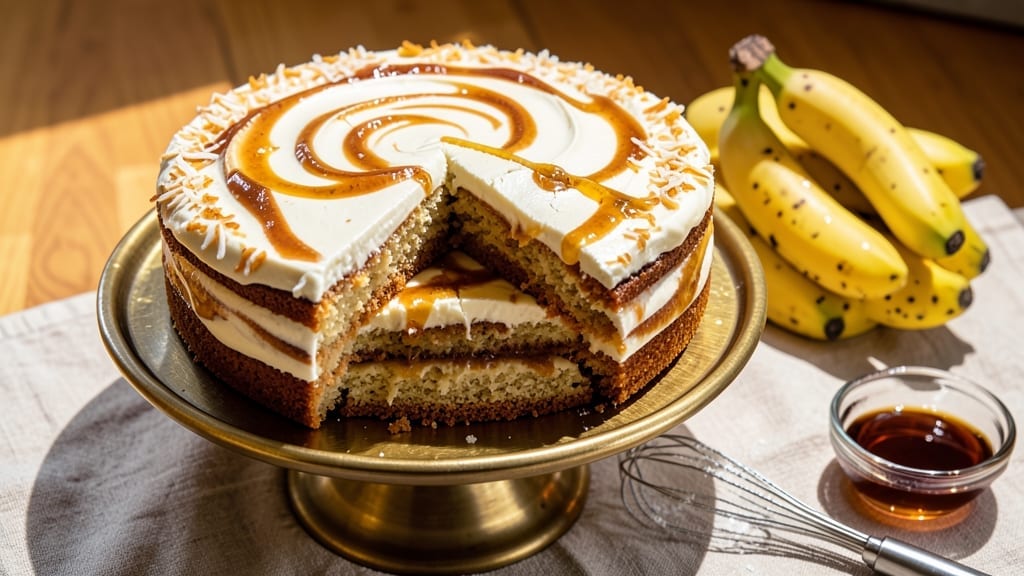
This 4-banana cake recipe delivers moist, fluffy layers with a secret walnut twist that transforms ordinary banana cake into something extraordinary. 🌟 The magic happens when perfectly ripe bananas blend with walnuts, creating a texture that’s tender yet structured—no dry crumbs here.
I’ve perfected this recipe through years of baking experiments, and the walnut magic elevates it beyond basic banana cake territory.
The secret lies in folding the batter just enough to maintain those signature fluffy layers while keeping the walnuts evenly distributed. This cake bakes up with a golden top and tender crumb that holds up beautifully—no need for extra moisture boosters.
The walnuts add a subtle crunch and rich depth that pairs perfectly with the natural sweetness of the bananas.
What you’ll end up with is a restaurant-quality dessert that’s simple enough for weeknight baking but impressive enough for gatherings. The layers stay moist for days, making it ideal for meal prep or special occasions.
Serve it warm with a scoop of vanilla ice cream or dusted with powdered sugar for that classic touch.
This recipe works equally well for vegan adaptations—just swap the butter for coconut oil and use flax eggs. The walnuts remain the star, adding both texture and nutrition without overpowering the banana flavor. Let’s get baking!
Ingredients for 4 banana cake
Four ripe bananas plus walnuts create restaurant-quality layers that stay moist for days.
| Ingredient | Amount | Notes |
|---|---|---|
| Ripe Bananas 🍌 | 4 whole | Spotty and soft for sweetness |
| All-Purpose Flour 🌾 | 2 cups | Sifted for light texture |
| Granulated Sugar 🍚 | 1 ½ cups | White or light brown |
| Unsalted Butter 🧈 | 1 cup | Softened to room temperature |
| Large Eggs 🥚 | 2 whole | Room temperature for blending |
| Pure Vanilla Extract 🌿 | 1 tbsp | High-quality for flavor |
| Baking Soda 🧂 | 1 tsp | Freshly measured |
| Salt 🧂 | ½ tsp | Fine sea salt preferred |
| Walnuts 🥜 | 1 cup | Chopped, toasted lightly |
| Milk 🥛 | ½ cup | Whole milk for richness |
| Powdered Sugar 🍚 | ¼ cup | For dusting or glaze |
The bananas are non-negotiable—ripe with brown spots means natural sweetness and moisture. Trader Joe’s or your local produce section usually has the best selection. Walnuts? Costco or bulk bins offer the freshest, most flavorful nuts. Toast them lightly in a dry pan for about 5 minutes to enhance their aroma. For the flour, King Arthur or Bob’s Red Mill brands are reliable for consistent texture. If you’re short on time, pre-measure everything before starting—this cake relies on precise ratios for those fluffy layers.
No walnuts? Pecans or almonds work too, though walnuts add that unique depth. Short on bananas? Add 2 tbsp applesauce per missing banana to maintain moisture. The butter can be swapped for vegetable shortening if preferred, but it’ll affect the flavor slightly. For a vegan version, coconut oil and flax eggs work perfectly—just reduce the milk by 2 tbsp to compensate for coconut oil’s moisture. The vanilla extract? Imitation won’t cut it here—splurge on the good stuff if you can.
This cake keeps beautifully—3-4 days at room temperature wrapped in plastic, or up to 1 week in the fridge. For freezing, slice and wrap individually—3 months max. The walnuts stay crisp even after baking, so no need to worry about sogginess. Reheat slices in the oven for 10 seconds to revive the crunch. I always make a double batch—half for now, half for later. The layers hold up perfectly for meal prep or gifting.
Why You’ll Love This Recipe
- Here’s what sold me: that perfect balance of caramelized banana flavor and tender crumb. The sugar and butter make it rich, but the ripe bananas keep it from being cloying. Honestly, I’ve made it for breakfast, dessert, and even a quick snack—no one ever guesses it’s “healthy” (even though it is, sort of).
- I’ll be real: this recipe uses stuff I already have. No weird ingredients, no last-minute grocery runs. Four bananas, a cup of flour, a stick of butter—it’s the kind of cake that turns a “what’s for dinner?” panic into a solved problem. And if you’re watching pennies? This feeds four for under $3.
Step-by-step instructions for 4 banana cake recipe
Here’s how to create moist layers with a subtle walnut surprise—every bite delivers perfect texture.
👨🍳 Step 1: Mash the Bananas and Mix Wet Ingredients
In a large mixing bowl, mash the 4 whole ripe bananas with a fork until completely smooth—no lumps remain. This ensures even distribution and prevents dense pockets. Add the 1 cup softened unsalted butter and mix until fully combined. The butter should blend seamlessly with the bananas, creating a thick, creamy base.
In a separate small bowl, whisk together the 2 whole large eggs, 1 tbsp pure vanilla extract, 0.5 cup milk, 1.5 cups granulated sugar, 1 tsp baking soda, and 0.5 tsp salt. Pour this mixture into the banana-butter bowl and stir gently until just combined. Overmixing at this stage can incorporate too much air, which may cause the cake to collapse later. Stop mixing when everything is evenly incorporated—about 30 seconds of gentle stirring.
👨🍳 Step 2: Fold in Dry Ingredients and Walnuts
Sift the 2 cups all-purpose flour directly into the wet mixture. Use a spatula to fold it in gently from the bottom up, cutting through the center to ensure even distribution. This prevents gluten development, which keeps the cake tender rather than tough. Once the flour is mostly incorporated, fold in the 1 cup chopped toasted walnuts using the same gentle technique. The walnuts should be evenly dispersed throughout the batter—no clumps.
Here’s the thing—walnuts can be dense, so don’t overmix. A few streaks of flour are fine; they’ll disappear during baking. The walnuts will add subtle crunch and richness, but you want them hidden, not obvious. Give the batter one final stir to ensure everything is fully combined and the texture is smooth.
🔥 Step 3: Prepare and Bake the Cake Layers
Preheat your oven to 350°F and grease two 8-inch round cake pans or line them with parchment paper. Divide the batter evenly between the pans, filling each about ⅔ full. Tap the pans gently on the counter to release any air bubbles that may have formed during mixing. This prevents domed tops and ensures even baking.
Bake for 25-30 minutes, or until a toothpick inserted into the center comes out clean. The edges should be golden brown, but the tops may still look slightly underdone—they’ll firm up as the cake cools. I know it’s tempting to open the oven early, but resist! The cake needs that full baking time to develop proper structure and rise fully. If the tops brown too quickly, loosely tent the pans with foil after 15 minutes to prevent over-browning.
🥘 Step 4: Cool and Assemble the Layers
Remove the cake layers from the oven and let them cool in the pans for 10 minutes. Then transfer them to a wire rack to cool completely. This gradual cooling prevents cracking and ensures clean slices later. While the layers cool, prepare your powdered sugar glaze by whisking together the 0.25 cup powdered sugar with 1-2 tablespoons milk until smooth. You want a thick but pourable consistency—like heavy cream.
Once the layers are completely cool, place one layer on a serving plate. Spread a thin layer of the glaze over the top, then add the second layer. Drizzle the remaining glaze over the top and sides for a professional finish. The walnuts will be subtly present in every bite, adding depth without overpowering the classic banana cake flavor. Serve at room temperature for the best texture—moist layers with just the right amount of crunch.
Pro Tips For Making 4 Banana Cake
- Mash Bananas Like Pudding: Don’t just chop them—squish those bananas with a fork until they’re smooth and thick, like applesauce. I used to leave them chunky, and the cake turned out dense. This step guarantees even moisture and a tender crumb.
- Cream Butter and Sugar First: Whip the butter and sugar together until light and fluffy before adding eggs. I learned this the hard way—skipping it makes the cake taste flat. A hand mixer for 2-3 minutes does the trick.
- Skip Overmixing the Batter: Once you fold in the flour, stop mixing as soon as it’s just combined. Overworking it turns the cake tough. I now use a spatula to gently fold—it’s messy but worth it.
- Test Doneness with a Toothpick: Pull the cake out when the center reads just under 190°F (88°C) and a toothpick comes out with a few moist crumbs, not wet batter. Overbaking dries out the banana flavor—trust your senses, not the timer.
Common mistakes when making this recipe
Overmixing the Batter
This is the #1 culprit for dense, tough banana cake layers. Once you’ve combined the wet ingredients, stop mixing immediately after everything is just incorporated—about 30 seconds of gentle stirring. Overmixing develops gluten in the flour, which creates a chewy texture instead of the light, fluffy crumb we want.
I’ve ruined many batches by continuing to stir “just a little more” – trust the process and resist the urge! 💫
Skipping the Toast
Those walnuts need to be toasted first—they’re the secret to that perfect crunch and flavor. Skipping this step means you’ll get bland, soft walnuts that disappear into the cake. Toast them in a dry skillet over medium heat for 5-6 minutes, stirring constantly, until fragrant.
Let them cool slightly before folding into the batter so they don’t release oils that can make the cake greasy.
Underripe Bananas
This is a dealbreaker—ripe bananas with brown spots are non-negotiable. Underripe bananas lack the natural sweetness and moisture needed for that signature tender crumb. I’ve learned this the hard way—once with firm bananas that resulted in a dry, crumbly cake.
Check your bananas: they should be soft enough to mash with minimal resistance and have those telltale brown speckles.
Incorrect Pan Size
Using the wrong pan size throws off the baking time and texture. This recipe calls for 8-inch round pans—any smaller and your cake will bake too quickly, any larger and it won’t rise properly. I’ve seen home cooks use 9-inch pans and end up with thick, dense layers.
If you don’t have 8-inch pans, use 7-inch pans but reduce the baking time by about 5 minutes. Always grease or line your pans to prevent sticking and ensure clean slices.
Opening the Oven Too Soon
The temptation to check on your cake early is real, but opening the oven before the 25-minute mark can cause the layers to sink. The cake needs that full baking time to set properly.
If you’re worried about over-browning, loosely tent with foil after 15 minutes instead. I’ve caught myself opening the oven at 20 minutes only to find the cake collapsing—patience pays off with perfect layers!
Not Cooling Properly
Rushing the cooling process leads to cracked layers and messy assembly. After baking, let the cakes cool in their pans for 10 full minutes before transferring to a wire rack. This gradual cooling prevents structural damage.
I once tried removing them too soon and ended up with a cracked top layer that ruined the presentation. The extra 10 minutes ensures clean slices and stable layers when assembling with glaze. 🍌
Nutrition facts
Frequently asked questions
Can I substitute walnuts in this recipe?
If you prefer other nuts, try pecans or almonds—they’ll add a different texture but still work beautifully. For a nut-free version, simply omit them or add 1/2 cup extra flour to maintain structure. Just remember, the walnuts provide that signature crunch and depth that makes this cake special.
How do I know when my bananas are ripe enough?
Look for bananas with soft spots and brown speckles on the peel—they’re perfect for this recipe! Press gently: if they yield slightly to pressure, they’re ready. Underripe bananas will make your cake dry and crumbly, while overripe ones (black peel) can make it too sweet. Aim for that sweet-spot ripe stage.
Can I make this cake in a bundt pan instead?
This recipe is designed for two 8-inch round layers, but you can adapt it! Reduce the batter by about 20% and bake in a 10-cup bundt pan at 325°F for 45-50 minutes. The texture will be slightly different (more dense), but still delicious. Just be patient—bundt cakes take longer to set.
Why did my cake turn out dense?
Dense cake usually means one of three things: overmixing (develops gluten), underripe bananas (not enough moisture), or incorrect baking time (too short). Check your mixing technique—stop stirring as soon as ingredients are combined. Also verify your bananas are properly ripe and you baked long enough (toothpick test!).
How can I make this vegan?
Swap the butter for 1 cup coconut oil (melted), replace eggs with 2 flax eggs (2 tbsp ground flaxseed + 6 tbsp water), and use plant-based milk. Reduce the milk by 2 tbsp since coconut oil adds moisture. The texture stays moist, and the walnuts add great nutrition!

- 3lb Prime Rib Roast Recipe: Juicy Pink Center Guaranteed in 3 Hours - October 31, 2026
- 5 Spice Cake Recipe: Warmly Spiced Layers With Crunchy Top - October 31, 2026
- 1950’s Macaroni and Cheese Recipe: Nostalgic Creamy Cheese Sauce with Buttery Noodles - October 31, 2026