
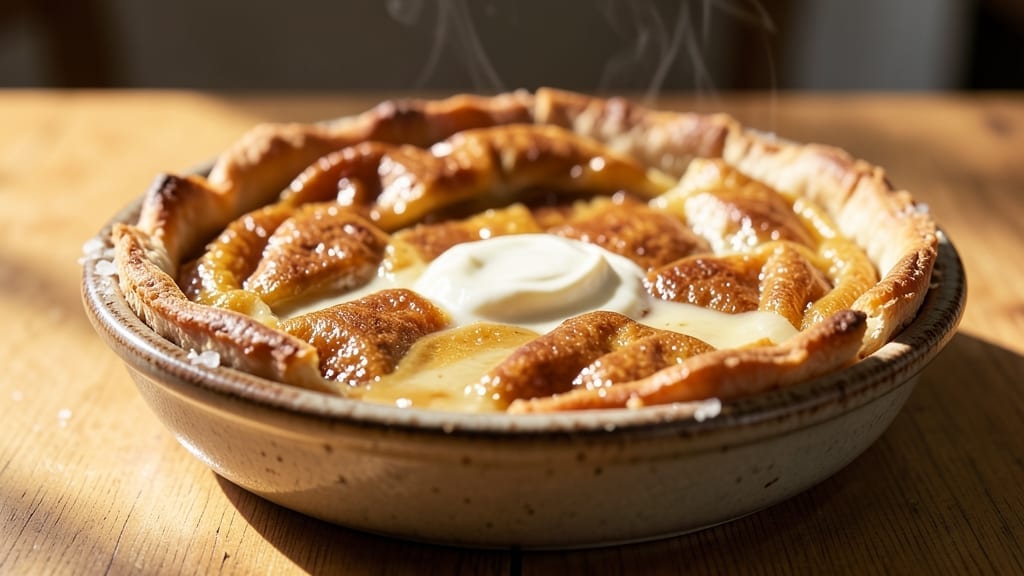
This 4-cheese quiche recipe delivers the perfect balance of flaky crust, creamy custard, and four distinct cheeses that melt into gooey perfection. 🧀 The secret lies in a well-seasoned egg mixture that transforms into a velvety filling, while the crust achieves that coveted golden-brown finish.
I’ve perfected this recipe over years of testing, ensuring every bite is rich, satisfying, and worth the effort.
The magic begins with a classic pie crust—either homemade for that extra flakiness or store-bought for convenience—filled with a mixture of sharp cheddar, creamy brie, tangy gouda, and nutty Gruyère. These cheeses melt together beautifully, creating pockets of decadence in every slice.
The egg custard, enriched with heavy cream and a touch of Dijon mustard, adds depth and a subtle tang that complements the cheeses.
What you’ll end up with is a quiche that’s golden on top, creamy in the center, and perfectly set—no rubbery edges or runny fillings here. The crust stays crisp while the filling holds its shape, making it ideal for brunch, a light lunch, or even a dinner party centerpiece.
Serve it warm with a side salad or crusty bread to soak up every last bit of that rich, cheesy goodness.
For added flavor, consider stirring in fresh spinach or herbs like thyme and chives into the filling. This quiche keeps well in the refrigerator for up to three days, making it perfect for meal prep.
Whether you’re a seasoned baker or a beginner, this recipe is designed to deliver restaurant-quality results with minimal fuss.
Ingredients for 4 cheese quiche
Six eggs, four cheeses, and one flaky crust create this restaurant-worthy quiche masterpiece.
| Ingredient | Amount | Notes |
|---|---|---|
| Pie Crust (Store-Bought or Homemade) 🥧 | 1 whole | Unbaked, 9-inch diameter |
| Large Eggs 🥚 | 6 whole | Room temperature preferred |
| Heavy Cream 🥛 | 1 cup | Full-fat for richness |
| Sharp Cheddar Cheese 🧀 | 1 cup | Shredded, aged variety |
| Brie Cheese 🧀 | 4 oz | Rind removed, cubed |
| Gouda Cheese 🧀 | 4 oz | Tangy, shredded |
| Gruyère Cheese 🧀 | 4 oz | Nutty, shredded |
| Dijon Mustard 🍯 | 1 tbsp | For subtle tang |
| Salt 🧂 | ½ tsp | Diamond Crystal preferred |
| Black Pepper 🌶️ | ¼ tsp | Freshly ground |
| Fresh Spinach 🌿 | 2 cups | Chopped, optional |
| Fresh Chives 🌱 | 2 tbsp | Chopped, for garnish |
| Unsalted Butter 🧈 | 1 tbsp | For crust brushing |
The cheeses are the stars here, so quality matters. Sharp cheddar from a block (not pre-shredded) adds that tangy bite, while Gruyère brings nutty depth. Brie and Gouda melt beautifully together—look for aged Gouda at specialty stores like Whole Foods or Trader Joe’s for that extra tang. The pie crust can be homemade for that buttery flakiness, but Pepperidge Farm or Pillsbury work perfectly for convenience. Pre-shredded cheese? Toss it—it gets gummy when melted. Grab a box grater and do it yourself.
No brie? Camembert or triple cream cheese works in a pinch, but it’ll be less creamy. Substituting Gouda for Parmesan changes the flavor profile completely—Gruyère’s nutty notes are key. The spinach is optional but adds freshness; if using frozen, thaw and squeeze out excess water. For extra flavor, add 1 tsp fresh thyme to the egg mixture. The Dijon mustard can be swapped for whole-grain mustard if you prefer a grainier texture. And if you’re feeling fancy, add a pinch of nutmeg to the egg mixture for warmth.
This quiche keeps beautifully in the fridge for up to 3 days, though it reheats best when warm. For serving, slide it onto a baking sheet and warm at 350°F for 10-15 minutes—the crust stays crisp while the filling gets creamy again. Store leftovers covered, and reheat individual slices in a skillet for that restaurant-style finish. The crust can be pre-baked for 10 minutes before adding filling if you’re worried about sogginess, but I find it’s not necessary with this recipe.
Why You’ll Love This Recipe
- No-Fuss Assembly: I swear by the store-bought crust here—it cuts my prep time in half. Just press it in, dot with cheese, pour the custard, and bake. That’s it. No rolling, no stress, just a golden crust waiting for you.
- Melty Magic Combo: Sharp cheddar brings the bite, brie adds that luxurious creaminess—every bite is a perfect balance. The heavy cream makes the filling so rich, it’s the kind of quiche you’ll finish before anyone else even gets a fork.
- Weeknight to Brunch: Make it for dinner when you’re too tired to plan, then reheat slices for brunch the next day. The custard stays creamy even cold, so it’s always ready. Honestly, I’ve served it at 7 AM and 7 PM without breaking a sweat.
- Leftovers That Don’t Suck: This quiche actually tastes better the second day—no sad, dry slices here. The cheeses hold up, the crust stays crisp, and I’ve packed it for lunches more times than I can count. Budget win, too—eggs and cheese stretch far.
Step-by-step instructions for 4 cheese quiche
Here’s how to assemble a rich, layered quiche with perfectly melted cheeses and a golden crust.
👨🍳 Step 1: Preheat and Prepare the Crust
Preheat your oven to 375°F. If using a homemade crust, prick the bottom all over with a fork to prevent bubbling. Brush the inside with the 1 tablespoon unsalted butter, melting it slightly with your finger to create a thin, even layer. This step ensures the crust stays crispy while preventing the filling from sticking.
Line the crust with a round of parchment paper cut to fit snugly. This makes removal easy later. Place the prepared crust on a baking sheet to catch any potential drips during baking. The butter layer also adds a subtle richness that complements the cheese filling beautifully.
🍳 Step 2: Build the Cheese Layers
In a medium bowl, whisk together the 6 whole large eggs, 1 cup heavy cream, 1 tablespoon Dijon mustard, ½ teaspoon salt, and ¼ teaspoon black pepper until just combined. Set aside. In a separate bowl, combine the 1 cup sharp cheddar cheese, 4 ounces brie cheese, 4 ounces gouda cheese, and 4 ounces gruyère cheese, cutting each into small, even pieces.
Spread half of the cheese mixture evenly over the crust’s bottom, creating a thin layer. Sprinkle the 2 cups fresh spinach over the cheese, distributing it evenly. This layering technique ensures each bite has that perfect blend of creamy custard and melted cheeses. The spinach adds a subtle freshness that balances the richness.
🥘 Step 3: Add Final Cheese Layer and Pour Custard
Top the spinach with the remaining cheese mixture, again creating an even layer. Pour the egg mixture evenly over the cheese, using a spatula to gently spread it to the edges. This creates a smooth, consistent texture throughout the quiche. The custard should cover all the cheese but not overflow the crust.
Real talk: Don’t worry if it looks like too much cheese—this recipe is designed for that luxurious, gooey texture. The egg mixture will bind everything together beautifully. Sprinkle the remaining 2 tablespoons fresh chives on top for a pop of color and fresh flavor that cuts through the richness.
🔥 Step 4: Bake Until Golden and Set
Bake for 40-45 minutes until the center is just set and the top is golden brown. The quiche is done when it’s firm to the touch and the edges are slightly puffed. If the crust starts to brown too quickly, loosely cover it with aluminum foil after 25 minutes to prevent over-browning while the center cooks.
Here’s the thing—you want the center to be slightly jiggly but set when you gently shake the dish. This ensures the quiche is fully cooked inside while remaining creamy. Remove from the oven and let it rest for 10 minutes before slicing. This resting period allows the custard to fully set and makes it easier to serve clean slices.
⏰ Step 5: Serve Warm with Fresh Garnish
Use the parchment paper to carefully lift the quiche from the baking sheet. Let it cool for another 5 minutes before slicing into 6 equal wedges. The warm quiche should have a beautifully golden crust, creamy custard, and melted cheeses that pull slightly in the center. Each bite should deliver a perfect balance of rich, cheesy goodness with a hint of tangy mustard and fresh spinach.
Garnish each serving with additional chopped chives for a fresh finish. Serve immediately while warm—this quiche tastes best straight from the oven when the cheeses are at their most gooey and the crust is still crisp. Pair with a simple green salad or crusty bread to complete the meal.
Pro Tips For Making 4 Cheese Quiche
- Preheat Oven to 375°F—Not a Degree Less: I learned this the hard way—skipping the preheat or guessing the temperature leads to a soggy crust or a quiche that’s underdone in the center. That sharp cheddar and brie need time to melt properly, and the crust needs to stay crisp. Set a timer and wait; your quiche will thank you with a golden, flaky bottom and perfectly set custard.
- Shred Cheese Fine—But Not Too Fine: I used to pulse the cheddar in the food processor until it was powdery, and it just disappeared into the custard. Instead, shred it by hand or use the large holes on the grater—big enough to see individual shreds but small enough to melt smoothly. The brie? Cut it into small cubes so it melts into creamy pockets rather than clumping into a single gooey lump.
- Bake on the Middle Rack—Not the Top: The top rack sounds like the logical place for even browning, but it turns your quiche into a science experiment—crust burning while the center stays wet. Middle rack ensures the custard sets evenly without scorching the cheese on top. If you’re worried about the crust browning too fast, tent it loosely with foil after 20 minutes.
- Whisk Eggs and Cream Until Smooth—No Lumps: I’ve seen quiches with visible streaks of cream or unincorporated yolks, and it’s a texture crime. Whisk the eggs and heavy cream together for at least 30 seconds until the mixture is uniformly pale and slightly thicker. This guarantees a silky, cohesive custard instead of a lumpy mess. Trust me, your fork will glide through it like butter.
Dietary considerations for these flavors
Gluten-Free Adaptation
For a gluten-free version, swap the traditional pie crust for a gluten-free crust like Pillsbury GF Pie Crust or a homemade option using almond flour and xanthan gum. I recommend King Arthur GF Flour for the crust—it creates a crispy, flaky texture that holds up beautifully.
Brush the crust with melted butter or olive oil instead of regular butter to avoid gluten cross-contamination. 🥧
Dairy-Free Options
This quiche is traditionally dairy-heavy, but you can make it dairy-free with some adjustments. Replace the heavy cream with full-fat coconut cream and use dairy-free cheese alternatives like Violife Just Like Feta or Miyoko’s Creamery shreds.
For the brie and gouda, try nutritional yeast mixed with cashew cream for a cheesy flavor. The texture will differ slightly, but it still delivers that creamy, satisfying bite.
Lower-Carb Adjustments
To reduce carbs, skip the crust entirely and use a cauliflower crust or almond flour crust instead. I love the Siete brand almond flour crust—it’s low-carb, easy to find, and holds up well.
For the filling, keep the egg and cheese mixture but omit the spinach (which adds minimal carbs) and focus on the cheeses. This version still feels indulgent but fits into a keto or low-carb diet beautifully. 🥗
Vegan Substitutions
Turning this quiche vegan requires a few swaps. Use flax eggs (3 tbsp ground flaxseed + 9 tbsp water per egg) and replace the heavy cream with unsweetened almond milk or oat cream. For cheese, Miyoko’s Mozzarella or Follow Your Heart American cheese shreds work well.
The crust can be made with vegan puff pastry or a nut-based crust using walnuts or cashews blended with oil. The result won’t be identical, but it’s a delicious plant-based twist! 🌱
Lactose-Intolerant Friendly
If you’re lactose-intolerant but can tolerate small amounts of dairy, try using lactose-free heavy cream and a blend of lactose-free cheeses like Green Valley Lactose-Free Cheddar and Lactaid Brie. The brie and gouda are higher in lactose, so use them sparingly—about 2 oz each instead of 4 oz.
The quiche will still be rich and satisfying without triggering digestive issues. Always check labels for lactose-free certifications! 💪
Nutrition facts
Frequently asked questions
Can I make this quiche ahead of time?
This quiche actually tastes even better the next day. Assemble it completely (including the egg mixture) and refrigerate uncovered for up to 24 hours before baking. The flavors meld beautifully overnight, and the crust stays crisp. For best results, bake it straight from the fridge—no need to bring to room temperature first.
Why is my quiche filling rubbery instead of creamy?
Overbaking is the most common cause. The center should be just set with a slight jiggle when done. Remove it from the oven when the edges are golden and the middle still looks slightly underdone. If it’s already rubbery, try reheating it gently in a 350°F oven for 10 minutes—this often restores the creamy texture.
What’s the best way to reheat leftover quiche?
Slice it and warm individual portions in a skillet over medium-low heat for 2-3 minutes per side until the crust is crispy again. For larger pieces, cover with foil and warm at 350°F for 10-15 minutes. The key is gentle heat—this prevents the filling from drying out while reviving the crust’s crunch.
Can I use pre-shredded cheese in this recipe?
While it’s tempting, pre-shredded cheese contains anti-caking agents that make it gummy when melted. For the best texture, grate your own cheeses using a box grater. If you must use pre-shredded, look for brands labeled “block-style” or “grated” without additives, and reduce the amount by about 10% since it’s often less dense.
How do I prevent the crust from getting soggy?
Pre-baking the crust for 10 minutes before adding filling solves 90% of soggy crust issues. For extra insurance, sprinkle a thin layer of crushed cornflakes or breadcrumbs between the crust and cheese filling. This creates a barrier that absorbs excess moisture while keeping the crust crisp.

- 3lb Prime Rib Roast Recipe: Juicy Pink Center Guaranteed in 3 Hours - October 31, 2026
- 5 Spice Cake Recipe: Warmly Spiced Layers With Crunchy Top - October 31, 2026
- 1950’s Macaroni and Cheese Recipe: Nostalgic Creamy Cheese Sauce with Buttery Noodles - October 31, 2026