
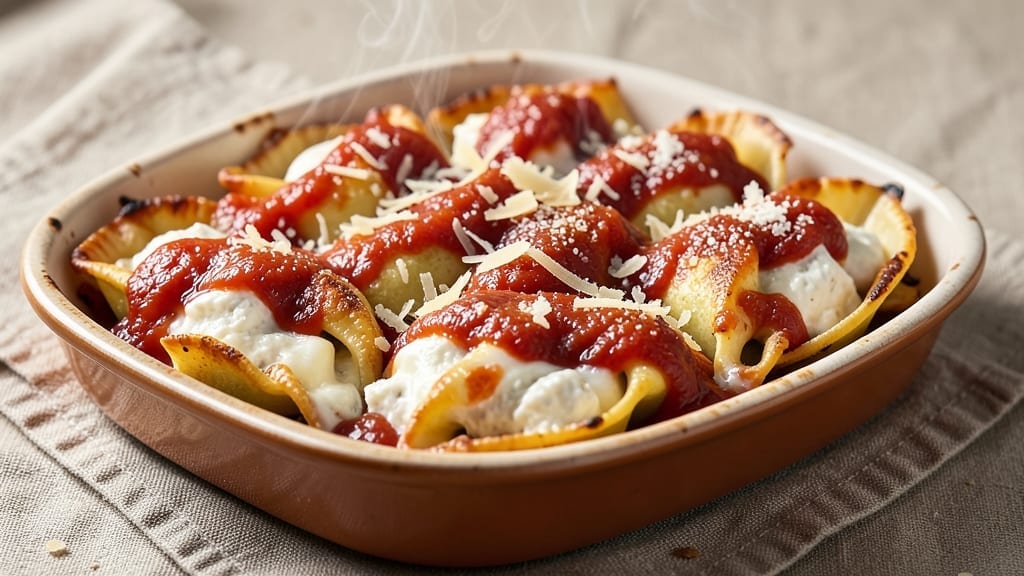
This 4 cheese stuffed shells recipe delivers the ultimate comfort food experience—rich, gooey, and perfectly baked to golden perfection. The secret lies in the perfect balance of four cheeses: creamy ricotta, melted mozzarella, sharp Romano, and nutty Parmesan, all baked until bubbly and irresistibly cheesy.
I’ve perfected this recipe over years of testing, ensuring every bite is tender, flavorful, and worth the effort.
The process is straightforward but requires attention to detail—starting with properly cooked jumbo pasta shells, then assembling them with a filling that’s neither too dry nor too wet. Baking at the right temperature ensures the shells stay tender while the cheese melts into a velvety, stretchy blanket.
This isn’t just a side dish; it’s a showstopper that turns any meal into a feast.
By the time you pull these from the oven, you’ll have a dish that’s crispy at the edges, gooey in the center, and topped with a glossy marinara or extra melted cheese.
The aroma alone will have everyone gathering around the table, and the first bite will have them asking for seconds. It’s the kind of recipe that feels like a hug in food form.
Whether you’re serving a family dinner or hosting a gathering, these stuffed shells are sure to impress. The technique is simple, but the result is restaurant-quality—just like Nonna used to make. Let’s get started on creating your cheesiest, most satisfying stuffed shells yet.
Ingredients for 4 cheese stuffed shells
Four cheeses, one perfect balance—this is the heart of your stuffed shells masterpiece.
| Ingredient | Amount | Notes |
|---|---|---|
| Jumbo Pasta Shells 🍝 | 24 pieces | Uncooked, jumbo size preferred |
| Part-Skim Ricotta Cheese 🧀 | 15 oz | Full-fat for creamier filling |
| Mozzarella Cheese 🧀 | 12 oz | Low-moisture, shredded |
| Parmesan Cheese 🧀 | 1 cup | Freshly grated, block preferred |
| Roman Cheese 🧀 | 4 oz | Shredded, sharp flavor |
| Large Eggs 🥚 | 2 whole | Room temperature, beaten |
| Garlic Cloves 🧄 | 3 cloves | Minced, for flavor base |
| Fresh Basil Leaves 🌿 | ¼ cup | Chopped, for freshness |
| Extra-Virgin Olive Oil 🫒 | 2 tbsp | For tossing shells |
| All-Purpose Flour 🌾 | ½ cup | For breading if needed |
| Marinara Sauce 🍅 | 2 ½ cups | Store-bought or homemade |
| Kosher Salt 🧂 | 1 ½ tsp | For seasoning filling |
| Ground Black Pepper 🌶️ | ½ tsp | Freshly ground preferred |
| Freshly Grated Nutmeg 🌿 | ¼ tsp | For depth of flavor |
The cheeses are non-negotiable here. Parmigiano-Reggiano from the deli counter (not pre-shredded) is worth the splurge—it melts like silk. Low-moisture mozzarella prevents soggy shells, and Roman cheese adds that sharp, salty punch. For ricotta, full-fat delivers the creamiest filling (the part-skim works, but trust me on this). If you’re shopping at Whole Foods or Trader Joe’s, grab their jumbo shells—they hold filling better than the smaller ones. Pro tip: Soak the shells in warm water for 10 minutes before stuffing to prevent cracking.
No ricotta? Cottage cheese blended smooth works in a pinch (drain excess liquid first). Short on Roman cheese? Pecorino Romano is a great swap—just use half the amount. The basil can be dried if fresh isn’t available (reduce to one-third the quantity), but fresh is ideal for that bright pop. For the marinara, Rao’s or Bertolli are solid store-bought options, but homemade with San Marzano tomatoes takes it to the next level. The nutmeg might seem optional, but it’s what elevates this from ‘good’ to ‘restaurant-quality’—don’t skip it.
Assemble the filling the night before and refrigerate for 24 hours—the flavors meld beautifully. Stuffed shells keep in the fridge for 3 days before baking, but bake within 2 hours of assembling to avoid soggy shells. For leftovers, reheat covered in the oven at 350°F until bubbly. Freeze unbaked shells (with sauce) for 3 months
Why You’ll Love This Recipe
- No Boil, No Stress: I just toast the shells in the oven first—no pre-boiling, no soggy mess. That crispy edge on the shells? It’s the secret weapon that makes this dish feel restaurant-worthy without the fuss.
- Cheese Overload (In the Best Way): Four cheeses mean four layers of flavor: creamy ricotta, gooey mozzarella, sharp parmesan, and that tangy Roman cheese—it’s like a hug for your taste buds. Honestly, the first bite makes me close my eyes.
- Lunchbox Magic: Pack these for work or school—just reheat and serve. The shells hold up perfectly, and kids (or adults) will actually eat their veggies if you sneak them into the ricotta mix. My daughter picks out the spinach, but still asks for seconds.
- Leftovers That Don’t Suck: Unlike most casseroles, these taste even better the next day. I make a double batch on Sundays, freeze half, and pull it out for lazy nights. The cheeses meld even more, and the sauce gets richer—no sad, dry leftovers here.
Step-by-step instructions for 4 cheese stuffed shells
Here’s the method for perfectly baked stuffed shells with a bubbly, golden cheese topping every time.
Cook the Jumbo Pasta Shells Al Dente
Bring a large pot of water to a rolling boil and add 24 pieces jumbo pasta shells. Cook for 1 minute less than the package instructions call for al dente—these shells will finish cooking in the oven. Stir occasionally to prevent sticking, especially since jumbo shells tend to clump together.
When the shells are 1 minute shy of al dente (they should still have a slight bite), drain them immediately and rinse under cold water for 10 seconds. This stops the cooking process and prevents them from overcooking while they sit. Spread the shells on a baking sheet to cool completely before stuffing—warm shells will make the filling too runny.
Prepare the 4-Cheese Filling
In a large bowl, combine the 15 oz part-skim ricotta cheese, 12 oz mozzarella cheese, 1 cup parmesan cheese, and 4 oz roman cheese. The ricotta provides creaminess while the other cheeses add sharpness and meltability. Mix with a fork until just combined—don’t overwork it or the filling will become dense.
Add the 2 whole large eggs, 1.5 tsp kosher salt, 0.5 tsp ground black pepper, and 0.25 tsp freshly grated nutmeg to the cheese mixture. Stir in the 3 cloves minced garlic cloves and 0.25 cup chopped fresh basil leaves. The basil adds bright freshness that cuts through the richness of the cheeses. Taste the mixture and adjust seasoning if needed—this is your flavor base.
Stuff and Assemble the Shells
Using a piping bag fitted with a large round tip (or a zip-top bag with a corner snipped off), pipe 1-2 tablespoons of cheese filling into each of the 24 jumbo pasta shells. Press the filling firmly to the bottom and sides of each shell—this ensures even distribution and prevents leaks during baking. If you don’t have a piping bag, use a spoon to carefully fill each shell.
Arrange the stuffed shells seam-side up in a single layer in a 9×13-inch baking dish. You’ll need to work in batches if your dish isn’t this size. Pour 2.5 cups marinara sauce evenly over the shells, spreading it to cover the bottom of the dish completely. The sauce will bubble up during baking, creating that signature golden crust.
Bake to Bubbly Perfection
Preheat your oven to 375°F. Lightly toss the 24 stuffed shells with 2 tbsp extra-virgin olive oil and sprinkle with 0.5 cup all-purpose flour if you want extra crispiness on top. This step creates a golden breaded crust that contrasts beautifully with the creamy filling.
Bake uncovered for 25-30 minutes until the shells are deep golden brown on top and the cheese filling is bubbling around the edges. The sauce should be hot enough to create steam, which helps melt the cheese perfectly. If the top isn’t browning enough after 25 minutes, broil for 1-2 minutes at the end, watching closely to avoid burning.
Rest and Serve
Remove the baking dish from the oven and let the stuffed shells rest for 5-10 minutes before serving. This resting period allows the cheese to set slightly and the filling to redistribute, preventing a runny mess when you cut into them. The shells should be hot and the cheese should be gooey but not liquid when cut.
Garnish with additional chopped fresh basil leaves and extra grated parmesan cheese if desired. Serve immediately with a side of garlic bread to soak up any remaining sauce. Each bite should deliver a perfect balance of creamy cheese filling, tangy marinara, and crispy shell—this is the hallmark of great stuffed shells.
Pro Tips For Making 4 Cheese Stuffed Shells
- Boil Shells Al Dente: DESCRIPTION: Jumbo shells need to be just tender—not mushy. Test one at the 8-minute mark (they finish cooking in the oven), or they’ll turn to mush when stuffed. I learned this the hard way after serving a plate of sad, limp shells that fell apart at the first bite.
- Salt the Ricotta: DESCRIPTION: Part-skim ricotta is mild—season it like you would mashed potatoes. Mix in 1 teaspoon of salt per 16 ounces (plus a pinch of black pepper) before folding in the other cheeses. Skipping this step means bland filling no matter how much Parmesan you sprinkle on top.
- Stuff Generously: DESCRIPTION: Don’t skimp on the cheese mix—aim for ¼ cup per shell. Pack it tightly so it holds shape when baking, and resist the urge to overfill (yes, even if you’re excited). Overstuffed shells leak like a sieve, and you’ll end up with a gooey mess instead of clean, cheesy bites.
- Bake Covered First: DESCRIPTION: Start the shells covered with foil for the first 20 minutes—this traps steam and melts the Roman cheese evenly. Uncover for the last 5–10 minutes to get that golden-brown crust on top. I used to rush this and always ended up with soggy shells. Trust the process.
Make-ahead tips for this 4 cheese stuffed shells
Prep Ahead Like a Pro
Assemble the cheese filling the night before and refrigerate it for 24 hours—this lets the flavors meld beautifully. The filling will be even creamier and more cohesive. I like to make mine in the morning and let it sit until dinner, which cuts down on last-minute prep.
Store it in an airtight container with plastic wrap pressed directly on the surface to prevent a skin from forming. 🧀
Shell Prep Shortcut
Cook the jumbo shells 1 day ahead and store them in the fridge submerged in cold water. This keeps them from sticking together and makes stuffing them easier later. Drain and pat them dry just before filling.
I’ve found that pre-cooked shells hold up better to the filling and bake more evenly. Keep them in a 9×13-inch baking dish with a damp towel over them to prevent drying. ⏰
Freezer-Friendly Assembly
Stuff the shells and arrange them in your baking dish, but skip the sauce. Cover tightly with plastic wrap and aluminum foil, then freeze for up to 3 months. When ready to bake, thaw overnight in the fridge.
Add the sauce and bake as directed—just add 5-10 extra minutes to the baking time since everything will be cold. This is a lifesaver for busy weeknights! ❄️
Sauce Prep Tip
Make your marinara sauce 2 days ahead and store it in the fridge. Reheat it gently on the stovetop before pouring over the stuffed shells. I like to use a slow cooker on low heat for reheating—it keeps the sauce from breaking down.
For extra richness, stir in 1 tbsp butter or 1 tbsp heavy cream before serving. 🍅
Baking Day Efficiency
Preheat your oven while the shells are baking—this ensures even cooking. Use the extra time to set the table and warm your serving dishes. I also like to preheat my baking dish in the oven for 5 minutes before adding the stuffed shells.
This helps the sauce bubble up faster and creates that signature golden crust. Trust me, it’s worth the extra minute! 🔥
Leftovers Hack
Reheat leftovers in the oven at 350°F for 15-20 minutes, covered with foil, until bubbly. Add 2 tbsp water or milk to the baking dish to restore moisture.
For a quick fix, microwave individual portions for 1-2 minutes on 50% power, then cover with a damp paper towel to keep them gooey. 💡
Nutrition facts
Frequently asked questions
Can I use regular shells instead of jumbo?
Jumbo shells are ideal because they hold more filling and create a better presentation, but you can use regular shells if that’s all you have. Just reduce the filling to 1 tablespoon per shell and expect slightly smaller portions. The baking time remains the same—just watch for even browning since smaller shells may cook faster.
Why is my cheese filling too runny?
This usually happens if the shells aren’t fully cooled before stuffing or if you overmixed the filling. Let shells cool completely and mix the cheese filling just until combined—overworking makes it dense and watery. For extra insurance, chill the filling for 30 minutes before stuffing. Also, use low-moisture mozzarella to avoid excess liquid.
Can I make this recipe vegetarian?
Replace the ricotta with vegan ricotta (like Miyoko’s) and use plant-based Parmesan and Romano substitutes. For the eggs, add 1 flax egg (1 tbsp ground flaxseed + 3 tbsp water) to bind the filling. The texture will be slightly different but still delicious. Just check your cheeses are 100% plant-based.
How do I prevent the shells from cracking when baking?
Cracking happens when shells aren’t properly cooled before stuffing or if the filling is too wet. Always cool shells completely, press filling firmly to the bottom, and use a 9×13-inch baking dish (not too wide). Bake at 375°F—higher temps can cause cracking. If you notice cracks forming, tent with foil for the last 10 minutes of baking.
What’s the best way to add extra protein?
For meat lovers, fold in 1/2 cup cooked ground beef or 1/2 cup crumbled sausage into the cheese filling. For a vegetarian option, add 1/2 cup chopped mushrooms or 1/2 cup cooked lentils (drained well). Just reduce the ricotta by 2 oz to maintain the right texture. The protein will absorb some moisture, keeping the filling stable.

- 3lb Prime Rib Roast Recipe: Juicy Pink Center Guaranteed in 3 Hours - October 31, 2026
- 5 Spice Cake Recipe: Warmly Spiced Layers With Crunchy Top - October 31, 2026
- 1950’s Macaroni and Cheese Recipe: Nostalgic Creamy Cheese Sauce with Buttery Noodles - October 31, 2026