
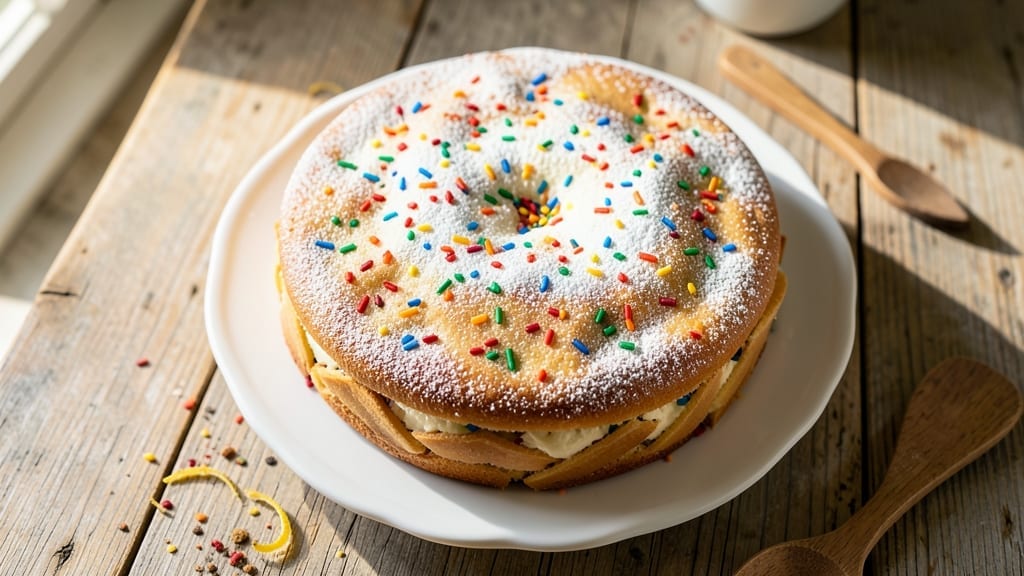
This 4-inch funfetti cake recipe delivers all the magic of rainbow sprinkles in a single, perfectly portioned pan—ideal for parties, gifts, or satisfying a single craving. The secret lies in layering vibrant colors within the batter itself, creating hidden surprises at every slice without the fuss of assembling multiple layers.
I developed this technique after years of baking funfetti cakes that either lost their color or required complicated assembly, and this version solves both problems with a foolproof method.
The recipe uses a simple vanilla cake base infused with rainbow sprinkles throughout, ensuring each bite delivers that classic funfetti experience. What makes this version special is the one-pan approach—no layering required, just mix, bake, and slice.
The cake emerges with a tender crumb and just the right amount of moisture, while the sprinkles maintain their color and crunch, even after baking. This method also works beautifully for dietary adaptations, like using gluten-free flour or vegan butter if needed.
By the time you pull this cake from the oven, you’ll have a golden, perfectly domed treat with vibrant rainbow swirls hidden within—no assembly needed. The aroma of vanilla and sprinkles will fill your kitchen, and the texture will be light yet sturdy enough to slice cleanly.
Whether you’re celebrating a birthday, surprising a friend, or simply treating yourself, this cake delivers restaurant-quality funfetti in a fraction of the time and effort.
For an extra touch, dust the top with powdered sugar or add a simple buttercream swirl before serving. This recipe scales perfectly for larger cakes too—just adjust the pan size and baking time. Let’s get baking!
Ingredients for 4 inch funfetti cake
Simple ingredients transform into a vibrant, foolproof funfetti cake with hidden rainbow magic.
| Ingredient | Amount | Notes |
|---|---|---|
| All-Purpose Flour 🌾 | 1 ½ cups | Sifted for light texture |
| Granulated Sugar 🍚 | 1 cup | White or light brown |
| Rainbow Sprinkles 🌈 | 1 ½ cups | Jelly or nonpareil type |
| Unsalted Butter 🧈 | ¾ cup | Room temperature, European preferred |
| Large Eggs 🥚 | 2 whole | Room temperature for even mixing |
| Pure Vanilla Extract 🌿 | 1 tbsp | High-quality, pure vanilla |
| Baking Powder 🧂 | 2 tsp | Aluminum-free preferred |
| Salt 🧂 | ½ tsp | Fine sea salt |
| Whole Milk 🥛 | ¾ cup | Room temperature |
| Powdered Sugar 🍚 | ½ cup | For dusting, plus extra |
| Vanilla Buttercream Frosting 🧈 | 1 cup | Store-bought or homemade |
| Vegetable Oil 🫒 | ¼ cup | Light, neutral flavor |
The sprinkles make or break this cake—jelly or nonpareil types hold their color best during baking. Trader Joe’s and Walmart carry excellent options in bulk, and I always buy extra for decorating. For the butter, European-style brands like Plugrá or President create a lighter texture, but any unsalted butter works. Sift the flour and baking powder together to prevent lumps, which keeps the cake tender. The vanilla extract should be pure, not imitation—McCormick or Nielsen-Massey are reliable brands.
No rainbow sprinkles? Use colored sugar crystals for a subtler effect, though the crunch will differ. Short on butter? Vegetable oil or coconut oil works in a pinch, but the texture may be slightly denser. The milk can be swapped for any dairy or plant-based milk, though whole milk ensures the best moisture. For a vegan adaptation, use vegan butter and flax eggs—just replace each egg with 1 tbsp ground flaxseed plus 3 tbsp water. The powdered sugar for dusting can be omitted if you prefer a cleaner finish, but it adds a lovely touch.
Store the cake in an airtight container at room temperature for up to 3 days, or refrigerate for 1 week if using buttercream. The sprinkles lose their crunch over time, so enjoy within 2 days for the best texture. For longer storage, freeze the cake (unfrosted) for up to 3 months. Thaw at room temperature before frosting. The batter can be prepped ahead and refrigerated for 24 hours, just let it sit at room temperature before baking.
Why You’ll Love This Recipe
- No Mixer Needed: I swear by this recipe when I’m in a rush—just creaming butter and sugar by hand (or with a fork in a pinch) until light. The eggs and flour come together like butter, and honestly? That’s all you need for a cake that looks like it took hours.
- Butter-Sugar Magic: That creamed butter and sugar combo? It’s the secret weapon here. The cake stays tender but sturdy, and the sprinkles—oh, the sprinkles—don’t just sit on top. They melt into the batter just enough to make every bite taste like a little celebration.
- Party in a Pan: Between us, this is my go-to for birthdays, showers, or just because. The 4-inch size means you can make four at once (or freeze extras), and the sprinkles make it feel special without the fuss. My kids think it’s “fancy,” but it’s really just flour, sugar, and joy.
- Budget-Friendly Joy: All the ingredients are pantry staples—no weird substitutes, no last-minute grocery runs. A stick of butter, a handful of sprinkles, and a few eggs stretch to feed a crowd or save for later. (Yes, even on a Tuesday night.)
Step-by-step instructions for creating a 4-Inch funfetti cake
Master the technique for a perfectly proportioned, vibrant funfetti cake in a single pan.
Prepare the Cake Batter with Precision
Preheat your oven to 350°F and grease a 4-inch round cake pan thoroughly with vegetable oil, then dust with 1 tablespoon of all-purpose flour. Tap out any excess to ensure a clean release later. In a medium bowl, whisk together the 1.5 cups all-purpose flour, 2 teaspoons baking powder, and 0.5 teaspoon salt until fully combined. This dry mixture forms the structural foundation of your cake.
In a separate large bowl, cream the 0.75 cup unsalted butter and 1 cup granulated sugar together using an electric mixer on medium speed for 3-4 minutes until light and fluffy. This step incorporates air, which creates the cake’s signature tenderness. Add the 2 whole large eggs, one at a time, mixing well after each addition. Incorporate the 1 tablespoon pure vanilla extract and 0.75 cup whole milk, mixing just until combined.
Fold in Sprinkles for Even Distribution
Gradually add the dry ingredients to the wet mixture in 3 additions, mixing on low speed just until incorporated after each addition. This gentle folding prevents overmixing, which can lead to a dense cake. Remove the bowl from the mixer and fold in 1 cup of the rainbow sprinkles using a spatula, ensuring even distribution throughout the batter. The remaining 0.5 cup sprinkles will be used for garnish later.
Pour the batter into the prepared cake pan and smooth the top with a spatula. The batter should fill the pan to about ¾ full. Sprinkle the remaining 0.5 cup rainbow sprinkles evenly over the batter, pressing down gently to ensure they adhere to the surface. This creates the signature funfetti effect while also adding a decorative top layer.
Bake to Golden Perfection
Place the cake pan in the preheated oven and bake for 25-30 minutes, or until a toothpick inserted into the center comes out clean. The cake is done when the edges pull away slightly from the pan and the top springs back when gently pressed. Rotate the pan halfway through baking for even heat distribution, which is crucial for a uniformly baked cake.
During the last 5 minutes of baking, the top should develop a golden hue. If the sprinkles on top begin to burn before the cake is fully baked, loosely tent the pan with aluminum foil to protect them while allowing the cake to finish cooking. Once baked, remove the cake from the oven and let it cool in the pan for 10 minutes before transferring to a wire rack to cool completely.
Frost and Finish the Cake
Once the cake has cooled completely, use a serrated knife to level the top if necessary. Apply a thin layer of vanilla buttercream frosting to the sides of the cake to create a smooth base for the final decoration. Spread the remaining 1 cup vanilla buttercream frosting evenly over the top and sides of the cake, creating a clean, professional finish.
Dust the top and sides of the cake with the 0.5 cup powdered sugar using a fine-mesh sieve for a snowy, elegant effect. This step not only enhances the visual appeal but also adds a subtle sweetness that complements the rich cake. Slice into 4 equal wedges and serve immediately for the best texture and flavor experience.
Pro Tips For Making 4 Inch Funfetti Cake
- Weigh Your Butter: That ½ cup of butter you’re scooping from the fridge? Not gonna cut it. Use a kitchen scale for 113 grams—packed, not fluffy—and let it sit at room temp for exactly 30 minutes. I learned this the hard way when my first batch turned out greasy and dense because cold butter didn’t emulsify properly.
- Fold Sprinkles Gently: Dump those rainbow sprinkles in all at once, and you’ll end up with clumps at the bottom. Instead, divide them into thirds and fold each batch in with a spatula—just until mixed. Overmixing = tough cake. (Yes, even if you’re impatient like me.)
- Check Oven Temp Early: Preheat your oven to 350°F, but don’t trust the dial. Stick an oven thermometer in there for 20 minutes—mine always runs 25°F hotter. A 4-inch cake bakes fast; if it’s too hot, you’ll get a burnt top before the center sets.
- Skip the Extra Egg Wash: You’re making a funfetti cake, not a showpiece. Brush the top with just a little melted butter (1 tsp) after baking instead of egg wash—it’ll still look golden and crisp without the risk of a soggy crumb. (Your future self will thank you.)
Storing and reheating your leftovers
Room Temperature Storage
Store your funfetti cake in an airtight container at room temperature for up to 3 days to preserve its moist texture and vibrant sprinkle colors.
I recommend using a clear plastic container with a tight-sealing lid—like the Rubbermaid Brilliance line—to keep the cake fresh while still letting you admire those rainbow layers. Place it on a wire rack inside the container to prevent sogginess from condensation. 💫
Refrigerator Refresh
For longer storage, refrigerate the cake for up to 1 week, but plan to serve it within 3-4 days for the best texture. The cold air helps maintain moisture, but the sprinkles may lose some of their crunch.
To revive the cake, let it sit at room temperature for 30-60 minutes before serving. I often use this method when prepping for parties—it’s perfect for keeping a cake fresh overnight.
Freezer-Friendly Method
Freeze unfrosted funfetti cake layers (without buttercream) for up to 3 months in plastic wrap followed by aluminum foil for maximum protection. When ready to serve, thaw overnight in the refrigerator, then frost and dust with powdered sugar.
The texture will be slightly denser after freezing, but the flavor remains rich. For a quick fix, microwave thawed slices for 10-15 seconds to restore softness. ❄️
Reheating Tips
If your cake has lost its freshness, reheat slices in a 350°F oven for 5-7 minutes to restore moisture and warmth. For a microwave option, heat individual slices on medium power (50%) for 10-15 seconds, then cover with a damp paper towel to prevent drying.
Avoid reheating frosted cakes—the buttercream can melt unevenly. Always let the cake cool completely before storing to prevent condensation buildup.
Sprinkle Preservation
The crunch of rainbow sprinkles fades after 2 days at room temperature, so enjoy your cake within that window for the best texture. If storing longer, keep the cake refrigerated and add fresh sprinkles on top just before serving.
For extra sparkle, toss a handful of edible glitter (like Lily’s Sugar Glass) over the frosting—they’ll add a magical shimmer without losing their texture. 🌈
Nutrition facts
Frequently asked questions
Can I use this recipe for a different-sized cake pan?
Yes, but adjust the baking time and ingredients accordingly. For a 6-inch pan, increase batter by 50% and bake for 35-40 minutes. For a 3-inch pan, use 75% of the batter and bake for 20-25 minutes. Always check doneness with a toothpick—it should come out clean. The key is maintaining the same batter-to-pan ratio for even baking.
Why did my sprinkles lose their color after baking?
This happens when sprinkles are exposed to high heat for too long. Use jelly or nonpareil sprinkles (they hold color best) and bake at 350°F for no more than 30 minutes. If the top starts browning too fast, tent loosely with foil during the last 5 minutes of baking. Also, avoid preheating the oven with sprinkles already in the batter.
How do I make this cake gluten-free or vegan?
For gluten-free, replace the 1.5 cups all-purpose flour with 1.25 cups gluten-free 1:1 baking flour (like Bob’s Red Mill) plus 0.25 cup cornstarch. For vegan, use vegan butter and flax eggs (replace each egg with 1 tbsp ground flaxseed + 3 tbsp water). Swap milk for almond or oat milk and ensure your vanilla extract is vegan-certified. The texture will be slightly denser but still delicious!
Can I add other flavors to this funfetti cake?
Swap vanilla extract for almond, lemon, or coconut extract for different flavors. Add 1 teaspoon cinnamon or ½ teaspoon orange zest to the batter for warmth. For chocolate funfetti, replace ½ cup flour with ½ cup cocoa powder and add ½ cup chocolate chips to the batter. Just remember to adjust other flavors accordingly to maintain balance.
How do I prevent my cake from cracking?
Cracking usually happens from overmixing or sudden temperature changes. Mix the batter just until combined (no streaks of flour), and avoid opening the oven door during baking. Let the cake cool in the pan for 10 minutes before removing. If cracks appear, simply frost over them—they won’t affect the taste! For extra insurance, bake at 325°F instead of 350°F if your kitchen runs hot.

- 3lb Prime Rib Roast Recipe: Juicy Pink Center Guaranteed in 3 Hours - October 31, 2026
- 5 Spice Cake Recipe: Warmly Spiced Layers With Crunchy Top - October 31, 2026
- 1950’s Macaroni and Cheese Recipe: Nostalgic Creamy Cheese Sauce with Buttery Noodles - October 31, 2026