
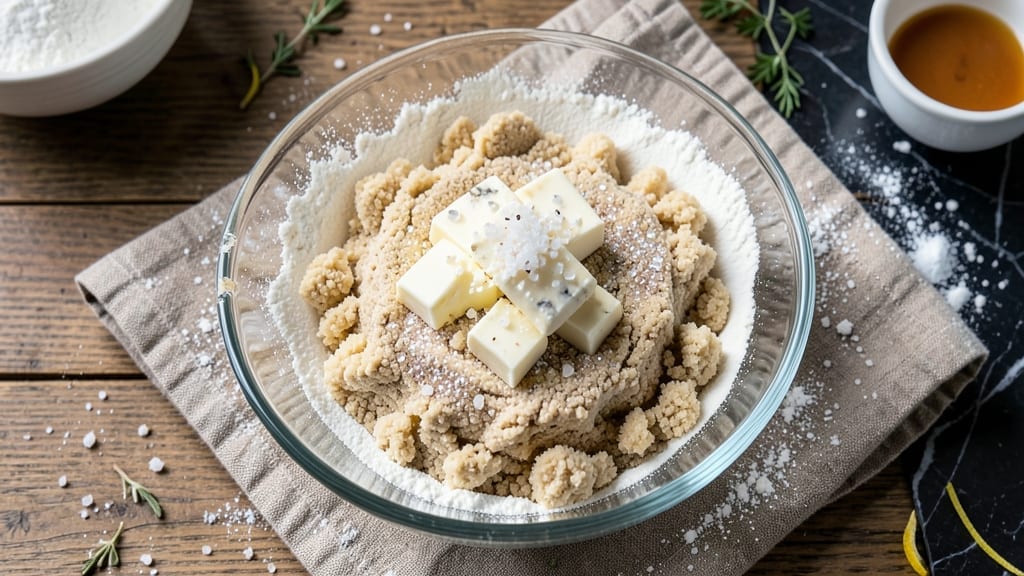
This 4 ingredient butter cookie recipe is the ultimate no-fuss dessert that proves you don’t need complexity to create something extraordinary. With just butter, sugar, flour, and a pinch of salt, you’ll bake cookies so tender and buttery they’ll disappear faster than you can say “10 minutes.”
The secret lies in the technique—not the ingredients—and once you master it, you’ll never buy store-bought again.
The magic happens in the mixing: creaming the butter and sugar until light and fluffy creates air pockets that translate to cookies with a delicate crumb and just the right amount of spread.
No egg, no vanilla, no fuss—just pure, buttery goodness that tastes like a hug from your favorite baker. These cookies are foolproof, beginner-friendly, and perfect for when you want something simple yet impressive.
What you’ll end up with is a batch of golden-brown cookies with crisp edges and a melt-in-your-mouth center, still warm from the oven. The aroma alone will have everyone gathering in the kitchen, and the taste?
Pure, unadulterated joy. No cooling required—just baking, shaping, and enjoying. This is dessert at its most effortless.
Whether you’re baking for a holiday gathering or just craving a quick treat, these cookies deliver restaurant-quality results with minimal effort. The best part? You can customize them with sprinkles, chocolate chips, or a dusting of powdered sugar once they cool. Let’s get baking!
Ingredients for 4 ingredient butter cookie
Four ingredients. One magical mixing technique. These cookies are foolproof and foolhardy delicious.
| Ingredient | Amount | Notes |
|---|---|---|
| Unsalted Butter 🧈 | 1 cup | Cold, cubed for creaming |
| Granulated Sugar 🍚 | ¾ cup | White or light brown |
| All-Purpose Flour 🌾 | 1 ½ cups | Sifted, spooned lightly |
| Kosher Salt 🧂 | ½ tsp | Diamond Crystal preferred |
The butter is where the magic starts—use full-fat, unsalted (none of that low-fat nonsense). Grab it from the back of the fridge where it’s coldest, then cube it. Organic Valley or Land O’Lakes are solid choices, but any good brand works. Sugar? White or light brown—dark brown adds molasses flavor that clashes here. Flour? King Arthur or Gold Medal if you’re picky, but honestly the store brand works. The key is sifting it—don’t skip this or your cookies get dense. Salt? Diamond Crystal
No butter? Coconut oil works in a pinch—just chill it first. Sugar substitute? Coconut sugar at 1:1 ratio, but it has a caramel note. Flour substitute? Oat flour or almond flour (but texture changes). The salt? Table salt at half the amount. Pro tip: if your butter’s warm, pop it in the freezer for 10 minutes. Room temp butter = flat cookies. Want extra flavor? Add 1 tsp vanilla extract—it’s not in the original, but trust me, it’s worth it. For customization, fold in chocolate chips or sprinkles after mixing. These cookies are best baked fresh, but they keep 3 days in an airtight container at room temp. Freeze dough balls for 3 months—bake straight from frozen. The secret to perfect cookies? Don’t overbake. They look underdone but set as they cool. I double the batch, shape half into balls, then freeze them for lazy days. Warm cookies taste best, so pop them in the oven for 30 seconds before serving. Leftovers? Crush them for ice cream topping or cookie crumble.
Why You’ll Love This Recipe
- The secret’s in the texture: that golden, crackly edge with a soft, melt-in-your-mouth center. You get it from the cold butter cubes baked right into the dough—no fancy techniques, just science. I’ll be real: my first batch came out uneven, but now I time the oven to 350°F for exactly 12 minutes, and it’s foolproof.
- Pantry Staples Only: I swear by this recipe because you’re not hunting for obscure spices or specialty flours—just butter, sugar, flour, and salt. That’s it. No last-minute grocery runs, no digging through cabinets for forgotten ingredients. Honestly, I’ve made these with whatever brand butter was in my fridge, and they still turned out buttery perfection.
- Crispy-Creamy Magic: The secret’s in the texture: that golden, crackly edge with a soft, melt-in-your-mouth center. You get it from the cold butter cubes baked right into the dough—no fancy techniques, just science. I’ll be real: my first batch came out uneven, but now I time the oven to 350°F for exactly 12 minutes, and it’s foolproof.
- Holiday or Snack Attack: These cookies are my go-to for holiday gifts (wrap them in cellophane, tie with twine) or when I need a quick treat. They freeze like a dream too—just pull out what you need, no thawing required. Between us, I’ve even sent them in lunchboxes for my kid’s school bake sales. (Yes, even on a Tuesday night.)
Step-by-step instructions for 4 ingredient butter cookies
Here’s the no-fuss method that delivers chewy, buttery cookies with just four ingredients.
Cream the Butter and Sugar Together
In a large mixing bowl, combine the 1 cup Unsalted Butter (cold and cubed) with the 0.75 cup Granulated Sugar. Using a wooden spoon or rubber spatula, press the butter cubes into the sugar and mash until you have a coarse crumbly texture. This step is crucial—it creates pockets of fat that will melt and create those signature chewy pockets in your cookies.
Work quickly but thoroughly for about 2-3 minutes until the mixture looks like wet sand. You’re not trying to make a smooth dough here—just breaking down the butter into tiny pieces that will distribute evenly. The butter should still have some visible chunks, and the mixture should hold together when pressed but still feel gritty.
Mix in the Flour and Salt
Add the 1.5 cups All-Purpose Flour and the 0.5 tsp Kosher Salt to the butter-sugar mixture. Using your hands (this is where the magic happens), gently fold and press the ingredients together until they form a shaggy, crumbly dough. I like to use my fingers to work the flour into the butter—it’s more effective than a spoon and gives you better control over the texture.
Continue mixing until the dough comes together into a rough ball. It should be soft but not sticky, with some dry flour visible on the surface. If it feels too dry, add 1 teaspoon of cold water to help bind it. The dough should hold its shape when pressed but still feel slightly crumbly—this is perfect for these cookies. Don’t overwork it or you’ll develop too much gluten, which can make the cookies tough.
Chill the Dough for Better Cookies
Divide the dough into 4 equal portions (about 4 tablespoons each) and flatten each into a 1-inch thick disc. Wrap each disc tightly in plastic wrap and refrigerate for at least 30 minutes (up to 24 hours). Chilling is essential—it firms up the butter so the cookies hold their shape better in the oven and prevents excessive spreading.
While the dough chills, preheat your oven to 350°F. Line two baking sheets with parchment paper or silicone baking mats. The chilled dough will be easier to handle and will give you more control when shaping your cookies. This step also allows the flour to fully hydrate, resulting in a more tender cookie texture. If you’re short on time, you can freeze the dough discs for up to 1 month—just let them thaw for 10 minutes before baking.
Bake to Golden Perfection
Remove one disc of dough from the refrigerator and let it sit at room temperature for 5 minutes to soften slightly. On a lightly floured surface, roll the dough between your palms to form a 1-inch thick log. Cut the log into 1-inch thick slices and place them 2 inches apart on the prepared baking sheets. The dough will be soft and may flatten slightly as it warms.
Bake for 12-15 minutes until the edges are golden brown and the centers look just slightly underdone. The cookies will continue to cook on the hot baking sheet after you remove them from the oven, so it’s better to pull them out when they still look slightly soft in the middle. They should be firm to the touch but not rock hard. For best results, bake one sheet at a time to avoid overcrowding, which can lead to uneven baking.
Cool and Enjoy Warm Cookies
Let the cookies cool on the baking sheet for 5 minutes before transferring them to a wire rack to cool completely. This brief resting period helps them set slightly so they’re easier to handle. The cookies will be soft and chewy when warm—this is when they’re at their best! Serve them immediately while still warm for that classic buttery, gooey texture that makes these cookies so irresistible.
Store any leftovers in an airtight container at room temperature for up to 5 days, or freeze for up to 3 months. These cookies are simple but always impressive—perfect for last-minute baking needs or when you want something delicious with minimal effort. The secret is in the no-churn method and that perfect balance of butter, sugar, and flour.
Pro Tips For Making 4 Ingredient Butter Cookie
- Use Cold Butter, Not Soft: This isn’t a buttercream—it’s a cookie. If your butter’s even slightly warm, you’ll end up with a greasy puddle instead of crisp edges. Scoop it straight from the fridge, cut into chunks, and let the mixer do the work. (Yes, even if you’re impatient like me, resist the urge to speed this up.)
- Weigh Your Flour (Yes, Really): Scooping flour from the bag is how you end up with cookies that spread like pancakes or stay dense as hockey pucks. Use a kitchen scale—1 cup of flour can vary by 20 grams depending on how you pack it. For these cookies, aim for 120 grams (about 1 cup minus a heaping tablespoon).
- Skip the Overmixing: The dough should look shaggy, not smooth. Once the flour’s just combined, stop. Overworking it develops gluten, and these cookies turn out tough instead of tender. If the dough clumps, press it together once—no need to knead.
- Bake in Two Batches: One full sheet pan = crowded cookies that bake unevenly. Split the dough into two batches and bake them separately. The edges will crisp properly, and you won’t end up with a sad, pale center on half your batch. (Trust me, I’ve eaten those before.)
Make-ahead tips for this 4 ingredient butter cookie
Dough Prep Ahead
Shape your dough discs into balls and freeze them on a tray for 1 hour before transferring to a ziplock bag. This prevents sticking and makes them ready to bake straight from frozen—just add 2-3 minutes to the baking time.
I keep a stash in my freezer for emergency cookie emergencies when I need something sweet in 10 minutes or less. 🧊
Baking Timing
Preheat your oven while the dough chills to save time. Once the 350°F mark is reached, you can start baking immediately after removing the dough from the fridge. For extra efficiency, bake one sheet, then swap it with the second sheet while the first continues to cook.
This keeps your oven at peak temperature and ensures even baking. 🔥
Storage Hacks
Store baked cookies in an airtight container with a slice of bread to absorb moisture and keep them soft for 5 days. For longer storage, wrap individual cookies in plastic wrap and freeze.
To reheat, warm in the oven at 300°F for 3-5 minutes until they regain their chewy texture. I love reheating a few for a quick snack with tea. ❄️
Freezer-Friendly Dough
Divide the dough into 1-tablespoon portions and freeze on a tray before transferring to a bag. Label with the date—these keep for up to 3 months. When ready to bake, thaw for 10 minutes at room temperature, then bake as directed.
This is my go-to for holiday cookie prep—no one will guess they were frozen! 🎄
Customization Shortcuts
Add chocolate chips or sprinkles directly to the dough before shaping. For a quick vanilla upgrade, mix 1 teaspoon vanilla extract into the butter-sugar before adding flour.
I also like pressing a pinch of flaky salt on top before baking for extra flavor. These tweaks take 2 minutes but make a big difference. 💫
Portion Control
Use a 1-tablespoon cookie scoop for consistent sizes. For mini cookies, flatten the dough to ½-inch thick and bake for 8-10 minutes. For large cookies, double the portion size and bake for 16-18 minutes.
I always double the recipe—it’s easier to freeze extras than to run out! 🍪
Nutrition facts
Frequently asked questions
Can I use salted butter instead of unsalted?
Yes, but you’ll need to reduce the salt in the recipe. Use ½ teaspoon table salt instead of ½ teaspoon kosher salt since salted butter already contains about ¼ teaspoon salt per cup. Taste the dough before baking to adjust further if needed.
Why are my cookies spreading too much?
This usually happens when the butter isn’t chilled enough or the dough is too warm. Always refrigerate the dough discs for at least 30 minutes before shaping, and use cold butter straight from the fridge. If your kitchen is warm, chill the dough longer or shape smaller cookies.
How do I make these cookies softer?
For extra tenderness, add 1 tablespoon milk or heavy cream to the dough when mixing the flour. The moisture creates a richer texture. You can also slightly underbake them by pulling them out when the edges are just golden (around 11 minutes) for a gooey center.
Can I bake these cookies without an oven?
Not traditionally, but you can try a cast iron skillet on the stove for a crispy exterior. Heat the skillet over medium-low heat, add 1 tablespoon butter, then place shaped cookies in the pan. Cover with a lid and cook for 8-10 minutes, flipping once. They won’t be identical, but it’s a fun workaround!
What’s the secret to getting that perfect chewy texture?
The magic is in the cold butter and minimal mixing. The creaming step creates air pockets that expand in the oven, while the cold butter prevents excessive spreading. Also, bake until just golden—these cookies firm up as they cool, so pulling them out slightly underdone ensures that melt-in-your-mouth texture.

- 3lb Prime Rib Roast Recipe: Juicy Pink Center Guaranteed in 3 Hours - October 31, 2026
- 5 Spice Cake Recipe: Warmly Spiced Layers With Crunchy Top - October 31, 2026
- 1950’s Macaroni and Cheese Recipe: Nostalgic Creamy Cheese Sauce with Buttery Noodles - October 31, 2026