
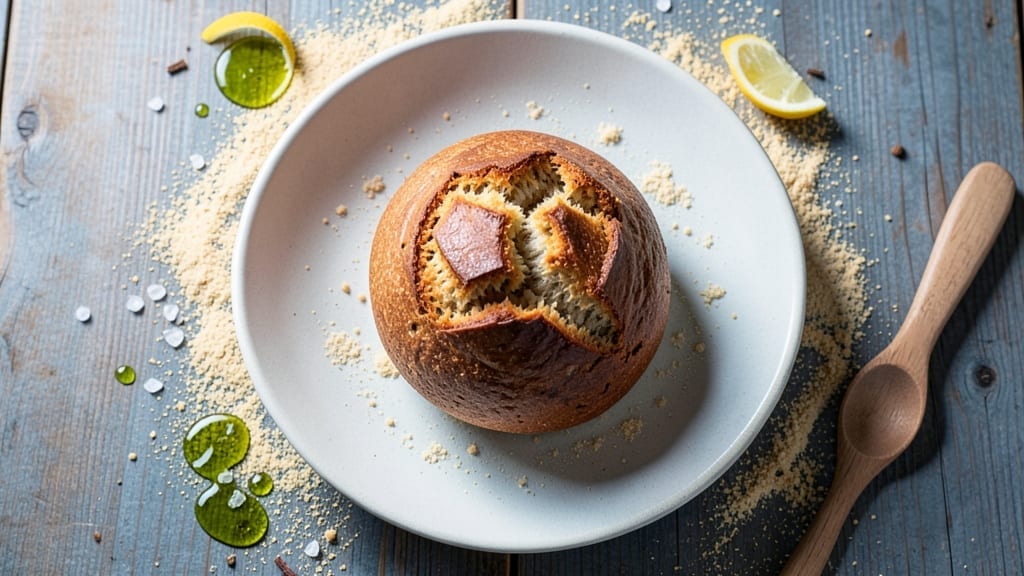
This 4-ingredient sourdough discard bread recipe transforms your leftover starter into a no-knead loaf with a crispy crust and tangy depth—no waste, no fuss. The secret lies in a simple mix of flour, water, salt, and your discard, which develops flavor as it ferments overnight.
I’ve perfected this method to avoid dense, gummy results while keeping the texture light and airy, just like artisanal bread should be.
The beauty of this recipe is its sustainability and simplicity—no yeast, no complicated techniques, just a few ingredients and time. The discard provides natural leavening, while the overnight cold proof creates that perfect open crumb structure.
Even beginners can achieve a golden, crusty loaf with minimal effort, and the tangy flavor from the discard makes every bite taste like a bakery secret.
By the time it emerges from the oven, you’ll have a crispy-edged, tender-crisp interior loaf that’s ideal for sandwiches, toast, or serving warm with butter. The recipe also allows for optional add-ins like seeds or herbs, so you can customize it to your taste.
No more tossing out discard—just turn it into something delicious.
This method is foolproof for those short on time or experience, yet delivers restaurant-quality results. Let’s get started on baking bread that’s as good for the planet as it is for your taste buds.
Ingredients for 4-ingredient sourdough discard bread
Four simple ingredients transform discard into artisanal crust—no yeast, no fuss, just flavor.
| Ingredient | Amount | Notes |
|---|---|---|
| Unbleached All-Purpose Flour 🌾 | 3 ½ cups | White or whole wheat blend preferred |
| Active Sourdough Starter Discard 🍞 | 1 cup | Unfed discard, 100% hydration |
| Warm Water 💧 | 1 ½ cups | 90-95°F for optimal hydration |
| Kosher Salt 🧂 | 1 ½ tsp | Diamond Crystal preferred |
| Extra-Virgin Olive Oil 🫒 | 1 tbsp | For bowl coating and crust |
| Cornmeal or Semolina 🌽 | 2 tbsp | For dusting baking surface |
| Optional Seeds or Herbs 🌿 | ¼ cup | Sunflower/pumpkin seeds or dried herbs |
The flour is your canvas—King Arthur or Caputo Tipo 00 create that perfect open crumb, but King Arthur all-purpose works beautifully too. Sourdough discard must be active (bubbly) and unfed—save your strongest starter for this. Water temperature matters: 90-95°F ensures proper hydration without killing the starter. For salt, Diamond Crystal dissolves more easily than table salt, giving you better control. I always grab a small bag of cornmeal at Trader Joe’s—it’s perfect for dusting and adds that subtle crunch to the crust.
No active discard? Feed your starter overnight with equal parts flour and water to revive it. Short on flour? Whole wheat or rye at 10-20% replacement adds depth. The olive oil can be swapped for melted coconut oil if you’re avoiding dairy, though it won’t crisp as beautifully. For seeds, toasted sunflower seeds are my go-to—they add crunch and nutrition. Fresh herbs? Dried work at half the amount, but toast them first for extra flavor. The recipe calls for minimal ingredients, but don’t be afraid to experiment—a pinch of sugar or honey can help if your starter is particularly tangy.
This dough needs 12-16 hours of cold proofing—set it in the fridge overnight for best results. The longer it ferments, the more complex the flavor. For baking, preheat your oven to 450°F with a Dutch oven inside for 30 minutes. That steam creates that restaurant-quality crust. Once baked, let it cool at least 1 hour before slicing—patience prevents a gummy interior. Store wrapped at room temperature for 3 days or freeze slices for up to 3 months. The crust stays crispy for days if you wrap it in parchment.
Why You’ll Love This Recipe
- No-Fuss Mixing: I swear, you can’t mess this up—just dump the flour, stir in the discard, add warm water, and a pinch of salt. The olive oil ties it all together without extra fuss, and honestly? No kneading, no waiting, just hands-off rising.
- Tangy Crust Magic: That sourdough discard brings a bright, slightly sour depth you won’t find in store-bought loaves. The crust gets a golden crunch from the olive oil, while the inside stays soft—like a hug from your favorite bakery, but made in 20 minutes.
- Leftovers? Not Here: This bread disappears so fast, you’ll forget to worry about storing it. Toast it for breakfast, drizzle with olive oil for dinner, or pack slices for lunch—it’s the kind of bread that turns into a habit, not a chore.
- Pantry Stash Hero: Between us, I keep a jar of discard on hand just for this. No wasted ingredients, no extra shopping—just flour, water, and whatever’s already fermenting. It’s my go-to when the fridge is bare, and the wallet’s lighter.
Step-by-step instructions for 4-Ingredient sourdough discard bread
Here’s how to transform discard into a rustic, tangy loaf with minimal effort.
Mix the Dough in a Single Bowl
In a large bowl, combine the 3.5 cups unbleached all-purpose flour and 1.5 tsp kosher salt. Make a well in the center and pour in the 1 cup active sourdough starter discard and 1.5 cups warm water. Let the water sit at 90-95°F—this temperature helps the starter activate properly without shocking it.
Using a wooden spoon or your hands, gently mix the ingredients until just combined. You’ll see a shaggy dough form with some dry flour still visible. Avoid overmixing—this prevents gluten development, which aligns perfectly with our no-knead approach. The dough should be sticky but manageable; if it’s too wet, add 1 tablespoon more flour.
Coat and Rest for Optimal Rise
Lightly coat the inside of the bowl with 1 tablespoon extra-virgin olive oil, then transfer the dough back into the bowl. Cover tightly with plastic wrap or a damp kitchen towel. Let it rest at room temperature for 12-16 hours—this slow fermentation develops deep flavor and creates that signature sourdough tang.
Here’s the thing—don’t rush this step. The longer it ferments (up to 24 hours in a cool kitchen), the more complex the flavor becomes. You’ll know it’s ready when the dough has nearly doubled in size and smells pleasantly tangy. If your kitchen is warm, place the bowl in a cooler spot to prevent overproofing.
Shape and Prepare for Baking
After fermentation, gently deflate the dough by pressing down on it with your fingers. Lightly dust a baking sheet with 2 tablespoons cornmeal or semolina and transfer the dough to the prepared surface. Shape it into a loose round or oval by folding the edges toward the center, creating surface tension that helps with oven spring.
If using the 0.25 cup optional seeds or herbs, sprinkle them evenly over the top now. The seeds will add texture while the herbs infuse subtle flavor. Cover the dough loosely with a clean kitchen towel and let it rest for another 30-60 minutes while you preheat your oven to 450°F.
Bake for a Crusty, Tangy Loaf
Place the shaped dough directly on the middle rack of your preheated oven. Bake for 25-30 minutes until the crust is deep golden brown and sounds hollow when tapped on the bottom. The internal temperature should reach 205-210°F—this ensures a fully baked center without drying out.
Here’s where it gets exciting—the crust should be crackly and slightly crisp, with a beautiful mahogany color. If it’s browning too quickly, tent loosely with foil after 15 minutes to prevent over-browning while still allowing steam to escape. Let the bread cool on a wire rack for at least 30 minutes before slicing—this prevents a gummy interior.
Optional Enhancement with Olive Oil (For Extra Flavor)
While the bread cools, brush the warm crust with a light coating of extra-virgin olive oil using a pastry brush. This step isn’t essential but adds a subtle richness and helps maintain moisture. The oil should be warm enough to penetrate the crust but not hot enough to melt it.
Slice into thick pieces to reveal the airy, open crumb structure characteristic of well-fermented sourdough. Each bite should deliver that perfect balance of tangy depth from the starter, crisp crust from proper baking, and a tender crumb that’s neither too dense nor too airy. Store leftovers wrapped in a cloth-lined bag at room temperature for up to 3 days.
Pro Tips For Making 4-Ingredient Sourdough Discard Bread
- Use Lukewarm Water: I learned this the hard way—hot water kills the starter’s wild yeast, and cold water slows fermentation so much you’ll be waiting forever. Aim for 80-85°F (like bathwater), and if you’re unsure, stick your pinky finger in: if it feels warm but not hot, you’re golden.
- Stretch and Fold Twice: Skip the lazy single fold and do two rounds, 30 minutes apart. This builds gluten faster than a single long rest, and your dough will hold its shape better in the pan. (Yes, it’s extra work, but your loaf will thank you.)
- Salt the Water First: Dissolve the salt in the warm water before mixing it with flour—it distributes evenly and prevents clumpy dough. I used to add it later, and my bread always had uneven saltiness. (Your future self will notice the difference.)
- Preheat Pan with Oil: Coat your Dutch oven or baking sheet with olive oil before preheating—this creates a nonstick barrier that keeps the bottom from sticking. I used to oil it after, and the oil would pool instead of spreading. (This isn’t the prettiest method, but it’s the tastiest.)
Troubleshooting this dish
Dense, Gummy Bread
If your loaf turns out dense or gummy, the issue is likely underproofing—meaning the dough didn’t ferment long enough. The starter needs 12-16 hours at room temperature (or 24 hours in a cool kitchen) to develop proper structure.
I’ve found that placing the dough in a cooler spot (like a turned-off oven with the light on) helps slow fermentation and prevent overproofing while still allowing enough time for flavor development. 🌡️
Another common culprit is overmixing during the initial mix. This develops too much gluten, creating a tough crumb. Instead, mix just until combined—you’ll see a shaggy dough with some dry flour still visible.
If your dough feels too sticky, add 1 tablespoon more flour at a time until it’s manageable but still sticky. For extra insurance, let the dough rest 30 minutes after shaping before baking to relax the gluten.
Pale, Underbaked Crust
A pale crust usually means the oven wasn’t hot enough or the bread didn’t bake long enough. Preheat your oven to 450°F for at least 30 minutes with a Dutch oven inside—this creates the steam needed for a crispy crust.
If your oven runs hot, bake for 25 minutes and check at 20 minutes. The bread is done when it’s deep golden brown and sounds hollow when tapped on the bottom. A meat thermometer is your best friend here—aim for an internal temperature of 205-210°F.
If your crust still looks pale after baking, try brushing the warm crust with extra-virgin olive oil while it cools. This adds color and richness. For next time, consider par-baking—bake the bread for 15 minutes, then tent with foil and finish baking.
This prevents over-browning while ensuring the interior cooks through. 🔥
Flat, No Rise
A flat loaf often happens when the starter isn’t active enough or the dough isn’t given enough time to rise. First, check your sourdough discard—it should be bubbly and have a tangy aroma. If it’s sluggish, feed it 1:1:1 (flour:water:starter by weight) overnight to revive it.
For the dough, 12-16 hours of room-temperature proofing is non-negotiable. If your kitchen is warm, place the dough in a cooler spot (like a pantry or turned-off fridge) to slow fermentation and encourage rise.
If the dough still doesn’t rise, it might be underhydrated. The recipe calls for 1.5 cups warm water, but if your flour absorbs more, add 1-2 tablespoons extra.
For extra lift, try folding the dough every 30 minutes during the first 2 hours of proofing—this builds strength and encourages rise. A proofing basket or bowl can also help shape the dough and trap gases for better expansion. ✨
Overproofed Dough
Overproofed dough collapses during baking, resulting in a flat, dense loaf. This happens when the dough ferments too long in a warm environment. To prevent this, cover the dough tightly with plastic wrap or a damp towel to retain moisture.
If your kitchen is warm, move the dough to a cooler spot (like a turned-off oven with the light on) to slow fermentation. The dough is ready when it’s nearly doubled in size and has a pleasantly tangy aroma—not sour or yeasty.
If you accidentally overproof, don’t panic. Gently deflate the dough by pressing down on it with your fingers, then shape it and bake immediately. The high heat of the oven will set the structure quickly. For next time, keep a thermometer in your kitchen—ideal proofing temperature is 70-75°F.
If your kitchen is above 80°F, reduce proofing time to 8-10 hours or move the dough to the fridge for 12-16 hours of cold proofing. ❄️
Nutrition facts
Frequently asked questions
Can I use whole wheat flour instead of all-purpose?
Yes, but replace only 10-20% of the all-purpose flour with whole wheat to avoid a dense texture. Whole wheat absorbs more liquid and can make the dough too heavy. For best results, use a 70/30 all-purpose to whole wheat ratio and add 1 extra tablespoon water if needed. The flavor will be nuttier and more complex, but the crumb may be slightly denser.
What if my sourdough discard isn’t bubbly?
Revive it first! Mix 1 part discard with 1 part flour and 1 part water (by weight), cover, and let sit at room temperature for 4-6 hours until bubbly. If your starter is sluggish, try feeding it twice daily for 24 hours before using. A healthy starter should float in water—if yours doesn’t, it’s not ready for baking.
Can I bake this bread without a Dutch oven?
Place the dough in a heavy oven-safe pot with a lid (like a stainless steel pan) or use a baking stone with a metal bowl inverted over it to trap steam. For extra crustiness, spray the dough with water before baking. Without a Dutch oven, expect a slightly less crisp crust but still delicious results.
How do I store this bread to keep it fresh?
Wrap the completely cooled loaf in a clean kitchen towel or beeswax wrap and store at room temperature for 3-4 days. For longer storage, freeze slices in a bag with parchment paper between them. To revive, warm in a 350°F oven for 5-10 minutes or toast directly. Never refrigerate—it dries out the crust.
Why does my bread taste too sour?
A strong sour flavor usually means your starter was overfed or too tangy before use. Balance it by reducing the discard amount to ½ cup and adding ½ cup extra flour to the dough. For future batches, use unfed discard (straight from your jar) and avoid feeding it 24 hours before baking. A 1:1:1 discard to flour to water ratio in the dough helps moderate the tang.

- 3lb Prime Rib Roast Recipe: Juicy Pink Center Guaranteed in 3 Hours - October 31, 2026
- 5 Spice Cake Recipe: Warmly Spiced Layers With Crunchy Top - October 31, 2026
- 1950’s Macaroni and Cheese Recipe: Nostalgic Creamy Cheese Sauce with Buttery Noodles - October 31, 2026