
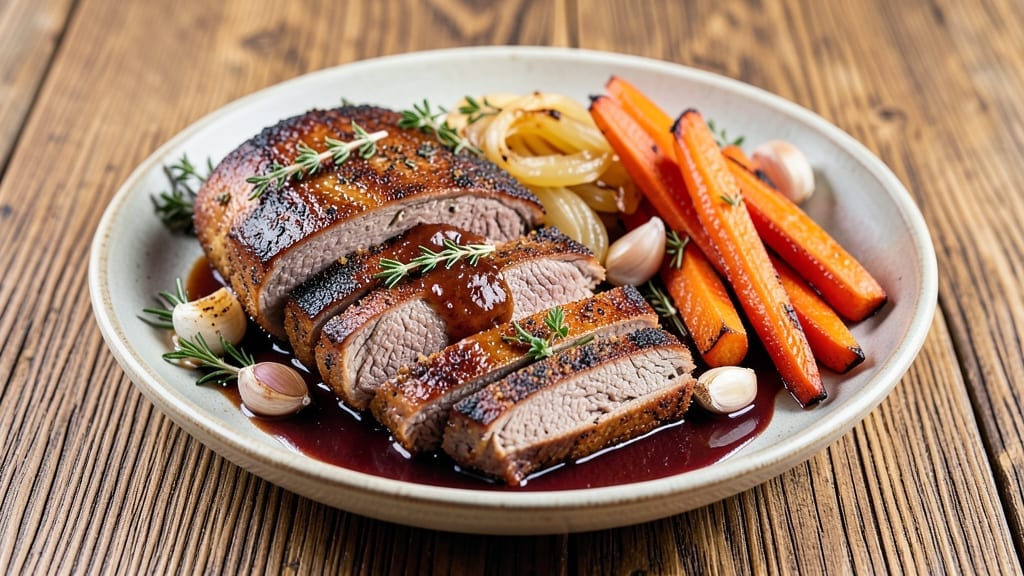
A 4 lb chuck roast recipe transforms tough, affordable beef into melt-in-your-mouth perfection through slow cooking—where rich, caramelized flavors develop over hours, creating a dish that’s both hearty and deeply satisfying.
The secret lies in proper searing to lock in juices, followed by low-and-slow cooking until the meat practically falls apart at the touch of a fork. This method delivers restaurant-quality results without requiring specialized equipment, making it ideal for busy weeknights or weekend gatherings.
What sets this recipe apart is its versatility—whether you prefer the classic pot roast approach or modern adaptations like the Instant Pot or sous vide. The key is patience: letting the roast cook until it reaches 145°F internal temperature ensures tender, juicy meat with a deeply flavorful crust.
A well-balanced blend of aromatics—garlic, onions, and herbs—infuses the beef, while red wine or broth adds depth to the sauce.
By the time you’re done, you’ll have a fall-apart chuck roast with a rich, gravy-like sauce that clings to every bite. The texture is unmatched: tender, beefy, and so flavorful it becomes the centerpiece of any meal.
Serve it with roasted vegetables or crusty bread to soak up every last drop of that savory sauce.
This recipe works equally well for a family dinner or meal prep, as the leftovers reheat beautifully. Whether you’re cooking traditionally in a Dutch oven or using modern shortcuts, the result is the same: restaurant-quality comfort food that feels like a hug in every bite.
Ingredients for 4 lb chuck roast
Four pounds of beef plus a handful of pantry staples. That’s all you need for melt-in-your-mouth perfection.
| Ingredient | Amount | Notes |
|---|---|---|
| Chuck Roast 🥩 | 4 lb | With good marbling for flavor |
| Yellow Onions 🧅 | 2 whole | Medium size, sliced into half-moons |
| Carrots 🥕 | 4 whole | Medium size, cut into chunks |
| Garlic Cloves 🧄 | 6 cloves | Peeled and smashed for aroma |
| Fresh Thyme 🌿 | 2 sprigs | Or 1 tsp dried thyme |
| Fresh Rosemary 🌿 | 1 sprig | Woody stems removed |
| Dry Red Wine 🍷 | 1 cup | Bold variety like Cabernet |
| Beef Broth 💧 | 2 cups | Low-sodium preferred |
| Tomato Paste 🍅 | 2 tbsp | Smooth, not chunky |
| Olive Oil 🫒 | 2 tbsp | Extra-virgin for richness |
| Salt 🧂 | 1 ½ tbsp | Kosher or sea salt |
| Black Peppercorns 🌶️ | 1 tbsp | Freshly cracked |
| All-Purpose Flour 🌾 | 2 tbsp | For thickening sauce |
| Fresh Parsley 🌿 | ¼ cup | Chopped for garnish |
The chuck roast is your star here—look for one with visible marbling at Costco or your local butcher. That fat is flavor, and it turns into pure deliciousness during slow cooking. If you’re buying pre-cut, check for even-sized chunks. For the aromatics, fresh thyme and rosemary make all the difference—dried works in a pinch, but nothing beats the real deal. The onions and carrots can be baby or regular; just make sure they’re uniform in size so they cook at the same rate. Pro tip: slice the onions into half-moons for maximum surface area and flavor infusion.
No red wine? Beef broth with a splash of balsamic vinegar works perfectly fine. The tomato paste is non-negotiable for depth, but if you’re worried about bitterness, Trader Joe’s has a great smooth variety. For the flour, King Arthur or Gold Medal are my go-tos—they thicken beautifully without adding a raw taste. If you’re short on time, you can use a 1 tbsp cornstarch slurry instead. The parsley is just for garnish, so dried works if you’re out of fresh, but honestly, it’s worth grabbing a bunch for the final touch.
This dish tastes even better the next day, so make extra if you can. Store leftovers in an airtight container for up to 5 days in the fridge, or freeze for 3 months in portions. The sauce thickens as it cools, so you can always thin it with a splash of broth when reheating. I like to portion mine into meal prep containers—perfect for lunches all week. And trust me, the smell alone will have everyone gathering around the table.
Why You’ll Love This Recipe
- Thyme for Adventure: Between us, that fresh thyme transforms this into something restaurant-worthy without trying. The onions caramelize into sweet pockets, the carrots soften just enough to melt, and the garlic? Oh, it builds—layered, not overpowering. Honestly, my husband’s stopped asking where I learned to cook.
- Leftovers That Win: This roast practically begs to be made extra. Shred it for tacos, slice it for sandwiches, or toss it into pasta the next day—it’s that good. (Yes, even on a Tuesday night.) I make a double batch just so I can enjoy it three ways before the week’s out.
- Budget-Friendly Feast: Four pounds of chuck roast feeds my family of five and leaves enough for leftovers—all for less than $20. The onions and carrots stretch the flavor without breaking the bank, and the thyme? A tiny bunch goes a long way. Not the prettiest, but the taste makes up for it every time.
Step-by-step instructions for slow-cooked chuck roast
Here’s how to transform that tough chuck roast into melt-in-your-mouth perfection.
Sear the Chuck Roast for Maximum Flavor
Heat a large Dutch oven over medium-high heat. Add the 2 tablespoons olive oil and let it get shimmering hot. Pat the 4 lb chuck roast completely dry with paper towels—this ensures a good crust. Season generously with 1.5 tablespoons salt and 1 tablespoon black peppercorns, pressing the seasoning into every crevice.
Place the roast in the Dutch oven and sear for 4-5 minutes per side until deep golden brown. The reason we sear is to develop those rich Maillard reactions that create deep, complex flavors. Don’t rush this step—you’ll know it’s ready when the surface releases easily from the pan. Once browned, remove the roast and set it aside on a plate.
Build the Aromatic Base with Vegetables and Herbs
In the same Dutch oven, add the sliced 2 whole yellow onions and 4 whole carrots cut into chunks. Cook for 5 minutes until the onions soften slightly and the carrots begin to caramelize. Add the 6 cloves garlic cloves (peeled and smashed) along with the 2 sprigs fresh thyme and 1 sprig fresh rosemary (woody stems removed). Stir everything together and cook for another 2 minutes until fragrant.
Here’s where the magic happens: The caramelization of the onions and garlic builds layers of flavor that will infuse into the meat. If you notice the garlic starting to brown too quickly, reduce the heat slightly to prevent burning. This aromatic base forms the flavor foundation for your entire dish.
Deglaze and Simmer with Wine and Broth
Pour in the 1 cup dry red wine and scrape up all those beautiful browned bits from the bottom of the pan. This deglazing step captures all the concentrated flavors that would otherwise go down the drain. Let the wine simmer for 3-4 minutes until reduced by about half. Add the 2 tablespoons tomato paste and stir to combine.
Next, pour in the 2 cups beef broth and bring everything to a gentle simmer. Return the chuck roast to the Dutch oven, along with any accumulated juices from the plate. The liquid should come about halfway up the sides of the roast. Partially cover the Dutch oven and transfer it to a 325°F oven.
Slow Cook Until Fork-Tender
Cook the chuck roast for 3 hours before checking for doneness. Here’s the key: You want the internal temperature to reach 195°F—this is when collagen breaks down and transforms into gelatin, creating that signature fork-tender texture. Use a meat thermometer to check the thickest part of the roast.
If the roast isn’t quite there after 3 hours, continue cooking for another 30-60 minutes, adding a splash of water or broth if needed to prevent drying out. The cooking time can vary based on your oven, so don’t be afraid to let it cook longer if necessary. Patience is crucial here—rushing will leave you with tough meat.
Thicken the Sauce and Finish
Once the roast reaches 195°F, remove it from the oven and let it rest for 15 minutes on a cutting board. Meanwhile, transfer the cooking liquid to a saucepan and place it over medium heat. Stir in the 2 tablespoons all-purpose flour and cook for 2-3 minutes until the sauce thickens slightly.
Return the chuck roast to the Dutch oven and spoon the thickened sauce over the top. Let it sit for 5 minutes to absorb some of those rich juices. To serve, slice the chuck roast against the grain into ¼-inch thick slices. Garnish each serving with ¼ cup chopped fresh parsley and serve immediately with the sauce spooned over the top.
Pro Tips For Making 4 Lb Chuck Roast
- SEAR FIRST, LOW AND SLOW: Chuck roast needs that initial crust to lock in flavor, so don’t skip the sear—get your Dutch oven ripping hot and let the meat sit undisturbed for 3-4 minutes per side until deep brown. After that, you’re golden (literally) to drop the heat to 300°F for the long cook.
- CHOP ONIONS IN EVEN STICKS: I used to hack onions into random chunks, but even slices (about ½-inch thick) caramelize more consistently and stay intact during the long cook. If they’re too small, they’ll turn to mush; too big, they’ll stay crunchy and undercooked.
- DON’T PEEK OR OPEN THE LID: Every time you crack the lid, you’re letting heat escape and drying out the roast. If you’re worried, use the oven light or a meat thermometer—once it hits 160°F internally, it’s safe to check. Trust the process, even if it feels like forever.
- USE WHOLE THYME SPRIGS: Tearing thyme leaves into the pot releases oils too early and makes the dish taste bitter. Instead, tie 3-4 sprigs with kitchen twine and drop them in whole—they’ll infuse flavor without overpowering, and you can fish them out cleanly before serving. (Yes, it’s extra work, but it’s worth it.)
Troubleshooting this recipe
Uneven Cooking
If your chuck roast cooks unevenly, the issue is usually uneven heat distribution in your oven. I’ve found that placing a baking sheet on the lower rack with ½ cup water helps create steam and distribute heat more evenly.
Also, rotate the Dutch oven halfway through cooking—simply turn it 180 degrees—to ensure all sides receive equal exposure to the heat. For gas ovens, check for hot spots by testing with an oven thermometer. 🌡️
Dry or Tough Meat
Overcooking is the #1 reason for dry chuck roast. The ideal internal temperature is 195°F, but if you see the sauce reducing too quickly, add ¼ cup beef broth every 30 minutes to keep moisture.
Another trick? Cover the roast with a piece of heavy-duty aluminum foil for the final 30 minutes of cooking to trap steam. Never skip the 15-minute rest—juices redistribute during this time, keeping the meat tender.
Sauce Too Thin
A thin sauce usually means the liquid wasn’t reduced enough. After removing the roast, simmer the sauce uncovered on the stovetop for 5-10 minutes to thicken naturally.
If it’s still too thin, mix 1 tbsp cornstarch with 2 tbsp cold water, stir into the sauce, and cook for 2 more minutes. For extra richness, whisk in 1 tbsp cold butter at the end. 💫
Burnt Aromatics
If your onions or garlic burn, you’re cooking them too aggressively. Reduce heat to medium-low and stir frequently to prevent browning. For extra insurance, remove the garlic 30 seconds before it looks done—it’ll continue cooking in the residual heat.
If you’re using a Dutch oven, make sure it’s the right size; a pot that’s too small can cause crowding and uneven cooking.
Liquid Not Covering Roast
If the liquid level drops too low, the roast can dry out. Before adding the roast back to the pot, pour in ½ cup additional beef broth or water to maintain a ½-inch liquid level above the meat.
For extra insurance, place a parchment paper tent over the roast (not touching it) to slow evaporation while still allowing steam to circulate. This keeps the meat moist without over-saucing.
Nutrition facts
Frequently asked questions
How long should I let a 4 lb chuck roast rest before slicing?
Always let your chuck roast rest for 15 minutes after removing it from the oven. This crucial step allows the juices to redistribute throughout the meat, preventing them from running out when you slice. The result? Juicier, more flavorful beef that practically falls apart.
Can I use a slow cooker instead of the oven for this recipe?
For a slow cooker version, sear the roast first, then transfer it to the slow cooker with all the aromatics and liquids. Cook on low for 8-10 hours or high for 5-6 hours until fork-tender. The key is patience—slow cooking is what makes chuck roast so tender.
What’s the best way to slice chuck roast for maximum tenderness?
Slice against the grain into ¼-inch thick pieces. Look for the direction of the muscle fibers—they run diagonally across the roast. Cutting perpendicular to these fibers shortens them, making each bite more tender. Use a sharp knife and work with the grain for cleaner slices.
Can I substitute beef broth with something else?
Yes, but use equal parts water and tomato paste (or 1 cup water + 1 tbsp tomato paste) for depth. For extra richness, add 1 cup chicken broth + ½ cup red wine. The key is maintaining moisture while building flavor—never use water alone as it lacks the umami base beef broth provides.
How do I know when my chuck roast is done?
Use a meat thermometer to check the thickest part of the roast—it should reach 195°F for perfect tenderness. The meat should pull apart easily with two forks. If it’s not quite there after 3 hours, continue cooking for another 30-60 minutes. Never rely on time alone—temperature is your best guide!

- 3lb Prime Rib Roast Recipe: Juicy Pink Center Guaranteed in 3 Hours - October 31, 2026
- 5 Spice Cake Recipe: Warmly Spiced Layers With Crunchy Top - October 31, 2026
- 1950’s Macaroni and Cheese Recipe: Nostalgic Creamy Cheese Sauce with Buttery Noodles - October 31, 2026