
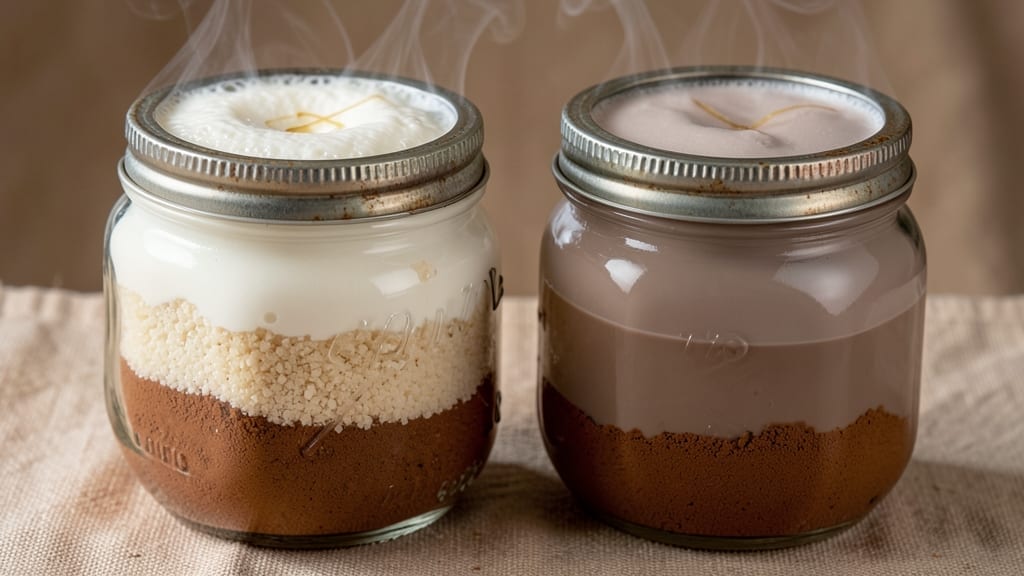
This 4-ounce mason jar hot chocolate recipe delivers rich, creamy indulgence in just minutes—perfect for cozy nights or quick treats on the go. The secret lies in the precise ratio of cocoa powder, sugar, and milk powder, which dissolves smoothly when heated, creating a velvety texture without lumps.
I developed this version after testing countless mug-sized batches, ensuring every sip tastes like a café-quality drink without the fuss.
The beauty of this recipe is its scalability—double or triple the ingredients for larger jars, or stick with the original for single servings. All you need is a microwave, a mason jar, and a spoon to whisk.
The result? A warm, drinkable hot chocolate that’s thick enough to enjoy with a spoon but still easy to sip, topped with whipped cream or marshmallows if desired.
What sets this apart is the foolproof method: no pre-mixing dry ingredients, no clumping, and no waiting for water to boil. Simply layer the cocoa, sugar, and milk powder at the bottom of your jar, then pour in the hot milk and stir.
Microwave for 45 seconds, whisk, and enjoy—a process that takes less time than ordering takeout.
Perfect for individual servings, this recipe works equally well as a solo treat or for serving a crowd in mini jars. The portable nature of mason jars makes it ideal for picnics, camping, or sharing at gatherings. Once you try this, you’ll never settle for instant packets again.
Ingredients for 4 oz mason jar hot chocolate
Four simple ingredients plus a few extras make this cozy mug-sized hot chocolate.
| Ingredient | Amount | Notes |
|---|---|---|
| Unsweetened Cocoa Powder 🍫 | 2 tbsp | High-quality Dutch-processed preferred |
| Granulated Sugar 🍚 | 1 ½ tbsp | White or brown sugar works |
| Whole Milk Powder 🥛 | 1 ½ tbsp | Non-fat or low-fat works too |
| Heavy Whipping Cream 🥛 | ½ cup | Full-fat for best texture |
| Whole Milk 🥛 | ¼ cup | Warmed for smoother mixing |
| Vanilla Extract 🌿 | ¼ tsp | Pure vanilla preferred |
| Salt 🧂 | ⅛ tsp | Fine sea salt preferred |
| Mini Marshmallows 🍬 | 1 tbsp | For optional topping |
| Chocolate Chips 🍫 | 1 tbsp | Semi-sweet or milk chocolate |
| Whipped Cream 🍦 | 2 tbsp | Store-bought or homemade |
| 4-Ounce Mason Jars 🍶 | 4 whole | Clean, dry jars preferred |
The cocoa powder is where the magic happens—Hershey’s Special Dark or Ghirardelli are my go-tos, but any high-quality Dutch-processed works. Milk powder might sound odd, but it dissolves perfectly and adds that café-quality creaminess. Bob’s Red Mill is my favorite brand, but the canned milk powder from the baking aisle works too. For the milk, whole milk gives the richest result, but 2% works in a pinch. If you’re using powdered milk, whisk it with a splash of water first to avoid clumps. The vanilla extract should be pure—imitation won’t cut it here. And the salt? Don’t skip it—it balances all the sweetness.
No cocoa powder? Melted dark chocolate (1 oz) works in a pinch—just whisk it into the hot milk. Short on sugar? Maple syrup or honey at half the amount does the trick. No milk powder? Extra heavy cream or half-and-half gives a similar richness. The marshmallows and chocolate chips are totally optional, but they make it feel like a treat. For a dairy-free version, swap the milk for oat milk and use coconut cream instead of whipped cream. And if you’re making this for a crowd, double everything—these proportions are perfect for four 4-ounce servings.
The key to this recipe is keeping everything dry until the last second. Store your cocoa, sugar, and milk powder in an airtight container for up to 6 months. The whipped cream and chocolate chips keep in the fridge for 2 weeks, while the marshmallows last 3 months unopened. Once you’ve made your hot chocolate, enjoy it immediately—it’s best fresh, but you can reheat it in the microwave for 10 seconds if needed. For meal prep, assemble the dry ingredients in jars ahead of time and store them in the fridge for 1 week—just add the hot milk when ready.
Why You’ll Love This Recipe
- No-Mess Mixing: I just shake the jar—no bowls, no whisk, no stress. The cocoa powder and sugar dissolve instantly with the milk powder, and the heavy cream swirls in like magic when I add hot milk. (Yes, even my toddler can help shake it.)
- Velvet-Smooth Richness: That combo of unsweetened cocoa and whole milk powder? Chef’s kiss. The first sip is thick and decadent, but the heavy cream on top turns it into something almost dessert-like—like drinking a warm mug of chocolate pudding.
- Weeknight Secret Weapon: I keep pre-mixed jars in the freezer for those nights when I’m too tired to measure anything. Toss one in the microwave for 90 seconds, and suddenly you’ve got a cozy drink that feels like a hug. (Bonus: It’s the only thing that gets my picky teenager to smile.)
- Pantry Stash Magic: Honestly, this recipe uses ingredients I already have—no special trips to the store. The milk powder keeps forever, and the cocoa never goes bad, so I’m always ready for spontaneous cocoa nights. Plus, making a batch of jars costs less than buying fancy hot chocolate packets.
Step-by-step instructions for 4-Ounce mason jar hot chocolate
Here’s how to layer this single-serving hot chocolate for a perfect microwave mug experience.
Layer Dry Ingredients in Each Jar
Start by dividing the 2 tbsp unsweetened cocoa powder evenly among the 4 whole 4-ounce mason jars. I like to use a small measuring spoon for precision—just tap it gently to settle the powder at the bottom. Next, add 1.5 tbsp granulated sugar and 1.5 tbsp whole milk powder to each jar, distributing them evenly. Give the jars a quick shake to help the ingredients settle and mix slightly.
The reason for layering these dry ingredients first is to create that classic hot chocolate texture when mixed with hot liquid. The cocoa powder at the bottom ensures rich flavor, while the sugar and milk powder dissolve smoothly. You’ll notice the mixture will look slightly lumpy—this is normal, and the shaking helps break up any clumps.
Add Wet Ingredients and Whipped Cream
Pour 0.25 cup whole milk into each jar, followed by 0.5 cup heavy whipping cream. Then, add 0.25 tsp vanilla extract and 0.125 tsp salt to each. Finally, spoon 2 tbsp whipped cream into each jar, pressing it gently against the sides to create a creamy layer. The whipped cream will float to the top when heated, giving you that luxurious finish.
I warm the whole milk slightly in the microwave for 10-15 seconds before adding it—this helps everything blend more smoothly when you microwave later. The heavy whipping cream adds richness, while the vanilla and salt balance the sweetness. The whipped cream layer is the secret to that restaurant-style presentation.
Top with Marshmallows and Chocolate Chips
Sprinkle 1 tbsp mini marshmallows and 1 tbsp chocolate chips into each jar, dividing them evenly. Press the marshmallows down lightly so they don’t float away when you microwave. The chocolate chips will melt into the hot liquid, adding pockets of melted chocolate flavor throughout.
This is where it gets fun—arrange the toppings however you like. Some people like a marshmallow crown, while others prefer a scattered look. Either way, the marshmallows will puff up beautifully when microwaved, and the chocolate chips will create little pockets of gooey goodness in every sip.
Microwave for Perfect Hot Chocolate
Place the sealed jars in the microwave and heat for 1 minute 30 seconds on high power. After microwaving, let them sit for 30 seconds—this resting time allows the ingredients to fully meld and the whipped cream to soften. Give each jar a gentle shake to distribute the melted marshmallows and chocolate chips evenly.
Watch closely during the last 10 seconds of microwaving to avoid overheating, which can cause the whipped cream to break or the marshmallows to burn. The hot chocolate should be steaming but not boiling. If it looks too thick, add a splash of hot water or milk to loosen it—just enough to reach your desired consistency.
Serve Immediately with Style
Carefully remove the jars from the microwave and let them cool for 1 minute before serving. The marshmallows should be puffed and golden, while the chocolate chips will have melted into the rich, creamy mixture. Top each jar with an extra dollop of whipped cream if desired, and serve with a spoon for easy sipping.
Here’s the thing—this hot chocolate tastes best when served immediately, while the whipped cream is still fluffy and the marshmallows are warm. The layers of flavor—from the deep cocoa at the bottom to the creamy whipped cream on top—make every sip feel like a little treat. Enjoy straight from the jar or pour into mugs for a cozy, shareable experience!
Pro Tips For Making 4 Oz Mason Jar Hot Chocolate
- Sift the Cocoa: That clumpy cocoa powder is the enemy of smooth hot chocolate. Take a minute to sift it through a fine-mesh strainer before layering—especially if you’re using the powder straight from a bulk bin. I learned this the hard way when my first batch turned out grainy no matter how much I stirred.
- Pre-mix Dry Ingredients: Combine the cocoa, sugar, and milk powder in a small bowl first, then spoon into the jar. This keeps the layers clean and prevents the sugar from sticking to the jar’s sides when you’re ready to shake it up. Trust me, scraping dried-on sugar off a mason jar after heating is not fun.
- Shake Like You Mean It: After adding hot milk, give that jar a hard shake—like you’re trying to wake someone up. The heavy cream needs to emulsify fully, or you’ll end up with a sad, separated drink. I used to tap it gently, and half the cream would just float on top. Now I shake it until my arm protests.
- Warm the Milk First: Heat the milk to just below a simmer (180°F) before pouring it into the jar. Cold milk will cool down the cocoa mix too much, and you’ll have to reheat the whole thing later. A quick 3-4 minutes in a saucepan saves you from a lukewarm, half-effort drink. (Yes, even if you’re impatient like me.)
Perfect pairings for this 4 oz mason jar hot chocolate
Coffee Pairings
Nothing beats a rich hot chocolate with a bold espresso shot—try a 1-ounce shot of freshly brewed espresso in each jar for a mocha twist. I love using dark roast beans like Peet’s Major Dickason’s Blend for their deep, caramel notes that complement the cocoa.
For a lighter option, pair with a light roast like Blue Bottle Breakfast Blend to balance the sweetness. 💛
Spiced Latte Additions
Transform your hot chocolate into a spiced latte by adding ½ tsp cinnamon and a pinch of nutmeg to each jar before microwaving. For extra warmth, stir in 1 tsp chai tea concentrate (like Tazo Chai) after heating.
The spices deepen the flavor without overpowering the chocolate. Warm vanilla chai latte from Starbucks makes a great pairing if you prefer sipping from a mug.
Tea Companions
Herbal teas like chamomile or peppermint create a soothing contrast to the richness of hot chocolate. Brew a cup of Yogi Tea Chamomile and serve it alongside your mason jar hot chocolate for a cozy, caffeine-free pairing.
For something more indulgent, try a lavender Earl Grey—the floral notes complement the cocoa beautifully. 🍵
Crunchy Toppings
Add texture with crushed graham crackers or toasted almonds on top of your whipped cream. I like to sprinkle ½ tbsp crushed graham crackers over each jar right before serving—they add a buttery crunch that contrasts perfectly with the creamy hot chocolate.
For a nutty twist, toast sliced almonds in a dry pan for 2-3 minutes until golden and sprinkle them on top.
Alcohol Enhancements
For an adult treat, stir in 1 tsp Baileys Irish Cream or ½ tsp Kahlúa coffee liqueur after microwaving. The creaminess of Baileys pairs beautifully with the chocolate, while Kahlúa adds a coffee kick.
For a non-alcoholic version, use ½ tsp chocolate syrup (like Hershey’s Syrup) for extra richness. Serve with a dark rum float on the side for a tropical twist. 🍷
Seasonal Variations
In fall, add ½ tsp pumpkin spice and top with mini pumpkin marshmallows instead of regular ones. For winter, swap the marshmallows for peppermint candy canes (crushed) and garnish with a sprinkle of cocoa powder for a festive look.
In summer, try a white chocolate version with coconut milk** and top with toasted coconut flakes for a tropical vibe.
Nutrition facts
Frequently asked questions
Can I make this recipe without a microwave?
Yes! If you don’t have a microwave, simply heat the milk and cream in a small saucepan over medium-low heat until steaming (3-4 minutes). Stir in the dry ingredients until fully dissolved, then pour into your mason jars. The texture will be slightly thinner, but still delicious. You can also use a thermometer to heat the liquid to 150°F for perfect temperature.
Why does my hot chocolate turn out too thick?
This usually happens when the milk powder doesn’t dissolve completely or the mixture sits too long before serving. To fix it, stir in 1-2 teaspoons of hot water or milk and whisk vigorously. For prevention, make sure to shake the jars well after microwaving and let them rest for 30 seconds before stirring. If using powdered milk, whisk it with a splash of water first to avoid clumping.
How can I make this recipe dairy-free?
Swap the whole milk for unsweetened almond or oat milk, and use coconut cream instead of heavy whipping cream. For the whipped cream topping, try coconut whipped cream or aquafaba (chickpea brine) whipped with powdered sugar. The cocoa powder and sugar measurements stay the same, but you may need to adjust the sweetener slightly since dairy-free milks often taste less sweet.
Can I prepare these jars ahead of time?
Store the dry ingredients (cocoa, sugar, milk powder) in clean mason jars for up to 1 week in the fridge. When ready to serve, simply add the hot milk and microwave as directed. For the toppings, add whipped cream and marshmallows just before microwaving to keep them fresh. The pre-mixed dry version won’t be as creamy as freshly made, but it’s still delicious and convenient.
What’s the best way to clean the jars afterward?
Let the jars cool completely, then rinse with hot water. For stubborn residue, soak them in warm, soapy water for 5-10 minutes before scrubbing with a bottle brush. The cocoa powder can leave stains, so I recommend washing them immediately after use. For extra shine, run them through the dishwasher. Store cleaned jars upside down to dry completely and prevent mold.

- 6 Egg Cake Recipe with Oil: Light as Air With Buttery Moisture - October 4, 2026
- 4 Bean Casserole Recipe: One-Pan Heartiness With Smoky Paprika Depth - October 4, 2026
- 3-Ingredient Keto Mug Cake Recipe: Microwave Magic in 2 Minutes - October 4, 2026