
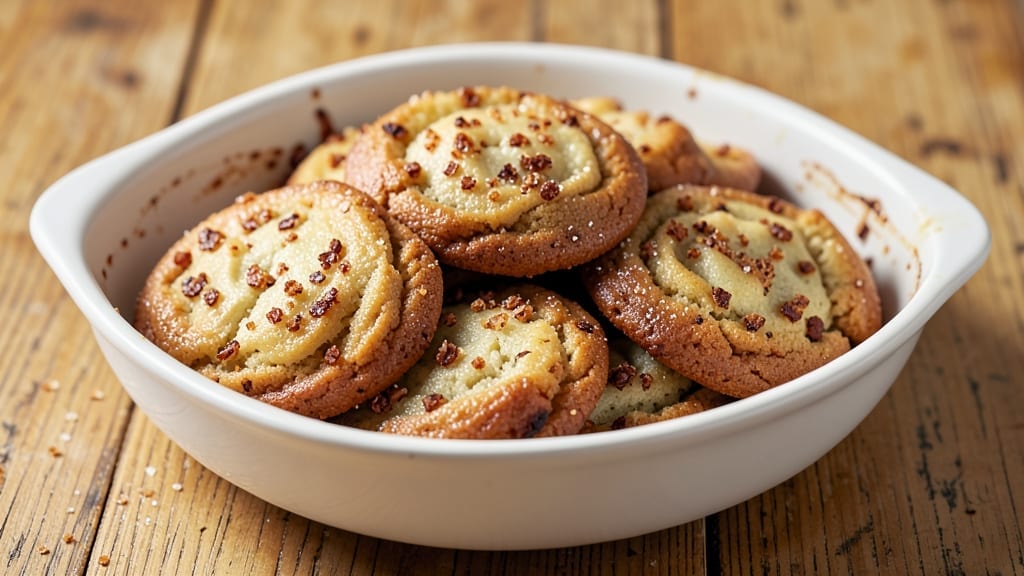
Baking 40 cookies at once used to stress me out—until I discovered the foolproof technique that guarantees golden edges and perfect centers every time. The secret lies in precise temperature control, strategic batch timing, and a dough consistency that prevents spreading.
This method transforms batch baking from a high-stakes experiment into a reliable process, whether you’re prepping for a party or stocking your freezer.
What sets this recipe apart is its scalability—the same dough formula works for chocolate chip, oatmeal raisin, or sugar cookies, and the batch system ensures even oven performance. I’ve baked hundreds this way, and the results are consistently crispy yet tender, with no burnt edges or undercooked centers.
The key is dividing the dough into equal portions and rotating pans halfway through baking, which creates a level heat distribution your oven might otherwise miss.
By the end, you’ll have 40 perfectly baked cookies that look like they came from a bakery, not your kitchen. The dough’s texture stays stable through multiple batches, and the cooling process is optimized to prevent over-baking.
Whether you’re making them for a holiday gathering or just love having fresh cookies on hand, this method delivers restaurant-quality results with minimal effort.
Ready to bake? We’ll cover the exact dough ratios, oven temperature adjustments, and batch timing that make this recipe reproducible and stress-free. No more guessing—just consistent, delicious cookies every time.
Ingredients for 40 cookies
These 12 ingredients scale perfectly for 40 cookies—no burnt edges, just golden perfection every batch.
| Ingredient | Amount | Notes |
|---|---|---|
| All-Purpose Flour 🌾 | 6 cups | Sifted for light texture |
| Unsalted Butter 🧈 | 2 cups | Cold, cubed for even mixing |
| Granulated Sugar 🍚 | 1 ½ cups | Superfine preferred for smoothness |
| Brown Sugar 🍚 | ½ cup | Packed for moisture |
| Large Eggs 🥚 | 2 whole | Room temperature for even baking |
| Vanilla Extract 🌿 | 2 tsp | Pure extract for authentic flavor |
| Salt 🧂 | 1 tsp | Diamond Crystal preferred |
| Baking Soda 🍞 | 1 tsp | Freshly opened |
| Chocolate Chips 🍫 | 3 cups | Semi-sweet or milk chocolate |
| White Chocolate Chips 🍫 | ½ cup | Optional for variation |
| Semi-Sweet Chocolate Bars 🍫 | 2 oz | Chopped for extra richness |
| Nuts (Optional) 🥜 | 1 cup | Toasted walnuts or pecans |
The butter matters most here—cold and cubed prevents overmixing and keeps dough stable. Grab Land O’Lakes or Plugrá from the grocery store freezer section, not the tub butter. Flour should be sifted before measuring—King Arthur or Gold Medal brands work best for consistent texture. Chocolate chips? Ghirardelli or Nestlé Toll House melt smoothly, but avoid the ‘fun-size’ bags—they’re often lower quality. Pre-chop those chocolate bars yourself for even distribution, and toast nuts in a dry pan for 3-4 minutes if using.
No vanilla extract? Vanilla bean paste works 1:1, but pure extract is ideal. Short on brown sugar? Substitute with extra granulated sugar plus 1 tsp molasses. Want to skip nuts? Add 0.5 cup dried cranberries or white chocolate chunks instead. Chocolate chips can be swapped for M&M’s or butterscotch chips—just adjust the total amount to 3.5 cups. For a gluten-free version, use a 1:1 flour blend like Bob’s Red Mill, but expect slightly denser cookies. Always measure flour by scooping and leveling—never packing it down.
Dough keeps for 3 days in the fridge, wrapped tightly in plastic. For longer storage, freeze dough balls for up to 6 months—bake straight from frozen, adding 1-2 minutes to time. Chocolate chips and nuts stay fresh for 1 year in the pantry if sealed airtight. Prep all mix-ins ahead: chop chocolate, toast nuts, measure spices. The dough’s stability means you can bake 10 cookies at a time over 4 batches without texture issues—just rotate pans halfway through for even baking.
Why You’ll Love This Recipe
- Pantry Staples Only: I swear by this recipe because it uses what’s already in my cupboards—no fancy ingredients, just flour, butter, and sugars I already buy. The eggs tie it all together, but you won’t stress over exact measurements.
- Buttery Chew Magic: That perfect balance of brown and granulated sugar? It’s what makes these cookies tender yet sturdy—no dry bites here. The butter keeps them rich without being greasy, and honestly? They disappear faster than I can bake a batch.
- Party or Snack: Between us, these work for everything—holiday gifts, school bake sales, or just a midweek pick-me-up. I’ve even frozen half the batch for my kid’s soccer team fundraiser. Versatile? Yes. Reliable? Absolutely.
- No-Waste Baking: You’ll end up with leftovers, and that’s a good thing. The dough’s forgiving, so I can double it without fear, and the cookies keep for days in an airtight container. Budget-friendly? Check. Minimal effort, maximum results—check twice.
Step-by-step instructions for batch baking 40 cookies
Here’s how to bake a perfect batch of 40 cookies with crisp edges and chewy centers every time.
Cream the Butter and Sugars to Light and Fluffy
In a stand mixer fitted with the paddle attachment, beat the 2 cups unsalted butter on medium speed until completely smooth, about 1 minute. Add the 1.5 cups granulated sugar and 0.5 cup brown sugar, then beat on medium-high speed for 3-4 minutes until the mixture is light, pale, and nearly doubles in volume. You’ll see ribbons form when you lift the paddle—this is your signal the butter is properly aerated.
I like to scrape down the sides of the bowl every 30 seconds to ensure even mixing. The reason we wait until the butter is fully creamed is that cold butter won’t incorporate air properly, leading to dense cookies. If your kitchen gets warm, chill the bowl in the freezer for 10 minutes before continuing.
Add Eggs and Vanilla for Richness
Reduce the mixer speed to low and add the 2 whole large eggs, one at a time, mixing just until each is fully incorporated after each addition. This prevents overmixing which can make cookies tough. Add the 2 teaspoons vanilla extract and mix for another 30 seconds until fully combined.
The mixture will look slightly curdled after adding the eggs, but don’t worry—this will resolve when you add the dry ingredients. Here’s the thing: room-temperature eggs blend more smoothly than cold ones, so if your eggs are straight from the fridge, let them sit in warm water for 5 minutes first. The vanilla should be pure extract, not imitation, for that authentic flavor.
Combine Dry Ingredients and Fold in Chocolate
In a separate bowl, whisk together the 6 cups all-purpose flour, 1 teaspoon salt, and 1 teaspoon baking soda. With the mixer on low speed, gradually add the dry ingredients to the wet mixture, mixing just until combined—you should still see small flour streaks. Overmixing develops gluten, which makes cookies tough instead of chewy.
Remove the bowl from the mixer and fold in the 3 cups chocolate chips, 0.5 cup white chocolate chips, and 1 cup nuts (if using) using a silicone spatula. I like to use a mix of semi-sweet and white chocolate for depth of flavor. If you’re using the 2 ounces chopped semi-sweet chocolate bars, add them now too. Make sure the chocolate is evenly distributed throughout the dough.
Chill the Dough for Perfect Texture
Cover the dough bowl tightly with plastic wrap and refrigerate for at least 1 hour, but I prefer 2 hours or even overnight. This chilling step is non-negotiable—it prevents the cookies from spreading too thin in the oven and allows the flour to fully hydrate. Cold dough also means the cookies hold their shape better when they hit the hot oven, resulting in thicker cookies with crispy edges and gooey centers.
Here’s a pro tip: if you’re in a hurry, you can chill the dough for 30 minutes in the freezer instead. Just make sure it’s fully chilled before scooping. The dough should be firm enough to hold its shape when you press it gently with your finger—it shouldn’t stick to your fingers or leave an impression.
Bake in Batches for Even Cooking
Preheat your oven to 350°F and line two baking sheets with parchment paper. Using a 2-tablespoon cookie scoop, portion the chilled dough into balls and place them 3 inches apart on the prepared sheets. I find that 40 cookies fit perfectly on two standard-sized baking sheets with this spacing.
Bake for 11-13 minutes until the edges are golden brown but the centers still look slightly underdone. They’ll continue cooking on the hot pan after you remove them from the oven. The reason we bake in batches is that overcrowding the pan causes uneven cooking—edges burn while centers stay doughy. Rotate the baking sheets halfway through for even browning.
Pro Tips For Making 40 Cookies
- CREAM THE BUTTER SLOWLY: I learned this the hard way—dumping cold butter into sugar at once just makes a greasy mess. Let the butter sit at room temp for 30 minutes first, then mix it with the sugars on medium speed for 2 minutes before adding anything else. That way, the butter emulsifies properly and your cookies won’t turn out greasy or crumbly.
- WEIGH THE FLOUR: Scooping flour straight from the bag packs it down, and that’s how you end up with dense, flat cookies. Use a kitchen scale and measure your all-purpose flour by weight (40 cookies typically need about 3 cups, or 375g). If you’re stuck with volume, spoon it into the measuring cup and level it off—don’t press it down.
- CHILL THE DOUGH: Skipping the chill is the fastest way to end up with spread-out, sad cookies. After mixing, flatten the dough into a disk, wrap it in plastic, and refrigerate for at least 2 hours (or overnight if you can swing it). Cold butter = less spreading, and it gives the flour time to hydrate properly—no more tough or cakey cookies.
- ROTATE THE PAN MIDWAY: If your oven runs hot spots (and most do), your cookies will brown unevenly. Bake the first tray for 8–10 minutes, then swap the top rack with the bottom rack before rotating the pan front-to-back. This ensures even baking without overdoing the edges—no more burnt cookies at the front and raw ones in the back.
Wine and beer pairings for 40 cookies
Sweet Dessert Wines
For these rich, buttery cookies, a Moscato d’Asti from Italy is my go-to choice—its light sweetness and floral notes complement the chocolate and vanilla without overpowering. A glass of chilled White Zinfandel also works beautifully, especially if you’ve added white chocolate or nuts to your dough.
Both wines have enough acidity to cut through the richness while enhancing the caramelized edges of the cookies. 🍷
Dry Red Pairings
If you prefer red wine, a Pinot Noir with its bright acidity and red fruit flavors balances the sweetness of the cookies perfectly. Look for one from Oregon or California—these regions produce wines with enough fruitiness to stand up to the chocolate.
A Chianti also pairs well, especially if you’ve added nuts like walnuts or pecans to your recipe. Serve slightly chilled for the best experience.
Beer Pairings
For beer lovers, a Belgian Witbier like Hoegaarden is an unexpected but excellent match—its coriander and citrus notes create a refreshing contrast to the cookies’ sweetness. If you prefer something darker, a honey ale (like a seasonal mead-style beer) enhances the caramelized flavors in the cookies.
For a classic option, try a light lager like Peroni or Corona—its crispness cleanses the palate between bites. 🍺
Coffee or Tea
If you’re not a wine or beer drinker, a strong espresso or dark roast coffee works wonderfully with these cookies. The bitterness in the coffee balances the sweetness, creating a perfect harmony.
For a non-caffeinated option, try Earl Grey tea—its bergamot notes add a sophisticated twist to the pairing. Serve the tea or coffee slightly warm to enhance the flavors.
Seasonal Variations
In summer, swap to a sparkling rosé or Prosecco—the bubbles and light fruitiness make for a refreshing pairing. For winter, a Port wine or dessert wine like Sauternes complements the warm spices in the cookies.
If you’re serving these cookies during the holidays, a mulled wine with cinnamon and cloves enhances the festive flavors. The key is matching the wine’s sweetness and body to the cookies’ texture and richness.
Nutrition facts
Frequently asked questions
Why do I need to chill the dough for 2 hours?
Chilling prevents cookies from spreading too much during baking, giving them a thicker shape with crisp edges. The cold dough also allows flour to hydrate properly, resulting in chewier centers. Skipping this step often leads to flat, cake-like cookies instead of the perfect texture you want!
Can I bake all 40 cookies at once?
No—baking in batches of 10-12 cookies per sheet is key. Overcrowding causes uneven cooking: edges burn while centers stay doughy. Rotate pans halfway through for even browning. This method ensures all 40 cookies bake perfectly without compromising quality.
What if my oven runs hot or cold?
Test your oven first: bake a single cookie at 350°F for 10 minutes. If it browns too fast, reduce heat to 325°F. If undercooked, increase to 375°F. Adjust baking time by 1-2 minutes per batch. An oven thermometer is your best friend for accuracy!
How do I store 40 freshly baked cookies?
Let cookies cool completely on the pan, then transfer to an airtight container with parchment between layers. They stay fresh for 5 days at room temperature or 3 months in the freezer. For maximum crispness, freeze unbaked dough balls and bake fresh as needed.
Can I make these gluten-free?
Yes! Replace all-purpose flour with a 1:1 gluten-free blend (like Bob’s Red Mill) and add ½ tsp xanthan gum if not included. Expect slightly denser cookies—chill dough longer (3 hours) and bake 1-2 minutes longer at 350°F. Test with a small batch first!

- 3lb Prime Rib Roast Recipe: Juicy Pink Center Guaranteed in 3 Hours - October 31, 2026
- 5 Spice Cake Recipe: Warmly Spiced Layers With Crunchy Top - October 31, 2026
- 1950’s Macaroni and Cheese Recipe: Nostalgic Creamy Cheese Sauce with Buttery Noodles - October 31, 2026