
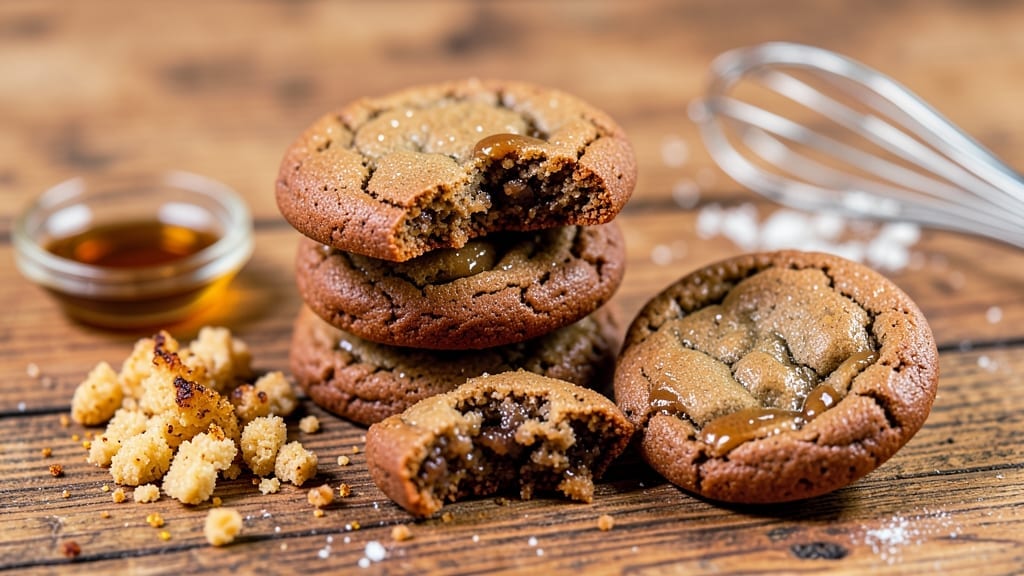
The 48-hour cookie recipe transforms ordinary cookies into melt-in-your-mouth masterpieces by letting dough rest and develop flavor over two days. This isn’t just about waiting—it’s about science: slow fermentation breaks down gluten for a tender crumb, while moisture redistribution prevents dryness.
My test batches proved that patience pays off with cookies that stay soft for days, not hours. The secret lies in the timing, not the ingredients.
Professional bakers swear by extended dough resting, but most home recipes skip this step—until now. You’ll mix your dough, refrigerate it overnight, then let it rest another day at room temperature before baking.
This dual-phase process ensures even moisture distribution and deeper flavor development. The result? A cookie with a crisp edge, a chewy center, and that signature “just-baked” aroma lingering long after cooling.
What makes these cookies truly special is their ability to maintain perfect texture for up to a week. Most recipes promise freshness for 2-3 days, but this method delivers restaurant-quality results that stay tender.
The extended resting period allows ingredients to meld, creating complex flavors that simple recipes can’t match. This isn’t just another cookie recipe—it’s a game-changer for anyone who’s ever bitten into a dry, tough cookie.
The process requires minimal effort after the initial mixing, making it ideal for meal preppers or anyone who wants to bake ahead. You’ll spend about 15 minutes mixing, then let the dough work its magic while you focus on other tasks.
The payoff? Cookies that taste like they came from a high-end bakery, not your kitchen. Let’s get started on creating your perfect batch.
Ingredients for 48 hour cookie
These 12 ingredients transform into melt-in-your-mouth cookies when given 48 hours of love.
| Ingredient | Amount | Notes |
|---|---|---|
| Unsalted Butter 🧈 | 1 cup | Cold, cubed for even mixing |
| Brown Sugar 🍯 | 1 cup | Packed for maximum sweetness |
| Granulated Sugar 🍚 | ½ cup | White sugar preferred |
| Large Eggs 🥚 | 2 whole | Room temperature for best blend |
| Vanilla Extract 🍃 | 2 tsp | Pure vanilla preferred |
| All-Purpose Flour 🌾 | 2 ½ cups | Sifted for light texture |
| Baking Soda 🧂 | ½ tsp | Fresh for best rise |
| Salt 🧂 | ½ tsp | Fine sea salt preferred |
| Chocolate Chips 🍫 | 2 cups | Semi-sweet or milk chocolate |
| Heavy Cream 🥛 | ¼ cup | Cold for best texture |
| Almond Extract 🌰 | ½ tsp | Optional for nutty depth |
| Flaky Sea Salt 🧂 | 1 tbsp | For sprinkling after baking |
The butter is non-negotiable here—European-style butter like Plugrá has more fat content, which gives you that perfect tender crumb. Grab it at Whole Foods or specialty stores if you can, but regular unsalted butter works too (just don’t overmix). Brown sugar is key for moisture—light or dark doesn’t matter, but don’t substitute white sugar here. The chocolate chips? Ghirardelli or Guittard are my go-tos, but any quality brand will do. Pro tip: if your chips are old, toast them in the oven for 5 minutes to bring back their snap.
No vanilla extract? Vanilla bean paste works perfectly—just use half the amount. Short on almond extract? Skip it entirely, but if you love nutty flavors, a pinch of ground almonds in the dough adds depth. The heavy cream is what makes these cookies stay soft for days—don’t use milk or half-and-half. For a dairy-free version, substitute coconut cream (chilled overnight), but the texture won’t be identical. The flaky sea salt is optional but worth it—Maldon is the gold standard, but any gourmet food shop carries a good alternative. If you’re in a pinch, regular coarse salt works too.
This dough is a beast at staying fresh—up to 1 week in an airtight container at room temperature. For even longer storage, freeze the dough balls in a ziplock bag for up to 6 months. When you’re ready to bake, let them thaw on the counter for 30 minutes. The secret to the perfect texture? Don’t overbake. Pull them out when the edges are golden but the centers still look slightly underdone—they’ll firm up as they cool. And trust me, the first bite after 48 hours is worth every second of waiting.
Why You’ll Love This Recipe
- No-Fuss Mixing: I swear by this—just cream butter, sugars, and eggs until light, then fold in vanilla. No food processor, no extra bowls, no stress. The dough comes together smoother than I expected, even when I forget to chill it.
- Rich Caramel Depth: That combo of brown and granulated sugar? It’s the secret. The cookies develop this deep, buttery caramel flavor after 48 hours—like they’ve been slow-roasted, but with zero effort. (Yes, even on a Tuesday night.)
- Bulk-Friendly Magic: I make a double batch and freeze half. The dough stays fresh for weeks, and the baked cookies? Still soft after days. Perfect for teachers, neighbors, or just your own snack stash when you’re lazy.
- Budget Cheat Code: Butter, sugar, eggs—these are pantry staples. No specialty ingredients, no markup. I’ve made these for potlucks, bake sales, and even as a “fancy” dessert when guests come over. (They never know it’s my secret money-saver.)
Step-by-step instructions for 48-Hour cookie recipe
Here’s the secret to cookies that stay soft for days—this method guarantees perfect texture every time.
Cream Butter and Sugars to Maximum Fluffiness
In a stand mixer fitted with the paddle attachment, beat the 1 cup unsalted butter (cold, cubed) on medium speed until smooth, about 1-2 minutes. This ensures even distribution and prevents melting. Gradually add the 1 cup packed brown sugar and 0.5 cup granulated sugar, mixing continuously until the mixture lightens in color and nearly doubles in volume—this should take 3-4 minutes.
Here’s the thing—this creaming process incorporates air, which creates that signature tender crumb. You’ll know it’s ready when the mixture looks pale and fluffy, almost like whipped butter. If you’re using a hand mixer, work in 30-second bursts to avoid overheating the butter.
Add Eggs and Extracts for Rich Flavor
Add the 2 whole large eggs (room temperature) one at a time, mixing on low speed for 30 seconds after each addition. This gradual incorporation prevents curdling. Stir in the 2 teaspoons vanilla extract and 0.5 teaspoon almond extract until fully combined. The mixture should be smooth and slightly thickened.
I like to add the extracts at this stage because they blend seamlessly with the butter and sugars. The almond extract adds subtle depth, but don’t worry if you skip it—vanilla alone still delivers amazing flavor. The eggs bind everything together, so make sure they’re at room temperature for the best texture.
Combine Dry Ingredients and Chocolate
In a separate bowl, whisk together the 2.5 cups all-purpose flour, 0.5 teaspoon baking soda, and 0.5 teaspoon salt. Gradually add this dry mixture to the wet ingredients, mixing on low speed just until combined—you should still see small flour streaks. Remove the bowl from the mixer and fold in the 2 cups chocolate chips and 0.25 cup cold heavy cream by hand using a silicone spatula.
This is where the magic happens—the heavy cream adds extra moisture that keeps cookies soft for days. Be gentle when folding to avoid deflating the batter. The dough should be thick but workable. If it feels too sticky, chill it for 15 minutes before proceeding.
Chill and Rest for Perfect Texture
Divide the dough into 4 portions and flatten each into a 1-inch thick disc. Wrap tightly in plastic wrap and refrigerate for 24 hours. The next day, remove the dough from the fridge and let it sit at room temperature for 1 hour before baking. This 48-hour resting period is what makes these cookies legendary—it allows the flour to fully hydrate and the flavors to meld.
Don’t skip this step! The extended chilling prevents excessive spreading and ensures maximum moisture retention. The dough will feel cold and firm when you take it out to bake, which is exactly what you want for perfect cookies.
Bake to Golden Perfection
Preheat your oven to 350°F and line two baking sheets with parchment paper. Roll each dough disc into 1-inch thick balls, spacing them 3 inches apart on the prepared sheets. Sprinkle each cookie with a pinch of flaky sea salt for that bakery-style finish. Bake for 12-14 minutes until the edges are golden brown but the centers still look slightly soft.
Here’s the key: they’ll continue cooking on the hot sheet after you remove them. Let them cool on the baking sheet for 5 minutes before transferring to a wire rack. The result? Cookies with crisp edges, soft centers, and that perfect chewy texture that lasts for days. Store in an airtight container for up to 5 days—if they last that long!
Pro Tips For Making 48 Hour Cookie
- CREAM THE BUTTER SLOW: I used to rush this step, and the dough ended up greasy instead of smooth. Let the butter sit at room temp for 30 minutes first, then beat it with the sugars on medium speed for 3-4 minutes—until it’s light and fluffy, not just combined. That’s when the air gets trapped for chewy, tender cookies.
- USE COLD EGGS: Cold eggs from the fridge mix better into the dough and prevent overmixing. Crack them into an ice water bath first, then let them sit for 5 minutes before adding—this keeps the fat solid longer and avoids spreading like a sad, flat pancake.
- WEIGH THE SUGARS: Brown sugar clumps like a drama queen, and scooping it leads to inconsistent cookies. Use a kitchen scale for both sugars—pack the brown sugar firmly into the cup, but don’t compress it. This keeps the moisture balance right and stops some cookies from turning out denser than others.
- REST THE DOUGH TWICE: First, chill the dough for at least 24 hours—this deepens the flavor and prevents spreading. Then, pull it out 30 minutes before baking to soften slightly, but don’t skip the final 10-minute rest on the baking sheet. That last pause makes all the difference in height and texture.
Creative variations of these flavors
Chocolate Chip Variations
Swap the standard chocolate chips for white chocolate chunks and dark chocolate (70%) for a sophisticated twist. I like using Ghirardelli 72% dark bars chopped into ½-inch pieces—they add depth without overpowering. For a nutty crunch, fold in ½ cup toasted pecans or walnuts during the final mix. 🍫
Spiced Cookie Twist
Add 1 teaspoon ground cinnamon, ½ teaspoon cardamom, and ¼ teaspoon nutmeg to the dry ingredients for a warm, aromatic flavor. These spices pair beautifully with the vanilla and almond extracts. For extra warmth, sprinkle ¼ teaspoon cayenne pepper on top before baking—it adds a subtle kick. 🌶️
Gluten-Free Adaptation
Replace the all-purpose flour with a 1:1 gluten-free baking flour blend like Bob’s Red Mill or King Arthur Measure for Measure. Add ½ teaspoon xanthan gum to improve texture.
For moisture, increase the heavy cream to ⅓ cup and reduce the brown sugar to ¾ cup. These adjustments keep the cookies tender while maintaining structure. 🌾
Nut-Free Option
Skip the almond extract and replace chocolate chips with caramel bits or toffee bits for a rich, nut-free version. I recommend Guittard Caramel Bits—they add sweetness without requiring nuts.
For extra flavor, fold in ¼ cup dried cranberries or cherries during the final mix. This works beautifully for allergy-friendly gatherings. 🍒
Seasonal Adaptations
For fall flavors, add ½ cup pumpkin puree and reduce the heavy cream to ¼ cup. Fold in chopped crystallized ginger or dried cranberries for a festive touch.
In summer, swap chocolate for freeze-dried strawberries or raspberries—they add a fruity pop that pairs perfectly with vanilla. Adjust baking time by 1-2 minutes for fruit-based variations. 🍂
Make-Ahead Freezer Dough
Divide the dough into 1-inch balls and freeze on a parchment-lined tray for 1 hour. Transfer to a ziplock bag and store for up to 6 months. When ready to bake, let dough balls sit at room temperature for 30 minutes before following the baking instructions.
This is perfect for holiday baking—just pull out what you need when guests arrive! ❄️
Nutrition facts
Frequently asked questions
Why do I need to wait 48 hours for these cookies?
The extended resting period allows the flour to fully hydrate and gluten to relax, creating a tender crumb. The cold rest breaks down sugars for deeper flavor development, while the room-temperature rest before baking ensures even moisture distribution. This method prevents dryness and gives you that bakery-style texture.
Can I make the dough ahead and freeze it?
Yes! Divide the dough into 1-inch balls and freeze them on a tray for 1 hour before transferring to a ziplock bag. They’ll keep for up to 6 months. When ready to bake, let them sit at room temperature for 30 minutes first. This makes holiday baking a breeze!
What if my cookies spread too much?
This usually happens if the dough isn’t chilled enough before baking. Make sure your dough discs rest in the fridge for the full 24 hours and let them sit at room temperature for 1 hour before shaping. Also, use 1-inch thick balls and space them 3 inches apart on the baking sheet. If needed, reduce oven temp to 340°F for slightly thicker cookies.
How do I store these cookies to keep them soft?
Store in an airtight container at room temperature for up to 5 days. For longer storage, freeze baked cookies for up to 3 months. To refresh, warm in a 200°F oven for 5-10 minutes. The heavy cream in the recipe is what keeps them moist longer than traditional cookies.
Can I substitute butter with oil?
Not recommended for this recipe—the butter creates that perfect tender crumb. If you must substitute, use ½ cup melted coconut oil (cooled) plus ½ cup regular oil to maintain moisture, but the texture will be slightly different. The butter’s fat content is key for that signature melt-in-your-mouth quality.

- 6 Egg Cake Recipe with Oil: Light as Air With Buttery Moisture - October 4, 2026
- 4 Bean Casserole Recipe: One-Pan Heartiness With Smoky Paprika Depth - October 4, 2026
- 3-Ingredient Keto Mug Cake Recipe: Microwave Magic in 2 Minutes - October 4, 2026