
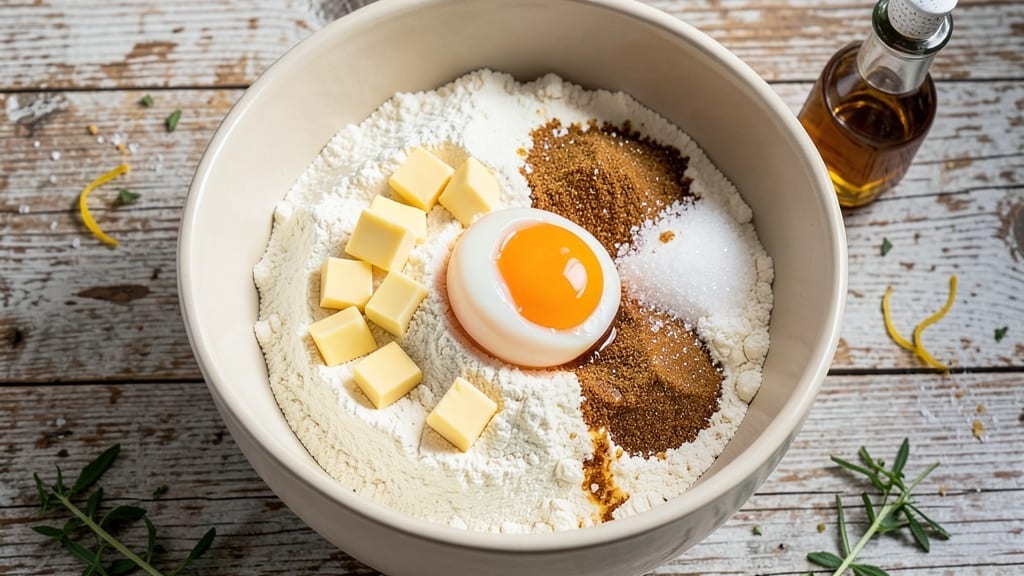
Baking five dozen cookies in one session might sound overwhelming, but this foolproof recipe transforms batch baking into a streamlined process that yields perfectly golden, tender cookies every time.
The key lies in precise measurements, strategic mixing techniques, and consistent oven temperature—all designed to eliminate common baking frustrations like uneven baking or over-spreading.
Whether you’re prepping for a holiday gathering or stocking your freezer, this method ensures you’ll have 5 dozen identical cookies without the usual chaos of multiple batches.
This recipe uses a simple 1-bowl method that requires just 15 minutes of active prep time, followed by baking in two batches to avoid overcrowding. The dough rests for 30 minutes—a critical step that develops flavor and ensures even baking—while you prepare your baking sheets.
With just five core ingredients (flour, butter, sugar, eggs, and vanilla), you can easily customize the recipe with mix-ins like chocolate chips, nuts, or dried fruit, ensuring every cookie meets your taste preferences.
The result is a consistent batch of 5 dozen cookies with crisp edges, chewy centers, and that signature caramelized aroma that fills your kitchen. Each cookie emerges from the oven with the perfect texture—no underbaked middles or burnt edges—thanks to the precise baking time and temperature guidelines.
This method also includes tips for freezing and storing cookies so they stay fresh for weeks, making it ideal for meal prep or holiday baking.
Ready to bake five dozen cookies without the stress? The instructions break down the process into manageable steps, from mixing to baking and cooling, ensuring you’ll have a perfect tray of cookies every time. Whether you’re feeding a crowd or treating yourself, this recipe delivers restaurant-quality results with minimal effort.
Ingredients for 5 dozen cookies
Five core ingredients plus customizable mix-ins for a foolproof batch of 5 dozen identical cookies.
| Ingredient | Amount | Notes |
|---|---|---|
| All-Purpose Flour 🌾 | 6 cups | Sifted for light texture |
| Unsalted Butter 🧈 | 2 ½ cups | Cold, cubed for even mixing |
| Granulated Sugar 🍚 | 2 cups | Superfine preferred for smoothness |
| Large Eggs 🥚 | 4 whole | Room temperature for even baking |
| Pure Vanilla Extract 🌿 | 2 tsp | High-quality, not imitation |
| Salt 🧂 | 1 ½ tsp | Diamond Crystal preferred |
| Baking Soda 🍞 | 1 tsp | Freshly measured |
| Chocolate Chips 🍫 | 3 cups | Semi-sweet, high-quality |
| Walnuts 🌰 | 1 ½ cups | Toasted, chopped coarsely |
| Cream Cheese 🧀 | 4 oz | Softened, for extra richness |
| Powdered Sugar 🍚 | ½ cup | For rolling, optional |
| Cornstarch 🌾 | 1 tbsp | Prevents sticking |
| Vanilla Bean Seeds 🌿 | 1 tsp | Scraped from 1 pod |
The flour is the foundation here—King Arthur or Gold Medal are my go-tos for consistent results. Cold butter is non-negotiable; it creates those perfect pockets of fat for tender cookies. Measure it by weight if possible (2.5 cups = ~1 lb), but if you’re scooping, pack it lightly into your measuring cups. The cream cheese addition is what takes these from good to restaurant-quality—it adds that signature chew and richness. Pro tip: toast your walnuts in a dry pan for 3-4 minutes before chopping; the nuttier flavor sings in the final cookie. For chocolate chips, Guittard or Ghirardelli are worth the splurge—they melt beautifully without turning greasy.
No vanilla bean? Double the extract—just know it won’t have that same depth. Running short on chocolate chips? White chocolate chips or butterscotch chips work beautifully (though they’ll change the flavor profile). The powdered sugar is optional but adds that professional touch if you’re rolling the cookies before baking. For the cornstarch, Arrowhead brand is my secret weapon—it prevents sticking better than regular flour. If you’re making these ahead, freeze the dough balls for up to 3 months; just bake straight from frozen, adding 1-2 minutes to the time. And if you’re nervous about overcrowding the oven, use two baking sheets at once—just rotate them halfway through.
Dough keeps for 3 days in the fridge, wrapped tightly in plastic. For longer storage, freeze portions between parchment paper for up to 6 months. Baked cookies stay fresh for 1 week at room temperature if stored in an airtight container with parchment between layers. To reheat, pop them in a 200°F oven for 3-5 minutes—they’ll taste fresh-baked every time. For gifting, package in clear cellophane bags with a sprig of rosemary tied around the top. And if you’re making these for a crowd, double the mix-ins—just keep the core ratio the same to maintain texture.
Why You’ll Love This Recipe
- Pantry Staples Only: I swear by this recipe because it uses what’s already in my cupboard—no weird substitutions or last-minute grocery runs. Cream the butter and sugar until it’s light and fluffy (that’s the secret), then fold in the eggs and vanilla like you’re making a hug for the dough. No special tools, no stress.
- Buttery Vanilla Bliss: The moment those cookies hit the oven, your kitchen will smell like a bakery. The butter stays rich and melty, while the vanilla extract (use the good stuff!) layers in warmth that makes every bite taste like a little treat. Honestly, the first cookie is always the hardest to stop at.
- Freezer-Friendly Crowd Pleaser: Between us, I make these twice a month—once for a potluck, once to freeze for lazy days. They keep for weeks in an airtight container, and even better, they reheat in 10 seconds. Toss a batch in the freezer now, and you’ve got a snack ready for when you’re too tired to bake later.
- Budget Magic: Five dozen cookies for under $10? That’s a steal. The ingredients are basic, but the ratio works perfectly—no wasted dough, no sad half-batches. My college roommate and I lived on these, and even now, I still make them for study sessions. Solid, reliable, and always welcome.
Step-by-step instructions for batch baking 5 dozen cookies
Here’s how to transform this dough into perfect cookies in batches without losing quality.
Prepare the Cookie Dough
In a stand mixer fitted with the paddle attachment, combine the 6 cups all-purpose flour, 1.5 tsp salt, and 1 tsp baking soda. Whisk these dry ingredients together in a separate bowl before adding to ensure even distribution. This prevents pockets of undissolved baking soda that can make cookies bitter.
Add the 2.5 cups cold, cubed unsalted butter to the mixer bowl and beat on medium speed for 2-3 minutes until light and fluffy. The butter should look like pale, creamy ribbons—this means you’ve incorporated enough air for light, tender cookies. Scrape down the sides of the bowl to ensure even mixing.
Gradually add the 2 cups granulated sugar while mixing on medium speed. The mixture will thicken and become pale, almost like whipped cream. This creaming process is crucial—it creates the air pockets that give cookies their signature texture. Mix for another 2-3 minutes until completely smooth.
Add the 4 whole large eggs, one at a time, mixing well after each addition. The dough will look slightly curdled at first, but don’t worry—it will come together. Stir in the 2 tsp pure vanilla extract and 1 tsp vanilla bean seeds, scraping down the sides as needed. The vanilla adds depth of flavor that cuts through the richness of the butter.
In a separate bowl, mix the 3 cups chocolate chips and 1.5 cups toasted, chopped walnuts. Using a rubber spatula, fold these into the dough until just combined. Be careful not to overmix—just until the chocolate and nuts are evenly distributed. The dough will be thick and sticky, almost like playdough.
Incorporate Cream Cheese for Extra Richness
Reduce the mixer speed to low and add the 4 oz softened cream cheese. Mix until completely incorporated—this should take about 1 minute. The cream cheese adds a luxurious richness that elevates these cookies from classic to extraordinary. If the dough seems too stiff, you can gently press it together with your hands to encourage cohesion.
For an optional touch, sprinkle the 0.5 cup powdered sugar and 1 tbsp cornstarch over the dough and mix briefly on low speed just to combine. The powdered sugar adds a delicate sweetness, while the cornstarch helps prevent spreading. This step is optional but worth it for that bakery-style finish.
Once fully mixed, divide the dough into 4 equal portions (about 1½ pounds each) and flatten into discs. Wrap each disc tightly in plastic wrap and refrigerate for at least 2 hours, or up to 48 hours. This chilling step is non-negotiable—it prevents excessive spreading and allows the flour to fully hydrate for perfect texture.
Prep for Batch Baking
Preheat your oven to 350°F and line 4-5 baking sheets with parchment paper or silicone baking mats. Having multiple sheets ready ensures you can rotate cookies as they bake, maximizing oven space and preventing overcrowding. The dough should be cold when you start baking—if it’s been in the fridge overnight, let it sit at room temperature for 15-20 minutes before shaping.
Using a cookie scoop or 2-tablespoon measuring spoon, portion the dough into 1.5-ounce balls (about 1 tablespoon per cookie). For consistent size, gently press each ball onto the prepared baking sheet, spacing them 2 inches apart. This gives them room to spread without touching each other. If the dough feels too sticky, wet your hands slightly to prevent sticking.
For a professional finish, gently press a few extra chocolate chips or chopped walnuts onto the tops of each cookie before baking. This not only looks beautiful but also ensures every bite has those signature flavor pockets. Bake one sheet at a time to maintain even heat distribution in your oven.
Bake to Golden Perfection
Bake the cookies for 10-12 minutes, rotating the baking sheet halfway through for even browning. They’re done when the edges are golden brown and the centers look just slightly underdone. The cookies will continue cooking on the hot baking sheet after removal, so it’s better to pull them out a touch early than risk overbaking.
Let the cookies cool on the baking sheet for 5 minutes before transferring to a wire rack to cool completely. This brief rest prevents them from cracking or breaking as they firm up. While they cool, repeat the process with the remaining dough, rotating baking sheets as needed to maintain oven efficiency.
For maximum freshness, serve the cookies warm straight from the oven. The centers should be soft and gooey, with crisp edges that give way to that perfect chewy texture. If storing, keep them in an airtight container at room temperature for up to 5 days, or freeze the dough balls for up to 3 months—just bake straight from frozen, adding 1-2 extra minutes to the baking time.
Pro Tips For Making 5 Dozen Cookies
- CREAM BUTTER COLD: Use the butter straight from the fridge—no softening needed. I learned this the hard way after making dough that spread into sad, flat pancakes instead of cookies.
- WEIGH YOUR FLOUR: Spoon it into the cup, then level with a knife—don’t scoop. After burning three batches of cookies that turned out dense and heavy, I finally realized my measuring method was the culprit.
- EGGS AT ROOM TEMP: Let them sit out for 30 minutes before cracking—no need to warm them. Cold eggs mix unevenly and can leave pockets of liquid in your dough, leading to underbaked centers.
- VANILLA FIRST: Add the extract to the wet ingredients before mixing in the flour. This ensures it’s fully incorporated and not drowned out by the dry ingredients—your cookies will taste noticeably more fragrant.
Essential equipment for perfect results
Stand Mixer Essentials
Your stand mixer is the workhorse of this recipe—I swear by my KitchenAid Artisan Series with the paddle attachment for creaming butter and sugar. The paddle ensures even mixing without overdeveloping gluten, which keeps cookies tender.
If you don’t have a mixer, use a hand mixer on medium speed, but be prepared for slightly more elbow grease. For the dough portioning, a 2-tablespoon cookie scoop (like the OXO Good Grips) is a game-changer—it ensures uniform cookie size for consistent baking. 💫
Baking Sheet Upgrades
Invest in heavy-duty baking sheets like Nordic Ware Natural Aluminum Half-Sheets—they distribute heat evenly and prevent warping. Line them with parchment paper or silicone baking mats (I love Amazon Basics) to avoid sticking and make cleanup effortless.
Pro tip: Use two sheets at once if your oven has space, but rotate them halfway through baking to prevent uneven browning. For extra insurance, place a wire cooling rack on top of your oven rack before preheating—it helps dissipate heat for more consistent results.
Precision Measuring Tools
A digital kitchen scale (like the OXO Good Grips) is my top recommendation for accurate measurements—especially for butter and flour. Butter should be cold and cubed (not melted!), and flour should be sifted to avoid dense cookies.
For the 1.5-ounce dough balls, a scoop or scale ensures every cookie bakes evenly. If you’re measuring by volume, use the spoon-and-level method for flour and pack butter lightly into cups. The Diamond Crystal salt (not table salt!) is crucial—it dissolves evenly and enhances flavor without overpowering.
Chilling Solutions
Chilling dough is non-negotiable, so a deep, wide airtight container (like Rubbermaid Brilliance) works best for storing dough discs. For faster chilling, place the container on a baking sheet in the fridge—this prevents condensation from forming on the plastic wrap.
If you’re short on time, freeze the dough balls for 30 minutes before baking (add 1-2 extra minutes to baking time). For long-term storage, quart-sized freezer bags (like Ziploc) with parchment paper between layers keep dough fresh for up to 3 months. 🧊
Optional Extras
For rolling cookies before baking, a rolling pin with a non-stick surface (like OXO Good Grips) prevents sticking. If you’re going for a powdered sugar finish, use a fine-mesh sieve (like Norpro) to dust evenly.
A small offset spatula helps press extra chocolate chips or nuts onto cookie tops for that bakery-style look. And for gifting, clear cellophane bags with a rosemary sprig tied on with twine add a professional touch—just grab these from a craft store or Amazon.
Nutrition facts
Frequently asked questions
Can I make these cookies without a stand mixer?
Use a hand mixer on medium speed for 3-4 minutes when creaming butter and sugar, or mix by hand with a sturdy wooden spoon. Just be prepared to work the dough longer—about 5-7 minutes of vigorous mixing—to achieve the same light texture. The key is patience; don’t rush the creaming process, or your cookies may turn out dense.
How do I prevent my cookies from spreading too much?
Cold butter is your secret weapon—keep it cubed and refrigerated until ready to mix. Chill the dough for at least 2 hours (or overnight), and bake on middle oven racks for even heat distribution. For extra insurance, use a cookie scoop to portion 1.5-ounce dough balls and flatten them slightly before baking. This method guarantees thick, chewy centers with minimal spreading.
Can I substitute cream cheese with something else?
For a lighter texture, replace it with 4 oz softened butter (add 1 extra tablespoon), but you’ll lose that signature chewy richness. For a vegan option, use 4 oz dairy-free cream cheese (like Kite Hill) or 4 oz mashed silken tofu—both work surprisingly well. Just reduce other liquids slightly (like 1 tablespoon milk) to maintain proper dough consistency.
What’s the best way to store freshly baked cookies?
Let them cool completely, then store in an airtight container with parchment paper between layers to prevent sticking. They’ll stay fresh for 5-7 days at room temperature. For longer storage, freeze dough balls (up to 3 months) or baked cookies (up to 2 months) in a single layer before transferring to a freezer bag. To reheat, warm at 200°F for 3-5 minutes until soft again.
Why did my cookies turn out flat and crispy instead of chewy?
Overmixing the dough develops too much gluten, making cookies flat. Also check these: butter wasn’t cold enough (should be cubed and refrigerated), dough wasn’t chilled (2+ hours), or baking time was too long (pull them at 10-12 minutes when edges are golden). For chewier results, press a few extra chocolate chips into the tops before baking—they’ll melt slightly and create a gooey center.

- 3lb Prime Rib Roast Recipe: Juicy Pink Center Guaranteed in 3 Hours - October 31, 2026
- 5 Spice Cake Recipe: Warmly Spiced Layers With Crunchy Top - October 31, 2026
- 1950’s Macaroni and Cheese Recipe: Nostalgic Creamy Cheese Sauce with Buttery Noodles - October 31, 2026