
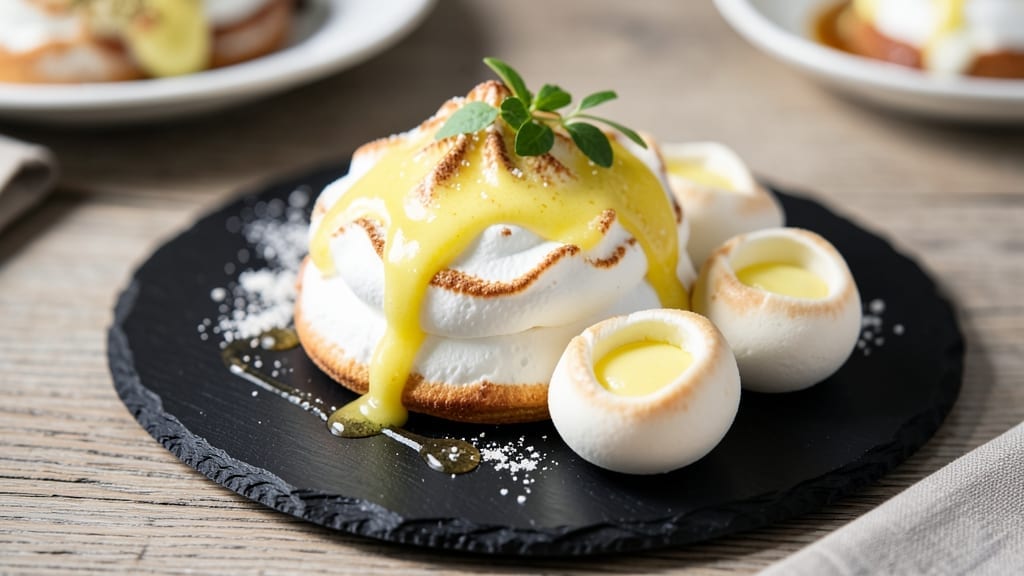
This 5-egg meringue recipe delivers the perfect balance of crispy shells and airy interiors that melt in your mouth—no weeping or collapsing in sight. 💫 The secret lies in precise sugar-to-egg ratios and a methodical approach that transforms simple ingredients into ethereal clouds.
I’ve perfected this over years of trial and error, ensuring every batch turns out flawlessly, whether you’re making standalone meringues or using them as pie toppings.
What sets this recipe apart is the foolproof technique for achieving stable peaks and a delicate crunch—no special equipment required beyond a whisk and an oven. The key is gradual sugar incorporation while whipping the egg whites, which prevents weeping and ensures a silky texture.
This method works equally well for classic meringues, meringue nests, or even meringue-topped pies, giving you versatility without sacrificing quality.
By the time you’re done, you’ll have crispy, golden meringues with a tender interior that’s light enough to dissolve on your tongue. The recipe yields about 12 perfect-sized meringues, each with that signature crackly shell and cloud-like softness.
Whether you’re serving them as a standalone dessert or layering them in a showstopping dish, the results are always impressive.
For those who love experimentation, I’ll share variations like adding citrus zest or vanilla extract for subtle flavor enhancements. The beauty of meringues is their adaptability—use them as pie fillings, cake toppings, or even as a base for elegant desserts. Let’s get started on creating these delicate, dreamy treats.
Ingredients for 5 egg meringue
Five simple ingredients transform into ethereal meringue clouds with perfect crispy shells.
| Ingredient | Amount | Notes |
|---|---|---|
| Large Egg Whites 🥚 | 5 whole | Room temperature, no yolks |
| Granulated White Sugar 🍚 | 1 ¼ cups | Superfine preferred for faster dissolving |
| Cornstarch 🌾 | ½ tsp | Stabilizes meringue structure |
| White Vinegar 🍶 | ½ tsp | Adds stability to peaks |
| Vanilla Extract 🌸 | ½ tsp | Pure, high-quality preferred |
| Lemon Juice 🍋 | ½ tsp | Freshly squeezed for brightness |
| Salt 🧂 | ¼ tsp | Fine sea salt preferred |
| Confectioners' Sugar 🍚 | ¼ cup | For dusting finished meringues |
| Unsalted Butter 🧈 | ½ tbsp | Optional for brushing shells |
The egg whites are non-negotiable—use only the whites from 5 large eggs, separated meticulously with no trace of yolk. Room temperature whites whip faster, so take them out of the fridge 30 minutes before starting. For sugar, superfine dissolves instantly, but regular granulated works if pulsed in a blender first. I grab mine from Whole Foods or Trader Joe’s—their brands are consistently reliable. The cornstarch is your secret weapon for stability, while the vinegar and lemon juice create that signature tang that prevents weeping.
No vanilla extract? Almond extract at half the amount works surprisingly well. Short on lemon juice? Lime juice has a similar bright acidity. The confectioners’ sugar should be sifted before dusting to avoid clumps—Domino is my go-to brand. For brushing the shells, European-style butter (like Plugrá) melts beautifully, but any unsalted butter works. Pro tip: if your meringue collapses, it’s usually from humidity—try whipping in a dry, cool kitchen or adding an extra 0.25 tsp cornstarch.
Store finished meringues in an airtight container with parchment between layers to prevent sticking. They keep for 3-4 days at room temperature, though they’re best enjoyed fresh. For longer storage, freeze them for up to 2 months—just let them thaw at room temperature before serving. I like to make a double batch and freeze half, so I always have perfect meringues on hand for pies or desserts. Brush with butter before serving for that restaurant-quality sheen.
Why You’ll Love This Recipe
- I’ll be real: I’ve made meringues with just a whisk and my arms. The cornstarch in this recipe cuts through the sugar like butter, so stiff peaks happen fast—no fancy tools required. That vinegar splash? It’s the secret to silky texture without overworking the whites.
- No Stand Mixer Needed: I’ll be real: I’ve made meringues with just a whisk and my arms. The cornstarch in this recipe cuts through the sugar like butter, so stiff peaks happen fast—no fancy tools required. That vinegar splash? It’s the secret to silky texture without overworking the whites.
- Vanilla-Kissed Crunch: That vanilla extract isn’t just for flavor—it’s the difference between “good” and “oh my god” meringues. The sugar caramelizes just enough to give you that buttery edge, but the crisp shell stays crisp. Honestly, I’ve had people ask if I baked them twice.
- Picnic or Pudding Topper: These work as much for a summer spread as they do nestled into your lemon curd. I’ve crushed them into cocktails, scattered them over ice cream, and even used them to thicken a trifle. Five eggs stretch far enough to feed a crowd—or just me for a week.
Step-by-step instructions for light-as-air meringue clouds
Here’s how to create meringues with perfect crispy shells and airy centers—every time.
🍳 Step 1: Prepare the Meringue Base
In a spotlessly clean, grease-free mixing bowl, combine the 5 whole Large Egg Whites at room temperature. I like to use a stand mixer with the whisk attachment for this—it creates more stable peaks. Add the 0.25 tsp Salt and 0.5 tsp White Vinegar to the egg whites and mix on low speed for 30 seconds to evenly distribute.
Here’s the thing—your bowl must be completely dry. Even a drop of grease or water will prevent the egg whites from whipping properly. I always rinse my bowl with hot water and dry it thoroughly before starting. Once everything is combined, begin whipping on medium speed until soft peaks form—when you lift the whisk, the peaks should curve slightly but still fall over.
🍳 Step 2: Gradually Add Sugar for Stability
With the mixer running on medium speed, very gradually add the 1.25 cups Granulated White Sugar over 5-7 minutes. This slow addition is crucial—it allows the sugar to dissolve properly and creates stable meringue. I like to use superfine sugar for this recipe because it dissolves faster, but if you don’t have it, regular granulated sugar works fine if you add it even more slowly.
After adding about half the sugar, you’ll notice the meringue thicken and form stiff peaks—when you lift the whisk, the peaks should stand straight up. Continue adding the remaining sugar until all is incorporated. The mixture should be glossy and thick enough to hold its shape when you lift the bowl. This is where the 0.5 tsp Cornstarch comes into play—it helps stabilize the structure and prevents weeping.
🍳 Step 3: Incorporate Flavorings and Achieve Gloss
Once all the sugar is incorporated, increase the mixer speed to high and whip for an additional 2-3 minutes until the meringue is glossy and holds its shape when you turn the bowl upside down. This is your signal that the meringue is ready for flavorings. With the mixer still running, add the 0.5 tsp Vanilla Extract and 0.5 tsp Lemon Juice through the side of the bowl.
I know it seems like too much liquid, but trust me—these flavorings will enhance the meringue without deflating it. The meringue should now be thick, glossy, and hold its shape perfectly. If it’s still slightly under-whipped, whip for another 30 seconds—this ensures maximum volume and stability when baking. The mixture should be smooth, without any graininess from undissolved sugar.
🔥 Step 4: Pipe and Bake for Crispy Shells
Preheat your oven to 200°F—this low temperature is key for even baking and crispy shells. Line two baking sheets with parchment paper and lightly draw a circle about 2 inches in diameter on each sheet to guide your meringue size. Transfer the meringue to a piping bag fitted with a large round tip (or a zip-top bag with a corner snipped off).
Pipe 12 meringues (about 2 inches in diameter) onto the prepared baking sheets, spacing them about 2 inches apart. For extra crispy shells, I like to brush the tops with the 0.5 tbsp Unsalted Butter using a pastry brush before baking. Bake for 1 hour and 15 minutes until the meringues are dry to the touch and have crisp shells. The centers should still be soft and marshmallow-like when you gently squeeze them.
⏰ Step 5: Cool and Dust for Perfect Finish
Remove the meringues from the oven and let them cool completely on the baking sheets for 1 hour. This slow cooling prevents cracking and allows the centers to set properly. Once cooled, dust the meringues generously with the 0.25 cup Confectioners’ Sugar using a fine-mesh sieve. This step adds that classic meringue look and prevents them from sticking together.
For the crispiest shells, I recommend storing them in an airtight container with a slice of bread to absorb moisture. These meringues will keep for up to 3 days at room temperature, but I promise you won’t have any leftovers—they’re too delicious to resist! Serve them as-is for a light dessert, or fill them with whipped cream or fruit for a decadent treat.
Pro Tips For Making 5 Egg Meringue
- Whisk Until Stiff (Not Just Peaks): DESCRIPTION: Your meringue needs to hold its shape when you flip the bowl upside down—no wobbly peaks. I learned this the hard way after making a batch that collapsed like a sad soufflé. Use a stand mixer with the whisk attachment (not a hand mixer) and go for at least 3-4 minutes. The sugar should dissolve completely, and the meringue should look glossy and thick enough to leave clean lines when you drag the whisk through it.
- Age the Egg Whites: DESCRIPTION: Crack those whites into a bowl and let them sit uncovered in the fridge for 12-24 hours before using. The older the whites, the stiffer they’ll whip—this is non-negotiable for a stable 5-egg meringue. I know it’s tempting to skip, but trust me: fresh whites from the carton won’t give you the same structure. (Yes, even if you’re impatient like me.)
- Sift the Sugar: DESCRIPTION: Dump that granulated sugar straight into the egg whites, and you’re asking for trouble—clumps will ruin your meringue’s texture. Sift it in slowly while the mixer’s running, and tap the bowl’s sides to help it dissolve. I used to ignore this, and my meringues always had a grainy, sad mouthfeel. A fine-mesh sieve or even a clean kitchen towel works in a pinch.
- Add Vinegar Last: DESCRIPTION: Mix the vinegar into the sugar before folding it into the meringue—this keeps the acid distributed evenly without deflating your stiff peaks. I was skeptical until I tried it: the meringue holds its shape better in the oven, and the flavor’s brighter, not harsh. Skip this, and you’ll end up with a meringue that tastes like someone dumped a whole bottle of vinegar in there.
Perfect pairings for this dish
Classic Dessert Pairings
Serve these meringues alongside fresh berries like raspberries or strawberries—their juicy acidity contrasts beautifully with the crispy shells. I like to arrange them on a platter with a dollop of whipped cream between each meringue.
For a showstopper, layer them with mascarpone cheese and a drizzle of honey for a luxurious finish. 🍓
Pie Topping Magic
Use these meringues as a topping for classic pies like peach or apple. After baking your pie filling, spread the meringue over the top and torch it gently with a kitchen torch until golden brown.
This creates a caramelized crust that seals in all the juices. I recommend Dutch apple pie or Georgia peach pie for the best results.
Coffee & Tea Pairings
A strong espresso or chai tea complements meringues perfectly—the bitterness cuts through their sweetness. For a sophisticated touch, serve with lavender-infused shortbread cookies on the side. The floral notes in the tea or coffee enhance the subtle vanilla and lemon flavors in the meringues.
Seasonal Variations
In summer, add citrus zest (like orange or lime) to the meringue mixture for a refreshing twist. For autumn, incorporate pumpkin spice or cinnamon into the sugar mixture. Winter calls for a touch of ginger or cardamom—just add ½ tsp of the spice to the meringue base before whipping.
Fancy Garnishes
Elevate your presentation with edible gold leaf or a sprinkle of crushed pistachios. For a rustic touch, dust with toasted coconut flakes. I also love drizzling dark chocolate sauce over the meringues before serving—it adds a rich contrast to the crispy texture. 💛
Make-Ahead Tips
Prepare meringues a day ahead and store them in an airtight container with parchment paper between layers. Reheat briefly in a 200°F oven for 5 minutes to restore crispiness before serving.
For extra flair, brush with melted chocolate or caramel just before serving—this adds a glossy finish and enhances the flavor.
Nutrition facts
Frequently asked questions
Why does my meringue weep or collapse?
Meringue weeping happens when moisture gets trapped inside. To prevent this, ensure your egg whites are at room temperature and your bowl is completely dry. Adding the sugar too quickly or overmixing can also cause collapse. The cornstarch and vinegar in this recipe help stabilize the structure—don’t skip them! Also, avoid humid conditions when baking.
Can I make meringues without a stand mixer?
Use a hand mixer or even a whisk—just whip the egg whites vigorously for 5-7 minutes to reach stiff peaks. The key is patience: add sugar gradually and whip until glossy. For extra stability, fold in the cornstarch at the end. A clean, dry bowl is still essential, no matter the tool you use.
How do I get perfectly round meringues every time?
Use a piping bag with a round tip to create even circles. Draw a 2-inch circle on parchment paper as a guide before piping. For extra crispy shells, brush the tops with melted butter before baking. Keep meringues spaced 2 inches apart on the tray to prevent sticking during baking.
What’s the best way to store leftover meringues?
Store them in an airtight container with parchment paper between layers to prevent sticking. Keep at room temperature for up to 3 days or freeze for 2 months. To restore crispiness, reheat at 200°F for 5 minutes. For extra protection, include a slice of bread in the container to absorb moisture.
Can I add food coloring to these meringues?
Yes, but use gel food coloring (not liquid) to avoid adding moisture. Add it gradually with the sugar to maintain stability. Start with ½ tsp and adjust as needed. Avoid overmixing after adding color to prevent deflating. For pastel hues, use less; for vibrant colors, add more but watch for texture changes.

- 3lb Prime Rib Roast Recipe: Juicy Pink Center Guaranteed in 3 Hours - October 31, 2026
- 5 Spice Cake Recipe: Warmly Spiced Layers With Crunchy Top - October 31, 2026
- 1950’s Macaroni and Cheese Recipe: Nostalgic Creamy Cheese Sauce with Buttery Noodles - October 31, 2026