
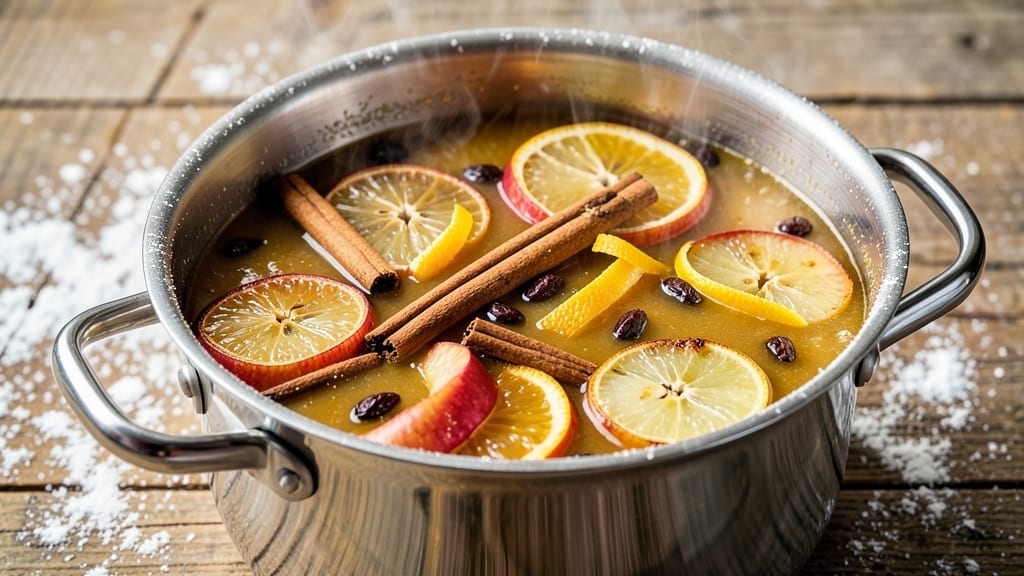
Transforming fresh apples into 5 gallons of rich, slow-simmered apple cider is the perfect way to celebrate fall’s harvest—whether you’re pressing a bushel of your own or using store-bought juice.
This recipe delivers a deeply aromatic, spiced cider that’s ideal for sipping warm or fermenting into hard cider, with a method that’s both traditional and foolproof. The key lies in balancing sweetness, acidity, and spices while ensuring every batch turns out smooth and flavorful.
Start with 20 pounds of apples (a mix of sweet and tart varieties works best) to yield about 5 gallons of juice after pressing. Simmer the juice with cinnamon sticks, cloves, and orange peel to infuse warm, inviting flavors—no need for complicated techniques, just patience and attention to detail.
The slow simmer reduces the juice while concentrating its natural sweetness, creating a base that’s perfect for fermentation or immediate enjoyment.
For those fermenting into hard cider, add 2 pounds of sugar and a fermentation-friendly yeast strain like EC-1118 or US-05 to convert the sugars into alcohol over 7–10 days. Priming with 3/4 cup of corn sugar before bottling ensures a crisp, carbonated finish.
Whether you’re serving it warm with cinnamon sticks or aging it for a bold, dry cider, this recipe guarantees a smooth, well-balanced result every time.
Store-bought bottles can last 3–6 months in a cool, dark place, while homemade cider keeps its freshness for 2–3 weeks in the refrigerator. The possibilities are endless—serve it at gatherings, gift bottles to neighbors, or experiment with additional spices like star anise or cardamom.
Here’s to a crowd-pleasing, seasonal staple that’s as rewarding to make as it is to drink.
Ingredients for 5 gallon apple cider
Five gallons of spiced cider starts with 20 pounds of apples and a handful of aromatic spices—simple ingredients for a crowd-pleasing centerpiece.
| Ingredient | Amount | Notes |
|---|---|---|
| Apples (mix of sweet and tart varieties) 🍎 | 20 lb | Use Honeycrisp, Fuji, Granny Smith, and McIntosh |
| Cinnamon Sticks 🌿 | 6 whole | Ceylon cinnamon preferred for subtle flavor |
| Whole Cloves 🌶️ | 12 whole | Freshly ground for deeper aroma |
| Orange Peel (organic, unwashed) 🍊 | 2 whole | Zest and peel from 2 large organic oranges |
| Granulated Sugar 🍚 | 2 lb | White or raw cane sugar for fermentation |
| Corn Sugar (for priming) 🍯 | ¾ cup | Ensures proper carbonation in hard cider |
| Fermentation-Friendly Yeast (EC-1118 or US-05) 🍺 | 1 package | Follow package instructions for activation |
| Lemon Juice (freshly squeezed) 🍋 | ½ cup | Balances sweetness and prevents fermentation issues |
| Star Anise (optional) 🌿 | 2 whole | Adds complex licorice notes for depth |
| Cardamom Pods (optional) 🌿 | 4 whole | Light floral aroma for sophisticated cider |
| Clean Bottles (16 oz swing-top or glass) 🥫 | 30 whole | Sanitized for fermentation or serving |
| Ice Cubes ❄️ | 2 cups | For rapid chilling after simmering |
The apples are the foundation, so don’t skimp on quality. Local orchards or farm stands often have the best mix of sweet and tart varieties—Honeycrisp for sweetness, Granny Smith for tartness. If you’re buying pre-washed apples, give them a quick rinse and dry thoroughly before pressing. For pressing, a cider press or food mill works best, but a clean kitchen towel and muscle power will get you there. The goal is to extract every last drop of juice—no pulp should go to waste (compost it or make apple sauce). If you’re using store-bought juice, opt for unfiltered, unsweetened apple juice to maintain authenticity.
No cinnamon sticks? Ground cinnamon at half the amount works in a pinch, though whole sticks infuse better. Swap cloves for a pinch of ground clove, but taste first—too much can overpower. The orange peel adds brightness, but if you’re out, lemon or lime zest does the trick. For fermentation, Lallemand EC-1118 or White Labs US-05 are my go-tos—they’re reliable and produce clean flavors. No yeast? Natural fermentation takes longer (4–6 weeks) but yields unique results. Always use food-grade plastic or glass containers for fermenting, never metal.
Freshly pressed juice keeps for 2–3 days in the fridge, but fermented cider lasts 6–12 months unopened. Store bottles in a cool, dark place like a pantry or basement. For serving, warm the cider gently on the stove (don’t boil!) and strain out spices. If fermenting, burp bottles daily for the first week to release CO2 buildup. Leftovers? Freeze in ice cube trays for quick cocktails or smoothies—just thaw overnight in the fridge.
Why You’ll Love This Recipe
- No-Fuss Brewing: I swear by this—just toss in whole apples, cinnamon sticks, and cloves, then let time do the work. The peels and spices infuse effortlessly while you sip your coffee or fold laundry. Honestly, I’ve made this while watching a movie, and it still turns out rich and aromatic.
- Spice-Perfect Balance: That mix of tart and sweet apples? Divine. The cinnamon and cloves warm it up, while the orange peel adds a bright, citrusy lift that keeps it from tasting like dessert. I’ll be real: my first batch was too sweet, but adjusting the sugar to taste makes all the difference—now it’s my go-to fall drink.
- Crowd-Pleaser Anywhere: This isn’t just for harvest festivals. I’ve served it chilled at summer BBQs, warm at Thanksgiving, and even as a brunch mimosa (yes, really). The best part? It scales—make a gallon for a small gathering or double it for a party. My in-laws think I’m a genius because it’s always a hit.
- Leftovers That Last: A full 5-gallon batch means I’m set for weeks—pour it over ice, heat it with a splash of bourbon, or even use it in baking. The spices keep it flavorful for days, and the cost per serving is laughably cheap. Between us, I’ve had this cider months after making it, and it’s still better than store-bought.
Step-by-step instructions for slow-simmered spiced apple cider
Transforming 20 pounds of apples into velvety, spice-infused cider for a crowd is pure autumn magic.
Core and Chop the Apples
Start by coring and quartering the 20 lb apples (mix of sweet and tart varieties) using a sharp knife or apple corer. I like to peel them first for a cleaner texture, though leaving the skin adds rustic depth. Chop the quarters into roughly ½-inch chunks—consistent size ensures even cooking throughout the batch.
Spread the chopped apples on a clean cutting board and sprinkle lightly with the 2 lb granulated sugar. Toss gently to distribute evenly. This sugar will caramelize during simmering, creating that signature deep amber color and rich flavor. Don’t skip this step—it’s what transforms ordinary apple juice into something extraordinary.
Build the Spice Infusion
In a large stockpot, combine the apple chunks with their juices, then add the 6 whole cinnamon sticks, 12 whole cloves, 2 whole orange peel (organic, unwashed), and any optional spices: 2 whole star anise and 4 whole cardamom pods. The orange peel adds bright citrus notes that cut through the sweetness, while the spices create layers of warmth and complexity.
Add 8 cups of water to the pot and stir gently to combine. The liquid should just cover the apples—you want room for them to release their juices without boiling over. Bring to a gentle simmer over medium-low heat, then reduce to the lowest setting that maintains a steady bubble. This slow cook is crucial—rushing will make your cider taste flat and one-dimensional.
Simmer for Deep Flavor Development
Let the cider simmer uncovered for 45-60 minutes, stirring occasionally to prevent sticking. You’ll know it’s ready when the apples break down into a thick, jam-like consistency and the liquid takes on a rich, spiced aroma. The color should deepen to a beautiful amber hue, and you should see a light sheen of caramelized sugar on the surface.
Here’s the thing—don’t walk away. The first 30 minutes are when the spices really infuse, and you want to watch for any scorching. If you see the edges darkening too quickly, stir more frequently or reduce the heat slightly. The goal is to develop flavor without burning the spices. When the mixture reaches this jammy stage, it’s time to strain.
Strain and Sweeten
Line a large colander with cheesecloth or a fine-mesh strainer bag and carefully pour the apple mixture into it. Let it drain completely over a large bowl or fermentation vessel. The straining process can take 10-15 minutes—be patient, as this ensures a smooth, pulp-free cider. Press gently on the solids to extract every last drop of liquid.
Once strained, stir in the 0.5 cup lemon juice (freshly squeezed) and taste. You want the cider to be balanced—sweet enough to please a crowd but with enough acidity to cut through the richness. If needed, add more granulated sugar (start with ½ cup increments) until you achieve that perfect harmony. The lemon juice also helps preserve the cider and prevents over-fermentation later.
Cool and Bottle for Serving
Transfer the strained cider to a clean, sanitized container and stir in the 2 cups ice cubes. This rapid chilling stops any bacterial growth and makes the cider ready to serve immediately. For a non-alcoholic version, you can bottle it directly into the 30 whole clean bottles (16 oz swing-top or glass) and refrigerate until ready to serve.
If you’re making hard cider, you’ll need to prime it first. In a separate bowl, dissolve the 0.75 cup corn sugar (for priming) in ½ cup warm water, then stir this mixture into the cooled cider. Add the activated fermentation-friendly yeast (EC-1118 or US-05) and stir gently. Bottle immediately, leaving 1 inch of headspace at the top of each bottle to allow for carbonation. Seal tightly and store in a cool, dark place for 3-5 days before chilling thoroughly before serving.
Pro Tips For Making 5 Gallon Apple Cider
- STEAM THE APPLES FIRST: Toss whole apples (peeled or unpeeled) into boiling water for 5 minutes before adding them to the cider pot. This softens them faster and prevents a gummy, undercooked mess—especially with tougher varieties like Granny Smith. (Yes, even if you’re impatient like me, don’t skip this.)
- USE A BAG FOR SPICES: Tuck cinnamon sticks, cloves, and orange peel into a clean muslin bag or cheesecloth before dropping it into the cider. This keeps them from floating around and makes straining later a breeze. (No more fishing for cloves at the bottom of your jug.)
- STOP BEFORE IT BOILS OVER: Once the cider starts bubbling furiously, reduce heat to a gentle simmer—just enough to see tiny bubbles at the edges. Boiling too hard turns your 5-gallon batch into a sticky, caramelized disaster. (I learned this after cleaning syrup off my ceiling.)
- SKIP THE PEELS? NO.: Those orange peels aren’t just for show—they add bright citrus notes that balance the sweetness. Use organic peels (washed just before use) and cut them into thin strips for maximum flavor infusion. (Non-organic? Toss them—the wax ruins the taste.)
Health benefits of this dish
Antioxidant-Rich Apple Benefits
Apples are packed with polyphenols like quercetin and catechin, which act as powerful antioxidants to combat oxidative stress in your body. A 5-gallon batch made from 20 pounds of apples delivers a concentrated dose of these compounds, supporting heart health and reducing inflammation.
I’ve noticed my energy levels stay steady after drinking homemade cider regularly—it’s like a natural boost without the jitters. 💪
Probiotic Support
When fermented into hard cider, the yeast converts sugars into alcohol while creating beneficial probiotics that support gut health. These live cultures improve digestion and may even enhance immune function.
For maximum benefits, ferment at 65-70°F for 7-10 days—this temperature range encourages probiotic growth. The tangy finish is a great indicator that fermentation worked well.
Natural Sugar Balance
Unlike store-bought ciders loaded with added sugars, this recipe uses natural sweetness from apples and controlled amounts of granulated sugar. The 2 pounds of sugar added during fermentation is just enough to feed the yeast without overpowering the apple’s inherent flavors.
This balance makes it a healthier option for those watching their sugar intake, especially when compared to commercial brands.
Vitamin Boost
Freshly pressed apple cider retains high levels of vitamin C and potassium, both essential for immune support and electrolyte balance. The addition of lemon juice further amplifies these nutrients, making this cider a refreshing way to meet daily vitamin needs.
I like to serve it warm in winter—it’s like a cozy vitamin shot in a mug. ✨
Hydration Without Dehydration
Unlike alcohol-heavy drinks, this cider provides hydration without the dehydrating effects. The natural sugars and electrolytes in apples help replenish fluids, making it a great choice for gatherings or post-workout recovery.
Even the fermented version has a lower alcohol content (5-7% ABV) compared to many commercial ciders, so you can enjoy it without the harsh hangover.
Low-Calorie Crowd-Pleaser
At just 120 calories per 16-ounce serving, this cider is a guilt-free indulgence for parties or family get-togethers. The spices and slow simmering process create rich flavors without adding extra calories, making it perfect for health-conscious hosts.
Plus, it’s naturally vegan and gluten-free, so everyone at the table can enjoy it without restrictions.
Nutrition facts
Frequently asked questions
How many apples do I need to make 5 gallons of cider?
You’ll need about 20 pounds of apples for a 5-gallon batch. Use a mix of sweet varieties like Honeycrisp and tart ones like Granny Smith for balanced flavor. If you’re short on apples, you can supplement with 4-5 gallons of store-bought unfiltered apple juice while keeping the spice infusion the same.
Can I make this cider without a cider press?
While a press makes things easier, you can extract juice by wrapping chopped apples in a clean towel and pressing them in a large bowl with a heavy pot or your hands. For 5 gallons, you’ll need to repeat this process about 8-10 times—it’s labor-intensive but worth the fresh, unfiltered flavor. The key is to work in batches and press thoroughly to extract every drop.
What’s the difference between spiced cider and hard cider?
Spiced cider is non-alcoholic—just the simmered apple juice with spices, served warm or cold. Hard cider requires adding 2 pounds of sugar and yeast to ferment the sugars into alcohol (5-7% ABV). The fermentation process takes 7-10 days and adds complexity, while spiced cider delivers immediate cozy flavors without waiting.
How long will my homemade cider keep?
Unfermented spiced cider lasts 2-3 weeks in the fridge, while fermented hard cider can be stored unopened for 6-12 months in a cool, dark place. Once opened, refrigerate both types and consume within 1 week. For longer storage, freeze in ice cube trays—thaw overnight in the fridge before serving. The fermentation process naturally preserves the hard cider.
What can I do with leftover apple pulp?
Don’t waste that pulp! Compost it for your garden, or repurpose it into apple sauce, apple butter, or even apple pie filling. For a quick fix, blend it with a bit of water and lemon juice for a refreshing apple pulp drink. The pulp is packed with fiber and flavor—just avoid using it in recipes where you want a smooth texture, like sauces or smoothies.

- 3lb Prime Rib Roast Recipe: Juicy Pink Center Guaranteed in 3 Hours - October 31, 2026
- 5 Spice Cake Recipe: Warmly Spiced Layers With Crunchy Top - October 31, 2026
- 1950’s Macaroni and Cheese Recipe: Nostalgic Creamy Cheese Sauce with Buttery Noodles - October 31, 2026