
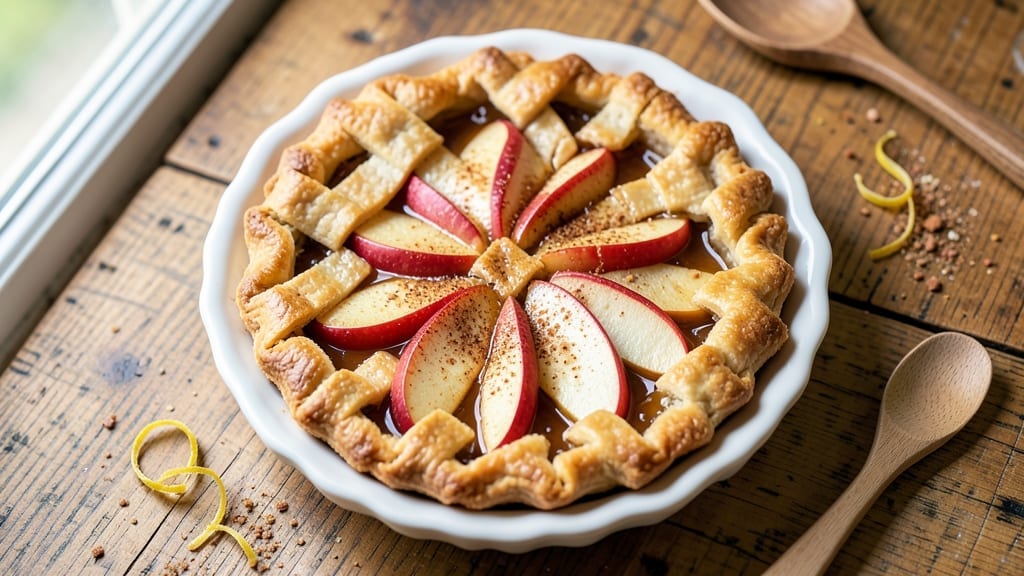
Creating five-inch mini apple pies delivers all the comfort of classic apple pie in a perfectly portable, single-serving package—ideal for picnics, potlucks, or dessert parties where every bite deserves its own crust.
The secret lies in a foolproof crust technique that stays flaky yet sturdy enough to hold its shape, paired with a filling that balances sweetness and spice without turning soggy.
I’ve perfected this recipe after years of testing, ensuring the crust achieves that golden brown finish while the apples remain tender with just the right amount of caramelization.
This recipe starts with a simple crust—either store-bought for convenience or homemade for that homemade touch—rolled out to fit a 5-inch pie pan with minimal fuss.
The filling combines tart apples (like Granny Smith or Honeycrisp) with a touch of cinnamon, sugar, and lemon juice, creating a flavor profile that’s nostalgic yet refined.
Baking at 375°F for about 20-25 minutes ensures the crust is crisp while the filling stays thick and inviting, with edges that just begin to bubble.
What you’ll end up with is a crust-perfect mini pie—each bite offering flaky layers, spiced apple goodness, and that irresistible mix of sweet and tart. The small size makes them easy to share, and the handheld format means no one has to wait for a slice.
Serve warm with a dollop of whipped cream or a drizzle of caramel for the ultimate dessert experience.
Scaling up is effortless—just double the crust and filling for a batch of 12 mini pies, perfect for gatherings. The recipe also adapts well to dietary preferences, like using gluten-free crust or a sugar-free filling.
Whether you’re baking for a crowd or treating yourself to a single indulgent bite, these mini apple pies are a game-changer for dessert lovers.
Ingredients for 5 inch mini apple pie
Twelve perfect mini pies start with these simple, high-impact ingredients—flaky crust meets spiced apple perfection.
| Ingredient | Amount | Notes |
|---|---|---|
| Unsalted Butter 🧈 | ¾ cup | Cold, cubed for flaky crust |
| All-Purpose Flour 🌾 | 2 ½ cups | Plus 1 tbsp for dusting |
| Granny Smith Apples 🍎 | 4 medium | Peeled, sliced 1/4-inch thick |
| Granulated Sugar 🍚 | ¾ cup | Plus 2 tbsp for sprinkling |
| Light Brown Sugar 🍚 | ¼ cup | Packed, for caramelization |
| Ground Cinnamon 🌿 | 2 tsp | Plus extra for garnish |
| Lemon Juice 🍋 | 1 ½ tbsp | Freshly squeezed |
| Salt 🧂 | ½ tsp | Fine sea salt preferred |
| Vanilla Extract 🌸 | ½ tsp | Pure vanilla for depth |
| Ice Water 💧 | 4 tbsp | For dough elasticity |
| 5-Inch Pie Pans 🍰 | 12 whole | Metal or ceramic preferred |
| Egg Wash 🥚 | 1 whole | 1 egg beaten with 1 tbsp water |
| Turbinado Sugar 🍚 | ¼ cup | For golden crust finish |
The butter matters here—European-style unsalted (like Plugrá) gives the most flavor, but any good brand works. For the apples, Granny Smith or Honeycrisp are ideal—their tartness balances the sweetness. If you can’t find Granny Smith, Fuji or Braeburn work too, but they’ll need a splash more lemon juice. The cinnamon should be fresh-ground if possible—Penzeys or bulk bins at Whole Foods are great sources. I always buy extra flour because it’s the backbone of that perfect crust, and King Arthur is my go-to for consistency.
No Granny Smith? Substitute with a mix of tart and sweet apples—like half Granny Smith and half Gala. Running low on vanilla? Almond extract at half the amount adds depth without overpowering. The pie pans are crucial—metal pans conduct heat better than ceramic, so if you’re baking more than one tray at a time, use metal for even baking. For the sugar, domestic vs. foreign
The dough needs to chill for at least 30 minutes before rolling—this prevents shrinking. Store pre-made dough between layers of parchment paper in the fridge for up to 3 days or freeze for 3 months. Sliced apples can be prepped ahead and stored in a bowl of cold water with a splash of lemon juice for up to 24 hours to prevent browning. These mini pies reheat beautifully—just 5 minutes at 350°F to restore that fresh-from-the-oven warmth. Portion the filling into small containers and freeze for 2 months if you’re prepping for a crowd.
Why You’ll Love This Recipe
- No-Roll Crust Magic: I swear by this trick—just cold butter and flour tossed together until it almost holds. No chilling, no fuss, and the flaky layers still happen. (Yes, even when my hands are sticky from apple filling.)
- Tart-Sweet Bliss: Granny Smiths cut with brown sugar? It’s the perfect balance—sharp enough to wake you up, but the caramelized edges? Pure comfort. The butter in the crust doesn’t just taste good; it sings.
- Party in a Bite: These are my secret weapon for potlucks, office birthdays, or when I need dessert now. Bite-sized means no awkward slicing, and the buttery crust holds up like a champ. (Pro tip: Serve warm with vanilla ice cream—people will fight over them.)
- Makes Ahead, Eats Forever: Bake a batch Sunday, freeze half, and you’ve got dessert for weeks. The crust stays crisp, the apples stay tender, and honestly? Nothing beats pulling one straight from the freezer and popping it in the oven for a 10-minute treat. Budget-friendly too—one bag of apples lasts for ages.
Step-by-step instructions for 5 inch mini apple pies
Here’s how to create flawless handheld apple pies with a golden crust and tender filling.
Make the Flaky Crust
Cut the 0.75 cup unsalted butter into ¼-inch cubes and place in a large bowl. Add 2.5 cups all-purpose flour, 0.5 tsp salt, and 0.5 tsp vanilla extract. Use a pastry cutter or your fingers to work the butter into the flour until you have pea-sized crumbs with some larger pieces remaining—this creates flaky layers.
Drizzle in the 4 tbsp ice water one tablespoon at a time while gently mixing with a fork. The dough should come together but still feel slightly crumbly. Form into a disk, wrap in plastic, and chill for at least 1 hour (or up to 2 days). Cold dough prevents shrinking and ensures crispy edges.
Prepare the Apple Filling
Peel and slice the 4 medium Granny Smith apples into ¼-inch thick slices. Toss them in a large bowl with 0.75 cup granulated sugar, 0.25 cup light brown sugar, 2 tsp ground cinnamon, 1.5 tbsp lemon juice, and a pinch of salt. Let the mixture sit for 10 minutes—this allows the flavors to meld and the juices to release slightly.
Real talk: Don’t skip the lemon juice. It brightens the apples and prevents the filling from turning mushy during baking. The sugar ratio balances sweetness with tartness, creating that perfect apple pie flavor we all love.
Roll and Assemble the Pies
Preheat your oven to 375°F. On a lightly floured surface, roll out the chilled dough to ⅛-inch thickness. Use a 5-inch round cutter to cut out 24 circles—you’ll need two rounds per pie. Gently press one circle into each of the 12 whole 5-inch pie pans, stretching it to fit the bottom and sides.
Spoon about ¼ cup of the apple mixture into each crust, mounding it slightly in the center. Sprinkle with 2 tbsp granulated sugar for extra caramelization. Top each with the second dough circle, pressing edges to seal completely. Trim excess dough with scissors for clean edges.
Bake to Golden Perfection
Brush the tops of the pies with egg wash (1 egg beaten with 1 tbsp water), then sprinkle generously with 0.25 cup turbinado sugar. This creates that beautiful golden crust we crave. Bake on a parchment-lined sheet for 25-30 minutes until the crust is deep golden brown and the filling is bubbling.
Here’s the thing—don’t overbake. The pies will continue cooking slightly as they cool. You want the crust to be crispy but not burnt, and the filling tender but not soupy. If the edges brown too quickly, tent with foil for the last 10 minutes of baking.
Cool and Serve
Let the pies cool in the pans for 10 minutes, then transfer to a wire rack. Serve warm with a dollop of vanilla ice cream or whipped cream. The contrast of warm pie and cold ice cream is pure magic.
These mini apple pies deliver all the comfort of classic apple pie in perfect bite-sized portions—crispy crust, tender apples, and that perfect balance of sweet and spice. Store leftovers in an airtight container for up to 3 days or freeze for 2 months.
Pro Tips For Making 5 Inch Mini Apple Pie
- CHILL THE BUTTER FIRST: Take that cold butter straight from the fridge and cut it into tiny cubes—no bigger than a pea. I learned this the hard way when my crust turned out greasy and tough; cold butter melts at the right moment, not all at once.
- PEEL THE APPLES HALFWAY: Granny Smiths are tart but tough—peel only the bruised or tough spots, not the whole skin. The texture stays better, and you keep that bright green color that makes mini pies look fancy without extra work.
- DON’T OVERFILL THE CRUST: Fill those 5-inch pans no more than halfway—apples expand, and you don’t want a mess spilling over the edges. Trust me, you’ll regret it when you’re scraping gooey filling off the tray later.
- USE A LITTLE CORNSTARCH: Toss your sliced apples with 1-2 teaspoons of cornstarch before baking—it keeps them from turning into mush. I was skeptical until I tried it; now it’s non-negotiable for mini pies.
Storing and reheating this dish
Refrigerator Storage
Store your mini apple pies in an airtight container with parchment paper between layers to prevent sticking. They’ll keep well in the fridge for up to 3 days—the crust stays crisp, and the filling maintains its perfect texture.
I like to use glass containers with tight-sealing lids from Pyrex because they’re sturdy and don’t absorb odors. Just let them cool completely before storing to avoid condensation. 💫
Freezer Prep Tips
For longer storage, freeze unbaked pies in individual freezer bags or wrapped tightly in plastic wrap and aluminum foil. They’ll keep for up to 2 months without losing quality. Thaw overnight in the fridge before baking—this ensures even cooking.
I’ve found that pre-baking the crusts before freezing works best for a flaky texture after reheating. Label your bags with the date to track freshness! ❄️
Reheating Perfection
For a quick refresher, reheat cooled pies in a 350°F oven for 5-7 minutes until warmed through. This restores that fresh-from-the-oven crispness without drying out the filling.
If you’re short on time, the microwave works in a pinch—cover with a damp paper towel and heat for 20-30 seconds on medium power. For extra decadence, add a drizzle of caramel or whipped cream after reheating. 🔥
Filling Refresh
If you’ve stored the filling separately (a great make-ahead tip!), reheat it in a small saucepan over low heat with 1 tablespoon of water to prevent sticking. Stir occasionally until warmed through—about 3-5 minutes.
This method keeps the apples tender and the spices vibrant. I often prep filling ahead for busy days and assemble pies fresh, saving time without sacrificing flavor. 🍏
Serving Warm
Serve reheated pies straight from the oven with vanilla ice cream or whipped cream for that classic contrast. For a gourmet touch, dust with powdered sugar or a sprinkle of cinnamon. If you’re serving a crowd, arrange them on a wooden board with fresh mint for a rustic presentation.
The warmth of the pie against the cold ice cream is pure comfort food magic. ✨
Nutrition facts
Frequently asked questions
Can I use a different type of apple for these mini pies?
While Granny Smith or Honeycrisp work best for their tart-sweet balance, you can mix in Fuji or Gala for extra sweetness. Just add 1 extra tablespoon of lemon juice to prevent browning and keep the filling from getting too soft.
How do I prevent the crust from shrinking during baking?
Chill the dough for at least 1 hour before rolling, and keep it cold while assembling. Use a 5-inch round cutter for precision, and avoid overfilling the crusts. Press edges firmly to seal—this creates a strong barrier that holds shape. A 10-minute rest before baking also helps!
Can I make these mini pies ahead of time?
Yes! Assemble unbaked pies and freeze them in individual bags for up to 2 months. Bake straight from frozen, adding 5-7 extra minutes at 375°F. For make-ahead filling, prep it 24 hours ahead and store in the fridge—just reheat gently with 1 tbsp water before assembling.
What’s the best way to serve these mini pies?
Warm is best! Serve straight from the oven with vanilla ice cream or whipped cream for classic contrast. For a festive touch, arrange on a wooden board with fresh mint or dust with powdered sugar. They’re perfect for picnics, potlucks, or dessert parties—each bite is a handheld treat!
Why did my filling turn watery?
Overfilling or undercooking are the usual culprits. Use ¼ cup filling per pie max, and bake until the crust is golden and filling bubbles (25-30 minutes). If using softer apples like Gala, reduce lemon juice to 1 tbsp and add 1 tsp cornstarch to the filling to thicken.

- 3lb Prime Rib Roast Recipe: Juicy Pink Center Guaranteed in 3 Hours - October 31, 2026
- 5 Spice Cake Recipe: Warmly Spiced Layers With Crunchy Top - October 31, 2026
- 1950’s Macaroni and Cheese Recipe: Nostalgic Creamy Cheese Sauce with Buttery Noodles - October 31, 2026