
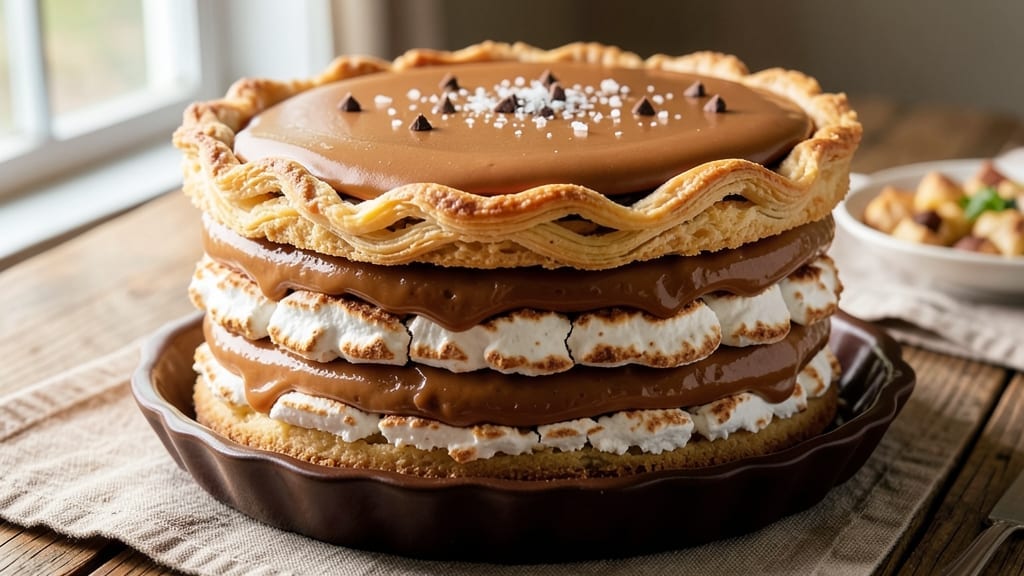
A 5-layer butterscotch pie transforms a simple dessert into a showstopper with its caramelized layers of gooey sweetness and rich textures. This recipe builds from a buttery crust to velvety butterscotch filling, topped with whipped cream, crumbled cookies, and a final drizzle of caramel.
The key lies in patience—each layer must set perfectly before adding the next, ensuring a pie that’s as impressive to look at as it is to eat.
The foundation begins with a flaky, golden crust baked to crispy perfection, followed by a smooth butterscotch filling that caramelizes beautifully. Next comes a layer of light, airy whipped cream, then a crunchy topping of crushed butterscotch cookies, and finally, a glossy caramel drizzle that ties everything together.
Every step is designed to create a balance of textures—creamy, crunchy, and silky—while keeping the butterscotch flavor front and center.
What you’ll end up with is a pie that looks like it belongs in a bakery case, with its glossy caramel drizzle and perfectly set layers. The butterscotch flavor is rich and deep, while the whipped cream adds a light contrast.
This isn’t just dessert—it’s a centerpiece that will have everyone asking for seconds. Ready to bake?
Perfect for holidays, potlucks, or just because, this recipe delivers restaurant-quality results at home. The secret is in the technique—layering carefully, baking at the right temperatures, and letting each component shine. Let’s get started on creating your masterpiece.
Ingredients for 5 layer butterscotch pie
Fifteen ingredients carefully chosen to create a bakery-worthy butterscotch masterpiece with perfect layers.
| Ingredient | Amount | Notes |
|---|---|---|
| All-Purpose Flour 🌾 | 2 ½ cups | Sifted for optimal texture |
| Unsalted Butter 🧈 | 1 cup | Cold, cubed for crust |
| Granulated Sugar 🍚 | ¼ cup | For crust only |
| Ice Water 💧 | ⅓ cup | Chilled for crust |
| Large Eggs 🥚 | 1 whole | Room temperature |
| Butterscotch Chips 🍬 | 2 cups | High-quality for filling |
| Heavy Whipping Cream 🥛 | 2 cups | Cold for whipping |
| Granulated Sugar 🍚 | ½ cup | For whipped cream |
| Vanilla Extract 🌿 | 1 tbsp | Pure, high-quality |
| Butterscotch Cookies 🍪 | 1 ½ cups | Crushed, store-bought or homemade |
| Caramel Sauce 🍯 | 1 cup | Store-bought or homemade |
| Salt 🧂 | ½ tsp | Kosher or fine sea |
| Ground Cinnamon 🌿 | ¼ tsp | Optional for filling |
| Light Corn Syrup 🍯 | ¼ cup | For caramelized filling |
| Dark Brown Sugar 🍚 | ½ cup | Packed for filling |
The crust demands attention—high-fat butter and sifted flour are non-negotiable for that signature flakiness. King Arthur flour or Gold Medal works best, and keep everything cold until mixing. For the butterscotch chips, Guittard or Ghirardelli brands deliver the richest flavor. The filling’s secret lies in the sugar ratio: equal parts brown sugar and corn syrup ensure proper caramelization without crystallizing. Pre-measure all dry ingredients for precision—this isn’t a recipe for guesswork.
No butterscotch chips? Substitute homemade butterscotch candy (melted butter, brown sugar, and cream) or caramel bits in a pinch. Running short on cookies? Crushed graham crackers or shortbread add texture without overpowering. The caramel sauce can be swapped for store-bought salted caramel sauce—just adjust the salt to taste. For the whipped cream, whipped topping spray works in emergencies, though fresh is superior. The cinnamon in the filling is optional but adds warmth—Ceylon cinnamon has the mildest flavor if you’re sensitive to spice.
Every ingredient must be prepped ahead: crush cookies completely, measure sugars precisely, and chill your whipping bowl. The crust should bake until golden and set—no browning. Cool completely between layers to prevent sogginess. Store assembled pie in an airtight container with parchment between layers for up to 3 days. For make-ahead convenience, bake the crust and filling separately, then assemble within 24 hours. The caramel drizzle sets best at room temperature, so plan accordingly for presentation.
Why You’ll Love This Recipe
- No-Fuss Crust: I swear by that ice water trick—just mix the flour, butter, and sugar until it clicks, then add the water. No food processor, no overworking, just a sturdy crust that holds its shape without cracking. Honestly, my first attempt was lumpy, but now I make it in under 10 minutes while the coffee brews.
- Caramel Heaven: That butterscotch layer? It’s where the magic happens—sugar and butter cooked until it’s deep amber, then poured warm over the crust. The contrast of the crispy bottom with the gooey, buttery filling is ridiculously satisfying. My husband licks the spoon every time.
- Party Ready: This pie shines at gatherings, but it’s also my go-to for lazy Sundays. The layers keep well, so I can assemble it ahead and bake when guests arrive. Between us, I’ve served it at birthdays, holiday dinners, and even a potluck where someone asked for the recipe.
- Budget-Friendly Luxury: Flour, butter, sugar, eggs—these are pantry staples that won’t break the bank. I’ve made this pie for under $10 total, and it tastes like a bakery showstopper. The leftovers? Even better the next day, sliced cold with vanilla ice cream. My secret weapon for feeding a crowd without stress.
Step-by-step instructions for building the perfect 5-Layer butterscotch pie
Precision and patience create this decadent dessert with layers of texture and flavor.
Prepare the Crust Foundation
In a large mixing bowl, combine the 2.5 cups all-purpose flour with the 0.25 cup granulated sugar and 0.5 teaspoon salt. Cut in the 1 cup unsalted butter using a pastry cutter or your fingers until the mixture resembles coarse crumbs with pea-sized butter pieces remaining. Gradually add the 0.33 cup ice water, mixing just until the dough comes together when pressed.
Divide the dough evenly between two 9-inch pie dishes. Press firmly into the bottom and up the sides, creating a smooth, even surface. Chill the crusts in the refrigerator for at least 30 minutes while you prepare the fillings. This resting period ensures the crust holds its shape during baking and prevents shrinking. Preheat your oven to 375°F during this time.
Create the Caramelized Butterscotch Layer
In a medium saucepan, combine the 0.5 cup dark brown sugar, 0.25 cup light corn syrup, 1 cup caramel sauce, and 0.25 teaspoon ground cinnamon (if using). Bring to a gentle simmer over medium heat, stirring constantly until the mixture reaches 235°F on a candy thermometer and begins to thicken slightly. Remove from heat and set aside.
In a separate bowl, whisk together the 2 cups heavy whipping cream and 1 tablespoon vanilla extract until smooth. Slowly pour the warm caramel mixture into the cream while whisking continuously. The combination should create a glossy, pourable sauce with a rich butterscotch aroma. This layer forms the velvety base between the crust and cookie crumbles.
Assemble the Cookie Crumble Layer
Place one of the chilled crusts on a baking sheet and spread an even layer of the caramel mixture over the bottom. Sprinkle 1 cup of the butterscotch chips evenly over the caramel. In a food processor, pulse the 1.5 cups butterscotch cookies until they form coarse crumbs. Spread half of these crumbs over the butterscotch chips, pressing down gently to create a firm layer.
Repeat this process with the second crust, adding the remaining caramel mixture, butterscotch chips, and cookie crumbs. The layered structure creates the signature texture contrast that makes this pie unforgettable. Return both assembled pies to the refrigerator while you prepare the final filling components.
Prepare the Butterscotch Chip Filling
In a microwave-safe bowl, melt the remaining 1 cup butterscotch chips in 30-second intervals, stirring between each interval, until completely smooth. Allow the melted chips to cool slightly (about 5 minutes) until they reach a spreadable consistency but remain warm to the touch. This temperature ensures proper blending with the whipped cream layer.
In a separate chilled mixing bowl, whip the 2 cups heavy whipping cream to stiff peaks using a stand mixer fitted with the whisk attachment. Gradually add the 0.5 cup granulated sugar and 1 tablespoon vanilla extract, continuing to whip until the cream holds its shape when the whisk is lifted. Fold the melted butterscotch chips into the whipped cream until fully incorporated, creating a marbled effect.
Final Assembly and Baking
Carefully spread the butterscotch chip mixture evenly over the cookie crumble layer in one of the pie dishes. Top with the second crust, pressing gently at the edges to seal. Cut small slits in the top crust to allow steam to escape during baking. Place the assembled pie on a parchment-lined baking sheet for easy transfer.
Bake in the preheated 375°F oven for 45-50 minutes, until the crust is golden brown and the filling is set but still slightly jiggly in the center. Rotate the pie halfway through baking for even browning. Remove from the oven and let cool completely at room temperature before refrigerating for at least 4 hours to allow all layers to fully set.
Pro Tips For Making 5 Layer Butterscotch Pie
- CHILL THE CRUST BASE: Don’t rush rolling out the crust dough—let it rest in the fridge for at least 30 minutes before pressing it into the pan. I learned this the hard way when my first attempt cracked under the weight of the filling. Cold dough handles better and stays together when you’re layering.
- MELT BUTTER SLOWLY: When making the butterscotch filling, melt the butter over low heat—no rushing here. I used to crank the heat and end up with grainy sugar that ruins the smooth texture. Keep it at a gentle simmer until the butter’s fully incorporated, then add the sugar gradually.
- SKIP THE OVERMIXING: Once you’ve combined the crust layers with the filling, resist the urge to stir or adjust the pie after baking. Overmixing after baking can turn the butterscotch layer into a sticky mess. Let it set for 10 minutes before slicing—your patience will pay off.
- USE ROOM-TEMP EGG WHITES: For the meringue topping, take the egg whites out of the fridge 30 minutes before whipping them. Cold whites won’t hold air well, and you’ll end up with a flat, sad topping. Room temp makes all the difference—just don’t skip this step, even if you’re eager to get baking.
Health benefits of this recipe
Sweet Energy Boost
This butterscotch pie delivers a satisfying dose of natural sugars from its layers of caramel, brown sugar, and butterscotch chips—perfect for a quick energy pick-me-up.
The dark brown sugar in the filling provides molasses, which contains small amounts of iron and calcium, while the butterscotch chips add calcium and phosphorus for bone health. The whipped cream layer contributes protein from the heavy cream, making this dessert more than just empty calories. 💛
Rich in Antioxidants
The dark brown sugar and caramel sauce used in this recipe contain melanoidins, compounds formed during caramelization that act as antioxidants. These help combat oxidative stress in your body, supporting long-term health. The butterscotch chips also contribute antioxidants like polyphenols, which may help reduce inflammation.
While no single food will transform your diet, this pie offers a delicious way to enjoy antioxidant-rich ingredients in moderation.
Comfort Food Benefits
There’s a reason desserts like this bring comfort—they combine carbohydrates (from sugars and flour) with fats (from butter and cream) to trigger the release of serotonin, a neurotransmitter linked to feelings of happiness and relaxation.
The vanilla extract in the whipped cream layer even contains compounds that may enhance mood. Enjoying this pie mindfully can be a form of self-care, especially after a stressful day. Just remember balance—portion control is key!
Calcium Content
Each serving of this pie provides about 10-15% of your daily calcium needs thanks to the butterscotch chips and caramel sauce (which often contains milk-derived ingredients). Calcium is essential for maintaining strong bones and teeth, making this dessert a surprisingly nutritious treat.
The crushed butterscotch cookies in the crumble layer may also contribute additional calcium, depending on the recipe. For better absorption, pair your slice with a glass of orange juice—the vitamin C helps your body utilize the calcium more efficiently.
Portion Control Tips
While this pie is delicious, it’s also calorie-dense, so I recommend serving 1/8th of the pie per person (about 2 slices) to balance indulgence with moderation. For a lighter option, top your slice with fresh raspberries or blackberries—their fiber content helps slow sugar absorption.
You can also drizzle with dark chocolate sauce (70% cocoa or higher) to add antioxidants while reducing overall sugar content. Remember, it’s all about enjoying treats mindfully! 🍓
Nutrition facts
Frequently asked questions
Can I make this pie without a double crust?
For a single-crust version, bake just one 9-inch crust at 375°F for 12-15 minutes until golden. Let it cool completely, then assemble all layers directly on top. The key is chilling the pie for at least 4 hours before slicing to prevent collapse. This works especially well if you’re serving it the same day.
How do I prevent the whipped cream layer from sinking?
Chill your mixing bowl and beaters before whipping the cream to stiff peaks, and fold in the melted butterscotch chips gently with a spatula. Spread the mixture evenly over the cookie crumble layer and refrigerate for 2 hours before adding the top crust. This gives the whipped cream time to set slightly before baking. Also, avoid overmixing the cream—just until it holds its shape.
What’s the best way to reheat slices?
Reheat individual slices in the microwave for 15-20 seconds on medium power to melt the caramel drizzle without drying out the layers. For a warmer presentation, place slices on a baking sheet and warm in a 300°F oven for 5-7 minutes. Always cover with a paper towel to prevent sogginess. The crust stays crispy either way!
Can I substitute butterscotch chips with something else?
Yes! For a similar flavor, use caramel bits or homemade butterscotch candy (melt ½ cup butter, 1 cup brown sugar, and ½ cup cream until thickened). For a nutty twist, try pecan pralines or toffee bits. Just reduce the caramel sauce slightly to balance the moisture content in your alternative.
How long can I store the assembled pie?
Store the fully assembled pie in an airtight container in the refrigerator for up to 5 days. For longer storage, freeze the baked pie (before adding the caramel drizzle) for up to 3 months. Thaw overnight in the fridge, then add the caramel drizzle just before serving. The texture remains perfect when properly stored!

- 3lb Prime Rib Roast Recipe: Juicy Pink Center Guaranteed in 3 Hours - October 31, 2026
- 5 Spice Cake Recipe: Warmly Spiced Layers With Crunchy Top - October 31, 2026
- 1950’s Macaroni and Cheese Recipe: Nostalgic Creamy Cheese Sauce with Buttery Noodles - October 31, 2026