
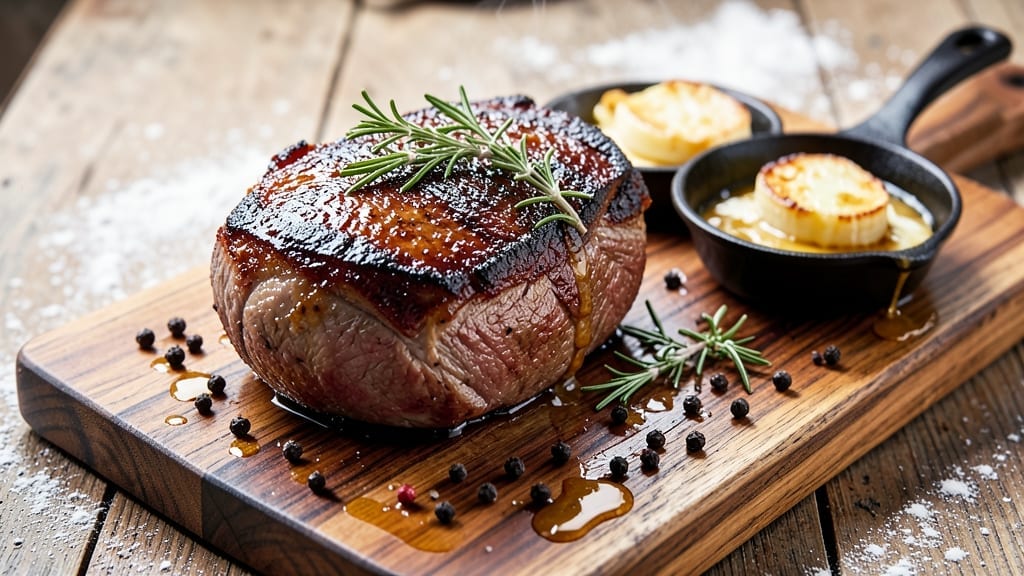
A 5 lb bone-in ribeye roast cooked with precision delivers melt-in-your-mouth tenderness and a caramelized crust that rivals high-end steakhouses. The reverse-sear method—low oven temperature followed by a high-heat sear—guarantees juicy meat with a perfect medium-rare center, every time.
This technique transforms tough cuts into restaurant-quality results, and the bone adds rich, savory depth that infuses the surrounding meat.
The secret lies in patience and temperature control. Start by roasting the ribeye at a low heat (around 275°F) until the internal temperature reaches 120–125°F—about 2–3 hours for even cooking.
Then, finish with a 2-minute sear in a screaming-hot cast-iron skillet to lock in juices and create that coveted crust. A meat thermometer is non-negotiable here; guesswork leads to overcooked, dry meat.
When done right, you’ll have a juicy, deeply flavorful roast with a crust so dark and caramelized it looks like it’s been slow-smoked. The bone-in cut ensures the meat stays moist, and the reverse-sear method prevents the common pitfall of overcooking the exterior while the center remains cold.
Resting for 15–20 minutes before carving is crucial—it redistributes juices, so every slice stays tender.
Serve with a bold red wine reduction or roasted garlic mashed potatoes to complement the rich, beefy flavors. This roast serves 6–8 people, making it ideal for gatherings or a special Sunday dinner.
Leftovers reheat beautifully in the oven or air fryer—just avoid the microwave to preserve texture. Now, let’s get to cooking.
Ingredients for 5 lb bone in ribeye roast
Precision-cut ingredients for a restaurant-quality bone-in ribeye roast with caramelized crust.
| Ingredient | Amount | Notes |
|---|---|---|
| Bone-In Ribeye Roast 🥩 | 5 lb | Center-cut, 1.5-2 inches thick |
| Kosher Salt 🧂 | 2 tbsp | Diamond Crystal preferred |
| Freshly Ground Black Pepper 🌶️ | 1 ½ tbsp | Coarse grind preferred |
| Unsalted Butter 🧈 | ½ cup | Cold, cubed for searing |
| Garlic Cloves 🧄 | 6 cloves | Smashed, skin-on |
| Fresh Rosemary 🌿 | 2 sprigs | Thick stems for handling |
| Fresh Thyme 🌿 | 4 sprigs | Leaves only |
| Extra-Virgin Olive Oil 🫒 | 2 tbsp | For basting |
| Red Wine 🍷 | ½ cup | Bold, dry variety |
| Beef Tallow or Duck Fat 🍳 | 2 tbsp | For high-heat sear |
| Meat Thermometer 🌡️ | 1 whole | Instant-read preferred |
| Cast-Iron Skillet 🍳 | 1 whole | 12-inch minimum |
The ribeye roast is non-negotiable here—center-cut with a thick cap of fat ensures juiciness. Look for USDA Choice or Prime at Whole Foods or your butcher shop; avoid pre-cut pieces with excessive trimming. The bone adds depth, so leave it intact. For herbs, fresh is essential—dried won’t deliver the same aromatic punch. The olive oil should be fruity and peppery; California or Italian varieties work best. If using red wine, Cabernet Sauvignon or Malbec adds complementary depth to the beef’s richness.
No kosher salt? Diamond Crystal kosher salt is ideal, but Morton coarse salt at half the amount works in a pinch. Fresh herbs wilt fast—chop thyme leaves only and store stems in a jar of water. Substituting beef tallow? Duck fat or lard works equally well for searing. The thermometer is critical—instant-read models like ThermoWorks ensure accuracy. For the wine, dry vermouth or beef stock can replace if unavailable. Prefer less fat? Trim excess from the roast, but leave some for flavor.
The roast keeps best 3–4 days in the fridge, wrapped tightly in butcher paper. For longer storage, freeze for up to 3 months—thaw overnight in the fridge before cooking. Leftovers reheat best in a 350°F oven for 15 minutes covered with foil; avoid microwaving to prevent drying. The searing butter and wine reduction can be made ahead—store separately and combine just before serving. Portion into individual slices for easy reheating, or freeze in vacuum-sealed bags for restaurant-quality leftovers.
Why You’ll Love This Recipe
- I’ll be real: this feels like a fancy dinner, but it’s actually my go-to for game days or lazy Sundays. The bone adds depth, and the garlic keeps it bright—no one ever complains when this hits the table.
- One-Pan Magic: Between us, this roast is the ultimate “set it and forget it” meal. Just season the beef with salt and pepper, sear it in a hot pan, then let the butter and garlic work their flavor magic in the oven—no flipping, no fussing, no extra dishes.
- Butter-Basted Bliss: That crispy, caramelized crust? Pure satisfaction. The butter bastes the roast while it cooks, turning it into something so rich and juicy, you’ll forget to breathe until the first bite. (Yes, even on a Tuesday night.)
- Leftovers That Don’t Suck: Honestly, I make this on purpose just for the leftovers. Thinly sliced the next day, it’s perfect for sandwiches, tacos, or a quick stir-fry—no one will guess it started as a whole roast.
Step-by-step instructions for reverse-seared ribeye roast
Master this technique for perfectly juicy meat with a deep caramelized crust every time.
Season and Low-Temperature Roast the Roast
Begin by patting the 5 lb bone-in ribeye roast dry with paper towels. This step is crucial – any moisture left on the surface will prevent proper crust formation. Generously coat all sides with the 2 tbsp kosher salt and 1.5 tbsp freshly ground black pepper, pressing the seasoning into the meat so it adheres evenly.
Place the seasoned roast on a wire rack set inside a rimmed baking sheet. This allows air to circulate completely around the meat, promoting even cooking. Transfer to a preheated oven at 275°F and roast for 2 hours. You’ll know it’s ready when the internal temperature reaches 115°F at the thickest part – this is the perfect temperature for the reverse sear method. The meat should feel slightly springy when pressed gently with your finger.
Prepare the Searing Station
While the roast cooks, prepare your searing station. Heat the 12-inch cast-iron skillet over high heat until it’s screaming hot – you should see a thin layer of steam when you sprinkle a few drops of water. Add the 2 tbsp beef tallow or duck fat and let it melt completely, then add the 0.5 cup unsalted butter. Watch carefully as the butter begins to foam and turn golden – this indicates it’s ready for the sear.
In a small bowl, combine the 6 smashed garlic cloves, leaves from 4 sprigs fresh thyme, and 2 sprigs fresh rosemary. Set aside – these aromatics will infuse the butter during the searing process. Keep the skillet at high heat throughout this preparation to maintain its temperature.
Sear the Roast for Perfect Crust
Remove the roast from the oven and let it rest for 5 minutes – this brief pause allows the surface to firm up slightly for better searing. Working quickly, place the roast in the hot skillet, fat-side down first. Press down gently on the roast with a metal spatula during the first minute – this prevents curling and ensures even contact with the pan.
Sear for 4-5 minutes per side until the crust develops a deep mahogany color and reaches 130-135°F internally. The butter should bubble vigorously and take on a nutty aroma from the garlic and herbs. If the butter begins to smoke excessively, reduce heat slightly but maintain high temperature. The crust should be crisp enough to resist when you press gently with tongs.
Rest and Baste for Maximum Flavor
Transfer the seared roast to a cutting board and tent loosely with aluminum foil. Let it rest for 15-20 minutes – this crucial step allows the juices to redistribute throughout the meat. While resting, carefully pour the garlic-infused butter from the skillet into a small saucepan. Add the 0.5 cup red wine and scrape up any browned bits from the bottom of the skillet.
Simmer the wine and butter mixture over medium heat for 3-4 minutes until slightly reduced. Brush this flavorful compound generously over the roast just before serving. The internal temperature should rise to 135-140°F during resting – this is the perfect serving temperature for medium-rare doneness.
Carve and Serve with Confidence
Slice the roast against the grain into ½-inch thick portions, cutting through the bone if needed. The meat should be tender enough to pull apart with minimal resistance, with a deep pink center and a caramelized crust that crackles slightly. Arrange the slices on a warm platter and drizzle with any remaining garlic butter from the pan.
Serve immediately with the 2 tbsp extra-virgin olive oil for basting on the side. Each bite should deliver perfect medium-rare doneness throughout, with a contrast of tender meat and crispy crust. The reverse-sear method ensures maximum juiciness while creating that coveted caramelized exterior that elevates this classic cut to restaurant-quality status.
Pro Tips For Making 5 Lb Bone In Ribeye Roast
- SEAR HARD FIRST: Hit that ribeye with a screaming-hot pan for 3-4 minutes per side before roasting—this locks in juices and builds flavor. I used to rush this, and the crust never formed right; now I leave the blackened bits on, they’re delicious.
- SALT THE GARLIC: Toss those smashed garlic cloves with a pinch of kosher salt before tucking them into the roast. It keeps them from burning and adds a subtle depth that plain garlic misses—trust me, it’s the thing that matters most.
- SKIP THE CROWDED PAN: Don’t stack butter and garlic on top of the roast like a tower—spread it out in a thin layer. I learned this the hard way when my first batch turned into a greasy mess instead of a golden crust.
- REST UNDER FOIL: After roasting, tent the meat with foil for 5-10 minutes before carving. This keeps it warm while letting the juices redistribute—cutting too soon means dry slices, and nobody wants that.
Regional styles of this 5 lb bone in ribeye roast
Texas-Style Ribeye
In Texas, the bone-in ribeye roast is often cooked low-and-slow with a focus on bold flavors. I’ve seen pitmasters use cherry wood chips in the oven for a subtle smoky note—just toss a handful on the coals or soak them in water and place them on the oven rack.
The Texas approach emphasizes a thick crust, so after the reverse sear, I recommend brushing the roast with melted beef fat and crushed black peppercorns while it rests. Serve with sliced white onions caramelized in butter and a side of Texas toast (thick-cut bread grilled with garlic butter). 🔥
French Bistro Technique
French bistros take the reverse sear to an art form, focusing on precision and presentation. Instead of just butter, they often use a mix of beef fat and duck fat for searing, which adds a luxurious richness.
I’ve adapted this by adding 1 tbsp chopped shallots to the garlic butter during the final basting step—this adds a delicate sweetness that pairs beautifully with the beef.
For serving, French chefs often drizzle the roast with a red wine reduction made from the same wine used in the recipe, and garnish with fresh parsley and a sprinkle of flaky sea salt. The crust should be so dark it’s almost black, signaling perfect caramelization.
Italian Sunday Roast
In Italy, the bone-in ribeye roast is often treated like a centerpiece for family gatherings. The key difference? Italian cooks frequently add rosemary and sage to the seasoning mix, along with a pinch of red pepper flakes for a subtle kick.
I like to sear the roast in a mix of olive oil and garlic instead of just butter, which adds a bright, herbal note. Serve with creamy polenta or roasted fingerling potatoes tossed with rosemary and garlic.
For extra flair, finish the roast with a drizzle of aged balsamic glaze just before serving—it cuts through the richness beautifully. 🌿
Argentinian Asado Influence
Argentinian asado culture brings a bold, meat-forward approach to roasting. For this style, I recommend adding smoked paprika and ground cumin to the seasoning mix before the low-temperature roast.
After searing, brush the roast with a mix of chimichurri sauce (parsley, garlic, olive oil, red wine vinegar) and grilled onion slices. The chimichurri adds a fresh, herby contrast that’s classic in Argentina. Serve with provoleta (grilled provolone cheese) and sliced avocado on the side.
The bone-in cut is especially popular here, as it’s believed to add extra flavor to the meat. 🌶️
English Sunday Roast Adaptation
The English Sunday roast tradition pairs the ribeye beautifully with classic sides. After the reverse sear, I like to add a layer of horseradish cream (mixed with crème fraîche and a touch of Worcestershire sauce) to the roast before serving.
For sides, roast Yorkshire puddings alongside the beef—these crispy, puffed pastries soak up any remaining juices. Add buttered greens (like Brussels sprouts or cabbage) and roast potatoes** for a complete meal. The English approach focuses on hearty, comforting flavors that balance the richness of the beef.
The bone is often left intact, as it’s considered part of the dining experience. 💛
Nutrition facts
Frequently asked questions
Can I use a bone-out ribeye instead of bone-in?
The reverse-sear method works best with bone-in cuts because the bone helps retain moisture and adds flavor. However, if you only have bone-out, reduce the oven temperature to 250°F and increase the initial roasting time by 30-45 minutes to compensate for the lack of bone. The crust will be slightly less intense, but the meat will still be tender. For a bone-out roast, consider adding a small piece of beef bone (like a marrow bone) to the pan during searing for extra flavor.
How do I adjust the cooking time if my roast is thicker or thinner?
Use a meat thermometer as your guide, not time. For a 2-inch thick roast, aim for 115°F at the thickest point before searing. If your roast is 2.5 inches thick, add 15-20 minutes to the initial roasting time. For thinner cuts (1.5 inches), reduce by 15 minutes. Always sear until the internal temperature reaches 130-135°F—this ensures a perfect medium-rare finish regardless of thickness.
What if I don’t have a cast-iron skillet for searing?
Use a heavy stainless steel skillet or even a well-seasoned carbon steel pan. Avoid nonstick—it won’t generate enough heat for a proper crust. If your pan isn’t heavy, preheat it for 5 extra minutes to ensure it’s screaming hot. For an even deeper crust, try a broiler for the final 2 minutes after searing in the pan, keeping the roast 3-4 inches from the heat source.
Can I make this roast ahead of time?
Yes, but with some adjustments. Cook the roast completely (to 140°F internal temp) and let it cool. Reheat in a 300°F oven for 20-25 minutes wrapped in foil, then sear again in a hot pan for 1-2 minutes per side to restore the crust. For best results, serve within 2 days of cooking. Freeze cooked roast (unseasoned) for up to 3 months—thaw overnight in the fridge before reheating.
Why did my crust turn gray instead of brown?
Gray crusts usually mean the meat wasn’t dry enough before searing or the pan wasn’t hot enough. Pat the roast extra dry with paper towels before searing, and ensure your pan is smoking hot (test with a drop of water—it should sizzle immediately). If using a gas stove, preheat on high for 5 minutes before adding fat. For electric stoves, use the highest setting and let the pan heat until it’s nearly glowing.

- 6 Egg Cake Recipe with Oil: Light as Air With Buttery Moisture - October 4, 2026
- 4 Bean Casserole Recipe: One-Pan Heartiness With Smoky Paprika Depth - October 4, 2026
- 3-Ingredient Keto Mug Cake Recipe: Microwave Magic in 2 Minutes - October 4, 2026