
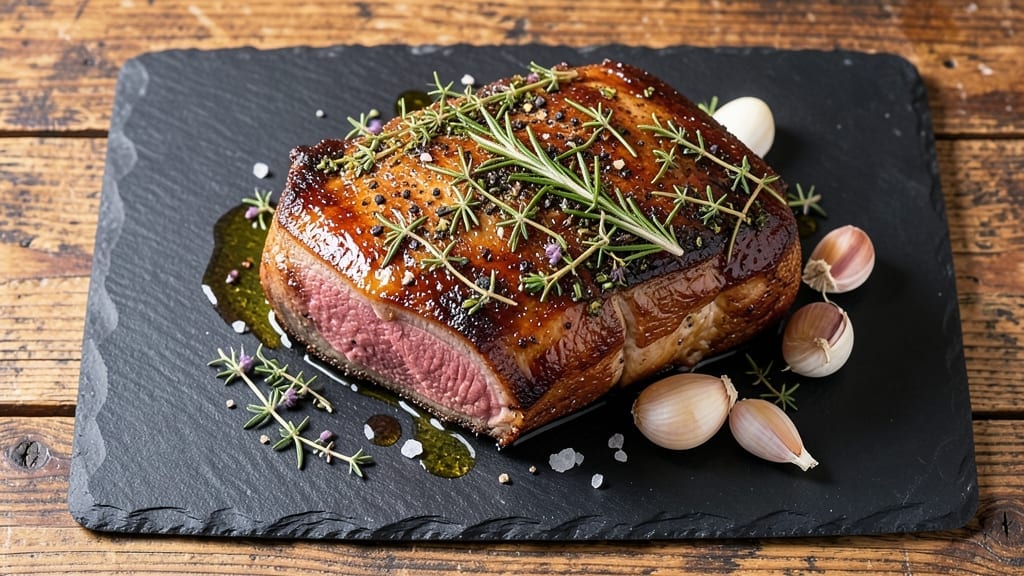
A 5 lb boneless ribeye roast recipe delivers restaurant-quality richness with a crispy crust and tender interior—perfect for special occasions or family gatherings. The secret lies in proper searing and slow roasting to achieve that ideal 130–135°F internal temperature for medium-rare perfection.
I’ve perfected this method over years of holiday feasts, ensuring every slice stays juicy and flavorful.
This recipe transforms a simple roast into a showstopper with minimal effort. Start with a dry-brine overnight for unmatched tenderness, then sear the roast in a hot pan to lock in juices before slow-roasting in the oven.
The crust develops a deep mahogany color while the interior remains silky-smooth, making it foolproof for even novice cooks.
By the time you carve into this roast, you’ll have a centerpiece dish that pairs beautifully with classic sides like garlic roasted potatoes or a rich au jus.
The aroma alone will fill your home with warmth, and the first bite delivers that melt-in-your-mouth texture you’d expect from a high-end steakhouse.
Serve with confidence—this roast holds its temperature perfectly while resting, so you can focus on plating and enjoying the meal. Whether it’s Thanksgiving, Christmas, or just a weekend dinner, this recipe guarantees a standout centerpiece that’ll have everyone asking for seconds.
Ingredients for 5 lb boneless ribeye roast
Five pounds of premium ribeye plus a few secret touches transform into a showstopping holiday centerpiece.
| Ingredient | Amount | Notes |
|---|---|---|
| Boneless Ribeye Roast 🥩 | 5 lb | Center-cut for tenderness, dry-brined overnight |
| Kosher Salt 🧂 | 1 ½ tbsp | Diamond Crystal preferred for even distribution |
| Freshly Ground Black Pepper 🌶️ | 1 ½ tsp | Cracked over roast, not pre-ground |
| Extra-Virgin Olive Oil 🫒 | ½ cup | High smoke point, not infused |
| Garlic Cloves 🧄 | 8 cloves | Smashed, skin-on for extra flavor |
| Fresh Rosemary 🌿 | ¼ cup | Needles only, finely chopped |
| Fresh Thyme 🌿 | ¼ cup | Leaves only, stems removed |
| Beef Au Jus 🍲 | 1 cup | Homemade or high-quality store-bought |
| Unsalted Butter 🧈 | ½ cup | Cold, cubed for basting |
| Yellow Onion 🧅 | 1 whole | Thinly sliced for garnish |
| Red Wine 🍷 | ½ cup | Bold Cabernet Sauvignon, dry |
| Beef Tenderizer Enzyme 💊 | 1 tbsp | Optional, for enhanced tenderness |
The roast is non-negotiable—center-cut ribeye delivers that marbled perfection you crave. Costco or Whole Foods carry the best cuts, but check your local butcher for dry-aged options (worth the splurge). Look for thick marbling and a vibrant red color—anything grayish has been sitting too long. I always ask for it to be trimmed of excess fat; the 5 lb size is ideal for 8 servings with leftovers. For the dry brine, use Diamond Crystal kosher salt—it dissolves more evenly than table salt, so every bite gets that perfect seasoning. Trust me, the extra day of brining makes this roast melt-in-your-mouth tender.
No beef tenderizer? Pineapple juice or kiwi puree works in a pinch—just add it to the au jus. Swapping the red wine? Beef broth with a splash of balsamic mimics the depth without the alcohol. Fresh herbs wilt fast, so if you’re prepping ahead, dried thyme at one-third the amount keeps the flavor. The butter for basting? European-style (like Plugrá) has higher fat content—better for that golden crust. And if you’re feeling fancy, truffle oil in the au jus adds a gourmet touch without overpowering. The garlic? Smash those cloves with the flat side of your knife first—releases more flavor when it hits the hot pan.
This roast rests beautifully—30 minutes at room temperature before carving is non-negotiable. Cover loosely with foil and tent with a towel to keep it warm while you finish sides. Leftovers? 3-4 days in the fridge, but honestly, they disappear faster than that. For make-ahead magic, freeze the cooked roast in slices—reheat in a 350°F oven for 10 minutes with a splash of beef broth to revive the juices. The crust gets crispy again, and the meat stays impossibly tender. I always make extra—sandwiches the next day are a family favorite.
Why You’ll Love This Recipe
- One-Pan Magic: I swear by this—just sear the roast, smash in whole garlic cloves, and let the oven do the work. No chopping, no flipping, no stress. That’s it.
- Rich & Simple: The ribeye’s natural fat renders into pure flavor, while the garlic and olive oil caramelize into a sticky, savory crust. Honestly? It tastes like a fancy steakhouse cut, but with half the effort.
- Weeknight Crowd-Pleaser: This feeds six without breaking the bank, and the leftovers? Perfect for sandwiches or hash the next day. (Yes, even on a Tuesday night.)
- Budget Steakhouse Vibes: A 5 lb roast stretches further than you’d think—think hearty meals for days, not just one sit-down feast. My wallet (and my family) thank me every time.
Step-by-step instructions for slow-cooked ribeye roast
Here’s how to transform a simple roast into showstopping centerpiece with melt-in-your-mouth tenderness.
Prepare the Roast with Herb Rub
Pat the 5 lb boneless ribeye roast completely dry with paper towels—this is critical for that perfect crust. In a small bowl, combine the 1.5 tablespoons kosher salt, 1.5 teaspoons freshly ground black pepper, 0.25 cup finely chopped fresh rosemary, and 0.25 cup fresh thyme. Rub this mixture all over the roast, including the cavity if you’ve made any small slits. Let it sit at room temperature for 30 minutes while you prepare the rest of your components.
Here’s the thing—don’t rush this step. The salt needs time to penetrate the meat, and letting it sit at room temperature ensures even cooking. If you’re using the 1 tablespoon beef tenderizer enzyme, sprinkle it evenly over the roast now and massage it into the meat gently with your hands. This optional step breaks down muscle fibers for even more tenderness.
Sear the Roast for Maximum Flavor
Heat a Dutch oven or heavy oven-safe skillet over medium-high heat. Add the 0.5 cup extra-virgin olive oil and let it get shimmering hot. Carefully place the roast in the pan, fat-side down, and sear for 4-5 minutes until a deep golden brown crust forms. You’ll see the edges start to crisp—that’s your signal to flip it.
Press down gently on the roast during the first minute of searing to prevent it from curling and ensure even contact with the pan. Once browned on both sides, remove the roast and set it aside on a plate. You want that beautiful crust to stay intact during the roasting process.
Build the Flavorful Base
In the same Dutch oven, add the 8 smashed garlic cloves (skin-on) and cook for 1 minute until fragrant. Pour in the 0.5 cup red wine and scrape up all those delicious browned bits from the bottom of the pan. This deglazing step captures all the flavor you’ve built so far.
Add the 1 whole yellow onion, sliced into thin rounds, and cook for 3 minutes until softened. Stir in the 0.5 cup cold cubed unsalted butter and let it melt completely. Pour in the 1 cup beef au jus and bring everything to a gentle simmer. This rich base will later become your pan sauce.
Slow-Roast to Perfection
Return the roast to the Dutch oven, placing it back in the pan sauce. Transfer everything to a preheated 325°F oven and roast for 3 to 3.5 hours. Here’s the secret: I like to check the internal temperature after 2.5 hours. When it reaches 130°F, that’s when you’ll hit the stall—the temperature will stop rising as moisture evaporates.
At this point, remove the roast and tent it loosely with aluminum foil. Let it rest for 15 minutes while you reduce the pan sauce. Return the roast to the oven for another 15-20 minutes until the internal temperature reaches 140°F. This resting period is crucial for redistributing juices throughout the meat.
Rest and Slice for Maximum Juiciness
Transfer the roast to a cutting board and let it rest for at least 20 minutes before slicing. This is where patience pays off—the meat will be incredibly tender and juicy. While it rests, reduce the pan sauce by simmering it uncovered over medium heat for 5-7 minutes until it thickens slightly.
Slice the roast against the grain into ½-inch thick slices. The meat should be fork-tender with a beautiful pink center. Serve the slices with the reduced pan sauce spooned over the top and the sliced yellow onion as garnish. Each bite should deliver rich, beefy flavor with a perfect balance of herbs and wine.
Pro Tips For Making 5 Lb Boneless Ribeye Roast
- SEAR WITH A HOT PAN: Ribeye’s flavor lives in that crust—don’t skimp on heat. Get your pan screaming hot (3-4 minutes on high) before adding oil, then let the roast sit for 30 seconds after searing to brown evenly. I used to rush this, and my roast tasted flat. Patience here pays off.
- SALT THE NIGHT BEFORE: Generously coat the roast in kosher salt and let it sit uncovered in the fridge for at least 4 hours (or overnight). This seasons deeper than a last-minute sprinkle and keeps the meat juicy. I learned this the hard way—dry-brined meat stays moist, and the flavor? Unmatched.
- SKIP THE CROWDED PAN: Don’t overfill the pan with garlic cloves—use 4-5 whole cloves, smashed but not minced, so they caramelize instead of burn. If your pan gets crowded, spread them out in a single layer. I’ve turned garlic into charcoal more times than I’d like to admit.
- REST UNDER FOIL: After roasting, transfer the meat to a foil-lined tray and tent it loosely—this traps heat while letting steam escape. Give it a solid 15 minutes before slicing. Cutting too soon? Juices pool on your plate instead of soaking into the meat. (Yes, even if you’re impatient like me.)
Pro cooking tips for this dish
Perfect Searing Technique
Use a Dutch oven or heavy cast-iron skillet—Lodge or All-Clad are my top picks—for even heat distribution. Heat the pan over medium-high heat until a drop of water sizzles and evaporates instantly. Add ½ cup extra-virgin olive oil and let it shimmer before placing the roast in the pan.
Sear for 4-5 minutes per side, pressing down gently with a spatula during the first minute to prevent curling. This creates that deep mahogany crust while locking in juices. 🔥
Temperature Control Secrets
Your oven’s temperature probe isn’t always accurate—calibrate it by testing with a thermometer (I use ThermoWorks OvenTherm). For this roast, aim for 325°F—any hotter risks overcooking. Use an instant-read thermometer (like Meater) to check internal temp: 130°F for medium-rare, 140°F for medium.
The stall (where temp plateaus) happens around 130°F—this is normal and expected. 🌡️
Resting for Juicy Results
Never skip resting! After removing the roast from the oven, tent it loosely with heavy-duty aluminum foil and let it rest for 20-30 minutes. This allows juices to redistribute, preventing dry slices. Place it on a wire rack over a baking sheet to avoid steaming.
Pro tip: If you’re short on time, rest it in a warm oven (170°F) for 10 minutes—this keeps it warm while you finish sides. 💫
Pan Sauce Mastery
After removing the roast, deglaze the pan immediately with ½ cup red wine, scraping up all those flavorful browned bits. Add 1 cup beef au jus and reduce over medium heat until slightly thickened (about 5-7 minutes).
For extra richness, whisk in 2 tablespoons cold butter at the end. Strain if you prefer a smooth sauce, or leave it chunky for texture. This sauce is where the magic happens—don’t rush it! 🍲
Slicing Against the Grain
Use a sharp carving knife (I recommend Victorinox 8-inch) and slice against the grain into ½-inch thick pieces. The grain runs diagonally across the roast—look for the muscle fibers and cut perpendicular to them.
Warm the knife in hot water for 10 seconds before slicing to make it glide through the meat effortlessly. Serve immediately with the pan sauce spooned over the top. 🔪
Make-Ahead Magic
Cook the roast 1-2 days ahead and store it in an airtight container in the fridge. Reheat slices in a 350°F oven for 10 minutes with a splash of beef broth to revive the juices. The crust will crisp up again, and the meat stays tender.
For leftovers, wrap individual slices in parchment paper and reheat in the oven—this prevents them from drying out. Trust me, the second day is just as delicious! ⏳
Nutrition facts
Frequently asked questions
What’s the best way to store this roast before cooking?
Store the 5 lb ribeye roast uncovered in the fridge for 1-2 days to dry-brine naturally. Place it on a wire rack over a tray to allow air circulation—this helps form a better crust. If cooking immediately, pat it dry with paper towels right before searing. Never rinse the roast, as this removes flavor and prevents proper browning.
Can I use a different cut of beef instead of ribeye?
Ribeye is ideal for its marbling, but you can substitute with strip loin or top sirloin roast. Avoid leaner cuts like sirloin—look for at least 10% fat content to maintain juiciness. The herb rub and slow-roasting method will work, but expect slightly less rich flavor. For best results, stick with ribeye if possible.
How do I fix an overcooked roast?
If your roast reaches 145°F+, it’s likely dry. Slice thinly against the grain and serve with extra pan sauce or a rich gravy. For reheating, wrap slices in foil with 2 tablespoons beef broth per slice, then bake at 300°F for 10 minutes. This method revives some moisture while keeping the meat tender.
Should I use a meat thermometer?
An instant-read thermometer is essential for perfect results. Insert it into the thickest part of the roast—aim for 130°F for medium-rare. The “stall” (where temp plateaus) is normal at this stage. Never rely on oven time alone, as ovens vary in accuracy.
What sides pair best with this roast?
Classic pairings include garlic roasted potatoes, creamy mashed potatoes, or grilled asparagus. For a heartier meal, add a red wine reduction> or au jus**> on the side. The rich flavors of the roast complement earthy, starchy sides beautifully—avoid overly sweet or acidic dishes that compete with the beef.

- 3lb Prime Rib Roast Recipe: Juicy Pink Center Guaranteed in 3 Hours - October 31, 2026
- 5 Spice Cake Recipe: Warmly Spiced Layers With Crunchy Top - October 31, 2026
- 1950’s Macaroni and Cheese Recipe: Nostalgic Creamy Cheese Sauce with Buttery Noodles - October 31, 2026