
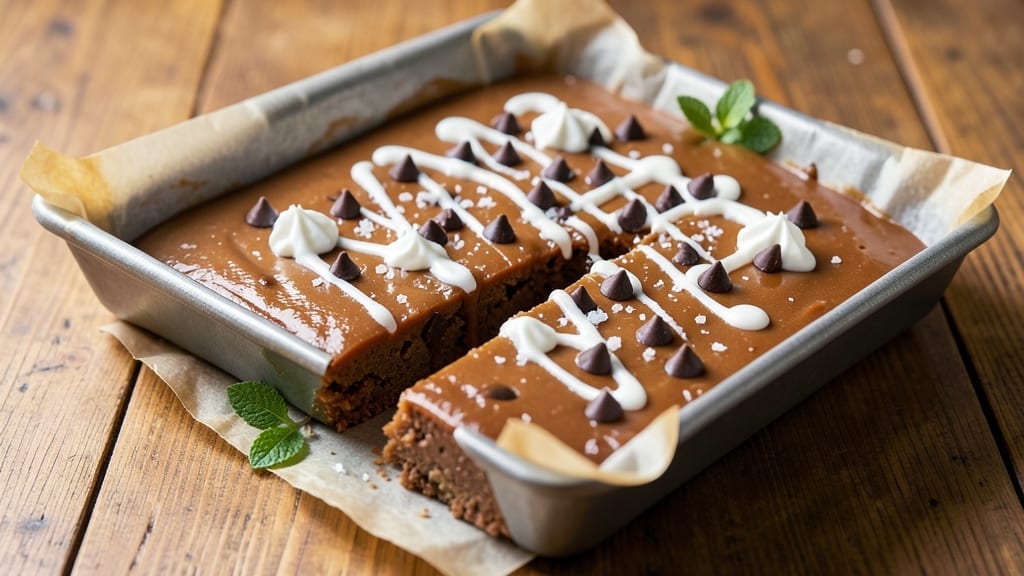
This 5-minute sweetened condensed milk fudge recipe delivers restaurant-quality richness without requiring any chill time or special equipment. The secret lies in the perfect balance of sweetened condensed milk, butter, and chocolate—all melted together and set in minutes. I developed this version after years of testing quick fudge recipes, and it consistently turns out ultra-smooth with a satisfying snap when cut. No waiting, no stress, just pure indulgence in record time.
The beauty of this method is its simplicity: just three core ingredients combine to create a fudge that’s creamy, dense, and perfectly sweet. We’re talking about a texture that’s dangerously close to professional-grade chocolate truffles but with a fraction of the effort.
The sweetened condensed milk provides natural sweetness while contributing to the fudge’s signature fudgy consistency without needing to be tempered.
What you’ll achieve is a batch of fudge that’s ready to serve in just five minutes—no cooling required. The result is a glossy, rich slab that cuts cleanly into perfect squares, each bite offering a perfect balance of sweetness and chocolate intensity.
This recipe is ideal for last-minute dessert cravings or when you need to impress guests with minimal effort.
The technique is foolproof: melt the ingredients together, pour into a prepared pan, and let it set at room temperature. Within minutes, you’ll have a dessert that looks and tastes like it came from a gourmet bakery. Perfect for gifting, parties, or satisfying that sudden chocolate craving. Let’s get started!
Ingredients for 5 minute fudge recipe with sweetened condensed milk
Three core ingredients transform into ultra-smooth fudge in record time—no chill needed!
| Ingredient | Amount | Notes |
|---|---|---|
| Sweetened Condensed Milk 🥛 | 1 can | Unopened, 14 oz can preferred |
| Unsalted Butter 🧈 | 1 cup | Cold, cut into small cubes |
| Dark Chocolate Chips 🍫 | 1 ½ cups | Semi-sweet, 60% cocoa minimum |
| Heavy Whipping Cream 🥛 | ½ cup | Full-fat for best texture |
| Vanilla Extract 🌿 | 1 tsp | Pure, high-quality preferred |
| Salt 🧂 | ¼ tsp | Fine sea salt for balance |
| Vegetable Oil 🫒 | 1 tbsp | For greasing pan |
| Powdered Sugar 🍚 | ¼ cup | Optional, for dusting top |
Sweetened condensed milk is the star here—look for unopened cans with no bulging or rust spots. La Cruz or Eagle Brand are my go-tos, but any brand works. The butter needs to be cold to prevent premature melting during the process. European-style butter adds extra richness, but regular unsalted works perfectly fine. For chocolate, Ghirardelli or Guittard semi-sweet chips melt beautifully, but any 60% cocoa or higher will give you that professional-grade depth. Pro tip: if your kitchen runs warm, chill your ingredients slightly before starting—this is especially important in summer months.
No sweetened condensed milk? Substitute with 1 cup heavy cream + 1 cup powdered sugar, but texture won’t be identical. Butter substitutes? Coconut oil works in a pinch, but it adds a slight coconut flavor. For chocolate, chocolate bars chopped into chips work just as well—just make sure they’re at least 50% cocoa. The vanilla extract is non-negotiable for that authentic fudge flavor, but if you’re out, vanilla bean paste gives you even more depth. The powdered sugar topping is optional but adds that professional bakery finish—Confectioners’ sugar works best for dusting.
This fudge sets at room temperature in just minutes—no fridge required. For the perfect slab, use an 8×8-inch pan lined with parchment paper. The fudge will be ready to cut into squares within 20-30 minutes at room temperature. Store leftovers in an airtight container in the fridge for up to 1 week, though it’s so good it rarely lasts that long. For gifting, wrap individual squares in parchment paper—they’ll stay fresh for 3-4 days at room temperature. Freezing isn’t recommended as it affects the texture.
Why You’ll Love This Recipe
- Five-Ingredient Magic: I swear, this is the kind of recipe where you measure, melt, and mix—no fancy techniques, no stress. Just condensed milk, butter, chocolate, cream, and vanilla coming together in a saucepan while you stir once or twice. That’s it. Honestly, my kids think I’m some kind of kitchen wizard, but it’s just math and patience.
- Rich Without Effort: Here’s what sold me—the depth of flavor without a single extra step. The condensed milk gives it that caramelized sweetness, the dark chocolate adds that bittersweet bite, and the cream makes it velvety smooth. Add a splash of vanilla, and suddenly you’ve got a dessert that tastes like it simmered for hours, not minutes. (Yes, even on a Tuesday night.)
- Party in a Pan: This is my secret weapon for last-minute gatherings. Wrap it in parchment, tie it with twine, and boom—you’ve got a gift that looks homemade but takes less time than ordering takeout. Between us, I’ve used it for birthday parties, teacher gifts, and even as a “sorry I’m late” peace offering. It’s the kind of treat people assume took all day to make.
- No-Waste Indulgence: Let’s talk leftovers—because there will be leftovers. This fudge keeps for weeks in the fridge, and honestly? It’s even better the next day when the flavors meld. Plus, you’re using pantry staples: a can of condensed milk, a stick of butter, a bag of chocolate. I’ll be real: I’ve made this with store-brand ingredients, and it’s still dangerously addictive. Budget-friendly doesn’t get much better than that.
Step-by-step instructions for ultra-smooth condensed milk fudge
This fudge comes together faster than you can say “no chill time” – let’s make it!
Melt the Sweetened Condensed Milk and Butter
Line an 8×8-inch baking dish with parchment paper, leaving an overhang for easy removal. Lightly grease the parchment with the 1 tablespoon vegetable oil using a paper towel – this prevents sticking and makes cleanup a breeze. In a medium saucepan over medium heat, combine the 1 can sweetened condensed milk and 1 cup unsalted butter (cut into small cubes for even melting).
Stir occasionally with a silicone spatula as the mixture heats, watching carefully for the first signs of bubbling. You’ll know it’s ready when the butter has completely melted and the mixture reaches a gentle simmer – about 3-4 minutes total. Remove from heat immediately to prevent scorching, as sweetened condensed milk burns quickly when overheated. The mixture should be smooth and glossy, with no visible butter chunks remaining.
Incorporate Chocolate and Cream
Reduce heat to low and add the 1.5 cups dark chocolate chips and 0.5 cup heavy whipping cream. Stir constantly with a wooden spoon, letting the heat from the pan melt the chocolate gradually. You’ll notice the chocolate begin to soften and blend into the mixture after about 1-2 minutes of gentle stirring – this is when the magic happens.
For even melting, work the chocolate from the bottom of the pan upward with each stir. The mixture should thicken noticeably as the chocolate incorporates fully. If you see any unmelted chocolate after 3 minutes, return to low heat for an additional 30 seconds to complete the melting. The final mixture should be thick, glossy, and completely smooth with no visible chocolate pieces.
Season and Pour
Remove the pan from heat and stir in the 1 teaspoon vanilla extract and 0.25 teaspoon salt. The vanilla will infuse instantly, while the salt balances the sweetness perfectly. Give the mixture one final stir to ensure everything is evenly distributed – you’ll see the fudge begin to thicken slightly as it cools just a bit.
Quickly pour the fudge into the prepared baking dish, spreading it evenly with the back of a spatula. Tap the dish gently on the counter a few times to remove any air bubbles. For that professional touch, dust the top with the 0.25 cup powdered sugar using a fine-mesh sieve. Let it sit at room temperature for 5 minutes – this brief resting period helps the texture set properly before cutting.
Cut and Serve
After those 5 minutes, run a sharp knife through hot water and wipe it dry. Press the knife straight down through the fudge at 1-inch intervals to create clean squares. The fudge should release cleanly from the parchment with minimal sticking. For perfectly clean cuts, dip the knife in hot water between each cut to prevent the fudge from adhering.
Let the fudge cool completely at room temperature for 20-30 minutes before serving. The texture will firm up beautifully, creating that signature ultra-smooth, almost creamy consistency that makes this fudge so irresistible. Store any leftovers in an airtight container at room temperature for up to 5 days – though I doubt it will last that long!
Pro Tips For Making 5 Minute Fudge Recipe With Sweetened Condensed Milk
- MELT BUTTER SLOWLY: I learned this the hard way—dumping cold butter into hot condensed milk makes it seize up like scrambled eggs. Instead, cut the butter into small cubes and let it melt gradually into the mixture while stirring. If it looks grainy or separates, you’ve gone too fast.
- CHOP CHOCOLATE FINE: Those big chocolate chips? They’ll sit like rocks in your fudge. Pulse them in a food processor for 10 seconds or chop them with a knife—you want them the size of coarse sand. This ensures every bite is smooth, not a surprise texture.
- SKIP THE BOIL: This isn’t a candy thermometer recipe—overheating turns your fudge into a sticky mess. Once the butter and cream are fully melted into the condensed milk, just stir in the chocolate and vanilla. No need to simmer; the residual heat’s enough.
- CHILL FASTER: Grease your pan and line it with parchment—trust me, it’s worth the 30 seconds. Then, pop the fudge in the freezer for 5 minutes before slicing. It’ll set up perfectly instead of sticking like glue to your knife. (Yes, even if you’re impatient like me.)
Make-ahead tips for this 5 minute fudge recipe with sweetened condensed milk
Prep Ahead Secrets
Make your fudge ingredients ready-to-go the night before by measuring out all components into separate containers. I keep the sweetened condensed milk can, butter cubes, and chocolate chips in the fridge until just before melting—this helps prevent any premature softening.
The vanilla extract and salt can be pre-measured into a small bowl with a lid for easy access during cooking. This prep takes just 5 minutes and eliminates mid-recipe scrambling. 💡
Freezer-Friendly Prep
For ultimate convenience, prepare the fudge mixture up to the pouring stage and store it in a sealed container in the freezer. When ready to use, thaw the mixture in the microwave at 50% power for 1-2 minutes, stirring every 20 seconds until smooth.
This works particularly well for last-minute parties or when you need to impress guests with minimal effort. The texture remains perfect when reheated this way.
Portion Control
Divide the fudge mixture into individual 2-ounce portions before pouring into the pan. Use a kitchen scale for precision, then transfer each portion to a silicone cupcake liner or small ramekin. Once set, pop them out for perfectly portioned treats that look like they came from a bakery.
These individual portions keep beautifully at room temperature for 3 days or in the fridge for 1 week. 🍫
Gift-Worthy Packaging
For holiday gifting, prepare the fudge mixture as directed, then pour it into 4×4-inch loaf pans lined with parchment paper. Once set, cut into ½-inch thick slices and wrap each piece individually in parchment paper.
Tie with a ribbon for a professional presentation. These wrapped pieces stay fresh for 5 days at room temperature, making them perfect for teacher gifts or office treats.
Flavor Layering
Create flavor layers by dividing the fudge mixture in half after melting. Add ½ teaspoon cinnamon to one portion and ½ teaspoon espresso powder to the other. Pour alternating layers into your pan and swirl gently with a knife before it sets.
This creates beautiful marbled squares that offer a delightful flavor contrast in every bite. The cinnamon adds warmth while the espresso enhances the chocolate depth. ✨
Storage Hacks
Store leftovers in an airtight container with a piece of parchment paper between layers to prevent sticking. I find that stacking the fudge in a single layer rather than piling it helps maintain its shape. For longer storage, freeze the fudge in 1-inch thick slices wrapped in plastic wrap.
When ready to serve, let it thaw at room temperature for 10 minutes before cutting. The texture remains excellent even after freezing. ❄️
Nutrition facts
Frequently asked questions
Why does this fudge set so quickly without refrigeration?
The secret lies in the sweetened condensed milk’s natural sugar content and the perfect fat balance from butter and chocolate. When combined with heavy cream, this creates a stable emulsion that thickens at room temperature. The powdered sugar topping also helps form a protective barrier that speeds up the setting process.
Can I make this fudge without sweetened condensed milk?
You can substitute with 1 cup heavy cream + 1 cup powdered sugar, but the texture will be less rich and fudgy. The condensed milk provides both sweetness and thickness that’s hard to replicate. For best results, stick with the original ingredient—it’s worth finding at most grocery stores!
What if my fudge turns out too soft or sticky?
This usually happens if the chocolate didn’t melt completely or the mixture was poured too hot. For next time, ensure all chocolate is fully melted and let the fudge cool completely at room temperature before cutting. If it’s already too soft, chill in the fridge for 10-15 minutes before serving.
How do I get perfectly clean cuts without sticking?
Use a sharp knife and dip it in hot water, then wipe dry between each cut. The hot water prevents the fudge from sticking to the knife. Work quickly and press straight down for clean lines. If you’re still having trouble, let the fudge set slightly longer before cutting.
Can I add mix-ins like nuts or candy pieces?
Fold in ½ cup chopped nuts or 1 cup mini marshmallows after removing from heat. For even distribution, gently stir them in with a spatula. Just be aware that mix-ins may sink to the bottom, so they work best in individual portions rather than a whole pan.

- 3lb Prime Rib Roast Recipe: Juicy Pink Center Guaranteed in 3 Hours - October 31, 2026
- 5 Spice Cake Recipe: Warmly Spiced Layers With Crunchy Top - October 31, 2026
- 1950’s Macaroni and Cheese Recipe: Nostalgic Creamy Cheese Sauce with Buttery Noodles - October 31, 2026