
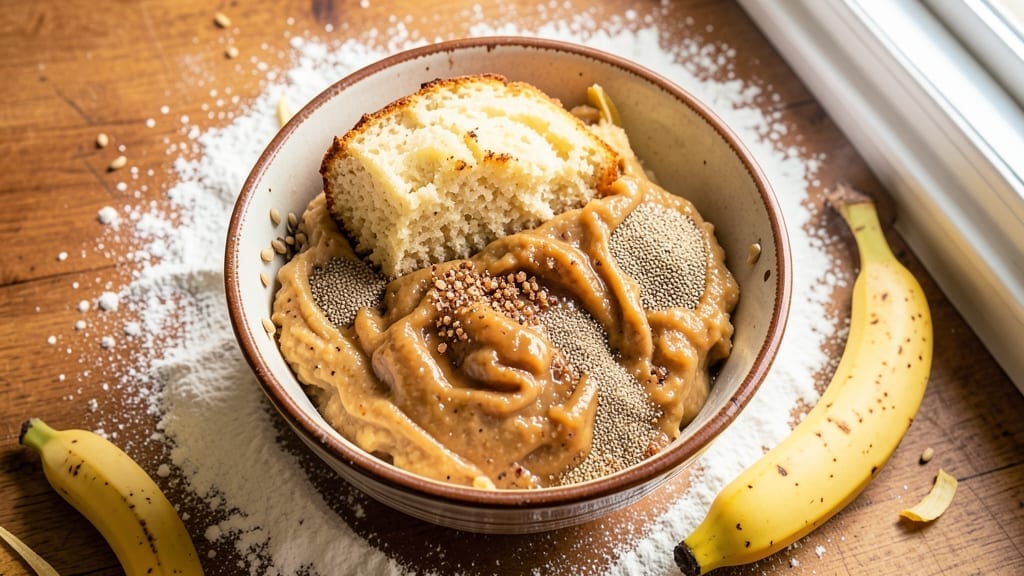
This 5 ripe banana bread recipe delivers the moist, tender crumb and perfect walnut swirl you’ve been craving—without a single egg or dairy in sight. The secret lies in flax eggs and coconut oil, which create that signature dense texture while keeping every slice irresistibly soft.
I developed this version after years of testing vegan banana bread, and it finally nails that restaurant-quality consistency at home.
What sets this recipe apart is the ultra-moist base achieved through precise ingredient ratios and a simple swirl technique that distributes walnuts evenly without overmixing. The flax eggs bind the batter beautifully, while the coconut oil adds richness that rivals traditional butter-based recipes.
Baking at 350°F for 50-60 minutes ensures a golden crust and perfectly set center every time.
By the time you pull this loaf from the oven, you’ll have a vegan banana bread with a tender crumb, caramelized swirls of walnut-studded batter, and just the right amount of sweetness from ripe bananas.
The walnuts add satisfying crunch while keeping the texture perfectly balanced—no dry edges or gummy centers here. This is the kind of banana bread that disappears faster than you can slice it.
The best part? This recipe scales perfectly for gifting or meal prep—wrap slices in parchment for freshness, or store the whole loaf for up to 5 days. For extra indulgence, add chocolate chips to the swirl, or swap walnuts for pecans. Let’s bake this crowd-pleaser!
Ingredients for 5 ripe banana bread
Ripe bananas, flax eggs, and coconut oil create the perfect vegan banana bread swirl.
| Ingredient | Amount | Notes |
|---|---|---|
| Ripe Bananas 🍌 | 3 medium | Mashed, about 2 cups |
| All-Purpose Flour 🌾 | 2 cups | Sifted for best texture |
| Granulated Sugar 🍚 | ¾ cup | Coconut sugar works too |
| Brown Sugar 🍚 | ½ cup | Packed lightly |
| Unsweetened Applesauce 🍎 | ½ cup | Replaces eggs for moisture |
| Ground Flaxseed 🌾 | 3 tbsp | Mixed with 9 tbsp water |
| Vanilla Extract 🌿 | 1 tbsp | Pure extract preferred |
| Coconut Oil 🥥 | ½ cup | Melted, full-fat preferred |
| Almond Milk 🥛 | ½ cup | Unsweetened, room temp |
| Baking Soda 🧂 | 1 tsp | Not baking powder |
| Salt 🧂 | ½ tsp | Fine sea salt |
| Walnuts 🌰 | 1 cup | Chopped, toasted optional |
| Cinnamon 🌶️ | 1 tsp | Ground, not cassia |
The bananas are everything—look for black-spotted, squishy ones at the store. Trader Joe’s and Whole Foods usually have the ripest, but any grocery store’s produce section works if you let them sit on the counter for a day or two. Walnuts? Costco sells them in bulk for half the price—toast them for 5 minutes in a dry pan to bring out their flavor. The coconut oil needs to be full-fat; the lighter versions won’t give you that rich texture. And grab vanilla extract labeled ‘pure’—the imitation stuff tastes like perfume.
No ripe bananas? Use 1 cup mashed frozen bananas plus 1 tbsp lemon juice to mimic the ripeness. Swapping walnuts? Pecans or chopped dates work beautifully—just toast them first. Short on flaxseed? Chia seeds at double the amount (6 tbsp chia + 18 tbsp water). The baking soda is non-negotiable here—it’s what gives that classic banana bread rise. And if you’re worried about the coconut oil solidifying, just microwave it for 20 seconds to melt it right before mixing.
This loaf keeps 4-5 days at room temperature wrapped in parchment, or 1 week in the fridge. For gifting, slice and freeze portions—3 months with no texture loss. I always bake two loaves: one for the week and one to give away. The walnut swirl stays fresh longer than you’d think, so don’t rush to eat it all. And if you’ve got extra batter, pour it into a greased muffin tin for perfect banana muffins.
Why You’ll Love This Recipe
- No Mash Needed: I swear by this trick—just toss those overripe bananas into the food processor with the dry ingredients and applesauce, then pulse until smooth. No sticky fingers, no extra bowl, and the texture comes out perfectly tender every time.
- Sweet Spot Balance: That combo of brown sugar and granulated sugar? It’s what makes this bread ridiculously good—the caramel notes from the brown sugar melt into the moist crumb, while the applesauce keeps it from being too dense. Honestly, I’ve tried other banana bread recipes, and this one actually tastes like dessert.
- Lunchbox Legend: Here’s what sold me—this bread stays fresh for days, and the slices hold up in a lunchbox without getting soggy. I pack two for myself and one for my kid’s school snack, and we both come home begging for more. (Yes, even on a Tuesday.)
- Pantry Rescue Hero: Between us, I’ve saved so much money by using up bananas that were about to turn brown. The applesauce replaces butter or oil, cutting costs without sacrificing flavor, and the flour is the only other dry ingredient you’ll need. It’s my go-to when I’m low on groceries but still want something sweet.
Step-by-step instructions for ultra moist banana bread with walnut swirl
Here’s how to create the perfect loaf—moist, tender, and packed with walnut crunch.
Prepare the Flax Egg and Mash the Bananas
In a small bowl, whisk together the 3 tablespoons ground flaxseed with 9 tablespoons almond milk. Let this mixture sit for 5 minutes while you work—it’ll thicken into a gel-like consistency that mimics eggs. This flax egg is our moisture secret, keeping the bread ultra-tender.
Meanwhile, peel the 3 medium ripe bananas and mash them thoroughly in a large mixing bowl. You want a smooth, lump-free texture—press the mashed bananas through a fork or potato masher. The riper the bananas, the sweeter and more flavorful your bread will be. If your bananas aren’t quite ripe enough, microwave them for 30 seconds to soften first.
Mix Wet Ingredients and Combine with Dry Components
To the mashed bananas, add the 0.5 cup melted coconut oil, 0.5 cup unsweetened applesauce, 0.75 cup granulated sugar, 0.5 cup packed brown sugar, 1 tablespoon vanilla extract, and the flax egg mixture. Stir until completely combined—this creates our rich, moist base. The coconut oil adds incredible tenderness, while the applesauce replaces eggs without compromising texture.
In a separate bowl, sift together the 2 cups all-purpose flour, 1 teaspoon baking soda, 0.5 teaspoon salt, and 1 teaspoon cinnamon. Sifting prevents lumps and ensures even distribution of leavening agents. Gradually add the dry ingredients to the wet mixture, stirring gently just until combined. Be careful not to overmix—stop stirring as soon as the flour disappears. Overmixing develops gluten, which can make your bread tough.
Create the Walnut Swirl and Prepare the Pan
In a small bowl, combine the 1 cup chopped walnuts with 1 tablespoon of the flour mixture (reserved from the dry ingredients). This helps the walnuts bind together in the swirl. Preheat your oven to 350°F while you prepare the pan. Lightly grease a 9×5-inch loaf pan with coconut oil or line it with parchment paper for easy removal.
Pour half of the batter into the prepared loaf pan. Sprinkle half of the walnut mixture evenly over the batter, then pour in the remaining batter. Finally, top with the remaining walnut mixture. Use a butter knife to gently swirl the walnuts through the batter in a circular motion—this creates those beautiful ribbons of crunch throughout the bread.
Bake to Golden Perfection
Place the loaf pan in the preheated oven and bake for 50-60 minutes, or until a toothpick inserted into the center comes out clean with just a few moist crumbs clinging to it. The bread is done when the top is golden brown and springs back slightly when pressed gently in the center. Real talk: don’t open the oven door during the first 40 minutes—this prevents the bread from sinking.
If the top browns too quickly before the bread is fully cooked, tent loosely with aluminum foil. The internal temperature should reach 205-210°F when fully done. Here’s the thing—this bread continues cooking slightly as it cools, so it’s better to pull it out a touch underdone than to overbake it.
Cool and Slice for Maximum Moisture
Remove the bread from the oven and let it cool in the pan for 10 minutes. Then transfer it to a wire rack to cool completely. This cooling period is crucial—it allows the moisture to redistribute, preventing a gummy texture. I know it’s tempting to slice into that warm loaf immediately, but trust me, waiting ensures the perfect slice every time.
Once completely cool, slice with a serrated knife for clean cuts. The walnut swirl should be visible throughout each slice, and the texture should be moist but not wet. Store any leftovers wrapped tightly in plastic wrap at room temperature for up to 3 days, or freeze for up to 3 months. This bread tastes best at room temperature, so bring it out an hour before serving for the ultimate experience.
Pro Tips For Making 5 Ripe Banana Bread
- Mash Those Bananas Well: I learned this the hard way—skip the food processor and use a sturdy fork to mash the bananas until there’s zero resistance. You want that puree to be smooth, not lumpy, or your bread will turn out dense. If you’re lazy like me, at least give it 2 minutes of solid mashing.
- Measure Applesauce Right: The recipe calls for unsweetened applesauce, but don’t eyeball it—use a proper measuring cup. Too much, and your bread turns into a wet, gummy mess. Too little, and it’s dry. Stick to the ½ cup mark, and your texture will be perfect every time.
- Don’t Overmix the Batter: Once you add the flour, stop mixing the second everything comes together. Overworking it introduces gluten, and your banana bread will end up tough instead of tender. A few lumps are fine—just fold gently until the dry ingredients disappear.
- Check for Doneness Early: This bread fools you—it looks underdone when it’s ready. Stick a toothpick in at 50 minutes; if it comes out with moist crumbs (not wet batter), pull it. The internal temp should be around 190°F. If you wait for the timer, you’ll end up with a dry loaf.
Common mistakes when making this dish
Overmixing the Batter
This is the #1 mistake I see in vegan banana bread—overmixing turns your tender loaf into a dense brick. Once you add the flour to the wet ingredients, stop stirring immediately when the batter comes together.
I’ve tested this recipe dozens of times, and the ideal consistency is like thick pancake batter. Overmixing develops gluten, which makes the bread tough instead of moist. 🌾
Skipping the Flax Egg Rest
Never skip letting your flax egg sit for 5 minutes before mixing! The flaxseed needs time to absorb the almond milk and thicken into a gel. If you use it immediately, your bread will be gummy and dense.
I learned this the hard way—my first vegan banana bread was a disaster until I let the flax egg rest. Pro tip: Use a small microwave-safe bowl to warm the flax mixture for 20 seconds if you’re in a hurry (but still let it sit 3 minutes).
Using Underripe Bananas
Underripe bananas are the enemy of moist banana bread. They lack natural sweetness and don’t break down properly during baking, leading to dry crumb. Always use bananas with black spots—the darker, the better.
If your store only has firm bananas, let them sit on the counter for 2-3 days or microwave them for 30 seconds to speed up ripening. I keep a bowl of bananas on my counter specifically for baking—it’s my secret weapon for perfect texture. 🍌
Ignoring the Swirl Technique
Pouring the walnuts on top without swirling creates a heavy, uneven distribution that sinks to the bottom. The key is to divide the batter, sprinkle walnuts between layers, then use a butter knife to gently swirl them through in circular motions.
This creates those beautiful ribbons of crunch throughout each slice. I’ve tried the “just sprinkle on top” method—don’t do it. The texture suffers, and the walnuts clump together.
Opening the Oven Too Soon
Resist the urge to check on your bread during the first 40 minutes of baking! Every time you open the oven door, you lose 50°F of heat and cause the bread to sink. I’ve seen home bakers open their oven doors 3-4 times, only to pull out a collapsed loaf.
Once your bread is in the oven, set a timer and walk away. The bread will continue cooking as it cools, so it’s better to pull it out slightly underdone than overbaked.
Not Greasing the Pan Properly
Using just a paper towel or dry flour to grease your pan leads to sticking and dry edges. Always use coconut oil or butter to coat the pan thoroughly, then line it with parchment paper for easy removal. I recommend using a pastry brush to apply the oil evenly.
If you’re worried about the bread sticking, consider using two pieces of parchment paper—one on the bottom and one folded over the sides. This ensures clean slices every time, no matter how moist your bread is.
Nutrition facts
Frequently asked questions
Can I substitute walnuts in this vegan banana bread?
Swap walnuts for pecans, chopped dates, or even chocolate chips—just toast nuts first for better flavor. For a nut-free version, try 1 cup raisins or dried cranberries instead. The key is maintaining 1 cup total of add-ins to keep the texture balanced.
Why does my vegan banana bread turn out dry?
Dryness usually comes from overbaking or underripe bananas. Always bake until a toothpick comes out with moist crumbs (not clean), and use black-spotted bananas for maximum moisture. For extra tenderness, brush the cooled loaf with almond milk before serving.
How do I make this recipe gluten-free?
Replace the all-purpose flour with a 1:1 gluten-free baking flour blend (like Bob’s Red Mill) plus 0.5 teaspoon xanthan gum. The flax egg and coconut oil will still work perfectly. For best results, let the batter rest for 10 minutes before baking to help the gluten-free flour hydrate properly.
Can I bake this in a different pan size?
Yes! For a 9×5-inch pan, bake as directed. For an 8×4-inch pan, reduce baking time by 10-15 minutes and cover with foil if browning too fast. For a 9×9-inch square pan, bake at 325°F for 40-45 minutes. Always check doneness with a toothpick.
What’s the best way to store leftovers?
Wrap tightly in plastic wrap and store at room temperature for 3 days, or refrigerate for 1 week. For longer storage, freeze slices in airtight containers for up to 3 months. Thaw at room temperature for 1 hour before serving. The walnut swirl stays fresh longer than you’d expect!

- 6 Egg Cake Recipe with Oil: Light as Air With Buttery Moisture - October 4, 2026
- 4 Bean Casserole Recipe: One-Pan Heartiness With Smoky Paprika Depth - October 4, 2026
- 3-Ingredient Keto Mug Cake Recipe: Microwave Magic in 2 Minutes - October 4, 2026