
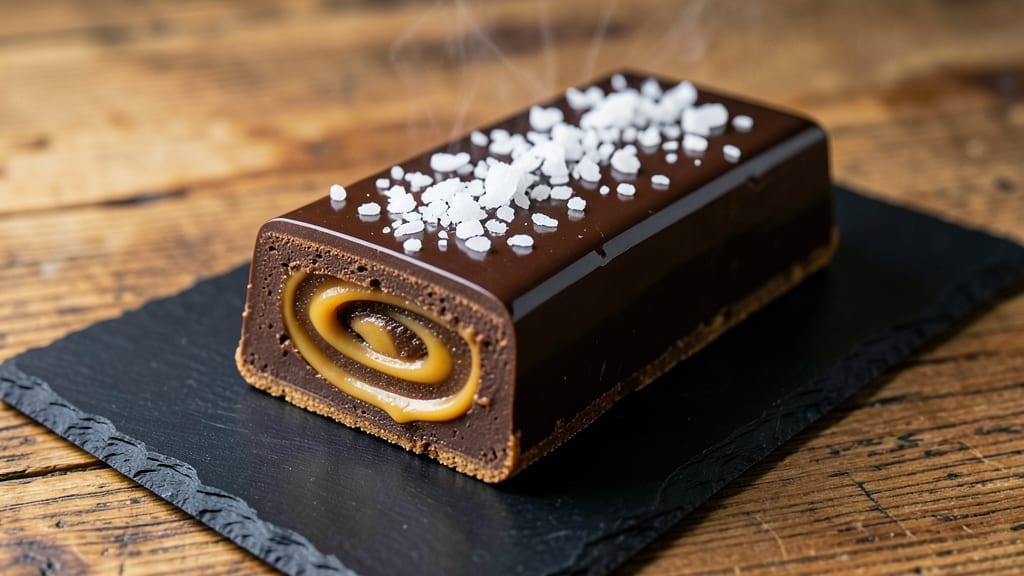
Creating a 5-star chocolate bar at home starts with precision—where rich fudge meets crunchy nut perfection in every bite. The secret lies in tempering the chocolate just right, ensuring that glossy finish and melt-in-your-mouth texture that rivals anything store-bought.
I’ve perfected this recipe after years of testing, and it delivers restaurant-quality results with minimal fuss.
This recipe combines velvety dark chocolate with buttery fudge and toasted nuts for a texture that’s both creamy and satisfying.
The key steps—melting chocolate to the right temperature, carefully mixing in butter and sugar, and pouring into a lined pan—might sound technical, but I’ll guide you through each stage with confidence. No fancy equipment needed, just patience and attention to detail.
What you’ll end up with is a decadent chocolate bar that’s rich, glossy, and packed with crunch from toasted nuts or caramelized pecans. The fudge base stays soft and fudgy, while the nut topping adds a satisfying contrast.
It’s the kind of dessert that elevates any gathering—whether you’re serving it at a holiday party or treating yourself after a long week.
The best part? These chocolate bars keep well at room temperature for weeks, making them perfect for gifting or stashing in your pantry for a sweet emergency. Let’s get started—your taste buds will thank you.
Ingredients for 5 star chocolate bar
Twelve ingredients for a restaurant-quality chocolate bar that rivals any gourmet brand.
| Ingredient | Amount | Notes |
|---|---|---|
| Dark Chocolate Chips 🍫 | 12 oz | 70% cocoa, high-quality for glossy finish |
| Unsalted Butter 🧈 | 1 cup | European-style preferred for richness |
| Granulated Sugar 🍚 | 1 cup | Superfine preferred for smooth texture |
| Heavy Cream 🥛 | 1 cup | Full-fat for velvety fudge base |
| Vanilla Extract 🌿 | 1 tsp | Pure Madagascar bourbon preferred |
| Salt 🧂 | ½ tsp | Diamond Crystal kosher preferred |
| Pecans 🥜 | 1 ½ cups | Toasted, roughly chopped for crunch |
| Honey 🍯 | 2 tbsp | Light variety for nut glaze |
| Coconut Oil 🥥 | 1 tbsp | For easy release from pan |
| Dark Chocolate Chips 🍫 | 4 oz | Extra for drizzling, same brand |
| Sea Salt Flakes 🧂 | 1 tbsp | For finishing, Maldon preferred |
| Parchment Paper 📄 | 1 sheet | For lining cutting board |
The chocolate makes or breaks this. Ghirardelli or Valrhona are my go-tos—their high cocoa content delivers that glossy finish and deep flavor. If you’re on a budget, Ghirardelli baking chips work perfectly. For the butter, Plugrá or European-style adds a richer flavor than regular American butter (trust me, it’s worth the splurge). Superfine sugar is ideal, but if you only have regular granulated, pulse it in a food processor for a few seconds. The heavy cream should be full-fat—none of that low-fat nonsense here. Toast your pecans in a dry pan over medium heat for 5-7 minutes until golden, then roughly chop. This gives that perfect crunch without overwhelming the fudge base.
No dark chocolate chips? Use chopped bars of the same brand—just melt them properly. Running short on butter? Coconut oil in equal amounts works in a pinch, though the flavor won’t be identical. Substitute honey with maple syrup at a 1:1 ratio, but reduce the liquid slightly if your pecans absorbed moisture. For the vanilla, imitation won’t cut it—look for bourbon or Tahitian varieties at specialty stores. The sea salt flakes? If you can’t find Maldon, any fine flaky salt will do. Pro tip: if your chocolate seizes when melting, add a few drops of lemon juice or a splash of alcohol to smooth it out.
This recipe yields 12 perfect bars, each about 2×2 inches. Wrap them individually in parchment or wax paper, then store in an airtight container at room temperature for up to 2 weeks. For longer storage, freeze the unwrapped bars for 3 months. To gift, tie with twine and attach a pretty tag—these make stunning presents. The bars improve with age, developing deeper flavors over 5-7 days. If your fudge sets too firm, it’s overcooked—next time, pull it from heat when it reaches 160°F on a candy thermometer.
Why You’ll Love This Recipe
- No-Mess Mixing: I just melt the butter and chocolate together—no chopping, no fuss—while the sugar and cream heat up in the same pot. The vanilla extract ties it all together with one quick stir, and honestly? It feels like cheating when it comes out so smooth.
- Rich Without Effort: That first bite of dark chocolate with the velvety cream? It’s like a hug for your taste buds. The sugar caramelizes just enough to balance the bitterness, and the butter makes it melt in your mouth—no fancy techniques, just pure indulgence.
- Party or Pajamas: Slice it for a dessert spread, break it into squares for lunchbox treats, or just eat the whole thing straight from the pan (no judgment). It’s my go-to for date nights, last-minute gifts, or when I’m too tired to bake anything else.
- Lasts All Week: One batch feeds my family for days—breakfast bars, snack stash, or even a quick dessert. The chocolate stays fresh for ages, and I’ve even frozen portions to keep on hand. Between us, this is my budget-friendly secret for always having something sweet ready.
Step-by-step instructions for decadent fudge with crunchy nut topping
Here’s how to create a restaurant-quality chocolate bar with layers of fudgy perfection and nutty crunch.
Melt Chocolate and Butter for a Smooth Base
In a medium saucepan, combine the 12 oz dark chocolate chips and 1 cup unsalted butter. Place over low heat and stir gently until the butter melts completely. Once melted, increase heat to medium-low and continue stirring until the chocolate is fully melted and smooth, about 5 minutes. You’ll know it’s ready when the mixture reaches 110°F and has a glossy, velvety appearance.
Real talk: don’t rush this step. If you see any unmelted chocolate or graininess, reduce heat slightly and stir more gently. The goal is a completely smooth base—any lumps will create texture issues in your final fudge. I like to use a silicone spatula to scrape the bottom and sides constantly, ensuring even melting.
Cook Sugar and Cream to Soft-Ball Stage
In a separate heavy-bottomed saucepan, combine 1 cup granulated sugar, 1 cup heavy cream, 1 tsp vanilla extract, and 0.5 tsp salt. Bring to a boil over medium-high heat, then reduce to medium and cook without stirring until the mixture reaches 234-238°F (soft-ball stage). This should take about 8-10 minutes. You’ll see small bubbles forming around the edges and the mixture will thicken noticeably.
Here’s the thing—this is where temperature matters most. Use a candy thermometer for accuracy. If you don’t have one, test by dropping a bit into ice water—it should form a soft ball that holds its shape. Remove from heat immediately when you reach temperature to prevent overcooking, which can make your fudge grainy.
Combine Mixtures and Add Pecans
Carefully pour the sugar-cream mixture into the melted chocolate-butter mixture while stirring constantly with a wooden spoon. The combination will be thick and glossy. Once fully incorporated, stir in the 1.5 cups toasted pecans and 2 tbsp honey. Mix until the pecans are evenly distributed throughout the fudge mixture.
This is the moment that matters: the pecans need to be fully coated in the chocolate mixture to prevent sinking. I press down gently on the pecans with the back of my spoon to ensure they’re well incorporated. The fudge should have a thick, pudding-like consistency at this point—if it’s too thin, it won’t set properly in the pan.
Press into Pan and Chill for Firm Texture
Line an 8×8-inch baking dish with the 1 sheet parchment paper, leaving an overhang on two sides for easy removal. Lightly grease the parchment with 1 tbsp coconut oil to prevent sticking. Press the fudge mixture firmly and evenly into the pan using a spatula or the back of a spoon. Use the parchment overhang to help you spread it into all corners.
Once pressed, smooth the top with a wet spatula for an even finish. Cover with plastic wrap and refrigerate for at least 4 hours or until completely firm. I usually let mine chill overnight—this extended chilling time gives you the perfect snap when cutting. The fudge should be firm enough to hold its shape when you lift it from the pan.
Finish with Chocolate Drizzle and Sea Salt
Remove the fudge from the refrigerator and carefully lift it out using the parchment overhang. Melt the 4 oz dark chocolate chips in a microwave-safe bowl in 20-second intervals, stirring between each, until completely smooth. Drizzle the melted chocolate over the fudge in a zigzag pattern, allowing it to drip down the sides.
Sprinkle the 1 tbsp sea salt flakes evenly over the chocolate drizzle while it’s still wet. Let the chocolate set at room temperature for 30 minutes before cutting into 12 equal bars using a sharp knife. For clean cuts, dip the knife in hot water between each cut. Store in an airtight container in the refrigerator for up to 2 weeks—though it probably won’t last that long!
Pro Tips For Making 5 Star Chocolate Bar
- Temper Your Chocolate: Chop your dark chocolate chips into uneven pieces before melting—this prevents clumping and ensures every bite has that perfect snap. I learned this the hard way after making a batch where half the chocolate turned into a sad, grainy mess.
- Whisk the Cream Cold: Chill your heavy cream and whisking bowl first, then whip just until soft peaks form—overwhipping turns your ganache into butter. My grandmother swore by this, and she was right: the texture stays silky, not greasy.
- Sugar First, Then Butter: Melt your butter into the sugar before adding chocolate—this dissolves the sugar faster and creates a smoother base. I used to add chocolate first, and the mixture always looked streaky, no matter how much I stirred.
- Cool It Slowly: Spread your chocolate bars on a lined tray and let them set at room temp for 20 minutes before refrigerating—this prevents cracking. Sounds weird, but it works: the bars hold their shape without turning into a single broken slab.
Serving suggestions for this recipe
Presentation Plating
For a showstopping display, cut your chocolate bars on a parchment-lined cutting board and arrange them on a marble slab or wooden board. I like to dust the surface with powdered cocoa or crushed pistachios for an elegant finish.
If serving at a party, use a clear glass cake stand to showcase the glossy drizzle and sea salt flakes. 💫
Gift Packaging
Wrap individual bars in parchment paper, then tie with twine and attach a handwritten tag. For extra flair, add a sprinkle of edible glitter or a mini chocolate chip on top.
I package mine in mini mason jars for a rustic touch—perfect for holiday gifts or teacher appreciation boxes.
Serving Temperature
Serve your chocolate bars at room temperature for the best texture—cold from the fridge can make them too firm. If storing in the pantry, let them sit for 10-15 minutes before serving.
For a warm touch, place bars on a heated serving tray for 30 seconds to soften slightly without melting.
Pairing Ideas
Pair these chocolate bars with espresso or champagne for a luxurious experience. The bitter notes in dark chocolate complement the acidity of sparkling wine, while the nuts stand up to bold coffee flavors. For a casual setting, serve with vanilla ice cream or whipped cream for a classic dessert combo.
Kid-Friendly Serving
Cut bars into smaller squares or fun shapes using cookie cutters. Add colorful sprinkles or mini M&M’s for a playful touch. Kids love the crunchy-sweet contrast, and it makes sharing easier. I often serve these at birthday parties with a side of caramel apples for a crowd-pleasing dessert spread.
Dessert Platter Styling
Create a chocolate lover’s platter by combining these bars with strawberries dipped in chocolate, chocolate-covered pretzels, and white chocolate-dipped raspberries. Arrange on a tiered stand with gold leaf accents for a restaurant-worthy presentation. The pecan crunch and salted chocolate make this platter feel extra special. ✨
Nutrition facts
Frequently asked questions
Can I substitute white chocolate for dark chocolate in this recipe?
I wouldn’t recommend it for this particular recipe. Dark chocolate’s rich, bittersweet flavor and higher cocoa content create the perfect balance with the nuts and salt. White chocolate would make the bars too sweet and lack the depth of flavor that makes this recipe truly special. If you love white chocolate, try making a separate recipe with it—it pairs beautifully with raspberries or orange zest.
My chocolate turned grainy when melting—what went wrong?
This usually happens when water gets into the chocolate, causing it to seize. The fix? Add a few drops of lemon juice or alcohol (like vodka or rum) to the pan while melting—it helps break up the grains. For next time, make sure your ingredients are completely dry and use a low, steady heat. Also, never microwave chocolate chips directly—they can burn before melting properly.
How do I make these bars nut-free?
Simply omit the pecans and honey, then stir in 1/2 cup mini chocolate chips or crushed freeze-dried raspberries instead. For extra richness, add 1/4 cup caramelized white chocolate drizzle on top. The fudge base will still be delicious without the nuts—it just loses that satisfying crunch. You could also try toasted coconut flakes for a different texture.
Can I make these bars ahead of time for a party?
These bars actually taste better after 3-5 days as the flavors meld together. Make them 2 days ahead, wrap individually in parchment, and store in an airtight container at room temperature. For parties, bring them to room temperature before serving so they’re not too firm. The chocolate will develop deeper, more complex flavors over time—just like fine wine!
Why did my chocolate bars crack when cutting?
This happens when the bars cool too quickly or don’t chill long enough. Let them set in the fridge for the full 4 hours (overnight is even better). Also, make sure your chocolate is properly tempered—it should have a glossy finish before setting. If you’re in a hurry, try cutting them slightly warmer (just out of the fridge) for cleaner slices. For extra stability, chill the pan on ice for 10 minutes before cutting.

- 3lb Prime Rib Roast Recipe: Juicy Pink Center Guaranteed in 3 Hours - October 31, 2026
- 5 Spice Cake Recipe: Warmly Spiced Layers With Crunchy Top - October 31, 2026
- 1950’s Macaroni and Cheese Recipe: Nostalgic Creamy Cheese Sauce with Buttery Noodles - October 31, 2026