
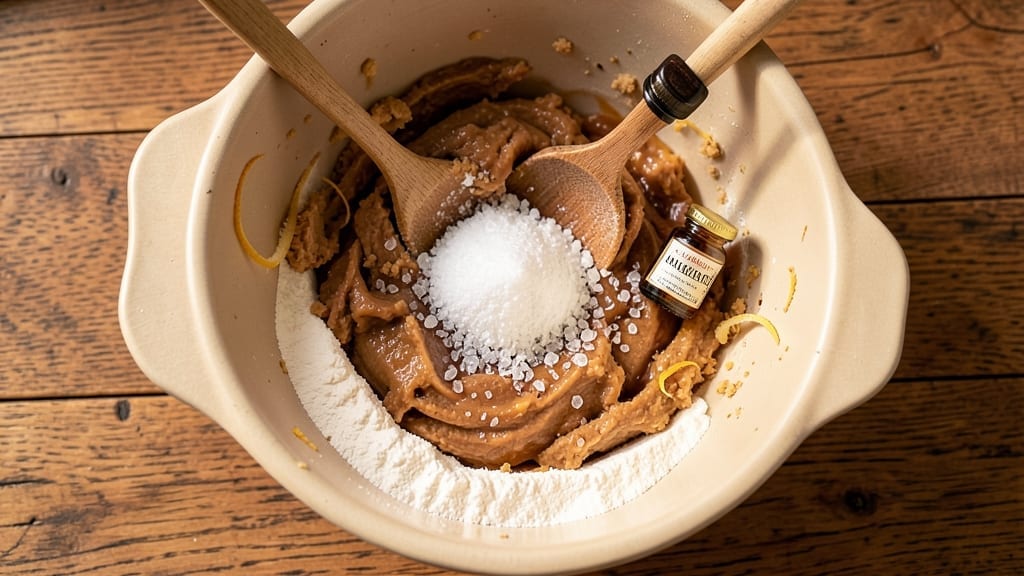
This 5-star cut-out cookie recipe transforms holiday baking from stressful to spectacular in just 30 minutes—no fancy skills required. The secret lies in a foolproof dough that stays crisp yet tender, perfect for cutting intricate shapes that look like they came from a bakery.
I’ve baked these for years, and they’ve earned rave reviews from both kids and adults alike, especially when decorated with royal icing and edible gold accents.
The dough comes together with basic ingredients—flour, butter, sugar, and vanilla—but the magic happens in the chilling and cutting. Shape the dough into a log, refrigerate for 30 minutes, then roll it out on a floured surface.
Use cookie cutters to create stars, trees, or any holiday shape you love. The key is baking them just until the edges are golden—overbaking turns them tough, and we’re aiming for that perfect crisp-yet-chewy texture.
Once baked, let the cookies cool completely before decorating—this ensures your icing sets smoothly. A simple royal icing recipe (powdered sugar, meringue powder, and water) is your best friend for piping borders, writing messages, or flooding entire cookies.
For that five-star finish, add sprinkles, edible glitter, or a dusting of gold luster. These cookies aren’t just delicious; they’re conversation starters that make holiday gatherings feel extra special.
Perfect for gifting, decorating the tree, or serving at parties, this recipe scales easily—double the batch for a crowd. The dough can be prepped ahead, and the decorating is the fun part.
Whether you’re a first-timer or a seasoned baker, these cookies will impress everyone at the table. Let’s get baking!
Ingredients for 5 star cut out cookie
Basic ingredients that transform into showstopping holiday cookies with just 30 minutes of magic.
| Ingredient | Amount | Notes |
|---|---|---|
| All-Purpose Flour 🌾 | 3 ½ cups | Sifted for light texture |
| Unsalted Butter 🧈 | 1 cup | Cold, cubed for even mixing |
| Granulated Sugar 🍚 | ½ cup | Superfine preferred for smoothness |
| Pure Vanilla Extract 🌿 | 1 tsp | Imitation-free for real flavor |
| Salt 🧂 | ½ tsp | Diamond Crystal preferred |
| Baking Soda 🍞 | ½ tsp | Fresh for best rise |
| Heavy Cream 🥛 | ¼ cup | Cold for easy handling |
| Powdered Sugar 🍚 | 2 cups | For royal icing (16 oz bag) |
| Meringue Powder 🍬 | 1 tbsp | For stable royal icing |
| Water 💧 | 1 tbsp | Room temperature for icing |
| Edible Gold Luster 🎨 | ¼ oz | For festive decoration |
| Holiday Sprinkles 🎄 | ½ cup | Assorted colors/shapes |
| Cookie Cutters ✂️ | 1 set | Stars, trees, or custom shapes |
| Parchment Paper 📄 | 1 sheet | For easy transfer |
The butter is non-negotiable here—Plugrá or Land O’Lakes work perfectly, but grab it cold from the store and keep it that way until mixing. King Arthur flour is my go-to for cookie dough, but any all-purpose will do. The vanilla extract? Nothing but pure—the imitation stuff ruins everything. Pro tip: measure your dry ingredients with a kitchen scale for perfect accuracy, but if you’re eyeballing, spoon and level that flour. The baking soda needs to be fresh—if it’s been sitting in your pantry for over 6 months, toss it. For the heavy cream, use the heaviest part of the carton—it’s richer and makes for a more tender cookie.
No powdered sugar? Blend granulated sugar in a blender for 30 seconds—it won’t be as fine but works in a pinch. Running out of meringue powder? 1 egg white + 1 tsp corn syrup makes a decent substitute. The edible gold luster can be pricey, but Amazon or Michaels have great deals if you buy in bulk. For the sprinkles, Wilton or Sugar Spritz are the gold standards—avoid the dollar store versions unless you’re okay with a sad, grainy texture. The cookie cutters? Any holiday-themed set works, but if you’re going for that bakery look, invest in sharp, high-quality steel ones.
The dough keeps beautifully in the fridge for up to 48 hours wrapped tightly in plastic. For longer storage, freeze shaped logs for 3 months—just thaw in the fridge before rolling. Once baked, store cookies in an airtight container with parchment between layers to keep them crisp. The royal icing sets best at room temperature, so let your cookies cool completely before decorating. Pro move: make the icing a day ahead—it thickens nicely and is ready to use when you are.
Why You’ll Love This Recipe
- No-Fuss Dough: I swear by this recipe—just cream butter and sugar, toss in vanilla, and fold in the flour. No mixer needed, no waiting for dough to chill. My kids help roll it out while I make dinner.
- Butter-Sugar Magic: That creamed butter and sugar combo? It’s the secret weapon here. The cookies stay tender inside with just the right crispness at the edges—no dry, crumbly mess.
- Holiday or Snack: Shape them into stars for Christmas, trees for Thanksgiving, or even hearts for Valentine’s. But honestly? I make them plain for a quick afternoon treat. They disappear fast either way.
- Budget-Friendly Staples: Flour, butter, sugar—ingredients you already own. A single batch makes 30 cookies, and they freeze perfectly. I bake a double batch in December and pull them out all winter.
Step-by-step instructions for holiday-worthy cut out cookies
Let’s create showstopping cookies that’ll make your holiday table the star of the season!
Mix the Dough for Perfect Texture
In a large mixing bowl, combine the 3.5 cups all-purpose flour, 0.5 tsp salt, and 0.5 tsp baking soda. Whisk these dry ingredients together until fully blended—this ensures even distribution and prevents lumps in your final cookies.
In a separate bowl, beat the 1 cup unsalted butter and 0.5 cup granulated sugar together until light and fluffy (about 3-4 minutes). This creaming process incorporates air, which gives your cookies that perfect rise and tender crumb. Add the 1 tsp pure vanilla extract and mix for another 30 seconds until fully combined.
Gradually add the dry ingredients to the butter mixture, mixing on low speed until just combined. Then stir in the 0.25 cup cold heavy cream until the dough comes together. The dough should be soft but not sticky—if it’s too dry, add 1 tsp more cream; if too sticky, add 1 tbsp more flour. Wrap the dough in plastic wrap and refrigerate for at least 1 hour (or up to 24 hours for best results).
Roll and Cut for Clean Edges
Preheat your oven to 350°F and line two baking sheets with the parchment paper. Roll out the chilled dough on a lightly floured surface to about ¼-inch thickness. Here’s the thing—keep the dough cold while rolling to prevent spreading during baking.
Use the cookie cutters to cut out your holiday shapes. Press down firmly but gently to ensure clean edges. Place the cut-out cookies on the prepared baking sheets, leaving about 1 inch of space between each one. This prevents them from spreading into each other during baking.
For extra festive flair, brush the tops of the cookies with a tiny bit of heavy cream before baking. This creates a beautiful sheen and helps the holiday sprinkles stick better later. Bake for 8-10 minutes until the edges are light golden brown—they’ll continue firming up as they cool.
Decorate with Royal Icing and Gold Luster
While the cookies bake, prepare the royal icing by whisking together the 2 cups powdered sugar, 1 tbsp meringue powder, and 1 tbsp water in a bowl until smooth. The icing should be thick enough to hold its shape when piped but still spreadable. If it’s too thick, add 1 tsp water; if too thin, add 1 tsp more powdered sugar.
Once the cookies are completely cooled, transfer them to a wire rack. Use a piping bag fitted with a small round tip to pipe borders or outlines onto the cookies. Let these dry for 10-15 minutes until firm to the touch. Then, carefully spread a thin layer of icing over the entire cookie surface with an offset spatula.
Sprinkle the 0.5 cup holiday sprinkles evenly over the wet icing while it’s still tacky. For the finishing touch, use a small brush to apply the 0.25 oz edible gold luster in decorative patterns or drizzles. The gold will add that extra festive sparkle that makes these cookies truly special!
Let Them Set for Perfect Decoration
Allow the decorated cookies to dry completely for at least 2 hours at room temperature. This ensures the icing sets properly and the sprinkles stay in place. For even better results, place them in the refrigerator for 30 minutes to help them set faster.
Once fully set, your cookies are ready to impress! These festive treats will be the highlight of your holiday gatherings, offering both beautiful decoration and delicious flavor. Store them in an airtight container at room temperature for up to 5 days, or freeze for up to 3 months for freshness whenever you need them.
Pro Tips For Making 5 Star Cut Out Cookie
- CHILL THE DOUGH: After mixing, wrap the dough in plastic and refrigerate for at least 2 hours—overnight is better. Cold dough handles cleaner, spreads less when baking, and gives you crisp edges instead of sad, flat cookies. I used to skip this and wondered why my cutouts always looked like they’d been sat on by a toddler.
- WEIGH THE BUTTER: Use a kitchen scale for the butter—pack it tightly into the measuring cup, then level it off. Butter expands when softened, and eyeballing it leads to greasy, dense cookies. I learned this the hard way after making a batch that tasted more like a shortbread brick than a delicate cutout.
- DON’T OVERWORK THE DOUGH: Mix the butter and sugar until just combined—no need to beat it into oblivion. Overmixing develops gluten, which turns your lacework cookies into chewy hockey pucks. Stop when the dough clumps together; it’ll come together when you add the flour.
- BAKE ONE PAN AT A TIME: Preheat the oven, bake one sheet at a time, and rotate the pan halfway through. Stacking pans steals heat, and overcrowding makes cookies bake unevenly. Yes, it takes longer, but you’ll get perfectly golden edges every time—no pale centers or burnt corners.
Flavor customization for these flavors
Classic Vanilla Twist
Start with the base recipe but infuse the dough with 1 teaspoon almond extract alongside the vanilla for a sophisticated nutty depth. For extra richness, replace 2 tablespoons of the heavy cream with 2 tablespoons of mascarpone cheese—it adds a luxurious creaminess that pairs beautifully with the vanilla. 🌟
Spiced Chai Delight
Transform your cookies into a cozy spiced treat by adding 1 teaspoon ground cinnamon, ½ teaspoon ground cardamom, and ¼ teaspoon ground cloves to the dry ingredients.
For warmth, swap 1 tablespoon of the vanilla extract with 1 tablespoon of chai concentrate (or brew a strong cup of chai, cool it, and use that). Top with a sprinkle of cinnamon sugar before baking for a festive touch.
Chocolate-Dipped Elegance
Bake the cookies as directed, then let them cool completely. Melt ½ cup dark chocolate chips with 1 tablespoon coconut oil over a double boiler, then dip the bottom half of each cookie into the chocolate.
Place on parchment-lined trays and sprinkle with crushed peppermint candies or sea salt flakes before the chocolate sets. This adds a decadent contrast to the buttery dough.
Lemon Glaze Brightness
After baking, let the cookies cool, then brush them with a simple lemon glaze made by whisking ½ cup powdered sugar with 1 tablespoon fresh lemon juice and 1 teaspoon lemon zest.
For extra zing, add ½ teaspoon lemon extract to the dough before baking. The bright citrus cuts through the richness, making these cookies feel light and refreshing—perfect for daytime gatherings. 💛
Peppermint Holiday Magic
For a festive twist, add ½ teaspoon peppermint extract to the dough and fold in ¼ cup crushed candy canes (reserve some for topping). After baking, mix ½ cup powdered sugar with 1 teaspoon peppermint extract and a few drops of water to make a glaze.
Drizzle over the cooled cookies and sprinkle with the reserved candy cane pieces for a showstopping holiday look.
Cookie Butter Dream
Swap out the vanilla extract for 1 tablespoon cookie butter (like Smucker’s) and fold in ¼ cup mini chocolate chips for pockets of gooey goodness. After baking, drizzle with a mix of melted white chocolate and crushed pretzels for a sweet-salty crunch.
This variation is a crowd-pleaser that feels indulgent yet easy to make.
Nutrition facts
Frequently asked questions
Can I use this dough for other cookie shapes besides holiday themes?
This versatile dough works perfectly for any shape—hearts, animals, or even classic rounds. The key is keeping the dough chilled while rolling to maintain clean edges. For intricate designs, use sharp cookie cutters and press firmly but gently. The same royal icing technique works for any shape too!
How do I prevent my cookies from spreading too much during baking?
Keep the dough cold throughout the process—roll it out on a chilled surface and refrigerate the scraps between uses. Use a ¼-inch thickness guide and bake at 350°F for exactly 8-10 minutes. Overbaking causes spreading, so pull them out when edges are just golden. A wire rack helps them set faster too!
Can I make the royal icing ahead of time?
Yes! Prepare the icing up to 24 hours ahead and store it in an airtight container. It thickens as it sits, so add 1-2 tsp water when ready to use. For best results, let it sit at room temperature for 30 minutes before piping to achieve the perfect consistency.
What if my cookie cutter leaves jagged edges?
Jagged edges usually mean the dough was too warm. Chill the dough for at least 1 hour before rolling, and keep it cold while cutting. Use a sharp cookie cutter and press firmly but steadily. For extra smooth edges, dip the cutter in flour before pressing down. A rolling pin with a built-in thickness guide helps too!
How do I store decorated cookies to keep them fresh?
Store in an airtight container with parchment paper between layers to prevent sticking. Keep them at room temperature for up to 5 days. For longer storage, freeze the undecorated cookies for 3 months, then decorate after thawing. Avoid refrigerating decorated cookies—they may develop condensation and lose crispness.

- 3lb Prime Rib Roast Recipe: Juicy Pink Center Guaranteed in 3 Hours - October 31, 2026
- 5 Spice Cake Recipe: Warmly Spiced Layers With Crunchy Top - October 31, 2026
- 1950’s Macaroni and Cheese Recipe: Nostalgic Creamy Cheese Sauce with Buttery Noodles - October 31, 2026