
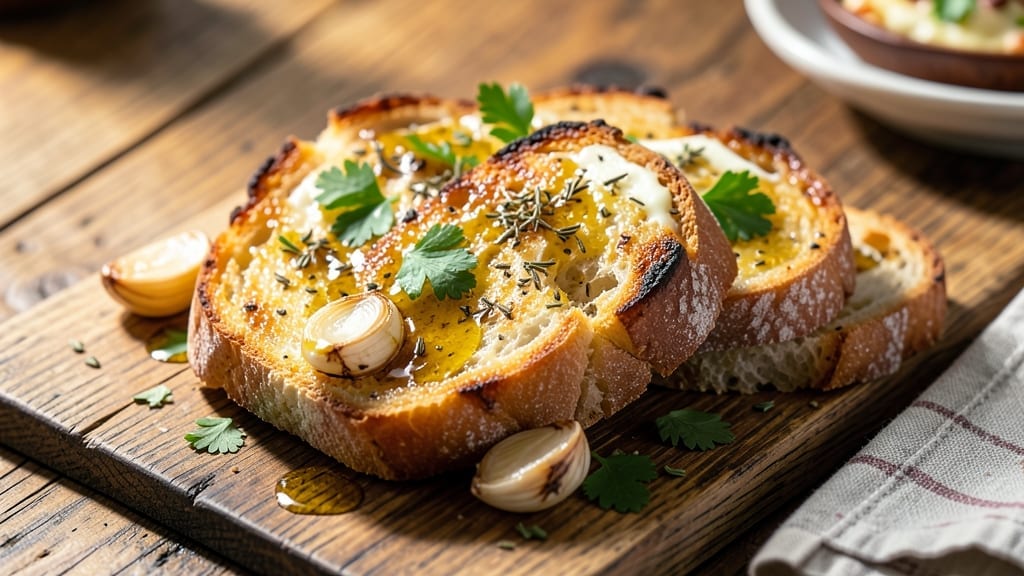
This 5-star garlic bread recipe delivers the kind of restaurant-quality results that make every bite worth the effort—crisp golden edges, buttery layers, and aromatic garlic that lingers just right. 💛 The secret lies in a perfect balance of technique and ingredients: a rich garlic-herb butter compound that gets brushed on just before baking, ensuring maximum flavor infusion without burning.
I’ve perfected this method after years of trial and error, and it never fails to impress, whether served alongside pasta, soups, or as a standalone appetizer.
The foundation starts with quality bread—either a fresh baguette or a pre-made loaf with a sturdy crust that can handle the toasting.
What sets this recipe apart is the two-step butter brushing: first, a thin layer before baking to create a crisp exterior, and second, a generous application of the garlic-herb butter immediately after removal from the oven.
This ensures the bread stays warm, the butter melts into every nook, and the edges achieve that coveted golden-brown finish. The result is a loaf that’s impossible to eat just one slice of.
By the time you’re done, you’ll have garlic bread so good it rivals what you’d get from your favorite Italian restaurant—crispy, aromatic, and rich with flavor. The garlic-herb butter isn’t just a topping; it’s the star, transforming simple bread into a dish worthy of center stage.
The aroma alone will have everyone gathering around the table, and the first bite will confirm why this recipe deserves its five-star reputation. Ready to make it?
This recipe works equally well for weeknight dinners or special occasions, and the variations—like adding parmesan or cheese—make it endlessly customizable. Let’s get started on creating garlic bread that’ll have your guests begging for the recipe.
Ingredients for 5 star garlic bread
Quality bread, rich butter, and aromatic garlic—this is all you need for restaurant-style garlic bread.
| Ingredient | Amount | Notes |
|---|---|---|
| Fresh Baguette 🥖 | 1 whole | Sturdy crust, 12-14 inches long |
| Unsalted Butter 🧈 | ¾ cup | Cold, cubed for compound butter |
| Garlic Cloves 🧄 | 6 cloves | Fresh, minced for compound butter |
| Fresh Parsley 🌿 | ¼ cup | Finely chopped, for compound butter |
| Dried Oregano 🌿 | 1 tsp | Italian preferred for authenticity |
| Dried Thyme 🌿 | ½ tsp | Fresh works too, finely chopped |
| Sea Salt 🧂 | ½ tsp | Fine grain for even distribution |
| Black Pepper 🌶️ | ¼ tsp | Freshly ground for best flavor |
| Extra-Virgin Olive Oil 🫒 | 1 tbsp | For brushing before baking |
| Parmesan Cheese 🧀 | ½ cup | Freshly grated, optional topping |
The bread is non-negotiable. A fresh baguette from a bakery section gives the best texture, but a sturdy pre-made loaf works too—just check the crust isn’t too soft. Whole Foods or your local bakery are great spots for fresh bread. For the butter, Plugrá or Land O’Lakes unsalted are my go-to brands—they melt beautifully. The garlic should be fresh, plump cloves with no sprouting. If you’re short on time, Trader Joe’s sells pre-minced garlic in a jar that works in a pinch, though fresh is always better. The herbs? Italian oregano has a distinct flavor—don’t substitute regular oregano if you can avoid it.
No fresh parsley? Dried parsley at one-third the amount works, but it won’t have the same brightness. Short on butter? Olive oil in the compound butter keeps it rich, though butter’s flavor can’t be fully replicated. The olive oil for brushing before baking can be swapped for melted butter if you prefer. For the Parmesan, pre-grated gets clumpy, so if you’re adding it, grate it yourself from a wedge. The two-step butter brushing is key—don’t skip the initial olive oil layer before baking. It’s what creates that perfect crisp exterior. And if you’re feeling fancy, add a sprinkle of red pepper flakes to the compound butter for a little kick.
The compound butter keeps for 1 week in the fridge, wrapped tightly in plastic. If you make extra, freeze it in 1-tbsp portions for quick use later. The bread itself reheats beautifully—just pop slices in a 350°F oven for 5-7 minutes until warmed through. For make-ahead prep, assemble the bread with the compound butter but don’t bake it. Store it in the fridge, then bake straight from cold. The butter will melt perfectly during baking, and you’ll get that same golden finish. Leftovers? Toast them up again—they’re even better the next day.
Why You’ll Love This Recipe
- I swear by this trick: slice the baguette before you preheat the oven—no messy butter hands or last-minute chopping. Just pop it in the toaster oven or broiler while you melt the butter, and you’re golden.
- No-Knife Night: I swear by this trick: slice the baguette before you preheat the oven—no messy butter hands or last-minute chopping. Just pop it in the toaster oven or broiler while you melt the butter, and you’re golden.
- Butter-Garlic Magic: That first bite? Crispy crust, oozing butter, and garlic so tender it melts into every nook. I’ll be real: I’ve made garlic bread before, but this combo with fresh parsley and oregano? It’s the only version I’ll ever need.
- Party in a Pan: Serve it warm with marinara for dipping, or tear it into pieces for a charcuterie board—no one will judge if you eat half before guests arrive. (Between us, I’ve done it.)
Step-by-step instructions for 5 star garlic bread
Here’s how to create restaurant-quality garlic bread with perfectly crisp edges and buttery layers.
👨🍳 Step 1: Prepare the Garlic-Butter Compound
In a medium bowl, combine the 0.75 cup unsalted butter (cold, cubed) with the 6 cloves minced garlic cloves. I like to use a fork to mash the butter and garlic together until it forms a smooth paste—this ensures even distribution when we spread it later.
Add the 0.25 cup finely chopped fresh parsley, 1 teaspoon dried oregano, 0.5 teaspoon dried thyme, 0.5 teaspoon sea salt, and 0.25 teaspoon black pepper. Mix well until all the herbs and spices are evenly incorporated. The mixture should be thick but spreadable—if it’s too stiff, let it sit at room temperature for 5 minutes to soften.
Here’s the thing—don’t skimp on the garlic. The flavor develops as it bakes, so you’ll taste it more in the finished bread. If you’re worried about overpowering flavor, start with 4 cloves and adjust to taste after tasting the spread.
🔥 Step 2: Preheat and Prep the Baguette
Preheat your oven to 375°F. While it heats, slice the 1 whole fresh baguette lengthwise into two equal halves, cutting all the way through but leaving the bottom intact so it stays connected. This creates a pocket for the garlic butter filling.
Gently open the baguette halves to create a wide gap in the center—you want room for the butter to spread without overflowing. Brush the inside surfaces of both halves with the 1 tablespoon extra-virgin olive oil. This step is crucial because the oil helps the bread brown beautifully and prevents the butter from making the bread soggy.
I press down gently on the baguette halves to help them absorb the oil. This also prevents them from curling up too much when we add the hot butter later. Don’t press too hard or you’ll crush the crust—just enough to open it up properly.
🥘 Step 3: Assemble and Bake to Golden Perfection
Spread the garlic-herb butter mixture evenly over both halves of the baguette, making sure to get it all the way to the edges. You’ll want to use a generous amount—don’t be shy here. The butter should be visible through the slits in the crust when you’re done.
Place the assembled garlic bread on a baking sheet lined with parchment paper. Bake for 12-15 minutes until the edges are deep golden brown and the bread is heated through. The center should still be soft—it’ll continue cooking as it rests.
Watch the bread carefully in the last 2 minutes of baking. If the top starts to brown too quickly, tent it loosely with aluminum foil to prevent burning. The perfect garlic bread should have crisp edges that give way to a soft, buttery interior when you cut into it.
🍽️ Step 4: Finish with Optional Cheese and Serve
Remove the garlic bread from the oven and immediately sprinkle the 0.5 cup freshly grated parmesan cheese evenly over the top. The heat from the bread will make the cheese melt slightly, creating a delicious salty contrast to the garlic butter.
Let the garlic bread rest for 2-3 minutes before serving. This resting time allows the flavors to meld together and prevents the butter from oozing out when you cut into it. The bread should be hot and the aroma should fill your kitchen—this is where you know it’s perfect.
Slice the garlic bread into 1-inch thick pieces and serve immediately. Each bite should deliver crispy, toasted edges, soft bread in the center, and layers of rich garlic butter flavor. If you’re serving with soup, wait until the bread is piping hot to dip—it makes all the difference!
Pro Tips For Making 5 Star Garlic Bread
- SLICE THE BAGUETTE THIN: Cut the baguette into ½-inch slices—thinner than you think. Thick slices burn on the outside while staying doughy inside, and no one wants that. I used to fight the knife, but a sharp serrated blade makes this effortless.
- MELT THE BUTTER FIRST: Warm the butter in a saucepan over low heat until just melted—about 3 minutes—then remove from heat. This keeps the garlic from burning while infusing the butter properly. I learned this the hard way after my kitchen smelled like a campfire.
- MINCE THE GARLIC FINE: Use a knife to mince the garlic into tiny specks, not rough chunks. This ensures even distribution and maximum flavor in every bite. A food processor is faster, but your hands give you more control—just don’t chop it into paste.
- REST THE BREAD AFTER TOASTING: Pull the garlic bread from the oven and let it sit for 2-3 minutes before serving. This lets the residual heat crisp the edges while keeping the interior soft. Skipping this step means tearing into bread that’s still gummy inside.
Wine and beer pairings for these flavors
White Wine Pairings
A crisp Italian Pinot Grigio from the Alto Adige region is my go-to choice—its bright acidity and citrus notes cut through the richness of the garlic butter while complementing the herbal notes.
Look for a bottle with 12-13% alcohol like Santa Margherita Pinot Grigio or Cavit Pinot Grigio for that perfect balance. The wine’s clean finish won’t overpower the garlic bread’s aromatic profile. 🍷
Light Red Options
For those who prefer red wine, a Chianti Classico with its cherry and herbal undertones works surprisingly well. Choose a Sangiovese-based wine with 13-14% alcohol like Castello di Volpaia Chianti Classico.
The wine’s earthy notes enhance the garlic and parsley in the butter, while its moderate tannins won’t clash with the bread’s texture. Avoid heavy reds like Cabernet Sauvignon—they’ll overpower the delicate flavors.
Beer Pairings
A Belgian Witbier like Hoegaarden or Stella Artois brings refreshing citrus and coriander notes that contrast beautifully with the garlic butter. The effervescence cleanses your palate between bites, making each slice taste fresh.
For a malty option, try a light lager such as Peroni or Heineken—their crisp profiles won’t compete with the bread’s rich flavors. 🍺
Non-Alcoholic Options
For a refreshing non-alcoholic pairing, serve with sparkling apple cider like Martinelli’s Sparkling Apple Cider. The effervescence and slight tartness mirror the wine pairing while complementing the garlic’s sweetness.
Alternatively, a cucumber-mint infused water with 1 tbsp lime juice and 4 cucumber slices provides a crisp, cooling contrast that highlights the bread’s buttery richness.
Dessert Wine Balance
If you’re serving garlic bread as part of a full Italian meal, finish with a Moscato d’Asti—its sweet, floral notes provide a delightful contrast to the savory garlic. The 5-6% alcohol and light body won’t overpower the bread’s flavors but instead create a harmonious balance.
A chilled glass of Brachetto d’Acqui offers a similar sweet-tart profile that pairs beautifully with the garlic’s aromatic depth.
Nutrition facts
Frequently asked questions
Can I make this garlic bread with store-bought bread?
Yes, but choose a sturdy loaf with a thick crust—like a French or Italian-style baguette. Avoid soft sandwich bread or rolls, as they won’t hold up to the butter and baking. For best results, look for bread with at least 24 hours of age (if pre-made) to ensure a crisp exterior. A fresh baguette from the bakery section is ideal, but a quality pre-packaged loaf works too.
How do I prevent the garlic bread from getting soggy?
The key is the olive oil brush before baking—this creates a barrier that prevents sogginess. Also, don’t overfill the bread with butter; spread it evenly but not too thickly. Bake on middle oven racks for even heat distribution, and avoid cutting into it immediately after baking. Let it rest 2-3 minutes to set the butter.
Can I make the garlic butter ahead of time?
The garlic-herb butter keeps well in the fridge for 1 week when wrapped tightly in plastic. For longer storage, freeze it in 1-tbsp portions for quick use. Thaw at room temperature before spreading. Pro tip: If the butter hardens too much, microwave it for 5-10 seconds to soften before spreading—just don’t melt it completely.
What’s the best way to reheat leftover garlic bread?
For crispy edges, place slices on a baking sheet and warm in a 350°F oven for 5-7 minutes. For a quicker method, use the toaster oven on high for 2-3 minutes until golden. Avoid microwaving—it makes the bread rubbery. The best part? Leftover garlic bread often tastes even better the next day when reheated properly!
Can I add cheese to this recipe?
Yes! For extra richness, sprinkle 0.5 cup freshly grated Parmesan on top right after baking. Or try mozzarella or provolone for a gooey texture—just add it during the last 2 minutes of baking. For a cheesy crust, mix 1/4 cup grated cheese into the garlic butter before spreading. The cheese should melt beautifully when the bread comes out of the oven.

- 3lb Prime Rib Roast Recipe: Juicy Pink Center Guaranteed in 3 Hours - October 31, 2026
- 5 Spice Cake Recipe: Warmly Spiced Layers With Crunchy Top - October 31, 2026
- 1950’s Macaroni and Cheese Recipe: Nostalgic Creamy Cheese Sauce with Buttery Noodles - October 31, 2026