
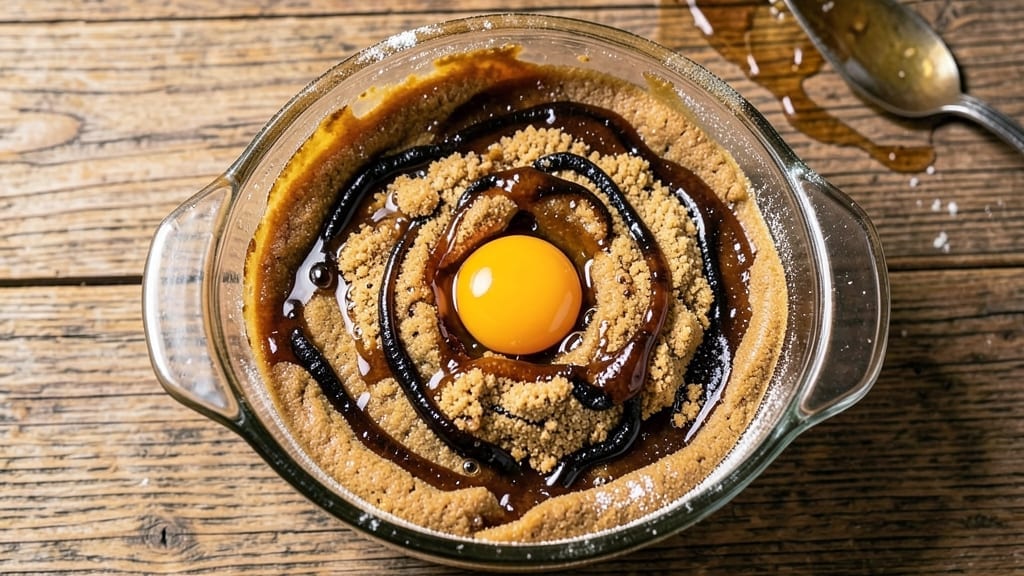
This 5-star molasses cookie recipe delivers the perfect balance of spiced warmth and caramelized sweetness that makes every bite unforgettable. The secret lies in using dark molasses and baking soda for that signature chewy texture, while a blend of cinnamon, ginger, and nutmeg creates layers of aromatic depth.
I’ve baked these cookies countless times, and they consistently earn rave reviews—crisp edges, soft centers, and a molasses flavor that’s rich without being overpowering.
The recipe is straightforward but packed with professional techniques to ensure foolproof results. You’ll need just 10 ingredients, including brown sugar for caramelization and a touch of corn syrup to prevent spreading.
The dough comes together in minutes, and the cookies bake up with a golden sheen that’s impossible to resist.
What makes these truly special is the balance of flavors—the molasses provides depth, while the spices add warmth, and the baking soda creates that signature chewiness that keeps them tender for days.
By the time these cookies emerge from the oven, you’ll have a tray of golden, aromatic cookies with a crackly top and soft, fudgy centers. The molasses flavor shines through with every bite, enhanced by the warm spices that linger on your palate.
These are the kind of cookies that disappear quickly, whether you’re serving them at a holiday gathering or enjoying them with a cup of coffee on a chilly afternoon.
For an extra touch of elegance, dust them with powdered sugar or drizzle with a simple glaze made from powdered sugar and milk. The possibilities for variations are endless—add chopped nuts for crunch, or swap in a bit of coffee for depth.
Whatever you choose, these cookies will deliver restaurant-quality results every time.
Ingredients for 5 star molasses cookie
These 13 ingredients create the perfect molasses cookie—spiced, chewy, and rich with caramelized sweetness.
| Ingredient | Amount | Notes |
|---|---|---|
| Dark Molasses 🍯 | ½ cup | Unsulphured for best flavor |
| All-Purpose Flour 🌾 | 2 ½ cups | Sifted for light texture |
| Packed Brown Sugar 🍚 | 1 cup | Light or dark, your choice |
| Granulated Sugar 🍬 | ½ cup | For caramelized crunch |
| Light Corn Syrup 💧 | ½ cup | Prevents spreading |
| Large Eggs 🥚 | 2 whole | Room temperature preferred |
| Baking Soda 🧂 | 1 tsp | Not baking powder |
| Ground Cinnamon 🌿 | 1 ½ tsp | Freshly ground preferred |
| Ground Ginger 🌶️ | ½ tsp | Freshly ground for warmth |
| Ground Nutmeg 🌿 | ¼ tsp | Freshly grated nutmeg |
| Salt 🧂 | ½ tsp | Kosher or sea salt |
| Unsalted Butter 🧈 | ½ cup | Cold, cubed for dough |
| Powdered Sugar 🍬 | ¼ cup | For dusting (optional) |
The molasses is non-negotiable here—unsulphured dark molasses gives that deep, rich flavor. Walmart or Whole Foods carry good brands, but if you see ‘unsulphured’ on the label, grab it. The baking soda is what creates that signature chewy texture (not baking powder!), and the corn syrup prevents spreading. I always buy organic spices from Penzeys or the bulk section at Trader Joe’s—they make a noticeable difference. For the butter, Land O’Lakes or Plugrá work perfectly, but don’t use salted. And yes, you need both brown and granulated sugar—the brown adds moisture, the granulated gives that caramelized crunch.
No dark molasses? Substitute with 1/4 cup less maple syrup plus 1/4 cup less brown sugar, but the flavor won’t be identical. Freshly ground spices are ideal, but if you’re using pre-ground, toast them in a dry pan for 30 seconds to wake up the flavors. Out of corn syrup? Light Karo syrup works in a pinch. The powdered sugar is optional—only use if you’re dusting the cookies after baking. And if you’re worried about the dough being too sticky, chill it for 30 minutes before scooping. Trust me on that one—it makes all the difference.
These cookies keep for 5-7 days in an airtight container at room temperature, but honestly, they won’t last that long. The flavor actually improves over time, so if you make a batch, plan to share. They freeze beautifully too—up to 3 months if you wrap them tightly in plastic. I like to freeze them unbaked, then bake straight from frozen (add 2-3 minutes to the baking time). For serving, dust with powdered sugar or drizzle with a simple glaze made from powdered sugar and milk. Pro tip: let them cool completely before dusting, or the sugar melts.
Why You’ll Love This Recipe
- No Mixer Needed: I swear by this dough’s forgiving texture—no chilling required, just scoop and bake. The molasses and corn syrup blend so smoothly, you won’t even miss the stand mixer.
- Deep, Caramelized Chew: That molasses isn’t just flavor—it’s the star. The brown sugar and corn syrup create this perfect balance: crisp edges that give way to a soft, buttery center with a molasses tang that lingers.
- Holiday or Snack Attack: Between us, these cookies are my go-to for Thanksgiving leftovers and when I’m craving something sweet at 3 PM. Freeze half the batch, and you’ve got instant dessert for months.
- Pantry Staple Magic: Honestly, this recipe costs me pennies—flour, sugar, and molasses last forever. And because they keep for weeks in an airtight container, I’m always covered without extra shopping.
Step-by-step instructions for 5 star molasses cookies
Here’s how to bake these rich, spiced molasses cookies with perfect texture and deep caramelized flavor.
Mix Wet Ingredients for Maximum Flavor
In a large mixing bowl, combine the 0.5 cup dark molasses, 1 cup packed brown sugar, 0.5 cup granulated sugar, and 0.5 cup light corn syrup. Whisk until everything is fully dissolved—you should see a smooth, syrupy mixture with no lumps. This step is crucial because the molasses and sugars need to blend completely for even distribution throughout the cookies.
Next, add the 2 whole large eggs (room temperature preferred) and the 0.5 cup unsalted butter, cut into cold cubes. Gently mix until the butter melts and the mixture becomes thick and creamy. The butter should be cold at first to help create that signature chewy texture in the final cookies. If your butter is too soft, chill the bowl for 5 minutes before proceeding.
Combine Dry Ingredients for Perfect Texture
In a separate bowl, sift together the 2.5 cups all-purpose flour, 1 tsp baking soda, 1.5 tsp ground cinnamon, 0.5 tsp ground ginger, 0.25 tsp ground nutmeg, and 0.5 tsp salt. Sifting ensures a light, airy texture and prevents dense cookies. The spices will give your cookies that warm, aromatic depth that makes them truly special.
Gradually add the dry ingredients to the wet mixture, mixing just until combined. Be careful not to overmix—stop as soon as you see no more flour streaks. Overmixing develops gluten, which can make the cookies tough instead of chewy. Once combined, the dough should be thick and slightly sticky, but workable.
Chill the Dough for Better Shape
Cover the bowl with plastic wrap and refrigerate for at least 1 hour (or up to 24 hours). Chilling is essential for two reasons: it firms up the dough so it holds its shape better when baking, and it allows the flour to fully hydrate, which improves texture. If you’re short on time, you can freeze the dough for 30 minutes as a quick alternative.
While the dough chills, preheat your oven to 350°F and line two baking sheets with parchment paper. The oven should be fully preheated before you put the cookies in—this ensures even baking and that perfect caramelized color. I like to use parchment paper because it prevents sticking and makes cleanup easier.
Bake to Golden Perfection
Using a cookie scoop or tablespoon, drop 1-tablespoon portions of dough onto the prepared baking sheets, spacing them 2 inches apart. The dough will be thick and sticky, but don’t worry—it will spread slightly as it bakes. For extra flavor, you can sprinkle a pinch of coarse sugar or a few extra spices on top before baking.
Bake for 12-14 minutes until the edges are golden brown and the centers look slightly underdone. The cookies will continue cooking on the baking sheet after you remove them from the oven. They’re done when they pull away slightly from the edges of the parchment paper but still look soft in the middle. If you prefer them crispier, bake for an additional 1-2 minutes.
Cool and Finish with Powdered Sugar
Remove the cookies from the oven and let them cool on the baking sheet for 5 minutes before transferring to a wire rack to cool completely. This resting period is important—it allows the cookies to set and prevents them from spreading too much as they cool. The longer you let them cool, the more they’ll hold their shape and develop that perfect chewy texture.
Once completely cooled, dust the cookies with 0.25 cup powdered sugar if desired. The powdered sugar adds a beautiful finishing touch and balances the rich molasses flavor. Store the cookies in an airtight container at room temperature for up to 1 week, or freeze for up to 3 months. Enjoy them warm for the best experience—they’re even more delicious straight from the oven!
Pro Tips For Making 5 Star Molasses Cookie
- Mix Molasses Last: Add the dark molasses to the wet ingredients after combining everything else—even if the recipe says otherwise. I learned this the hard way when my cookies turned out dense and bitter; the molasses needs to be fully incorporated into the warm butter and sugars first, or it’ll clump and fight you.
- Pack That Sugar: Use a light hand when packing brown sugar—don’t ram it down like you’re trying to win a snowball fight. Over-packing adds too much moisture, and your cookies will spread into sad, flat pancakes instead of chewy, crackly stars. Tap the cup gently on the counter a few times.
- Chill the Dough Hard: Skip the “just refrigerate for 30 minutes” nonsense—let the dough sit overnight in the fridge for real depth of flavor. The corn syrup and molasses need time to mellow, and the gluten relaxes so your cookies don’t toughen up. (Yes, even if you’re impatient like me.)
- Bake in Batches: Crowding the pan is how you get cookies that steam and turn out pale and gummy. Bake in two sheets at a time, with at least 2 inches between racks, and rotate the pans halfway through. The edges will look done before the centers—resist the urge to peek.
Troubleshooting this dish
Dough Too Sticky?
If your dough feels unworkably sticky, don’t panic—this is normal with molasses cookies! First, try chilling the dough for an extra 30-60 minutes to firm it up.
For immediate fixes, wet your hands slightly before handling, or use a light coating of flour on your fingers (just enough to prevent sticking). I’ve even used a light dusting of powdered sugar on my hands when working with sticky doughs—it works surprisingly well! 💪
Cookies Spread Too Much
Over-spreading happens when the dough is too warm or the oven isn’t fully preheated. Always chill the dough for at least 1 hour before baking, and make sure your oven reaches 350°F before adding cookies.
For extra insurance, place the baking sheets on the middle rack (not the top) and avoid opening the oven door during the first 10 minutes of baking. If you’re still having issues, try baking at 325°F for 15-16 minutes instead.
Cookies Too Dense
Dense cookies usually mean overmixing the dough or using old baking soda. First, verify your baking soda is fresh (it loses potency after 6 months). Second, mix the dry ingredients just until combined—stop as soon as you see no flour streaks.
Finally, make sure you’re using all-purpose flour (not bread flour) and that your butter is cold when mixing. If your dough feels too dry, add 1-2 teaspoons of milk or water to help bind it.
Molasses Flavor Too Strong
If your cookies taste overwhelmingly like molasses, balance the flavor by adding 1-2 teaspoons of vanilla extract to the wet ingredients. You can also reduce the molasses slightly (try 0.4 cup instead of 0.5 cup) and add 1 tablespoon of maple syrup for sweetness.
For a more subtle spice profile, reduce the cinnamon to 1 teaspoon and add ¼ teaspoon of cardamom—it pairs beautifully with molasses without overpowering.
Cookies Burn Before Cooking Through
This usually happens when the oven runs hot or the cookies are too close together. First, check your oven temperature with an oven thermometer—many home ovens run 25-50°F hotter than set. If your oven runs hot, reduce the temperature to 325°F.
Also, space cookies 2 inches apart on the baking sheet and rotate the pans halfway through baking. For extra insurance, use dark or non-stick baking sheets—they conduct heat differently than light-colored metal pans.
Cookies Too Crumbly
Crumbly cookies often result from overbaking or using too much flour. First, check your baking time—remove cookies when edges are golden but centers still look slightly soft.
If you’ve already overbaked, try reviving them by brushing with a simple glaze made from ½ cup powdered sugar + 1 tablespoon milk.
For future batches, measure flour by spooning it into the cup (don’t scoop directly from the bag) and level it off—this prevents packing too much flour into the dough. A 1-teaspoon egg yolk added to the dough also helps bind crumbly textures.
Nutrition facts
Frequently asked questions
Why do I need both brown and granulated sugar in these cookies?
The brown sugar adds moisture and creates that signature chewy texture, while the granulated sugar provides caramelized crunch and helps with browning. Together, they create the perfect balance of soft centers and crisp edges.
Can I make these cookies without corn syrup?
Yes, but your cookies may spread more during baking. Substitute with light Karo syrup or honey (reduce other liquids by 1 tablespoon if using honey). For best results, stick with corn syrup—it prevents excessive spreading while keeping the cookies tender.
How do I know when the molasses cookies are done baking?
They’re done when edges are golden brown and centers still look slightly soft (about 12-14 minutes at 350°F). The cookies will continue cooking on the sheet—remove them when they pull away slightly from the edges but still look tender in the middle. Overbaking makes them dry!
Can I add nuts or chocolate chips to these cookies?
Fold in ½ cup chopped walnuts or pecans for crunch, or add ½ cup chocolate chips for extra richness. Just be aware these will sink to the bottom during baking—press them gently into the tops before baking for even distribution.
Why does the dough need to chill before baking?
Chilling (1 hour minimum) firms up the dough so it holds its shape better and prevents excessive spreading. It also allows the flour to fully hydrate, resulting in a chewier texture. Pro tip: If you’re short on time, freeze the dough for 30 minutes instead.

- 3lb Prime Rib Roast Recipe: Juicy Pink Center Guaranteed in 3 Hours - October 31, 2026
- 5 Spice Cake Recipe: Warmly Spiced Layers With Crunchy Top - October 31, 2026
- 1950’s Macaroni and Cheese Recipe: Nostalgic Creamy Cheese Sauce with Buttery Noodles - October 31, 2026