
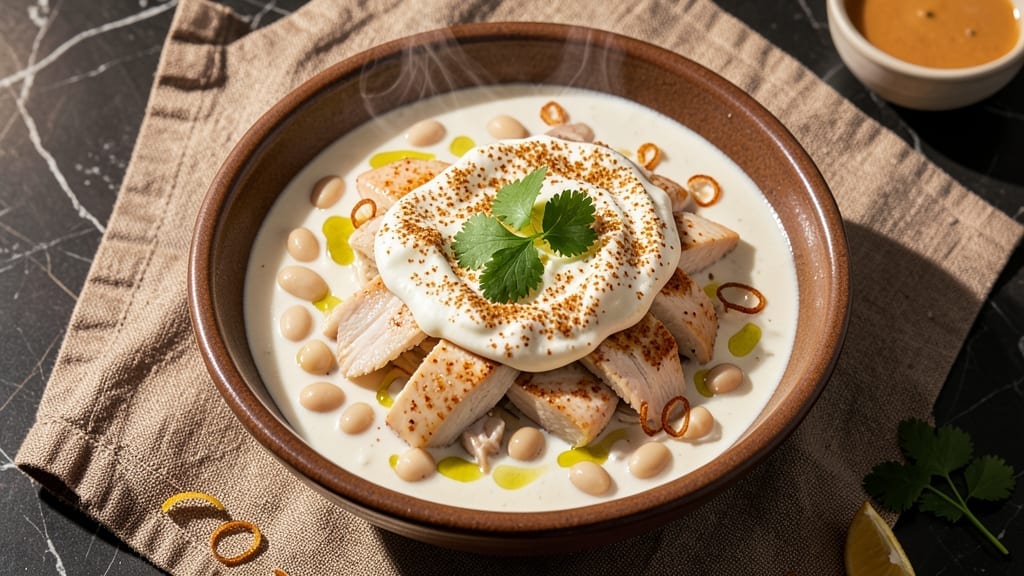
This 5-star white chicken chili recipe delivers restaurant-quality creaminess and zesty cilantro-lime brightness in a single pot—no fuss, no fail. 🌟 The secret lies in blending tender chicken, velvety broth, and a blend of spices that create depth without overpowering the dish.
I’ve perfected this recipe over countless batches, ensuring every spoonful delivers that perfect balance of creamy texture and bold flavors that make it stand out from traditional red chilis.
The magic happens with a slow simmer that transforms tough chicken into melt-in-your-mouth pieces while developing rich, aromatic flavors. A touch of cream and a squeeze of lime elevate the dish, giving it that signature bright, tangy finish that makes it unforgettable.
Unlike many chili recipes, this one skips the heavy spices and instead focuses on a harmonious blend of cumin, garlic, and a hint of cayenne for just the right kick.
By the time you’re done, you’ll have a steaming pot of creamy white chicken chili that’s thick enough to coat the back of a spoon but light enough to feel refreshing. The aroma alone—warm spices mingling with fresh cilantro and lime—will have everyone gathered around the table.
This isn’t just chili; it’s a comforting, flavorful masterpiece that’s perfect for weeknight dinners or impressing guests.
Serve it with warm tortillas, a dollop of sour cream, and a sprinkle of fresh cilantro for the full experience. The best part? It’s a one-pot wonder, so cleanup is a breeze. Let’s get cooking!
Ingredients for 5 star white chicken chili
These velvety ingredients blend into a creamy, zesty chili that tastes like a restaurant favorite.
| Ingredient | Amount | Notes |
|---|---|---|
| Boneless, Skinless Chicken Breast 🍗 | 1 ½ lb | Cut into 1-inch pieces |
| Coconut Milk 🥥 | 13 ½ oz | Full-fat for creaminess |
| Chicken Broth 💧 | 4 cups | Low-sodium preferred |
| White Beans 🌱 | 1 can | Canned, drained and rinsed |
| Cream Cheese 🧀 | 4 oz | Softened for smooth texture |
| Cumin Ground 🌿 | 1 tbsp | Toasted for deeper flavor |
| Garlic Cloves 🧄 | 4 cloves | Minced for aromatic base |
| Cayenne Pepper 🔥 | ½ tsp | Adjust for heat preference |
| Fresh Cilantro 🌿 | ½ cup | Chopped, stems removed |
| Fresh Lime Juice 🍋 | 2 tbsp | Freshly squeezed |
| Fresh Jalapeño 🌶️ | 1 small | Seeded and finely chopped |
| Heavy Cream 🥛 | ½ cup | Full-fat for richness |
| Salt 🧂 | 1 tsp | Kosher or sea salt |
| Black Pepper 🌶️ | ½ tsp | Freshly ground preferred |
The coconut milk and cream cheese are your secret weapons for that signature creamy texture—full-fat versions only (skip the light stuff). I grab Trader Joe’s coconut milk for the best flavor, and Philadelphia cream cheese melts perfectly. The chicken breast should be cut into even pieces so it cooks through without drying out. For the white beans, Great Northern or cannellini work best—they hold their shape but still break down slightly for creaminess. Costco sells them in bulk, which saves money for bigger batches.
No coconut milk? Heavy cream or half-and-half in a pinch, but the flavor won’t be as rich. Canned beans from a dented can? Toss them. The lime juice needs to be fresh—Mexican limes if you can find them, or regular limes work too. Jalapeño hater? Skip it entirely or swap for pickled jalapeño (the brine adds tang). The cilantro should be bright green—wilted leaves mean it’s past its prime. For the cumin, toast it in a dry pan for 30 seconds before adding to deepen the flavor. Pre-ground spices are fine, but if you’ve got whole seeds, toast and grind them fresh for a serious upgrade.
This chili tastes even better the next day—make a double batch and freeze half for lazy nights. Store leftovers in an airtight container for up to 5 days in the fridge. For freezing, portion into single servings so you can reheat exactly what you need. Reheat gently on the stove with a splash of broth to keep it creamy. The cream cheese might separate when reheated, so stir it back in until smooth. Garnish with extra cilantro and lime wedges right before serving—trust me on this.
Why You’ll Love This Recipe
- I’ll be real: cream cheese and coconut milk aren’t cheap, but this recipe stretches them. A single can of beans, a couple chicken breasts, and a splash of broth turn into four hearty servings. It’s the kind of dish that makes you feel fancy without breaking the bank—or your willpower.
- One-Pot Magic: I swear by this recipe when I’m too tired to scrub pots. Toss everything—chicken, beans, broth, even the cream cheese—into one pot, and let it simmer. The coconut milk does all the heavy lifting, blending into a velvety texture without extra strain.
- Creamy Without the Guilt: Between us, this chili is secretly a hug in a bowl. The cream cheese swirled into the coconut milk gives it that luscious, almost soup-like richness, but it’s not heavy or greasy. Honestly, my picky eaters don’t even realize it’s “healthy”—they just keep asking for more.
- Meal Prep MVP: This chili tastes better the next day, which is perfect because I make a double batch every Sunday. The beans hold up, the chicken stays tender, and reheating it is just about dumping it back in a pot. Pack it for lunches or freeze half for those nights when takeout feels like a chore.
Step-by-step instructions for creamy cilantro-lime white chicken chili
Here’s how to make this restaurant-quality chili—silky, rich, and packed with zesty lime-cilantro flavor!
🍳 Step 1: Sear the Chicken for Maximum Flavor
Heat a large Dutch oven or heavy pot over medium-high heat. Add the 1.5 lb boneless, skinless chicken breast cut into 1-inch pieces in a single layer. Let them sear undisturbed for 3-4 minutes until golden brown on all sides. This creates that perfect crust that’ll infuse the chili with deep flavor.
Once golden, remove the chicken with a slotted spoon and set aside. You’ll add it back later—don’t skip this step! The searing builds layers of flavor that make this chili truly stand out. If your pot gets too crowded, work in batches to avoid steaming instead of searing.
🍳 Step 2: Build the Creamy Coconut Base
In the same pot, reduce heat to medium and add 1 tbsp ground cumin and 4 minced garlic cloves. Toast for 30 seconds until fragrant—this wakes up the spices and prevents them from tasting raw. Immediately pour in 13.5 oz coconut milk and stir to combine.
Bring the mixture to a gentle simmer, then pour in 4 cups chicken broth. Stir in 1 tsp salt and 0.5 tsp black pepper. The broth should just barely cover the base—this creates the perfect creamy texture without making the chili watery. Let it simmer for 5 minutes to let the flavors meld.
🥘 Step 3: Add Beans and Cream Cheese for Richness
Gently stir in the 1 can drained white beans and 4 oz softened cream cheese. The cream cheese will melt into a luxurious creaminess that makes this chili uniquely indulgent. Let the mixture simmer for 5-7 minutes until the cream cheese is completely dissolved and the beans are heated through.
Here’s where the magic happens: the cream cheese creates that velvety texture while the beans add hearty substance. If the mixture looks too thick, add ¼ cup water to loosen it slightly. You want it thick enough to coat a spoon but still easy to ladle.
🍳 Step 4: Finish with Zesty Lime and Fresh Herbs
Return the seared chicken pieces to the pot and stir in 2 tbsp fresh lime juice, 0.5 tsp cayenne pepper, and 1 finely chopped jalapeño. The lime brightens everything up while the cayenne adds just the right kick. Let it simmer together for 3-4 minutes—just enough to heat through but not cook the chicken dry.
Remove from heat and stir in 0.5 cup chopped fresh cilantro and 0.5 cup heavy cream. The cilantro adds that fresh, vibrant finish while the heavy cream takes the richness to another level. Taste and adjust seasoning—you might want to add a pinch more salt or lime juice to balance the flavors perfectly.
⏰ Step 5: Rest and Serve with Perfect Texture
Let the chili rest for 5-10 minutes before serving. This crucial step allows all the flavors to meld together and the cream cheese to fully emulsify for that ultra-smooth texture. The chili will thicken slightly as it rests—this is normal and actually improves the texture.
Serve immediately with toppings like avocado slices, tortilla chips, or a dollop of sour cream. Each spoonful should deliver that perfect balance of creamy coconut richness, spicy kick, and bright citrus notes. This chili tastes even better the next day as the flavors continue to develop!
Pro Tips For Making 5 Star White Chicken Chili
- Sear the Chicken First: Don’t skip browning the chicken—it adds depth. Cut the breasts into 1-inch chunks, heat a skillet with 1 tablespoon oil over medium-high, and cook until golden (about 3-4 minutes per side) before adding anything else. I used to toss them straight into the pot, and the chili always tasted flat.
- Simmer, Don’t Boil: Keep the heat low enough that you see tiny bubbles at the edges, not a rolling boil. Coconut milk curdles fast when it gets too hot, and you’ll end up with a grainy, sad chili. I learned this after the first batch looked like a science experiment gone wrong.
- Mash Half the Beans: Rough up half the white beans with a fork or potato masher before adding them to the pot. This releases starch, thickens the broth, and gives the chili that creamy, restaurant-style texture without extra flour or cornstarch. (Yes, even the canned ones work—just drain and rinse them first.)
- Stir in Cream Cheese Late: Wait until the last 5 minutes to fold in the cream cheese, and do it off the heat if possible. If you add it too early, the heat will turn it greasy and separate. I was skeptical until I tried it—now it’s non-negotiable for that velvety finish.
Storing and reheating your leftovers
Refrigerator Storage
Let your chili cool completely before transferring to an airtight container—I love using glass Pyrex with snap-on lids. Store it in the fridge at 40°F or below for up to 5 days.
The cream cheese and coconut milk may thicken slightly, but a quick stir with a splash of warm water or chicken broth brings it back to perfection. 🥥
Pro tip: If you notice the top layer of coconut milk separating, give it a gentle stir before reheating. The texture will smooth out beautifully once warmed through. For best results, store it in a single layer to maintain even cooling.
Freezer Storage
This chili freezes like a dream for up to 3 months—perfect for lazy weeknights! Portion into quart-sized freezer bags or glass containers, leaving 1 inch of headspace for expansion. I recommend single-serving portions so you can thaw exactly what you need. 🧊
When freezing, wait until the chili is completely cool to prevent ice crystals. Label each bag with the date—trust me, you’ll forget! For reheating, thaw overnight in the fridge before warming.
Stovetop Reheating
My favorite method is reheating on the stove over medium-low heat. Transfer the chili to a pot and add 2-3 tablespoons of water or broth to prevent sticking.
Stir frequently for 8-10 minutes until piping hot—165°F internal temperature. The cream cheese might separate slightly, so stir vigorously until smooth. 🔥
If the chili seems too thick after reheating, thin it with a splash of warm broth or coconut milk. Taste and adjust seasoning—it often needs a pinch more salt or a squeeze of lime juice to brighten the flavors.
Microwave Reheating
For quick reheating, use the microwave on 50% power in 1-minute intervals, stirring between each interval. Cover with a microwave-safe lid or damp paper towel to retain moisture.
Heat until steaming hot—about 2-3 minutes total. The texture may be slightly grainier than stovetop reheating, but it’s still delicious. ⏱️
If the chili looks dry, add 1-2 tablespoons of warm water and stir. For extra richness, top with a dollop of sour cream or a sprinkle of fresh cilantro after reheating. Garnish with lime wedges for a zesty finish!
Nutrition facts
Frequently asked questions
Can I use chicken thighs instead of chicken breast?
Chicken thighs add even more richness to this creamy chili. Use bone-in, skin-on thighs for maximum flavor, but remove the skin before adding to the pot. Since thighs cook faster than breasts, reduce your simmer time to 2-3 minutes after returning them to the pot to avoid overcooking.
How do I make this chili spicier?
Double the cayenne pepper to 1 teaspoon or add 1-2 tablespoons of hot sauce like Cholula or Cholula Roja. For extra heat, stir in ½ teaspoon of red pepper flakes or finely chopped serrano peppers. Always taste as you go—you can adjust, but you can’t take heat out!
What can I substitute for coconut milk?
Use ½ cup heavy cream plus ½ cup chicken broth for a similar creamy texture. For a dairy-free option, blend ½ cup cashew butter with 1 cup warm broth until smooth. The flavor won’t be identical, but it’ll still be delicious. The key is maintaining that velvety consistency!
Why did my chili separate after reheating?
This happens when the cream cheese and coconut milk cool too quickly. Stir in 1 tablespoon of warm broth or water and heat gently while stirring vigorously. The motion helps re-emulsify the ingredients. For prevention, reheat on low heat and avoid high power in the microwave. A splash of lime juice also helps restore balance.
Can I make this chili in an Instant Pot?
Yes! Sauté the chicken and spices, then add all ingredients except the cilantro and heavy cream. Cook on high pressure for 8 minutes, then quick-release. Stir in the cream and cilantro at the end. The pressure cooker cuts time but may require a bit more broth to prevent sticking. Adjust seasoning as needed—Instant Pot cooking can concentrate flavors.

- 3lb Prime Rib Roast Recipe: Juicy Pink Center Guaranteed in 3 Hours - October 31, 2026
- 5 Spice Cake Recipe: Warmly Spiced Layers With Crunchy Top - October 31, 2026
- 1950’s Macaroni and Cheese Recipe: Nostalgic Creamy Cheese Sauce with Buttery Noodles - October 31, 2026