
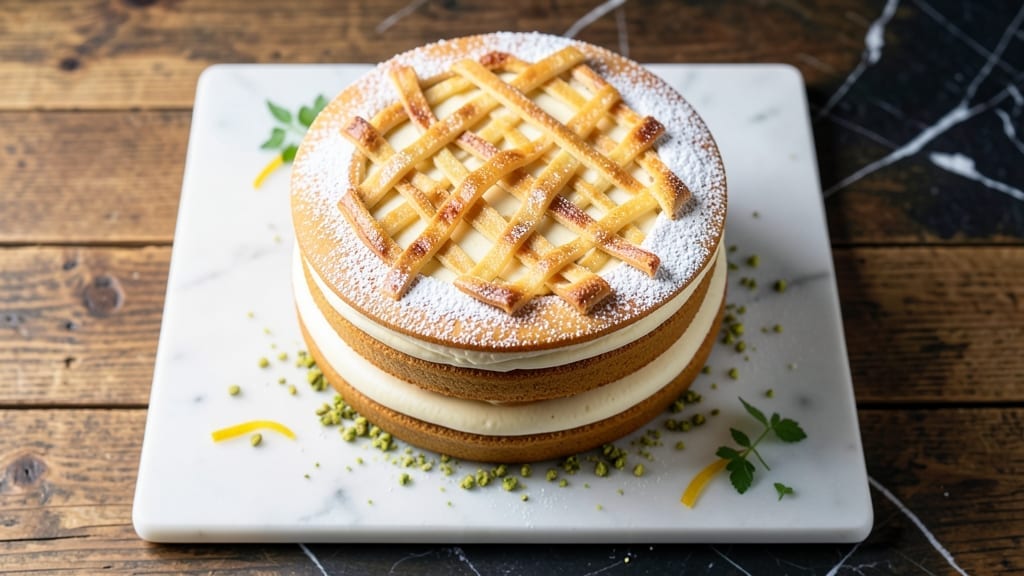
This 6-6-6 cake recipe delivers a showstopping triple-layered vanilla dream with foolproof techniques for perfect layers and silky frosting. The magic lies in equal parts cake, filling, and frosting—each layer carefully balanced to create a towering dessert that’s as impressive as it is delicious.
I’ve baked this for weddings, birthdays, and holiday celebrations, and it never fails to impress, even with beginner bakers.
The secret to a flawless 6-6-6 cake starts with a moist, tender vanilla cake batter that bakes evenly in three 6-inch pans. Between each layer, we add a luscious filling—whether it’s raspberry jam, vanilla custard, or whipped cream—to keep the texture light and airy.
The frosting, a no-fail buttercream, gets piped between layers and swirled on top for that classic, elegant finish.
What you’ll end up with is a cake that’s perfectly proportioned, sturdy enough to slice cleanly, and rich enough to satisfy any crowd. The layers stay moist, the frosting holds its shape, and the flavors harmonize in every bite.
This isn’t just a cake—it’s a masterpiece that makes every celebration feel special.
Ready to bake? We’ll walk through each step—from mixing the batter to layering and chilling—so your 6-6-6 cake turns out picture-perfect every time. Let’s get started with the ingredients and instructions.
Ingredients for 6 6 6 cake
Fifteen ingredients, three perfect layers, and a frosting that never fails—this is your cake masterpiece.
| Ingredient | Amount | Notes |
|---|---|---|
| All-Purpose Flour 🌾 | 3 cups | Sifted for lightness, plus extra for pans |
| Granulated Sugar 🍚 | 2 ¼ cups | Divided for batter and frosting |
| Unsalted Butter 🧈 | 1 ½ cups | Room temperature, full-fat preferred |
| Large Eggs 🥚 | 6 whole | Room temperature for even mixing |
| Vanilla Extract 🌸 | 2 tbsp | Pure, high-quality extract (no imitation) |
| Baking Powder 🍞 | 2 tsp | Freshly opened for best rise |
| Salt 🧂 | ½ tsp | Fine sea salt for balanced flavor |
| Whole Milk 🥛 | 1 cup | Room temperature for smooth batter |
| Raspberry Jam 🍓 | 1 ½ cups | Seedless preferred for clean filling |
| Heavy Whipping Cream 🥛 | 1 ½ cups | Cold for stable whipped cream |
| Powdered Sugar 🍚 | 4 cups | Sifted for smooth buttercream |
| Vanilla Bean Paste 🌸 | 1 tbsp | For intense vanilla flavor (optional) |
| Unflavored Gelatin 🍬 | 1 tbsp | Bloomed in 3 tbsp cold water |
| Lemon Juice 🍋 | 1 tbsp | Freshly squeezed for brightness |
The flour and butter are your foundation—King Arthur all-purpose flour bakes evenly, and Plugrá butter stays rich without cutting. Grab Land O’Lakes heavy cream for the filling—it whips stiffer than store brands. For the vanilla, McCormick pure extract or Madagascar vanilla bean paste makes all the difference. The jam? Smash or Bonne Maman—seedless so it doesn’t grit between layers. If you’re short on time, pre-made raspberry preserves work too, just strain out any big seeds. The gelatin? Great Jones brand dissolves smoothly, but regular Knox works in a pinch.
No raspberry jam? Strawberry preserves or blackberry jam swap one-to-one—just adjust sweetness with a pinch more powdered sugar in the frosting. Out of gelatin? Agar-agar powder at double the weight gives a similar set, though it’s firmer. The vanilla bean paste is a splurge, but imitation vanilla extract (like Walmart’s) works if you’re budgeting—just double the amount. For the milk, evaporated milk at half the quantity adds richness without thinning the batter. And if you’re avoiding dairy, coconut cream in the filling holds up surprisingly well, though it’s slightly sweeter.
Store your dry ingredients—flour, sugar, baking powder—in airtight containers with parchment barriers to keep them fresh for 6-12 months. Butter and cream should go in the fridge (or freezer for longer storage), and the jam lasts unopened for 1 year. Once assembled, your cake keeps covered at room temp for 2 days or fridge for 5 days—though honestly, it’s gone before then. For make-ahead magic, bake the layers 2 days ahead, fill and frost 1 day ahead, and let it come to room temp before serving. The frosting? Pipe it into a freezer bag, snip the corner, and freeze for 3 months—thaw overnight before using.
Why You’ll Love This Recipe
- No Weighing Guesswork: I just eyeball the six cups of each ingredient—flour, sugar, butter—and it’s foolproof. No scales? No problem. The butter-egg ratio gives that signature tender crumb without fuss.
- Butter-Sugar Bliss: That classic 6-6-6 ratio means the butter and sugar get worked together until it’s light, airy, and just sweet enough. Honestly, the first bite makes me close my eyes—it’s that good.
- Birthday Party Ready: Slice it into layers for a crowd, or keep it whole for a showstopper. The vanilla extract adds depth, so it’s perfect for celebrations without tasting like a bakery shortcut.
- Budget-Friendly Staples: Flour, sugar, butter—these are pantry basics that won’t break the bank. Plus, leftovers stay fresh for days, so you’re not baking from scratch every time. My wallet thanks me.
Step-by-step instructions for triple-layered vanilla dream cake
Let’s build this elegant 6-6-6 cake with foolproof techniques for perfect layers and silky frosting.
Prepare the Cake Batter for Even Layers
Preheat your oven to 350°F and grease three 6-inch round cake pans with butter, then dust with the 3 cups all-purpose flour reserved for pans. In a medium bowl, whisk together the 3 cups all-purpose flour, 2.25 cups granulated sugar, 2 tsp baking powder, and 0.5 tsp salt. Sift this mixture twice for a light, airy texture.
In a separate large bowl, cream the 1.5 cups unsalted butter (at room temperature) and 6 whole large eggs (also room temperature) on medium speed for 3-4 minutes until pale and fluffy. Gradually add the dry ingredients to the wet, mixing on low speed just until combined. Fold in the 2 tbsp vanilla extract and 1 cup whole milk until smooth. The batter should be thick but pourable.
Bake and Cool the Layers Perfectly
Divide the batter evenly among the prepared pans. Tap each pan gently on the counter to remove air bubbles, then bake for 25-30 minutes or until a toothpick inserted in the center comes out clean. Rotate the pans halfway through baking for even browning. Let the cakes cool in their pans for 10 minutes, then transfer to a wire rack to cool completely.
While the cakes cool, prepare the raspberry filling by gently heating the 1.5 cups raspberry jam in a small saucepan over low heat for 2-3 minutes until it reaches a spreadable consistency. Remove from heat and stir in the 1 tbsp lemon juice to brighten the flavor. Let it cool to room temperature before assembling.
Create the No-Fail Buttercream Frosting
In a stand mixer fitted with the paddle attachment, beat the 1.5 cups heavy whipping cream (cold) on medium-high speed until soft peaks form. In a separate large bowl, beat the 1.5 cups unsalted butter (softened) and 4 cups powdered sugar (sifted) on medium speed for 3-4 minutes until light and fluffy. Gradually add the whipped cream to the butter mixture, mixing on low speed until fully incorporated.
Add the 1 tbsp vanilla bean paste and 2 tbsp vanilla extract, mixing until smooth. For extra stability, bloom the 1 tbsp unflavored gelatin in 3 tbsp cold water for 10 minutes, then heat in the microwave for 15 seconds until dissolved. Stir this into the buttercream and mix until completely smooth. Chill the frosting for 30 minutes before using to achieve the perfect piping consistency.
Assemble the Triple-Layered Cake
Place the first cake layer on a cake stand or plate. Spread a thin layer of the cooled raspberry filling over the top, leaving a ½-inch border uncovered. Pipe a thin layer of the chilled buttercream around the edge of the cake to create a dam. Add the second cake layer and repeat with another layer of filling and buttercream dam. Top with the final cake layer.
Pipe the remaining buttercream over the entire cake, creating smooth sides and a dome on top. Use a bench scraper to create clean lines and a professional finish. For extra elegance, pipe a simple rosette or swirl on top. Refrigerate the cake for 30 minutes before slicing to allow the filling to set slightly and the frosting to firm up.
Pro Tips For Making 6 6 6 Cake
- Cream Butter & Sugar Slowly: I used to rush this step and ended up with a cake that was dense and greasy. Take your time beating the butter and sugar—about 3-5 minutes on medium-high—until it’s light and fluffy, with ribbons forming when you lift the beaters. That’s when the air gets trapped, and your cake won’t sink like a lead weight.
- Sift the Flour Twice: The 6-6-6 cake relies on a light, airy crumb, and unsifted flour is its enemy. Sift it once into the bowl, then sift it again right before folding it in. This keeps the gluten from overdeveloping and ensures a tender texture—no one wants a cake that fights back with a tough bite.
- Room-Temp Eggs Matter: Cold eggs from the fridge will curdle your butter mixture faster than you can say “soggy cake.” Let them sit in warm water for 5 minutes before cracking them in—just enough to bring them to about 70°F. Your batter will stay smoother, and the eggs will blend in like they’re supposed to.
- Don’t Overmix the Batter: The second you see streaks of flour disappear, stop. Overmixing develops gluten, and your cake will turn out dense instead of light. Fold in the dry ingredients just until combined—maybe 10-12 strokes max. Trust me, your cake won’t fall apart if you leave a few streaks.
Perfect pairings for these flavors
Fruit Compote Swaps
Swap the raspberry filling for strawberry compote or peach jam—both pair beautifully with vanilla cake. For a tropical twist, use mango purée (simmer 2 cups diced mango with 2 tbsp sugar and 1 tsp lime juice until thickened).
I’ve also used blackberry jam for a deeper berry flavor—just reduce the sugar in the frosting by ½ cup to balance the tartness. 🍓
Creamy Filling Options
For a richer texture, replace the jam with vanilla custard (whisk 2 cups heavy cream, 4 egg yolks, ½ cup sugar, and 1 tsp vanilla; cook until thickened).
Or try mascarpone cream—mix 1 cup mascarpone with ½ cup whipped cream and 1 tbsp powdered sugar for a velvety layer. Both keep the cake moist for days. 🥛
Chocolate Lovers’ Twist
Add a dark chocolate ganache between layers by heating ½ cup heavy cream and pouring over 8 oz chopped dark chocolate. Let it cool slightly before spreading—it sets like buttercream but tastes decadent. For extra indulgence, fold ½ cup crushed hazelnuts into the ganache. 🍫
Whipped Cream Alternative
Lighten the filling by using Italian meringue buttercream instead of standard buttercream. Whip 4 egg whites with 1 cup sugar to stiff peaks, then fold into 1 cup softened butter. This adds airiness and a subtle sweetness that complements the cake’s richness. 🌸
Seasonal Fillings
In summer, use peach jam or pineapple purée (blend 2 cups peeled peaches with 2 tbsp honey). For fall, try apple butter (simmer 4 peeled apples, ½ cup brown sugar, and 1 tsp cinnamon until thick).
Winter calls for chestnut purée—blend cooked chestnuts with 2 tbsp maple syrup for a nutty depth. 🍎
Boozy Upgrades
Infuse the filling with 1 tbsp Grand Marnier or raspberry liqueur for a sophisticated touch. For a non-alcoholic version, add 1 tsp almond extract to the custard or 1 tbsp orange zest to the jam. These subtle flavors elevate the cake without overpowering it. 🍷
Nutrition facts
Frequently asked questions
Why is this called a 6-6-6 cake?
The name comes from its signature structure: 6 layers of cake, 6 layers of filling, and 6 layers of frosting—though this recipe simplifies it to three 6-inch layers with alternating fillings and frosting. The balanced ratio creates a towering dessert that’s both visually stunning and perfectly proportioned for slicing.
Can I make this cake with fewer layers?
For a 2-2-2 cake, use two 6-inch pans and halve all ingredients (except frosting). For a 4-4-4 cake, quadruple the batter and use four pans. Just ensure each layer gets enough filling and frosting to maintain the 6-6-6 ratio conceptually. The key is keeping the cake-to-filling-to-frosting balance for stability.
How do I prevent the layers from sliding when stacking?
Create a buttercream dam around each layer before adding the next—pipe a thin border of frosting to create a barrier. Also, chill the cake for 30 minutes after assembly to firm up the frosting. For extra security, use a cake collar (cardboard ring) around the base while it sets. This technique keeps your tower intact even for multi-tiered designs.
What’s the best way to store leftover cake?
Cover tightly with plastic wrap and store at room temperature for up to 2 days. For longer storage, refrigerate for up to 5 days—just let it sit at room temp for 30 minutes before serving to soften the frosting. Freezing isn’t recommended as it can alter the texture of the cake layers. The filling and frosting will separate slightly when chilled, but they blend back together when brought to room temperature.
Can I substitute the raspberry filling with something else?
Yes! Try strawberry compote, vanilla custard, or even chocolate ganache—just adjust the sweetness level. For a lighter option, use whipped cream mixed with jam. The key is maintaining a ¼-inch layer between cakes to prevent sogginess. If using custard or ganache, let it cool completely before assembling to avoid melting the frosting.

- 3lb Prime Rib Roast Recipe: Juicy Pink Center Guaranteed in 3 Hours - October 31, 2026
- 5 Spice Cake Recipe: Warmly Spiced Layers With Crunchy Top - October 31, 2026
- 1950’s Macaroni and Cheese Recipe: Nostalgic Creamy Cheese Sauce with Buttery Noodles - October 31, 2026