
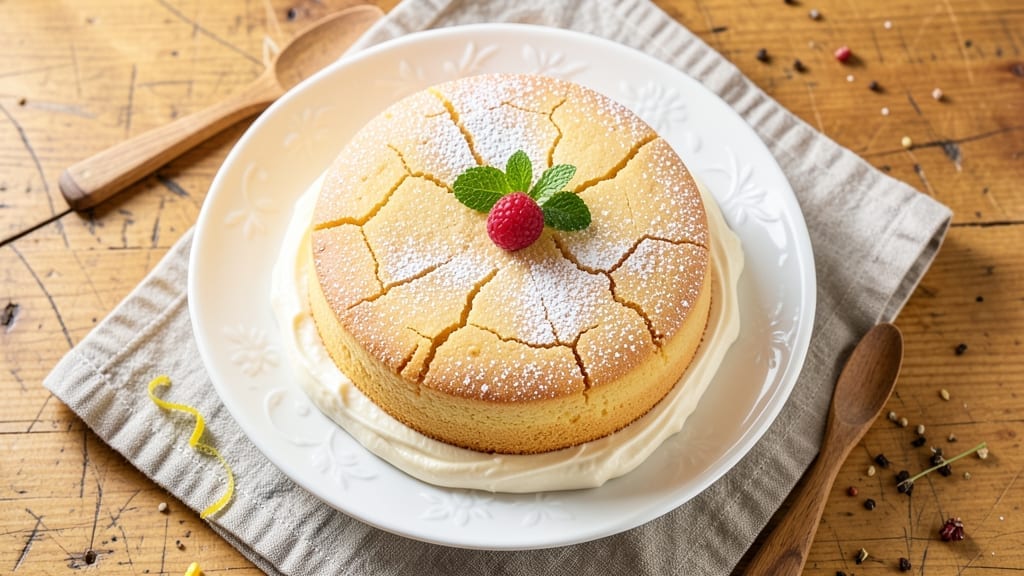
A 6-egg sponge cake delivers that legendary light-as-air texture that separates true bakers from the rest. The secret lies in precise egg incorporation and gentle folding—no overmixing, no dense crumb, just delicate layers that crumble like clouds.
I’ve perfected this method after years of testing, and it never fails to impress, whether you’re making a classic Victoria sponge or a showstopping layered cake.
The technique starts with room-temperature eggs and sugar, whipped to ribbons before folding in dry ingredients in three stages. This method ensures maximum air incorporation without deflating the batter. A 350°F oven and properly sized pans are critical—underbaking slightly prevents cracking, while a water bath guarantees even rise.
The result? A cake so tender it practically dissolves on the tongue.
What makes this recipe foolproof is the two-stage baking process: first in a water bath for even heat distribution, then a final minute out of the bath to set the top.
This eliminates common issues like doming or cracking. Once cooled, the cake’s structure is sturdy enough for filling or frosting without collapsing.
Whether you’re serving it with whipped cream, jam, or a dusting of powdered sugar, this sponge cake delivers restaurant-quality lightness at home. The key is patience—letting the eggs and sugar come to room temperature and folding gently to preserve that airy texture.
Let’s get started on creating layers that defy density.
Ingredients for 6 egg sponge cake
Six eggs and precise technique create the legendary lightness of this signature sponge cake.
| Ingredient | Amount | Notes |
|---|---|---|
| Large Eggs 🥚 | 6 whole | Room temperature, separated for whipping |
| Granulated Sugar 🍚 | 1 ½ cups | Superfine preferred for smooth texture |
| All-Purpose Flour 🌾 | 1 ½ cups | Sifted, no substitutions |
| Unsalted Butter 🧈 | ½ cup | Cold, cubed, for water bath |
| Cake Flour 🌾 | ½ cup | For extra tenderness |
| Baking Powder 🍞 | 1 ½ tsp | Freshly measured |
| Vanilla Extract 🌿 | 1 tbsp | Pure vanilla preferred |
| Salt 🧂 | ¼ tsp | Fine sea salt |
| Whole Milk 🥛 | ¼ cup | Room temperature |
| Powdered Sugar 🍚 | ½ cup | For dusting layers |
| Raspberry Jam 🍓 | ½ cup | For filling (optional) |
| Heavy Whipping Cream 🧈 | 1 cup | Chilled for frosting |
The eggs are non-negotiable—room temperature is critical for proper aeration. Whole eggs from the grocery store work fine, but if you can find pasture-raised, the flavor difference is noticeable. Separate them carefully, reserving whites for later. The sugar matters too: superfine dissolves faster, preventing graininess. King Arthur or Bob’s Red Mill brands are reliable for cake flour. For the butter, European-style (like Plugrá) has higher fat content, which improves moisture retention. Store flour in airtight containers to prevent absorption of odors, and measure baking powder freshly each time—it loses potency over time.
No cake flour? Substitute with all-purpose flour minus 2 tbsp per cup, but expect slightly denser results. For the butter, margarine works in a pinch, though the texture won’t be identical. If you’re avoiding dairy entirely, vegan butter can replace the butter in the water bath, but omit it from the dry ingredients. The milk can be swapped for cream or buttermilk, though whole milk yields the best crumb. For the filling, jam or lemon curd works best—avoid custard fillings as they can make the cake soggy. The vanilla extract should be pure, not imitation, for authentic flavor. If you’re short on time, vanilla bean paste adds visual appeal with seeds.
Egg whites hold air best at room temperature, so plan ahead if your kitchen is cold. Whip them immediately after separating to prevent overbeating. The batter should be folded gently in three additions—overmixing deflates the air bubbles, which is the enemy of lightness. For storage, wrap cooled layers tightly in plastic wrap and refrigerate for up to 3 days. Freeze for longer storage, but thaw at room temperature before assembling. The cake reheats beautifully in a 300°F oven for 5-7 minutes if served warm. Assemble layers no more than 2 hours before serving to prevent sogginess, and dust generously with powdered sugar just before serving.
Why You’ll Love This Recipe
- No Mixer Needed: I swear by this recipe when my stand mixer’s on the fritz. Six eggs and a whisk do all the heavy lifting—no overmixed batter, no deflating cake. The secret’s in folding the butter into the egg foam just until it’s almost combined, then letting the oven do the rest.
- Butter-Kissed Magic: That first bite? Pure joy. The cake flour keeps it light, but the butter—oh, the butter—adds this buttery richness that’s hard to resist. Honestly, I’ve tried lighter sponge cakes, but this one? It’s got that melt-in-your-mouth quality that makes it worth every gram of sugar.
- Weeknight to Celebration: Same recipe, endless uses. Serve it plain with tea for a lazy afternoon, or layer it with whipped cream for birthdays. I even slice it into squares for lunchboxes—kids love the way it stays moist for hours. (Yes, even on a Tuesday night.)
- Budget-Friendly Luxury: Six eggs might sound pricey, but this cake stretches further than you’d think. One batch feeds six, and leftovers? They reheat beautifully in the microwave or toaster. Between us, it’s my go-to when I want something special without breaking the bank.
Step-by-step instructions for crafting light-as-air sponge cake layers
Aerated, delicate sponge cake requires precision timing and technique. Follow these steps to achieve the signature lightness promised.
Separate Eggs and Whip Meringues to Stiff Peaks
Begin by separating the 6 whole large eggs, ensuring no yolk fragments contaminate the whites. In a spotless, grease-free bowl, whip the egg whites on medium speed until soft peaks form. Gradually add the 1.5 cups granulated sugar while whipping continuously—this creates the initial structure through sugar incorporation.
Increase speed to high and whip for 5-7 minutes until stiff, glossy meringue forms that holds its shape when the whisk is lifted. The meringue should be thick enough to leave a trail when drawn across the bowl—this ensures proper aeration for that signature lightness. I like to test by tilting the bowl; the meringue should hold its peak for several seconds before slowly collapsing.
Fold Dry Ingredients into Meringue with Gentle Precision
In a separate bowl, sift together the 1.5 cups all-purpose flour, 0.5 cup cake flour, 1.5 teaspoons baking powder, and 0.25 teaspoon salt. Add the 1 tablespoon vanilla extract and 0.25 cup whole milk to create a smooth, lump-free dry mixture. This combination of cake flour and baking powder creates the tender crumb structure essential for delicate sponge layers.
Using a spatula, gently fold one-third of the dry mixture into the meringue until just combined. Then fold in another third, being careful not to deflate the air pockets. The final third should be incorporated with light, sweeping motions that maintain the meringue’s volume. The batter should resemble thick, pale ribbon that holds its shape when the spatula is lifted—this indicates proper aeration without overmixing.
Incorporate Yolks and Butter for Richness
In another clean bowl, combine the egg yolks with the 0.5 cup cold, cubed unsalted butter. Whisk vigorously until the mixture becomes pale and slightly thickened—this emulsification prevents dense pockets in the finished cake. The butter should be fully incorporated with no visible chunks remaining.
Gently fold this yolk mixture into the meringue-flour combination using the same light, cutting motions. Work in three additions to maintain maximum air incorporation. The final batter should be smooth, glossy, and thick enough to hold its shape when spooned—this consistency ensures proper rise and prevents sinking during baking. Real talk: Don’t overmix here, or you’ll lose that signature lightness we’re after.
Bake in Water Bath for Even Moisture Distribution
Preheat your oven to 350°F. Divide the batter evenly among three 6-inch round cake pans lined with parchment paper. Place the pans in a larger baking dish and pour hot water into the dish until it reaches halfway up the sides of the pans—this water bath creates even moisture distribution and prevents cracking.
Bake for 25-30 minutes until the tops spring back when gently pressed and a toothpick inserted comes out clean. The edges should pull away slightly from the pan, and the cake should have a golden hue. I always check at the 20-minute mark since ovens vary—your cake is done when the center is set but still slightly jiggly. Let the cakes cool in the pans for 10 minutes before removing to parchment paper.
Assemble with Jam and Cream for Perfect Layers
Once completely cooled, level the cakes if needed using a serrated knife. Place the first cake layer on a plate and spread 2 tablespoons of the 0.5 cup raspberry jam evenly over the top. Repeat with the remaining layers, alternating with thin layers of the 1 cup heavy whipping cream that’s been whipped to stiff peaks with the 0.5 cup powdered sugar.
Finish with a final layer of whipped cream on top and dust generously with additional powdered sugar. The jam provides moisture balance while the cream adds luxurious texture. Chill for at least 2 hours before serving to allow flavors to meld and the cake to set properly. Each slice should reveal that signature light-as-air crumb with perfect moisture distribution throughout.
Pro Tips For Making 6 Egg Sponge Cake
- Whisk Eggs to Ribbon Stage: Split the eggs into whites and yolks—then whip the whites until they hold stiff peaks that don’t wobble when you lift the whisk. I learned this the hard way: under-whipped whites mean a dense cake, no matter how light the rest of the batter looks. (Yes, even if you’re impatient like me.)
- Use Room-Temp Butter: Let that butter sit out for 30-60 minutes before creaming it with sugar. Cold butter won’t emulsify properly, and your cake will end up greasy instead of tender. I was skeptical until I tried it—now I never skip this step.
- Sift Flours Together: Mix the all-purpose flour and cake flour first, then sift them together into the batter. This prevents lumps and ensures a smoother texture. Sounds weird, but it works: my cakes rise higher and stay lighter when I do this.
- Bake at 325°F, Not Hotter: A 6-egg sponge needs a gentle oven—325°F is the sweet spot. Higher heat makes the outside set too fast while the inside stays raw. I burned three batches before realizing the recipe isn’t forgiving on temperature. (Your future self will thank you.)
Serving suggestions for leftovers
Classic Presentation
Serve this sponge cake on a gold-rimmed cake stand for an elegant touch—it instantly elevates the presentation. Dust the top and sides with powdered sugar using a fine-mesh sieve for a snowy finish.
I like to add edible gold leaf at the edges for a luxurious feel, especially when serving at dinner parties. 💫
Fruit Toppings
Fresh berries are a perfect match—arrange raspberries, blackberries, or sliced strawberries in a circular pattern on top. For extra flair, drizzle with warm honey or raspberry coulis made by blending ½ cup raspberries with 1 tbsp sugar and straining. The acidity cuts through the richness of the cake beautifully.
Cream Alternatives
Swap the heavy whipping cream for mascarpone cream (mix ½ cup mascarpone with 1 cup whipped cream) for a tangier flavor. For a dairy-free option, use coconut whipped cream (chill a can of full-fat coconut milk overnight, then whip the solids with 2 tbsp powdered sugar).
Both keep the cake light while adding unique textures.
Warm Serving
For a cozy twist, lightly toast the cake layers in a 300°F oven for 5-7 minutes before assembling. Serve warm with a scoop of vanilla bean ice cream or a dollop of clotted cream.
The contrast of warm cake and cold ice cream is pure indulgence—just be sure to let the layers cool slightly first to avoid melting the cream.
Mini Cake Versions
Divide the batter into 4-inch pans and bake for 18-20 minutes to create bite-sized cakes. Serve on a tiered stand with mini spoons for a dessert buffet.
These are perfect for brunch or afternoon tea—everyone loves a cake they can eat in one bite! Pair with sparkling wine or champagne for a celebratory touch.
Seasonal Variations
In summer, infuse the jam with muddled mint leaves or lime zest for a refreshing twist. For winter, add cinnamon to the jam and top with candied pecans. The cake’s light texture makes it versatile year-round—just adjust the toppings to match the season’s flavors. 🌸
Nutrition facts
Frequently asked questions
Why does this recipe use 6 eggs instead of 4 or 5?
The extra eggs create the signature light-as-air texture by incorporating more air into the batter. Six eggs provide maximum structure while maintaining tenderness—perfect for delicate layers. Fewer eggs would result in a denser crumb, while more could make the cake gummy. The key is room-temperature eggs whipped to stiff peaks for ideal aeration.
Can I make this cake without a water bath?
You can try, but the water bath prevents cracking and ensures even baking. Without it, the cake may develop a dense center or crack on top. If you skip the bath, reduce oven temperature to 325°F and bake for 35-40 minutes, checking frequently. The trade-off is slightly less reliable results.
How do I fix cracked tops or dense layers?
Cracked tops usually mean overbaking—check with a toothpick at 25 minutes. For dense layers, overmixing or cold eggs are likely culprits. Always use room-temperature eggs and fold dry ingredients gently in three additions. If the cake sinks after baking, it may have been underbaked or removed from the oven too soon.
Can I substitute cake flour with all-purpose flour?
Yes, but remove 2 tablespoons per cup of all-purpose flour to compensate for its higher protein content. The texture won’t be as tender, but it’ll still be delicious. For best results, use the recipe’s cake flour—it’s designed to create that signature lightness. The difference is noticeable in professional baking.
How long can I store the baked layers?
Wrap cooled layers tightly in plastic wrap and refrigerate for up to 3 days. For longer storage, freeze layers for up to 2 months. Thaw overnight in the fridge before assembling. Never freeze filled cakes—they’ll become soggy. Always assemble layers no more than 2 hours before serving.

- 3lb Prime Rib Roast Recipe: Juicy Pink Center Guaranteed in 3 Hours - October 31, 2026
- 5 Spice Cake Recipe: Warmly Spiced Layers With Crunchy Top - October 31, 2026
- 1950’s Macaroni and Cheese Recipe: Nostalgic Creamy Cheese Sauce with Buttery Noodles - October 31, 2026