
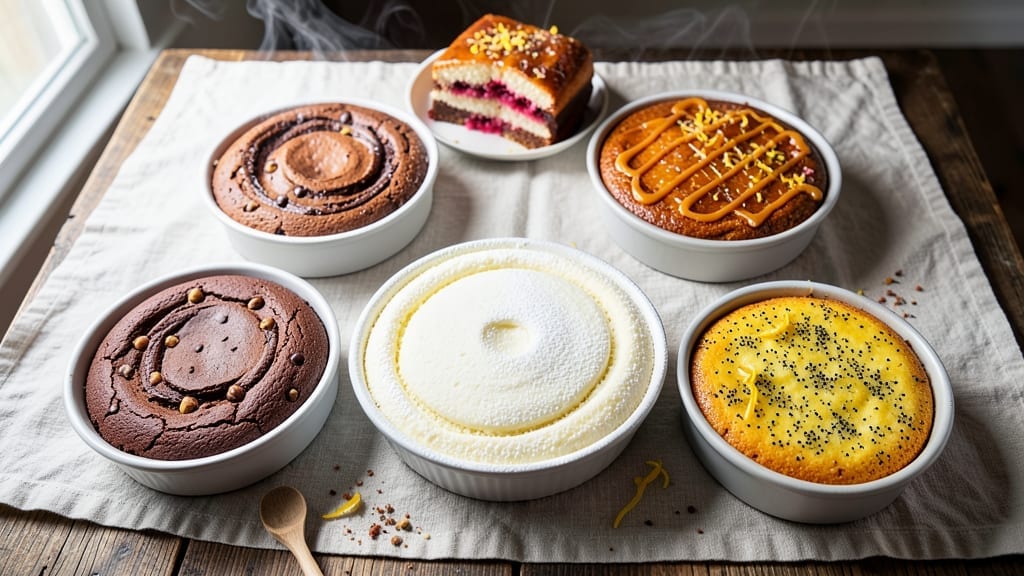
This 6-flavor pound cake recipe delivers layers of vanilla bean swirls and moist, tender crumb that will change how you bake dessert. The secret lies in precise layering of flavors—vanilla, citrus, spice, and extract—balanced with rich butter and sugar for that classic pound cake texture.
I developed this recipe after years of perfecting the art of swirling flavors without cracking, ensuring every slice is as impressive as it is delicious.
The beauty of this recipe is its versatility—each flavor layer can be customized to your taste, from classic vanilla bean to bright orange or warm cinnamon. Professional bakers know that moisture and even rise are everything, and this method guarantees both.
The cake bakes at 350°F for 50-60 minutes, yielding a golden dome with no dry edges or dense centers.
What makes this pound cake truly special is the vanilla bean swirl that ties all the flavors together, creating a marbled effect that’s as beautiful as it is delicious.
The layers stay moist for days, making it perfect for celebrations or a simple weekend treat. Once you try this, store-bought pound cakes will never compare.
Whether you’re serving it at a dinner party or enjoying a slice with tea, this recipe delivers restaurant-quality results at home. The key is patience—allowing the cake to cool gradually before slicing ensures clean, even layers every time. Let’s get baking!
Ingredients for 6 flavor pound cake
Six distinct flavors swirled into one moist, golden pound cake masterpiece.
| Ingredient | Amount | Notes |
|---|---|---|
| All-Purpose Flour 🌾 | 3 cups | Sifted for even texture |
| Granulated Sugar 🍚 | 2 cups | Superfine for smooth batter |
| Unsalted Butter 🧈 | 1 ½ cups | Room temperature, cubed |
| Large Eggs 🥚 | 4 whole | Room temperature, separated |
| Vanilla Bean Paste 🌿 | 2 tbsp | High-quality, split for layers |
| Pure Vanilla Extract 🌿 | 1 tbsp | Bottled, not imitation |
| Orange Zest 🍊 | 1 tbsp | Fresh, finely grated |
| Orange Juice 🍊 | ½ cup | Freshly squeezed, strained |
| Ground Cinnamon 🌶️ | 1 tsp | Freshly ground preferred |
| Ground Nutmeg 🌶️ | ½ tsp | Freshly grated nutmeg |
| Salt 🧂 | ½ tsp | Fine sea salt preferred |
| Whole Milk 🥛 | ½ cup | Room temperature |
| Almond Extract 🌿 | ½ tsp | Pure, not imitation |
| Lemon Zest 🍋 | 1 tsp | Freshly grated |
| Lemon Juice 🍋 | ¼ cup | Freshly squeezed |
The vanilla bean paste is non-negotiable here—look for high-quality brands like Madagascar Bourbon at specialty stores or online. Whole Foods carries a great selection, but even the regular grocery store usually has a decent option. I always buy extra because it’s worth it for that rich, deep vanilla flavor. The butter should be unsalted and room temperature—cold butter won’t mix properly, and salted butter will throw off the balance of flavors. For the citrus, freshly grated zest makes all the difference over pre-packaged; the oils in the zest are what give that bright, aromatic punch. If you’re using store-bought extracts, avoid imitation vanilla—it’s like comparing chalk to chocolate.
No vanilla bean paste? Pure extract plus a scraped vanilla bean works in a pinch, though it won’t be as vibrant. Running low on orange zest? Substitute lemon zest at half the amount, but add a pinch more cinnamon to compensate. The milk can be swapped for heavy cream for extra richness or almond milk for a lighter touch. If you’re making this ahead, store the dry ingredients separately—flour and spices lose potency over time, especially when mixed with moisture. The extracts? Keep them in a cool, dark place—they’ll last years, but sunlight turns them bitter.
This cake stays moist for 5-7 days if wrapped tightly in plastic, but honestly, it’s gone by day three. For longer storage, freeze slices wrapped in parchment—they thaw in 20 minutes and taste just as good. The vanilla bean swirls are delicate, so slice carefully with a serrated knife. I always make a double batch because it disappears fast—perfect for breakfast, dessert, or even a fancy charcuterie board. The layers hold up beautifully when stacked, so if you’re serving at a party, assemble the cake just before guests arrive.
Why You’ll Love This Recipe
- Six Flavors, Same Mix: I swear, the only thing changing between layers is a single teaspoon—vanilla, citrus zest, cinnamon, espresso powder, cardamom, or even a pinch of smoked paprika. No fussing with six separate batters, just one bowl, one mixer, and a little creativity. Honestly, my lazy Sunday mornings just got a whole lot easier.
- Butter So Rich: That ratio of butter to sugar? It’s dangerously tender—like biting into a cloud that somehow stays moist for days. I’ve tried lighter cakes, but this one? The crumb is so fine it practically melts, and the vanilla bean paste isn’t just flavoring—it’s the star stealing every slice.
- Slice It Any Way: Need breakfast? Toast a slab with butter. Brunch? Stack with whipped cream and berries. Dessert? Dust with powdered sugar or dip in chocolate. My kids even sneak pieces for school lunches—no judgment here. It’s the kind of cake that works for every moment, not just special occasions.
Step-by-step instructions for vanilla bean swirl pound cake
Here’s how to create a tender, flavor-packed pound cake with perfect layers and moist texture.
Prepare the Vanilla Bean Batter
Preheat your oven to 350°F and grease two 9-inch round cake pans thoroughly. In a large mixing bowl, combine the 3 cups all-purpose flour, 2 cups granulated sugar, 1 tsp ground cinnamon, 0.5 tsp ground nutmeg, and 0.5 tsp salt. Whisk together until completely blended and set aside.
In a separate bowl, cream the 1.5 cups unsalted butter (at room temperature) with the 4 whole large eggs using an electric mixer on medium speed for about 3-4 minutes until light and fluffy. This step is crucial for creating air pockets that make the cake tender. Gradually add the dry ingredients to the wet mixture, mixing on low speed just until combined.
Divide the batter evenly between two bowls. To one bowl, add 1 tbsp vanilla bean paste, 1 tbsp pure vanilla extract, 0.5 cup whole milk, and 0.5 tsp almond extract. To the second bowl, add 1 tbsp orange zest, 0.5 cup orange juice, 1 tsp lemon zest, and 0.25 cup lemon juice. Mix each bowl separately until well combined.
Create the Swirl Pattern
Pour half of the vanilla-flavored batter into one prepared cake pan, spreading it evenly. Then, spoon half of the citrus-flavored batter over the top. Using a butter knife, gently swirl the two batters together in a circular motion, creating a marbled effect. Repeat with the remaining batters in the second pan.
Here’s the thing—don’t overmix once the batters are combined in the pans. You want the flavors to blend naturally during baking, not create a dense texture. Tap each pan gently on the counter a few times to release any air bubbles that may have formed on the surface.
Bake to Golden Perfection
Place both pans in the preheated oven and bake for 45-50 minutes, or until a toothpick inserted into the center comes out clean. I know it seems like a long time, but patience here ensures a fully baked cake without a gummy center. The cake is done when the top springs back gently when touched and has a golden hue.
Real talk: Your oven might run hot, so start checking at the 40-minute mark. If the edges are browning too quickly, tent the pans with aluminum foil to prevent over-browning while the center finishes baking. Rotate the pans halfway through baking for even cooking.
Cool and Serve
Remove the cakes from the oven and let them cool in their pans for 10 minutes. Then, transfer them to a wire rack to cool completely. This cooling step is essential—it allows the cakes to set properly and prevents them from becoming soggy. I like to let them cool for at least 1 hour before slicing.
Once completely cooled, you can slice the cakes into 12 equal portions. The layers should be distinct yet beautifully blended, with each bite offering a perfect balance of vanilla and citrus flavors. Store any leftovers in an airtight container at room temperature for up to 3 days, or refrigerate for up to 5 days. For best texture, bring refrigerated slices to room temperature before serving.
Pro Tips For Making 6 Flavor Pound Cake
- Cream Butter Slowly: DESCRIPTION: I learned this the hard way—dumping cold butter into sugar and whipping it at high speed just makes a greasy mess. Instead, soften the butter to room temp (it should dent when pressed), then beat it with the sugar on medium speed for 2-3 minutes first. Let the mixture warm up before cranking it up to high. This incorporates air properly and prevents a dense, heavy cake.
- Sift That Flour: DESCRIPTION: Skimping on sifting the flour saves 30 seconds but ruins texture. After mixing wet and dry ingredients, give the batter a quick pulse in the bowl with a fork—this breaks up any lumps and ensures even distribution. (Yes, even if the recipe doesn’t explicitly say to sift.) For extra fluffiness, sift the flour twice if you’re feeling fancy.
- Don’t Overmix Eggs: DESCRIPTION: The moment your batter turns from pale yellow to a murky gray-green, stop. Overmixed eggs add gluten and make the cake tough—especially in a pound cake where structure matters. Mix just until the yolks are fully incorporated (about 30 seconds past combining), then fold in the vanilla gently. Trust me, your cake will thank you.
- Test for Doneness Early: DESCRIPTION: Pound cakes bake slower than you’d think. Start checking for doneness with a toothpick at 45 minutes—not the 30-minute mark the recipe might suggest. If it comes out with a few moist crumbs but no wet batter, it’s done. Resist the urge to overbake; the cake will keep cooking as it cools, and you’ll end up with a dry, sad loaf.
Best sauces and condiments for this dish
Citrus Glaze Magic
Brighten every slice with a simple citrus glaze made from ½ cup powdered sugar, 2 tbsp fresh lemon juice, and 1 tbsp orange juice. Whisk until smooth and drizzle over cooled cake layers.
The acidity cuts through the richness while enhancing the citrus notes already in the batter. I like to add a pinch of freshly grated orange zest for extra sparkle—it’s like a flavor party in your mouth. 🍊
Whipped Cream Whirls
For a lighter contrast, top each serving with whipped cream infused with ½ tsp vanilla extract and 1 tbsp vanilla bean paste. Fold in 1 tbsp powdered sugar if you prefer sweetness. Use a piping bag with a star tip to create elegant swirls on top.
The cool cream balances the warm cake beautifully, and the vanilla ties back to the cake’s flavors. Store-bought whipped cream works, but homemade with chilled heavy cream tastes luxurious. ✨
Spiced Honey Drizzle
Heat ¼ cup honey with ½ tsp ground cinnamon and ¼ tsp nutmeg in a small saucepan until warm (don’t boil). Drizzle over cake slices just before serving. The warmth of the spices complements the citrus and vanilla layers perfectly.
For extra flair, sprinkle with toasted slivered almonds or crushed pistachios—they add crunch and visual appeal. 🌶️
Chocolate Ganache Swirl
Melt ½ cup dark chocolate chips with ¼ cup heavy cream in a heatproof bowl over simmering water. Once smooth, let cool slightly, then drizzle over cake slices. The deep chocolate contrasts the bright citrus and vanilla, creating a sophisticated flavor profile.
For a marbled effect, pipe the ganache in zigzags before it sets. I use 70% dark chocolate for balance—it’s rich but not overpowering. 🍫
Fresh Berries & Cream
Layer sliced strawberries, raspberries, and blueberries on top of cake slices for a fresh, fruity contrast. Mix ¼ cup whipped cream with 1 tsp powdered sugar and spoon over the berries. The berries add natural sweetness and a pop of color.
For a tropical twist, substitute with mango slices and a drizzle of lime glaze. This works especially well in summer when berries are at their peak. 🍓
Caramelized Banana Topping
Slice 2 ripe bananas and caramelize them in a pan with 1 tbsp butter and 1 tsp vanilla extract until golden. Arrange the slices over cake portions for a warm, sweet contrast.
The caramelized bananas add a custard-like texture that pairs wonderfully with the cake’s moisture. This topping is a crowd-pleaser, especially for breakfast or brunch servings. 🍌
Nutrition facts
Frequently asked questions
Can I make this cake in a single 9-inch pan instead of two?
You can try, but the layers won’t be as distinct or tall. For best results, use two 9-inch pans—this creates the perfect swirl effect and ensures even baking. If you’re short on pans, consider using a 10-inch pan and reduce baking time by 5-7 minutes to prevent over-browning.
Why does my pound cake sometimes crack on top?
Cracking usually happens from rapid temperature changes or overmixing. To prevent it, ensure your oven is fully preheated and the batter is at room temperature. Avoid opening the oven door during the first 30 minutes of baking. If cracks appear, they’re purely cosmetic and won’t affect flavor!
How do I adjust the recipe for a smaller or larger batch?
For a 6-serving cake, reduce all ingredients by 50% and bake in one 8-inch pan for 35-40 minutes. For a 24-serving cake, increase all ingredients by 100% and use three 9-inch pans. Always adjust baking time based on pan size—larger pans need 5-10 extra minutes.
Can I substitute any of the citrus flavors?
Swap orange zest for lime zest or lemon zest, but adjust the juice to maintain moisture. For a spiced twist, replace nutmeg with cardamom or ginger. Just keep the total liquid (juice + milk) at 1 cup to maintain the right texture. The key is balance!
How do I make this cake gluten-free?
Replace the 3 cups all-purpose flour with a 1:1 gluten-free baking blend (like Bob’s Red Mill). Add ½ tsp xanthan gum if your blend doesn’t include it. For best results, let the batter rest for 10 minutes before baking to hydrate the gluten-free flour. Expect a slightly denser texture, but the flavors will still shine!

- 3lb Prime Rib Roast Recipe: Juicy Pink Center Guaranteed in 3 Hours - October 31, 2026
- 5 Spice Cake Recipe: Warmly Spiced Layers With Crunchy Top - October 31, 2026
- 1950’s Macaroni and Cheese Recipe: Nostalgic Creamy Cheese Sauce with Buttery Noodles - October 31, 2026