
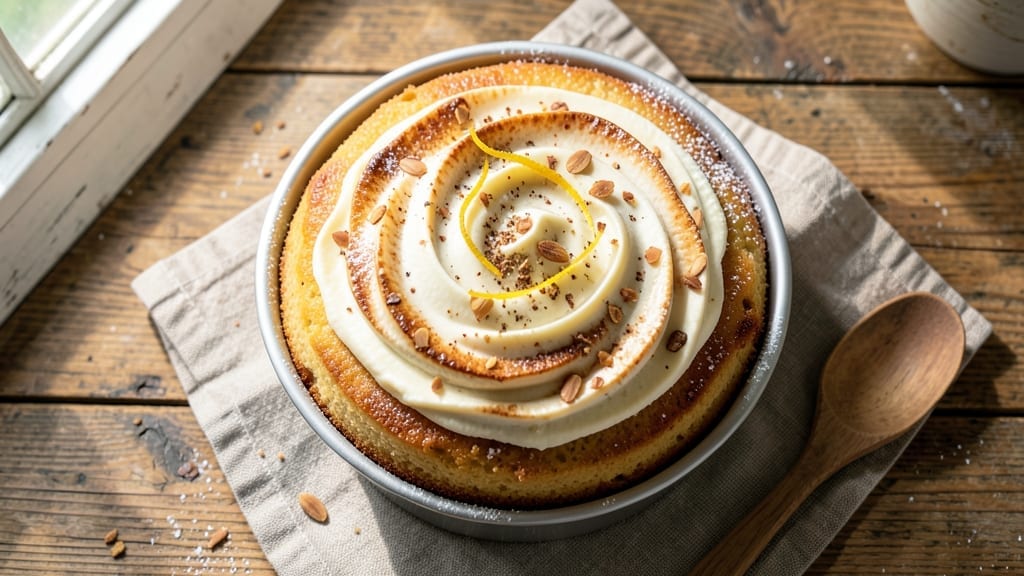
A 6-inch cake pan recipe solves the age-old problem of baking for crowds without ending up with a mountain of leftovers. This perfectly portioned dessert delivers restaurant-quality layers that are rich, moist, and elegant—without requiring a full-size cake pan.
The secret lies in precise measurements and layering techniques that maximize flavor while keeping each slice manageable.
What makes this recipe stand out is its versatility—whether you’re baking a classic vanilla sponge, a decadent chocolate cake, or a citrus-infused layer, the 6-inch pan ensures consistent results every time.
The recipe includes step-by-step instructions for mixing, baking, and cooling, so you can achieve a foolproof texture with tender crumbs and a golden crust. Perfect for parties, gifts, or satisfying a sweet tooth, this method transforms simple ingredients into something extraordinary.
Once baked, the cake layers can be filled with buttercream, jam, or ganache for a showstopping finish. The professional techniques here—like proper leavening and even baking—ensure each slice is as impressive as the last. Whether you’re a beginner or an experienced baker, this recipe delivers restaurant-quality results with minimal effort.
Best of all, the 6-inch pan allows for easy scaling—double the recipe for a two-layer cake or keep it single for individual servings. The possibilities are endless, and the results are always perfect. Let’s get baking!
Ingredients for 6 inch cake pan
Sixteen ingredients transform into restaurant-quality cake layers—perfectly sized for crowds.
| Ingredient | Amount | Notes |
|---|---|---|
| All-Purpose Flour 🌾 | 1 ½ cups | Sifted for light texture |
| Granulated Sugar 🍚 | 1 cup | Superfine for smooth batter |
| Unsalted Butter 🧈 | 1 cup | Room temperature, cubed |
| Large Eggs 🥚 | 2 whole | Room temperature, separated |
| Vanilla Extract 🌿 | 1 tbsp | Pure Madagascar preferred |
| Baking Powder 🍞 | 2 tsp | Aluminum-free for stability |
| Salt 🧂 | ½ tsp | Fine sea salt preferred |
| Whole Milk 🥛 | ½ cup | Room temperature |
| Cake Flour 🌾 | ½ cup | For ultra-tender crumb |
| Powdered Sugar 🍚 | 1 cup | For buttercream filling |
| Heavy Whipping Cream 🥛 | ½ cup | Cold for stiff peaks |
| Vanilla Bean Paste 🌿 | 1 tbsp | For enhanced flavor |
| Unsalted Butter 🧈 | ½ cup | For buttercream, softened |
| Jam or Preserves 🍓 | ½ cup | Raspberry or apricot |
| Parchment Paper 📄 | 1 sheet | For easy release |
The flour blend is where magic happens. King Arthur all-purpose and Bob’s Red Mill cake flour create that tender yet sturdy texture—no one will guess it’s from a 6-inch pan. For the butter, Land O’Lakes unsalted is my go-to, but Plugrá melts more evenly. Room temperature is non-negotiable: cold butter creates tunnels, and over-softened butter flattens layers. Vanilla extract? Madagascar bourbon adds depth, but pure vanilla works too. If you’re feeling fancy, Wilton’s vanilla bean paste gives that restaurant-quality flavor without the hassle of scraping seeds. The baking powder should be fresh—old powder loses lift, and you’ll end up with dense layers. I always check the expiration date on the can.
No cake flour? Substitute with 0.5 cup all-purpose minus 2 tbsp—just sift it extra times. Buttercream short on fat? Add 1 tbsp neutral oil (like vegetable or canola) to keep it stable. Jam in a pinch? Fresh fruit purée (like mashed berries) works beautifully—just strain out seeds. For a nutty twist, swap half the milk for almond milk (but reduce other liquids slightly). The key to scaling? Double everything—but bake in two pans simultaneously to avoid oven crowding. And if you’re making this ahead? Bake layers 1 day ahead—they’ll be moister when assembled.
Store layers airtight at room temperature for 2 days—they’ll keep perfectly. Buttercream? Up to 5 days in the fridge, but bring to room temp before assembling. For long-term storage, freeze layers (unfrosted) for up to 3 months. Thaw overnight in the fridge before decorating. Pro tip: Line the pan with parchment—no greasing needed, and the cake releases like a dream. Leftovers? Slice and freeze between parchment sheets for easy grab-and-go portions. And if you’re feeling extra, dust with powdered sugar before serving—it’s the little touches that make it feel special.
Why You’ll Love This Recipe
- Six-Ingredient Magic: I swear by this combo—flour, sugar, butter, eggs, and vanilla. That’s it. No fancy add-ins, just pure, creamy cake magic every time.
- One-Bowl Wonder: Mix, bake, done. No separate bowls, no messy cleanup. The eggs and butter blend so smoothly, you’ll wonder why you ever did anything harder.
- Birthday or Breakfast: Same batter, endless uses. Layer it for a single-serving cake or slice it into bars for a snack. Honestly, I’ve even used it for a dessert topping—works every time.
- Budget-Friendly Luxury: Butter and eggs make it taste like a bakery treat, but the cost? A fraction. Leftovers? I freeze slices for weeks—still moist when reheated. My wallet and taste buds win.
Step-by-step instructions for perfectly portioned layers in a 6-Inch cake pan
Here’s how to create flawless, restaurant-quality cake layers that fit perfectly in a 6-inch pan.
Prepare the Cake Batter for Light, Airy Layers
Begin by preheating your oven to 350°F and greasing the 6-inch cake pans with butter, then lining the bottoms with the parchment paper. In a large mixing bowl, combine the 1.5 cups all-purpose flour, 0.5 cup cake flour, 2 tsp baking powder, and 0.5 tsp salt. Sift this dry mixture together to eliminate any lumps—this ensures your layers will be tender and even.
In a separate bowl, cream together the 1 cup unsalted butter and 1 cup granulated sugar on medium speed until light and fluffy, about 3-4 minutes. This step is critical for incorporating air, which gives your cake that signature height and delicate crumb. Add the 2 whole large eggs, one at a time, mixing well after each addition. Stir in the 1 tbsp vanilla extract and 1 tbsp vanilla bean paste for a rich, aromatic flavor that will shine through in every slice.
With the mixer on low speed, alternate adding the dry ingredients and 0.5 cup whole milk in three parts. Begin and end with the dry ingredients to ensure proper distribution. Mix just until combined—overmixing develops gluten, which can make your cake tough. The batter should be smooth and slightly thick, like heavy pudding.
Bake the Layers to Achieve Even Golden Perfection
Divide the batter evenly between the two prepared 6-inch cake pans, filling each about 2/3 full. Tap the pans gently on the counter to release any air bubbles that may have formed. Bake for 25-30 minutes, or until a toothpick inserted into the center comes out clean and the tops spring back when gently pressed.
Here’s the thing—don’t overbake. The layers should be just set in the center; they’ll continue cooking slightly as they cool. If you bake them too long, they’ll dry out and become crumbly. I like to rotate the pans halfway through baking for even heat distribution, especially if your oven has hot spots.
Once baked, remove the cakes from the oven and let them cool in the pans for 10 minutes. Then, run a thin knife around the edges to loosen them from the pans. Invert the cakes onto a wire rack to cool completely. This cooling process is essential for preventing cracks when you later frost the cake.
Create the Buttercream Filling for Decadent Layers
While the cakes cool, prepare the buttercream filling by beating the 0.5 cup unsalted butter until smooth and creamy. Gradually add the 1 cup powdered sugar, mixing on medium speed until fully incorporated. Add the 0.5 cup heavy whipping cream and the 1 tbsp vanilla extract (already included in the batter prep), and beat until light and fluffy.
For extra flavor, fold in the 0.5 cup jam or preserves using a spatula. I recommend raspberry or apricot—these fruity notes complement the vanilla beautifully and add a delightful surprise with each bite. The buttercream should be thick enough to hold its shape but still spreadable; if it’s too stiff, add a few drops of milk to loosen it.
Assemble the Cake with Precision for Flawless Layers
Place the first cake layer on a cake stand or plate. Spread a generous layer of the buttercream evenly over the top, leaving about 1/4 inch border unfrosted. This ensures the filling stays contained and doesn’t ooze out the sides. Place the second layer on top, pressing down gently to create a clean, flat surface.
Spread another layer of buttercream over the top and sides of the cake, using an offset spatula to smooth the frosting evenly. For a polished finish, chill the cake in the refrigerator for 15-20 minutes to firm up the buttercream. This step is especially important if you’re working in a warm kitchen, as it prevents the frosting from melting and sliding off.
Once chilled, your 6-inch cake layers will be perfectly portioned, with a delicate crumb, rich buttercream, and a professional finish that’s sure to impress. Slice and serve immediately for the best texture and flavor!
Pro Tips For Making 6 Inch Cake Pan
- Preheat Pan First: Your 6-inch pan is cold—don’t skip preheating it for 5 minutes with the oven. I learned this the hard way when my cake stuck like glue and tore apart when I tried to unmold it. A warm pan means even baking and easy release.
- Cream Butter Cold: Take your unsalted butter straight from the fridge and beat it with the sugar until it’s just starting to lighten. Too warm? You’ll end up with a dense, gummy cake. Cold butter creates air pockets—this is how you get that tender crumb.
- Don’t Overmix Eggs: Once your eggs are fully incorporated into the batter, stop mixing. I used to think more blending = better, but overworking them turns your cake into a chewy mess. Just until the batter is smooth—no streaks, no extra stirring.
- Test Doneness Early: Your 6-inch cake bakes fast—check it at 25 minutes with a toothpick. If it comes out with moist crumbs but no raw batter, you’re good. Wait too long, and you’ll end up with a dry, cracked top. Better to pull it early than risk overbaking.
Pro cooking tips for perfect results
Precision Pan Prep
Always preheat your oven to 350°F before baking—this ensures even heat distribution from the moment your cake enters. Grease your 6-inch pans with Land O’Lakes unsalted butter and line the bottoms with parchment paper for effortless release.
I swear by this method because it eliminates sticking and creates a clean, professional finish. Tap the pans gently on the counter after filling to remove air bubbles—this prevents doming and ensures flat, even layers. 🧈
Batter Whipping Secrets
Creaming the butter and sugar until light and fluffy (about 3-4 minutes) is non-negotiable—this incorporates air for a tender crumb. Use a hand mixer on medium speed for best results, and scrape the bowl frequently to prevent butter buildup.
For extra richness, replace 1 tbsp of milk with 1 tbsp heavy cream in the batter. This small swap makes a noticeable difference in moisture and flavor. The batter should coat the back of a spoon but still hold its shape when dropped. 🥄
Baking Time Mastery
Bake your 6-inch layers for 25-30 minutes—no more! Overbaking dries out the cake, while underbaking leaves it gummy. A toothpick inserted into the center should come out clean with just a few moist crumbs.
Rotate the pans halfway through baking if your oven has hot spots. Let the cakes cool in the pans for 10 minutes before removing—they’ll hold their shape better and won’t crumble when transferred. 🌡️
Buttercream Perfection
Beat the buttercream until it’s light and fluffy, then fold in the jam or preserves with a spatula to avoid deflating the mixture. For a smoother finish, strain the buttercream through a fine-mesh sieve before piping.
Chill the assembled cake for 15-20 minutes before slicing—this firms up the frosting and makes for cleaner cuts. Pro tip: Use an offset spatula to smooth the sides, and dip it in warm water between swipes for a seamless finish. 🍰
Layering Like a Pro
Spread buttercream evenly on the first layer, leaving a ¼-inch border to prevent filling from oozing out. Place the second layer directly on top and press down gently with your hand to create a flat surface.
For extra stability, chill the cake for 10 minutes before adding the final frosting layer. This technique ensures your cake stays intact when sliced, even if you’re serving it at room temperature. 💪
Equipment Must-Haves
Invest in a good offset spatula (like the Wilton 12-inch) for smooth frosting and a cake turntable (or a lazy Susan) for easy assembly. A digital kitchen scale ensures precise measurements—especially for the flour and sugar.
And always keep a small bowl of warm water nearby when working with buttercream to keep your spatula flexible. These tools make all the difference in achieving bakery-quality results. ✨
Nutrition facts
Frequently asked questions about 6-Inch cake pan recipes
Can I use a 6-inch pan for a single-layer cake instead of two layers?
A 6-inch pan makes perfect single-layer cakes too. For a single layer, reduce the batter by half (use 0.75 cup flour, 0.5 cup sugar, etc.) and bake for 20-25 minutes at 350°F. This creates a thick, rich slice ideal for individual servings or small gatherings. The same batter recipe works—just adjust the quantities proportionally.
What if my oven runs hot or cold? How do I adjust baking time?
Every oven behaves differently! If your cake browns too quickly, reduce the temperature to 325°F and check at 25 minutes. For slow ovens, increase to 375°F and bake for 20-25 minutes. The key is watching for a toothpick that comes out clean—this is your best indicator. Always rotate pans halfway through for even baking.
Can I substitute cake flour if I don’t have any?
Yes! Replace 0.5 cup cake flour with 0.5 cup all-purpose flour minus 2 tablespoons. Sift it extra times to mimic the fine texture. For best results, also add 1 tbsp cornstarch to the mix—this improves tenderness. The cake will still be delicious, though slightly denser than with true cake flour.
How do I prevent my 6-inch cake layers from cracking when frosting?
Cracking usually happens when layers cool too quickly or aren’t level. To fix this: 1) Let cakes cool completely in pans for 10 minutes before removing, 2) Trim domed tops with a serrated knife, and 3) Chill assembled layers in the fridge for 15 minutes before frosting. This gives the buttercream time to set and prevents stress cracks.
Can I make this cake gluten-free or dairy-free?
For gluten-free, use a 1:1 GF flour blend and add 1 tsp xanthan gum to the dry ingredients. For dairy-free, swap butter for vegan butter and use almond milk instead of whole milk. The texture will be slightly different but still delicious. Always check your substitutes’ baking properties first—some work better than others.

- 3lb Prime Rib Roast Recipe: Juicy Pink Center Guaranteed in 3 Hours - October 31, 2026
- 5 Spice Cake Recipe: Warmly Spiced Layers With Crunchy Top - October 31, 2026
- 1950’s Macaroni and Cheese Recipe: Nostalgic Creamy Cheese Sauce with Buttery Noodles - October 31, 2026