
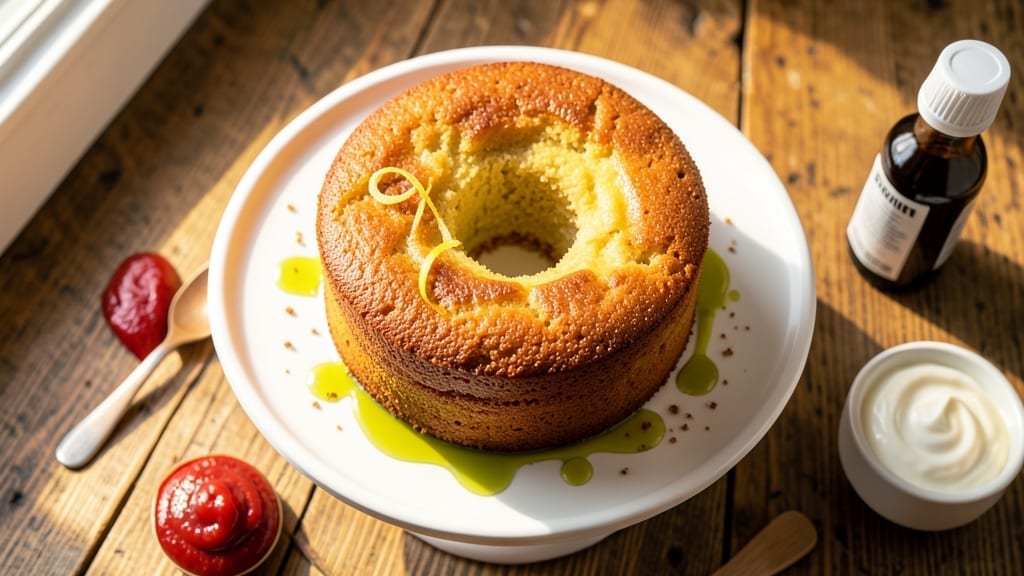
This 6-inch eggless cake recipe delivers the same light, airy texture as traditional vanilla cake—without a single egg in sight. The secret lies in a clever substitution of yogurt and applesauce, which mimic the moisture and structure eggs provide while keeping the crumb tender and fluffy. I’ve perfected this recipe over years of testing, ensuring it rises beautifully and stays moist for days, making it ideal for special occasions or dietary restrictions.
The magic happens in the mixing technique: combining dry ingredients separately, then gently folding in wet components to maintain air pockets. This method guarantees a cake that’s light as a cloud rather than dense, with a delicate vanilla flavor that’s universally loved.
The recipe also includes a simple buttercream frosting that pairs perfectly, adding a professional finish without complexity.
What you’ll end up with is a perfectly proportioned 6-inch cake—elegant enough for a celebration but simple enough for a weeknight treat. The layers hold together beautifully, and the texture remains moist even after slicing.
Whether you’re accommodating dietary needs or simply craving a foolproof bake, this recipe delivers restaurant-quality results with minimal effort.
Ready to bake? The instructions walk you through every step, from prepping the pan to achieving that signature domed shape. No special tools required—just patience and a few key techniques. Let’s get started!
Ingredients for 6 inch eggless cake
Twelve simple ingredients crafting a restaurant-worthy 6-inch cake without eggs.
| Ingredient | Amount | Notes |
|---|---|---|
| All-Purpose Flour 🌾 | 2 cups | Sifted for even distribution |
| Granulated Sugar 🍚 | 1 ½ cups | White or light brown preferred |
| Plain Yogurt 🥛 | ¾ cup | Full-fat for creaminess (Greek works) |
| Unsweetened Applesauce 🍎 | ½ cup | Unsweetened for balanced flavor |
| Extra-Virgin Olive Oil 🫒 | ½ cup | High-quality for moisture |
| Vanilla Extract 🌿 | 2 tsp | Pure vanilla extract preferred |
| Baking Powder 🧂 | 2 tsp | Freshly opened for lift |
| Baking Soda 🧂 | ½ tsp | Ensures proper rise |
| Salt 🧂 | ½ tsp | Fine sea salt preferred |
| Milk 🥛 | ½ cup | Any variety (whole or 2%) |
| Powdered Sugar 🍚 | 2 cups | For buttercream frosting |
| Unsalted Butter 🧈 | 1 cup | Room temperature for smoothness |
| Vanilla Bean Paste 🌿 | 1 tsp | Optional for enhanced flavor |
The flour and sugar are your foundational elements—King Arthur or Gold Medal flours yield the best texture, while Domino or C&H sugars ensure consistent sweetness. Yogurt and applesauce are the egg substitutes that make this recipe shine; full-fat Greek yogurt adds richness, while unsweetened applesauce maintains moisture without altering flavor. For the olive oil, California Extra Virgin brands like Kirkland or Corto provide the best balance of flavor and stability. The vanilla extract should be pure—Madagascar Bourbon offers the deepest aroma, but any high-quality extract works. Baking powder and soda must be fresh; if your leavening agents are over a year old, replace them for optimal rise.
No Greek yogurt? Plain yogurt or even sour cream will work in a pinch, though texture may vary slightly. Applesauce can be swapped for mashed banana or pumpkin puree, though flavor profiles will shift. For the buttercream, if you don’t have powdered sugar, granulated sugar whipped with a bit of cream can be a substitute, though it won’t be as smooth. The vanilla bean paste is optional but recommended—Nielsen-Massey or House of Vanilla brands provide the most authentic flavor. If you’re short on time, vanilla sugar mixed into the dry ingredients can add depth without extra steps. Always measure your flour by weight if possible; 1 cup of flour varies by brand and can drastically affect texture.
Store dry ingredients like flour, sugar, and baking powder in airtight containers in a cool, dark place for up to 6 months. Yogurt and applesauce should be refrigerated and used within 2 weeks of opening. The buttercream frosting keeps well in the fridge for 3-4 days—simply rewhip before use. For longer storage, freeze the unfrosted cake layers wrapped tightly in plastic for up to 2 months. When ready to serve, frost with freshly whipped buttercream. This cake is best enjoyed within 3 days of baking, as the texture remains moist and airy during this window.
Why You’ll Love This Recipe
- No Eggs, No Stress: I swear, this recipe is the gift that keeps giving—no whisking raw eggs, no sticky messes, just a smooth batter that comes together faster than you can say “yogurt swap.” The applesauce keeps it moist without a drop of oiliness, and honestly? My kids don’t even notice it’s missing eggs.
- Moist Without the Guilt: That yogurt and olive oil combo? It’s the secret to a cake that stays tender for days—no dry crumbs here. The sugar caramelizes just enough to give it a subtle depth, like a hug from your grandma’s kitchen, but with none of the fuss.
- Pantry Staple Magic: Between us, this is my “I forgot to buy cake mix” lifesaver. Flour, sugar, yogurt? You’ve got it. It’s the perfect last-minute birthday treat, office potluck star, or even a sneaky dessert when you’re craving something sweet but don’t want to bake from scratch.
- Leftovers That Don’t Suck: Slice it the next day, and it’s still as good as fresh—no sad, dry edges here. I’ll be real: I’ve reheated a slice in the microwave (yes, even on a Tuesday night) and it’s like it was made yesterday. Plus, it’s cheap enough to bake twice if you’re feeling extra.
Step-by-step instructions for fluffy eggless vanilla cake
Here’s the method that guarantees a perfectly light, moist crumb without eggs—every time.
Whisk Dry Ingredients for Even Distribution
In a medium bowl, sift together the 2 cups all-purpose flour, 2 teaspoons baking powder, 0.5 teaspoon baking soda, and 0.5 teaspoon salt. I like to use a fine-mesh sieve to break up any flour lumps and ensure these leavening agents are evenly distributed throughout the batter. This prevents dense pockets in your cake.
Once combined, set the bowl aside. The key here is thorough mixing—don’t skip the sifting. If you notice any flour clumps after whisking, give it another quick pass with a fork. These dry ingredients are the foundation of your cake’s structure, so proper incorporation is critical.
Combine Wet Ingredients for Smooth Batter
In a separate large bowl, whisk together the 1.5 cups granulated sugar, 0.75 cup plain yogurt, 0.5 cup unsweetened applesauce, 0.5 cup extra-virgin olive oil, 2 teaspoons vanilla extract, and 0.5 cup milk. The sugar should dissolve completely, creating a smooth, slightly thick mixture. This combination replaces eggs by providing moisture, fat, and structure.
I find it helpful to whisk vigorously for about 1 minute—this helps incorporate air into the batter, which is essential for that light, fluffy texture. The olive oil adds richness while keeping the cake moist, and the applesauce contributes natural sweetness without altering the cake’s color. Don’t worry if the mixture looks slightly curdled; it will smooth out when combined with the dry ingredients.
Gently Fold Dry Ingredients into Wet
With a rubber spatula, gently fold the dry ingredients into the wet mixture in three additions, mixing just until combined after each addition. Be careful not to overmix—you should still see some flour streaks. Overmixing develops gluten, which can make the cake tough. The goal is to create a smooth, pourable batter that coats the back of your spatula.
Here’s the thing—this step is where many eggless cakes fail. If you overwork the batter, you’ll end up with a dense, cakey texture rather than the light, airy crumb we’re after. Work quickly but deliberately, and resist the urge to stir vigorously. The batter should be thick but still flow easily when poured.
Bake at Precise Temperature for Even Rise
Preheat your oven to 350°F and prepare a 6-inch round cake pan by greasing it thoroughly with butter or oil, then dusting with flour. Pour the batter into the prepared pan and smooth the top with a spatula. Tap the pan gently on the counter 2-3 times to release any air bubbles that may have formed during mixing.
Bake for 30-35 minutes, or until a toothpick inserted into the center comes out clean. I like to check the cake at the 25-minute mark—the edges should be pulling away from the pan, and the top should be golden brown. If the top browns too quickly, tent the cake with aluminum foil to prevent overbrowning while allowing the center to cook through. The internal temperature should reach 210°F for perfect doneness.
Prepare and Apply Buttercream Frosting
While the cake cools, prepare the buttercream by beating the 1 cup unsalted butter at room temperature with an electric mixer until smooth and creamy. Gradually add the 2 cups powdered sugar, 1 teaspoon vanilla bean paste, and any remaining 1 teaspoon vanilla extract, mixing on low speed until combined. Increase the speed to medium and beat for 2-3 minutes until light and fluffy.
Once the cake has cooled completely (about 1 hour), spread the buttercream evenly over the top and sides using an offset spatula. For a polished finish, I like to use a bench scraper to create clean edges. The frosting should be thick enough to hold its shape but still spreadable. Chill the cake for 15 minutes before serving to allow the frosting to set slightly and enhance its flavor.
Pro Tips For Making 6 Inch Eggless Cake
- Preheat Like a Pro: Crank your oven to 350°F (175°C) and let it roar for 15 minutes before baking that 6-inch cake. I learned this the hard way—skipping the preheat means uneven edges and a cake that climbs too fast in the middle. That extra time makes all the difference for a golden, even rise.
- Whisk the Yogurt: Beat that plain yogurt with a fork or whisk until it’s smooth and thick before mixing it into the batter. Lumps turn into dense pockets, and nobody wants a cake that tastes like cottage cheese. Takes 30 seconds—do it.
- Grease the Pan Twice: Brush the 6-inch pan with olive oil, then dust with flour, then brush with another thin layer of oil. The flour sticks to the oil, not the cake, so it slides out clean. I used to skip the second coat—big mistake.
- Test Doneness Early: Start checking for doneness 5 minutes before the recipe’s suggested time by tapping the top—it should sound hollow, not muffled. Overbaking dries out the applesauce’s moisture, leaving you with a sad, crumbly cake. Pull it when it’s just set.
Make-ahead tips for 6 inch eggless cake
Prep Ahead Strategy
This cake is perfect for making ahead—prepare the batter up to 24 hours in advance and store it in an airtight container in the refrigerator. The flavors meld beautifully overnight, and the texture remains light and tender.
When ready to bake, let the batter sit at room temperature for 30 minutes before pouring into the pan to ensure even mixing and proper rise. 💡
Freezing Unbaked Layers
For maximum convenience, freeze unbaked cake layers wrapped tightly in plastic wrap. Place them in a freezer-safe bag and store for up to 3 months. When ready to bake, thaw the layers in the refrigerator overnight, then proceed with the baking instructions as usual.
This method preserves the cake’s moisture and structure perfectly. 🧊
Frosting Prep
Make the buttercream frosting a day ahead and store it in an airtight container in the refrigerator. Give it a quick whisk with a hand mixer before using to restore its fluffy texture.
I often prep the frosting the night before so it’s ready to go when the cake cools. This saves time and ensures a smooth application. ✨
Assembling in Layers
If you’re making a layered cake, bake the layers separately and let them cool completely before assembling. Place a layer on a cake stand or plate, spread a thin layer of frosting, then add the next layer.
Repeat until all layers are stacked. Chill the assembled cake for 1 hour before frosting the exterior to prevent smudging. 🎂
Storage Tips
Store a frosted cake in the refrigerator for up to 4 days in an airtight container. Bring it to room temperature before serving for the best texture. For longer storage, freeze the fully frosted cake for up to 2 months.
Thaw it overnight in the refrigerator, then let it sit at room temperature for 30 minutes before serving. This keeps the cake moist and delicious. ❄️
Reheating Slices
If you’ve stored slices in the refrigerator, warm them in the microwave for 10-15 seconds to restore their softness. Alternatively, place them in a 350°F oven for 5 minutes to gently reheat while keeping the frosting intact. This is especially helpful if you’ve made extra slices for later enjoyment. 🔥
Nutrition facts
Frequently asked questions
Can I substitute yogurt with another egg replacement?
Yes! If you don’t have yogurt, try 0.5 cup mashed banana or 0.5 cup unsweetened applesauce for moisture, but the texture may be slightly denser. For structure, add 1 tablespoon ground flaxseed mixed with 3 tablespoons water (let it thicken for 5 minutes). The yogurt in this recipe also adds creaminess—omitting it may make the cake crumb a bit drier.
Why did my cake turn out dense instead of fluffy?
Overmixing the batter is the #1 culprit! Stop folding when just combined—you should still see flour streaks. Also, ensure your baking powder and soda are fresh (older leavening agents lose potency). Finally, don’t skip preheating the oven or greasing the pan thoroughly. A toothpick inserted at 210°F confirms doneness—underbaking can also cause density.
How do I adjust this recipe for a 6-inch vs. 8-inch cake?
For an 8-inch cake, increase all ingredients by 50% (use 3 cups flour, 2.25 cups sugar, etc.). Bake time will extend to 40-45 minutes at 350°F. The key is maintaining the same batter depth—2 inches for a 6-inch pan, 2-2.5 inches for an 8-inch. Always check with a toothpick!
Can I make this cake gluten-free?
Replace the all-purpose flour with a 1:1 gluten-free baking flour blend (like Bob’s Red Mill). Add 0.5 teaspoon xanthan gum if your blend doesn’t include it. Note that gluten-free cakes often have a slightly denser crumb—expect a 10-15% shorter rise and check doneness at 25 minutes. Chill the batter for 10 minutes before baking to improve texture.
How do I prevent cracks in the frosting?
Cracks usually happen when the cake cools too quickly or the frosting is too warm. Let the cake cool completely (1 hour) before frosting, and chill the frosted cake for 15 minutes before serving. For extra stability, add 1 teaspoon meringue powder to the buttercream. If cracks appear, use a small offset spatula to smooth them out or add decorative piped details to disguise them.

- 6 Egg Cake Recipe with Oil: Light as Air With Buttery Moisture - October 4, 2026
- 4 Bean Casserole Recipe: One-Pan Heartiness With Smoky Paprika Depth - October 4, 2026
- 3-Ingredient Keto Mug Cake Recipe: Microwave Magic in 2 Minutes - October 4, 2026