
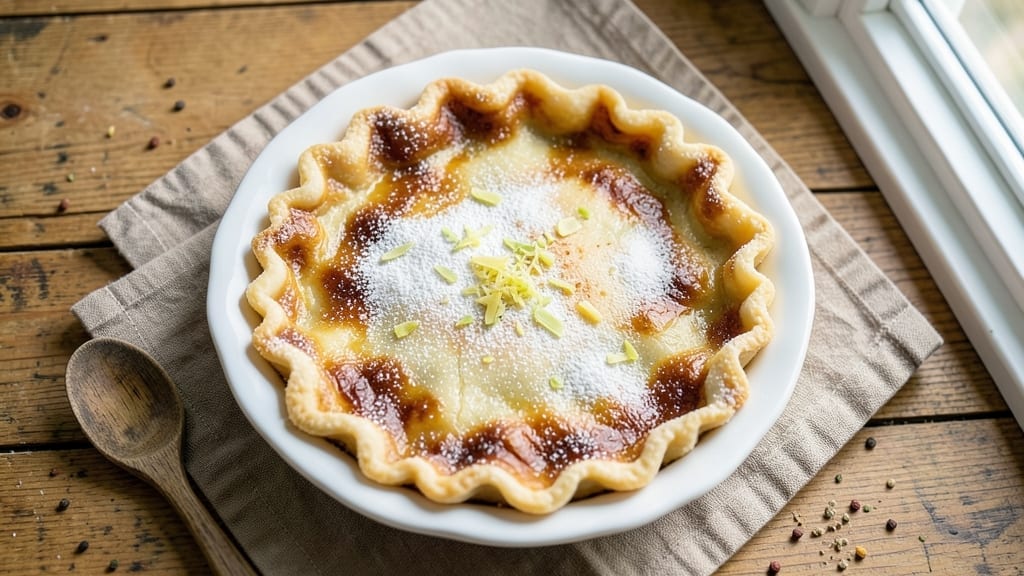
A 6-inch pie crust recipe that delivers perfectly flaky lattice for mini tarts starts with the right technique—cold butter, precise measurements, and patience. This foundational recipe transforms simple ingredients into a crisp, golden crust that holds fillings beautifully without shrinking.
The secret lies in chilling the dough thoroughly and rolling it evenly, ensuring every tart has that signature lattice pattern.
What sets this crust apart is its foolproof method for achieving flakiness, even with a smaller 6-inch size. You’ll use all-purpose flour, cold unsalted butter cut into small pieces, and ice water to bind it together.
The dough rests twice—once after mixing and again before rolling—to prevent cracking and ensure a tender yet sturdy texture. This approach guarantees a crust that’s sturdy enough for baking but delicate enough to melt in your mouth.
By the time you’ve baked it, you’ll have a golden, crisp lattice with layers so delicate they shatter at the touch—ideal for mini tarts, quiches, or even savory hand pies.
The crust holds its shape perfectly, so you can fill it with anything from sweet berry compote to savory cheese and herbs. This recipe is the foundation for countless desserts, and once you master it, you’ll never buy pre-made again.
For extra flakiness, use more butter (up to 2/3 cup) and avoid overworking the dough. If you’re short on time, a food processor speeds up mixing, but hand-cutting the butter creates even more texture.
Whether you’re making a single tart or a batch of mini desserts, this crust delivers restaurant-quality results every time.
Ingredients for 6 inch pie crust
Cold butter and precise flour ratios create a golden lattice crust that shatters deliciously.
| Ingredient | Amount | Notes |
|---|---|---|
| All-Purpose Flour 🌾 | 2 ½ cups | Sifted for even texture |
| Cold Unsalted Butter 🧈 | 1 cup | Cut into 1/2-inch cubes |
| Ice Water 💧 | ¼ cup | Chilled for binding |
| Diamond Crystal Kosher Salt 🧂 | ½ tsp | Fine grain preferred |
| Granulated Sugar 🍚 | 1 tbsp | For lattice crispness |
| Large Egg Yolk 🥚 | 1 whole | Optional for shine |
| Cornstarch 🌾 | 1 tbsp | Prevents sticking |
| Black Pepper 🌶️ | ¼ tsp | Freshly ground |
| Lemon Zest 🍋 | 1 tsp | Brightens flavor |
| Vanilla Extract 🌸 | ½ tsp | For subtle sweetness |
The butter is non-negotiable here—European-style unsalted butter (like Plugrá) gives the most flaky layers, but any cold, high-fat butter works. Whole Foods or Trader Joe’s carry excellent options, or check the refrigerated section of your grocery store. Keep it frozen until ready to cut—this ensures it stays cold and creates perfect pockets of steam during baking. The flour should be sifted for a light, airy texture; King Arthur or Gold Medal are reliable brands. If you’re in a pinch, sift it yourself with a fine-mesh strainer.
No ice water? Cold tap water works, but the ice helps prevent overmixing. Short on butter? Shortening like Crisco adds flakiness, though butter’s flavor can’t be beat. The egg yolk is optional but worth it for that restaurant-quality sheen—skip it if you’re making a savory crust. For extra flakiness, freeze the butter-flour mixture for 15 minutes before adding water. The sugar and cornstarch combo prevents sticking while adding just enough crispness to the lattice. If you’re making a sweet tart, add an extra 1 tbsp sugar to the dough.
This dough must rest—at least 2 hours in the fridge is non-negotiable. Wrap it tightly in plastic and press it flat to prevent air pockets. For the lattice, roll it 1/8-inch thick—any thicker and it won’t bake evenly. Use a bench scraper to cut clean lines. Bake immediately after cutting the lattice to prevent sogginess. Leftovers? Store dough scraps in the freezer for up to 3 months—thaw overnight in the fridge before using. The baked crust keeps for 5 days at room temperature if stored in an airtight container.
Why You’ll Love This Recipe
- No-Fuss Assembly: I swear, this crust comes together in five minutes—just toss the flour, butter, and ice water like you’re making pancake batter. The cold butter cuts in with almost no effort, and no food processor required.
- Buttery Crisp Magic: That flaky, golden edge? It’s all in the cold butter and just enough sugar to caramelize. Honestly, the first time I bit into one, I nearly dropped the whole thing—it’s that good.
- Mini Portions, Big Impact: Six-inch crusts mean single servings or perfect potluck pies. I use them for mini apple galettes, savory tartlets, or even dessert quiches—no one ever leaves with leftovers.
- Budget-Friendly Staples: Flour, butter, salt—these are pantry basics that stretch far. I’ve made a dozen crusts for under $10, and they freeze like a dream for when I’m too tired to bake.
Step-by-step instructions for perfectly flaky lattice pie crust
Here’s how to create a delicate lattice crust that’s crisp, flaky, and built to hold its shape.
Combine Dry Ingredients for Optimal Texture
In a large bowl, whisk together the 2.5 cups all-purpose flour, 1 tbsp cornstarch, 0.5 tsp Diamond Crystal kosher salt, 1 tbsp granulated sugar, 0.25 tsp black pepper, 1 tsp lemon zest, and 0.5 tsp vanilla extract. The cornstarch prevents sticking while baking, and the sugar adds subtle crispness to the lattice pattern. Sift the dry ingredients through a fine-mesh sieve directly into the bowl to aerate the flour and eliminate any lumps.
I like to use a rubber spatula to press the flour mixture against the sides of the bowl to ensure even distribution. This prevents pockets of dry flour that can lead to uneven texture in your crust. The lemon zest and vanilla extract might seem unusual, but they actually enhance the buttery flavor profile while adding subtle brightness that complements sweet fillings beautifully.
Cut in the Cold Butter for Maximum Flakiness
Add the 1 cup cold unsalted butter (cut into ½-inch cubes) to the dry ingredients. Using a pastry cutter or your fingers, work the butter into the flour mixture until you achieve pea-sized crumbs with minimal flour streaks. The butter should remain cold and firm—this is crucial for creating flaky layers. If the mixture feels too crumbly, you can gently press it together with your fingers, but don’t overwork it.
Here’s the thing—cold butter creates steam pockets when baked, which separate into distinct flaky layers. If your butter starts to melt, place the bowl in the refrigerator for 5-10 minutes to firm it up again. The goal is to maintain that perfect balance between butter and flour where each bite delivers that satisfying crispness with tender layers underneath.
Add Ice Water for Precise Dough Formation
Gradually add the 0.25 cup ice water, 1 tablespoon at a time, mixing gently with a fork or silicone spatula. The ice water is essential for binding the dough without making it too wet. Stop adding water as soon as the dough begins to come together—it should hold its shape when pressed lightly but still feel slightly crumbly. Overmixing at this stage develops gluten, which can make your crust tough instead of tender.
Once the dough forms, turn it out onto a lightly floured surface and gently shape it into a 6-inch round disk. Wrap it tightly in plastic wrap and refrigerate for at least 1 hour (up to 24 hours). This resting period allows the gluten to relax and the butter to redistribute evenly, which is what gives you that perfect flaky texture when baked. Don’t skip this step—it makes all the difference in the final result.
Roll and Assemble the Lattice Crust
On a lightly floured surface, roll out the chilled dough to a ⅛-inch thickness, about 8 inches in diameter. For the lattice top, roll out a second piece of dough to the same thickness. Using a sharp knife or pizza cutter, cut 6 strips (about 1-inch wide) from one of the rolled-out dough pieces, leaving a 1-inch border around the edge.
Arrange the strips in a crisscross pattern over the filled tart shell, alternating directions with each layer. Press gently where the strips cross to seal them. The lattice design not only looks beautiful but also allows steam to escape while maintaining structure. Brush both the bottom crust and lattice with the egg yolk (if using) for a golden finish and extra shine.
Bake for Golden Perfection
Preheat your oven to 375°F. Place a baking sheet on the lower rack to catch any potential drips. Bake the tart for 25-30 minutes until the crust is deep golden brown and the lattice edges are crisp. The crust should be fully set but still tender—not hard or pale. If the edges brown too quickly, cover them loosely with aluminum foil after 15 minutes to prevent over-browning while the center cooks through.
Let the tart cool for 10 minutes before filling to allow the crust to set completely. The contrast between the crisp lattice and tender bottom crust is what makes this recipe truly special. Serve warm with your favorite filling—whether it’s berry compote, custard, or savory chutney—and enjoy the perfect balance of texture and flavor in every bite.
Pro Tips For Making 6 Inch Pie Crust
- Cut Butter in Small Batches: I learned this the hard way—trying to mix all 1 cup of cold butter into the flour at once just makes a mess. Work in 2-3 tablespoon chunks, pulsing your food processor or cutting by hand until you get pea-sized crumbs. This keeps the butter cold and ensures even distribution, which is the thing that matters most for that perfect flaky texture.
- Use Ice Water Sparingly: The recipe calls for ice water, but don’t drown the dough. Start with 4 tablespoons, then add 1 more if needed—too much water makes the crust tough. I was skeptical until I tried it: the right amount just binds the dough without stealing the flakiness.
- Rest the Dough Twice: Chill the dough for 30 minutes after mixing, then roll it out and chill again for another 15-20 minutes before baking. This isn’t the prettiest method, but it’s the tastiest—prevents shrinking and gives you a cleaner edge.
- Salt the Butter First: Skip the extra kosher salt in the flour and mix ¼ teaspoon directly into the butter before cutting it in. This guarantees even salt distribution—no dry pockets or overly salty spots. (Yes, even if you’re impatient like me, trust the process.)
Creative variations of this dish
Sweet vs. Savory
This crust shines in both sweet and savory applications—just adjust the seasonings. For sweet tarts, stick with the original recipe (lemon zest and vanilla) and pair with berry fillings or custard.
For savory hand pies, swap the sugar for an extra ½ tsp garlic powder and ¼ tsp smoked paprika, then brush with olive oil instead of egg wash. The lattice holds up beautifully to fillings like spinach and feta or pulled pork and apple chutney. 🥧
Gluten-Free Adaptation
Replace the 2.5 cups all-purpose flour with a 1:1 gluten-free blend (like King Arthur Measure for Measure). Add ¼ cup xanthan gum to mimic gluten’s binding properties. Chill the dough 30 minutes longer than usual since gluten-free doughs are more fragile.
For extra stability, press a thin layer of cornstarch between the lattice strips before baking. The texture will be slightly denser but still crisp and flaky. 🌾
Vegan Butter Option
Use 1 cup vegan butter (like Miyoko’s or Earth Balance) for a plant-based crust. Keep it frozen until ready to cut into cubes—this prevents melting and maintains flakiness.
For binding, replace the egg yolk with 1 tbsp aquafaba (chickpea brine) or 1 tbsp melted coconut oil mixed with 1 tsp water. The crust will be just as golden and crisp, perfect for vegan fruit tarts or mushroom and walnut galettes. 🌱
Herb-Infused Variations
Swap the vanilla and lemon zest for 1 tbsp fresh herbs like rosemary, thyme, or chives (finely chopped). For herb crusts, reduce the sugar to ½ tbsp and add 1 tsp dried herbs to the dry mix.
These work beautifully with goat cheese and honey fillings or roasted vegetable tartlets. For a citrus twist, replace the vanilla with 1 tsp orange zest and add ½ tsp cardamom—ideal for lemon curd or spiced apple compote. 🌿
Mini Tart Batch Prep
For 12 mini tarts (3-inch diameter), scale the recipe down to 1.25 cups flour, ½ cup butter, and ¼ cup ice water. Use a mini tart pan with removable bottoms for easy serving. Roll the dough ⅛-inch thick and cut circles with a 3-inch round cutter.
Blind-bake the shells for 12-15 minutes at 375°F before filling. Store unbaked dough scraps in the freezer for up to 3 months—thaw overnight before rolling. 🧁
No-Roll Crust Hack
Skip rolling entirely for a no-fuss crust: Press the chilled dough into a 6-inch tart pan using your fingers, then poke it with a fork. For lattice, roll out just the top layer (½ the dough) and cut strips as directed.
This method works perfectly for rustic free-form tarts or when you’re short on time. The texture stays flaky, though slightly thicker—ideal for cheesecake or chocolate ganache fillings. ⏱️
Nutrition facts
Frequently asked questions
Why does my 6-inch crust keep shrinking during baking?
Shrinking happens when the dough isn’t chilled enough or overworked. Always refrigerate the dough for at least 2 hours before rolling, and handle it gently to avoid developing gluten. For extra stability, pre-bake the crust (blind bake) for 10 minutes at 375°F before adding fillings. A 6-inch tart pan with removable bottom helps too—it provides structure while baking.
Can I make this crust without a rolling pin?
Use a wine bottle, a heavy skillet, or even a clean soup can wrapped in parchment paper. For lattice crusts, roll the dough between two sheets of parchment paper to prevent sticking. The key is to keep it ⅛-inch thick—press gently with your fingers if needed. This method works perfectly for rustic mini tarts!
How do I prevent the lattice from falling apart?
Press the lattice strips gently at the crossings to seal them, but don’t overhandle. Brush the strips with egg wash (or water for vegan versions) before baking to help them set. Bake at 375°F for 25-30 minutes—don’t overbake, or the lattice will become brittle. Let the crust cool 10 minutes before adding fillings to prevent sogginess.
What’s the best way to store leftover crust dough?
Wrap the dough tightly in plastic wrap and refrigerate for up to 3 days or freeze for 3 months. For freezing, flatten the dough slightly before wrapping to save space. Thaw overnight in the fridge—never at room temperature. The dough can also be baked and stored at room temperature in an airtight container for 5 days.
Can I make this crust gluten-free or vegan?
Yes! For gluten-free, replace flour with a 1:1 blend and add ¼ cup xanthan gum. Chill 30 minutes longer for stability. For vegan, use vegan butter (keep frozen until cutting) and replace egg wash with aquafaba or coconut oil. Both versions stay crisp and flaky when baked properly.

- 3lb Prime Rib Roast Recipe: Juicy Pink Center Guaranteed in 3 Hours - October 31, 2026
- 5 Spice Cake Recipe: Warmly Spiced Layers With Crunchy Top - October 31, 2026
- 1950’s Macaroni and Cheese Recipe: Nostalgic Creamy Cheese Sauce with Buttery Noodles - October 31, 2026