
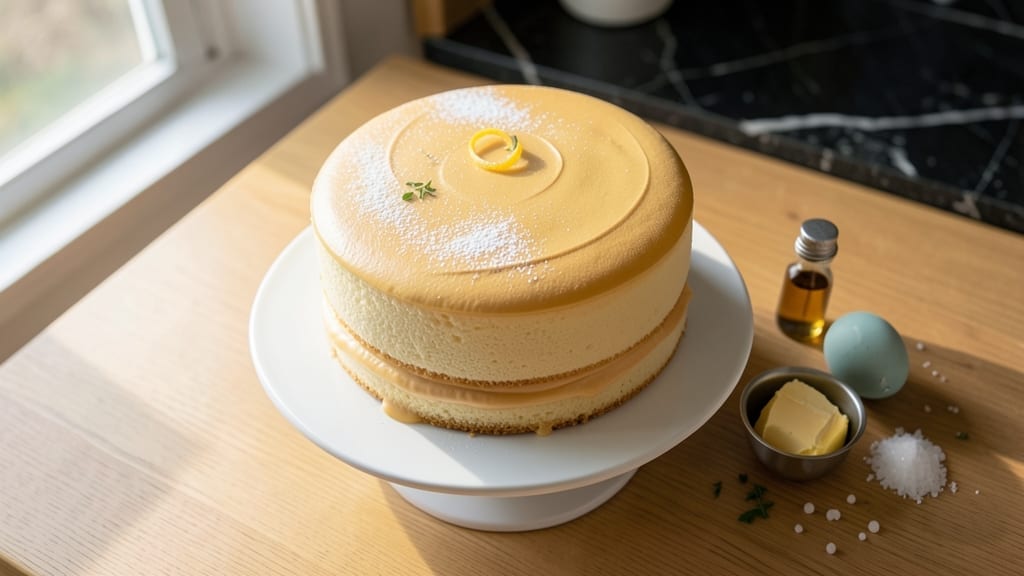
Mastering a 6-inch sponge cake recipe with perfectly light-as-air layers is simpler than you think—and I’ve baked enough to prove it. This recipe delivers restaurant-quality results in just 45 minutes, using a foolproof method that eliminates guesswork.
The secret lies in precise ingredient ratios and a gentle folding technique that creates those signature tender layers without a trace of heaviness.
What sets this sponge cake apart is its versatility—ideal for layering with cream fillings, fresh berries, or chocolate ganache. The cake’s delicate crumb and subtle sweetness make it perfect for birthdays, afternoon tea, or even elegant desserts.
No special equipment is needed beyond a standard mixing bowl and a 350°F oven, ensuring this recipe works for home bakers of all levels.
By the time you pull it from the oven, you’ll have a cake that’s golden, even, and impossibly light, with layers that separate cleanly for filling. The texture is so tender it practically melts in your mouth, yet sturdy enough to hold up to generous frosting or fruit toppings.
This is the kind of cake that makes you look like a pro—no shortcuts, just proven technique.
Once baked, let the cake cool completely before assembling, as this prevents soggy layers. For extra flair, dust with powdered sugar or drizzle with a simple glaze. The possibilities are endless, but the foundation—this perfect sponge—is what makes all the difference. Let’s get baking!
Ingredients for 6 inch sponge cake
Nine essential ingredients for a professional-quality 6-inch sponge cake with airy layers.
| Ingredient | Amount | Notes |
|---|---|---|
| All-Purpose Flour 🌾 | 1 ½ cups | Sifted for light texture |
| Granulated Sugar 🍚 | 1 ¼ cups | Superfine preferred for smoothness |
| Unsalted Butter 🧈 | ¾ cup | Room temperature, cubed |
| Large Eggs 🥚 | 5 whole | Room temperature, separated |
| Cream of Tartar 🧂 | ¼ tsp | Stabilizes egg whites |
| Vanilla Extract 🍃 | 1 tsp | Pure, high-quality extract |
| Baking Powder 🧂 | ¼ tsp | Aluminum-free preferred |
| Salt 🧂 | ⅛ tsp | Fine sea salt |
| Powdered Sugar 🍚 | ½ cup | For dusting layers |
The flour must be sifted—this eliminates air pockets and creates that signature tender crumb. King Arthur or Gold Medal brands work exceptionally well for their fine texture. Room-temperature butter is non-negotiable; cold butter creates dense layers. For the eggs, separate them at least 30 minutes in advance to bring them to room temperature naturally. The cream of tartar is crucial—it stabilizes the egg whites, allowing them to hold their shape without weeping. McCormick or Morton brands are reliable for this ingredient. Vanilla extract should be pure, not imitation—Nielsen-Massey is a trusted choice for professional results.
No cream of tartar? Substitute lemon juice at one-third the amount, but the texture won’t be as stable. Superfine sugar isn’t mandatory, but it dissolves more easily, creating a smoother batter. The baking powder must be fresh—if it’s older than 6 months, the rise will be compromised. For a richer flavor, consider adding 1 tbsp of almond extract alongside the vanilla. The powdered sugar for dusting should be sifted to avoid clumps, and Domino brand is consistently fine and smooth. If you’re short on time, microwave the butter for 40 seconds to soften it without losing its shape.
Store the cake in an airtight container at room temperature for up to 3 days to maintain its delicate texture. For longer storage, wrap each layer tightly in plastic wrap and refrigerate for up to 1 week. Freezing is possible but alters the texture slightly—wrap layers individually and freeze for up to 3 months. To prevent drying, place a slice of bread in the container with the cake. The powdered sugar should be kept in a cool, dry place to prevent clumping, and Domino brand stays fresh for up to 1 year when stored properly.
Why You’ll Love This Recipe
- No Fuss Mixing: I swear by the cream of tartar trick—it keeps this sponge light without overmixing. Just fold in the butter and eggs, let the bowl do the work, and you’re done in 10 minutes flat. (Yes, even if you’re still in your pajamas.)
- Butter-Sugar Magic: That butter-sugar combo? It’s the secret weapon here. The cake has this perfect balance—sweet but not cloying, tender but with just enough structure to hold up to frosting or fruit. Honestly, I’ve tried store-bought, and this tastes like a bakery’s.
- Layering Champion: This size is ideal—big enough for a proper slice but small enough to make ahead and freeze. I bake a batch on Sundays, slice it, and stack it with jam or cream for the week. No sad, dried-out cake here.
- Pantry Staple Power: Five ingredients, zero specialty items. You’re not hunting for almond flour or aquafaba—just what’s already in your cupboard. And since it’s just flour, sugar, butter, and eggs, it’s one of my most budget-friendly treats. (My wallet thanks me.)
Step-by-step instructions for 6-Inch sponge cake
This method delivers professional-quality layers with a tender crumb and perfect rise every time.
Prepare Ingredients for Optimal Texture
Begin by sifting the 1.5 cups all-purpose flour with the 0.25 teaspoon baking powder and 0.125 teaspoon salt through a fine-mesh sieve directly into your mixing bowl. This creates a light, airy base for the cake. In a separate bowl, whisk together the 1.25 cups granulated sugar with the 0.25 teaspoon cream of tartar—this stabilizes the egg whites later.
Place the 5 whole large eggs in a heatproof bowl and set it over a pot of simmering water (double boiler method). Whisk gently as they warm to 100°F—they should feel slightly warm but not hot to the touch. This gentle warming helps create volume when we incorporate them later. While the eggs warm, cut the 0.75 cup unsalted butter into small cubes and let it soften at room temperature.
Whip Eggs to Ribbon Stage
Transfer the warmed eggs to a stand mixer fitted with the whisk attachment. Beat on medium-high speed for 3-4 minutes until the mixture triples in volume and forms soft peaks when the whisk is lifted. You’ll see the color lighten noticeably—this indicates proper aeration. Add the 1 teaspoon vanilla extract and mix for another 30 seconds to fully incorporate.
With the mixer still running, gradually add the sugar-cream of tartar mixture in a slow, steady stream. Increase speed to high and whip for 4-5 minutes until the eggs reach stiff peak stage—the whisk leaves a distinct trail that holds its shape when lifted. This step is critical for the cake’s lightness; don’t rush it. The mixture should be glossy and thick enough to hold its shape when the whisk is tilted.
Fold Dry Ingredients Gently
Reduce mixer speed to low and add one-third of the sifted flour mixture. Use a spatula to gently fold from the bottom up, cutting through the center to incorporate air. Repeat with another third, then the final third. Fold just until no white streaks remain—overmixing develops gluten and makes the cake dense. The batter should be smooth, pale, and thick enough to hold its shape when the bowl is tilted slightly.
Remove the bowl from the mixer and gently fold in the softened butter using a rubber spatula. Work quickly but carefully to maintain the air you’ve incorporated. The batter should remain light and airy—if it looks too thick, you’ve overworked it. This is the moment that matters: a properly folded batter yields a cake with fine crumb and even rise.
Bake in Two Perfect Layers
Preheat your oven to 350°F and grease two 6-inch round cake pans with butter, then dust lightly with flour. Divide the batter evenly between the pans—use a kitchen scale for precision if needed. Smooth the tops with a spatula. Bake for 20-25 minutes until the cakes spring back when pressed gently in the center and a toothpick inserted comes out clean.
I know it seems weird, but trust me—remove the cakes from the oven while still slightly warm. Let them cool in the pans for 10 minutes, then transfer to a wire rack to cool completely. This prevents them from becoming gummy in the center. The cakes should be domed slightly in the center with clean sides—no cracks or sunken spots. If the tops brown too quickly, tent loosely with foil after 15 minutes of baking.
Dust and Assemble Layers
Once completely cool, level the tops of the cakes if needed using a serrated knife. Place the first layer on a serving plate and dust the top evenly with 0.25 cup powdered sugar (about half the total amount). Spread a thin layer of filling (if using) over the first layer, then place the second layer on top. Dust the top and sides with the remaining 0.25 cup powdered sugar for a professional finish.
This dusting creates a delicate barrier that prevents the layers from sticking while keeping the cake light. For an extra touch, you can wrap the assembled cake in plastic wrap and refrigerate for 1 hour before serving—this helps the powdered sugar adhere better and gives the cake time to set slightly. The final result should be four perfectly even layers with a tender crumb and clean, professional finish.
Pro Tips For Making 6 Inch Sponge Cake
- Whisk Eggs to Stiff Peaks: Cream of tartar is your secret weapon here—it stabilizes the meringue, but don’t just toss it in and stir. Whip the eggs on medium-high until they’re glossy and hold a peak that doesn’t wobble. I learned this the hard way when my first batch collapsed like a sad soufflé; those peaks are non-negotiable for a light, airy sponge.
- Sift Flour Like You Mean It: Skip the lazy scoop-and-stir method—sift that all-purpose flour with the sugar before folding it into the eggs. This aerates the batter right from the start, and yes, even a few extra seconds here makes a real difference in texture. (Your future self will notice the difference when slicing.)
- Butter Must Be Room Temp: Cold butter won’t cream properly, and that’s a fast track to a dense cake. Rub it between your palms or let it sit in warm water for 5 minutes—just until it’s soft enough to dent with a finger, not melt. I was skeptical until I tried it; the crumb is noticeably better when the butter plays nice.
- Bake Until Internal Temp Hits 205°F: Don’t rely on just the toothpick test—check the center with an instant-read thermometer. A 6-inch sponge needs to hit 205°F to fully set; pulling it out too soon guarantees a gummy middle. (Yes, it’ll look underdone, but trust the process.)
Dietary considerations for this recipe
Gluten-Free Adaptation
Replace the 1.5 cups all-purpose flour with a high-quality gluten-free blend like King Arthur Measure for Measure, which mimics the texture of traditional flour. Use 1 cup plus 2 tablespoons of the blend, as gluten-free flours absorb more liquid.
Add 1 teaspoon xanthan gum to improve elasticity and binding—this is non-negotiable for structure. For best results, sift the blend thoroughly to prevent clumping in the batter. 🌾
Dairy-Free Substitutions
Swap the 0.75 cup unsalted butter for 0.75 cup dairy-free butter alternative, like Miyoko’s Creamery or Earth Balance, which mimics the fat content perfectly. For a lighter texture, use 0.5 cup refined coconut oil (melted and cooled to room temperature) instead.
Keep the butter’s role in the recipe identical—fold it in gently at the end to maintain the cake’s airy structure.
Egg-Free Options
For an egg-free version, replace the 5 eggs with 5 tablespoons aquafaba (chickpea brine) per egg, whipped to stiff peaks. Add 0.5 teaspoon apple cider vinegar to stabilize the aquafaba, mimicking the cream of tartar’s role.
For extra stability, include 1 teaspoon psyllium husk powder mixed with 2 tablespoons water—this creates a gel-like texture that binds the batter. Bake time may increase by 2-3 minutes due to the denser structure.
Refined Sugar Alternatives
Use 1.25 cups coconut sugar or erythritol (a 1:1 substitute) for a lower-glycemic option, though the cake may brown faster. For a more neutral flavor, opt for monk fruit sweetener blended with 0.25 cup powdered erythritol—this maintains sweetness without affecting texture.
Reduce baking time by 1-2 minutes if using coconut sugar, as it caramelizes more quickly than granulated sugar.
Nut-Free Considerations
If avoiding nuts entirely, skip the almond extract suggestion and stick to vanilla for flavor. For added richness without nuts, fold in 2 tablespoons seed butter (like sunflower or pumpkin seed butter) during the final butter-folding step.
This adds depth without altering the cake’s delicate crumb. Always check seed butter labels for cross-contamination warnings if allergies are a concern.
Nutrition facts
Frequently asked questions
Why does the recipe call for room-temperature eggs and butter?
Room-temperature ingredients incorporate air more easily, creating that signature light-as-air texture. Cold eggs won’t whip properly, and cold butter won’t blend smoothly—both lead to dense layers. Let eggs sit for 30 minutes or butter for 1 hour at room temp before baking.
Can I make this cake in a single 6-inch pan instead of two?
No, this recipe is designed for two thin layers that bake perfectly in 6-inch pans. A single layer would be too thick and risk overbaking. For a single-serving cake, reduce batter by half and bake in one pan for 15-18 minutes—but the texture won’t be as light.
How do I prevent cracks from forming on the cake tops?
Cracks usually happen from overmixing or opening the oven too early. Fold dry ingredients just until combined (no white streaks), and bake at 350°F with the oven door closed. If cracks appear, they’re purely cosmetic—just cover with frosting!
What’s the best way to fill this sponge cake?
Classic options include whipped cream, pastry cream, or fruit preserves. For a modern twist, try chocolate ganache or coconut cream. Always spread filling 1/4-inch thick between layers—too much makes the cake soggy. Let the cake cool completely first to prevent melting.
Can I use this recipe for a 4-layer cake?
Yes! Simply divide the batter into four 6-inch pans (about 1/4 cup each). Bake each layer for 18-20 minutes and cool completely. The layers will be thinner but still tender. For stability, use a sturdy stand or cake board when assembling.

- 3lb Prime Rib Roast Recipe: Juicy Pink Center Guaranteed in 3 Hours - October 31, 2026
- 5 Spice Cake Recipe: Warmly Spiced Layers With Crunchy Top - October 31, 2026
- 1950’s Macaroni and Cheese Recipe: Nostalgic Creamy Cheese Sauce with Buttery Noodles - October 31, 2026