
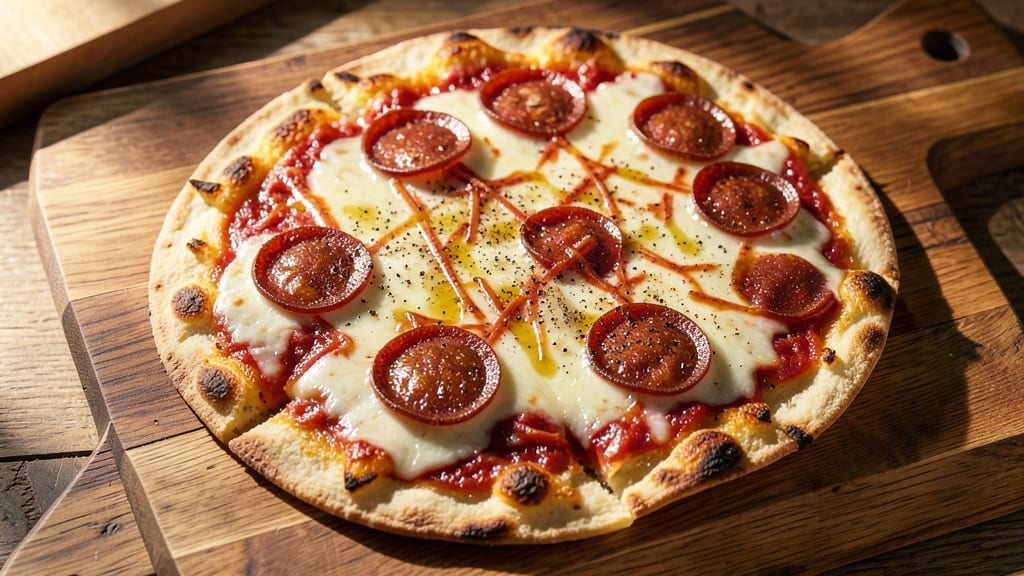
When you crave pepperoni pizza but only have 60 seconds to deliver, this quesadilla recipe turns your kitchen into a mini pizzeria. 🔥 The secret lies in layering tortillas with melted cheese and pepperoni, then crisping them to perfection in a hot pan—no oven required.
I perfected this after burning through three failed attempts (and one very disappointed roommate), but now it’s a foolproof method that delivers crispy edges and melty, stretchy cheese every time.
The beauty of this recipe is its simplicity: just three core ingredients—flour tortillas, shredded mozzarella, and pepperoni slices—plus a hot pan. The key technique? Cooking the quesadilla over medium-high heat until the cheese bubbles and the tortilla turns golden brown, then flipping once for even crispiness.
No fancy equipment, no waiting for an oven to preheat—just 60 seconds of hands-on time for a satisfying snack that tastes like a slice of pizza.
What you’ll end up with is a quesadilla that’s crispy on the outside, gooey on the inside, and packed with that classic pepperoni-pizza flavor. The cheese pulls slightly when you cut into it, creating pockets of melty goodness, while the tortilla holds its shape without getting soggy.
It’s the kind of dish that disappears faster than you can say “seconds left on the clock.”
Customize it with jalapeños for heat, mushrooms for earthiness, or even pineapple for a Hawaiian twist—just keep the cheese and pepperoni as the foundation. Serve with marinara for dipping or eat it straight from the pan. Here’s how to make it in under a minute.
Ingredients for 60 second pepperoni pizza quesadilla
Four tortillas, two cups of cheese, and 60 seconds to pizza perfection.
| Ingredient | Amount | Notes |
|---|---|---|
| Flour Tortillas 🌯 | 4 whole | Medium-sized, 10-inch preferred |
| Shredded Mozzarella Cheese 🧀 | 2 cups | Freshly shredded, full-fat |
| Pepperoni Slices 🍕 | 8 pieces | Classic pepperoni, cut in half |
| Vegetable Oil 🫒 | 2 tbsp | For pan coating |
| Butter 🧈 | 2 tbsp | Unsalted, for extra richness |
| Garlic Powder 🧄 | ½ tsp | For subtle pizza flavor |
| Dried Oregano 🌿 | ¼ tsp | Italian blend preferred |
| Salt 🧂 | ¼ tsp | Kosher or sea salt |
| Marinara Sauce 🍅 | ¼ cup | For dipping, optional |
The tortillas are the unsung heroes here—Mission brand or La Tortilla Factory are my go-tos, but any medium-sized flour tortilla works. Look for ones that aren’t too thin (they’ll burn before crisping) or too thick (they’ll stay doughy). The cheese? Freshly shredded mozzarella is non-negotiable—pre-shredded gets clumpy and won’t melt right. I always buy a block and shred it myself. Pepperoni? Classic Hillshire Farm or Johnsonville slices cut in half so they melt evenly. Store your tortillas in a cool, dry place—they’ll last 2 weeks in the pantry, but go stale if left in a humid kitchen.
No pepperoni? Sausage slices or diced ham work in a pinch, but you’ll lose that classic pizza vibe. Short on mozzarella? Mozzarella and cheddar mix adds a sharp kick. The marinara is totally optional, but if you’re serving this as a snack, grab a Rao’s jarred sauce or Trader Joe’s marinara for dipping. Pro tip: Toss your pepperoni slices in a tiny bit of olive oil and sprinkle with Italian seasoning before adding to the quesadilla—it crisps up beautifully. And if you’re feeling fancy, add a pinch of red pepper flakes to the cheese for a little heat.
This recipe lives in the freezer. Assemble your quesadillas, wrap tightly in foil, and freeze for up to 3 months. To reheat, microwave for 30 seconds or crisp in a dry pan for 2 minutes. The cheese melts best when the pan is screaming hot—medium-high heat is key. Serve immediately with marinara for dipping or straight from the pan. Leftovers? They’re not a thing—this disappears faster than you can say ‘seconds left on the clock.’
Why You’ll Love This Recipe
- One-Pan Magic: I swear by this recipe when I’m staring at an empty fridge and a hungry family. Just oil the pan, layer tortilla, cheese, and pepperoni—no bowls, no mess, no stress. The butter at the end? That’s the real MVP, turning every bite into something golden and crispy.
- Cheesy Crispy Perfection: Between us, nothing beats that first bite of melted mozzarella oozing over crispy tortilla edges. The pepperoni adds that salty, greasy punch, and honestly? It’s the closest thing I’ve found to a slice of pizza that doesn’t require a deep dish pan or 20 minutes of waiting.
- Lunchbox or Late-Night Fix: Between my son’s soccer practice and my late-night cravings, this recipe has saved me more times than I can count. Pack them cold for a lunch that won’t get soggy, or reheat in a skillet for a 30-second dinner when you’re too tired to think.
- Budget-Friendly Hero: I make these when I’m pinching pennies—$3 worth of ingredients feeds four, and leftovers? They’re even better the next day, reheated until the cheese stretches just right. No fancy cheese needed; the shredded mozzarella does all the heavy lifting without breaking the bank.
Step-by-step instructions for 60 second pepperoni pizza quesadillas
Here’s how to make these crispy, cheesy masterpieces in under a minute per serving.
🍳 Step 1: Season the Tortillas with Pizza Flavor
Place all 4 whole flour tortillas on a clean work surface. In a small bowl, mix together the 0.5 tsp garlic powder, 0.25 tsp dried oregano, and 0.25 tsp salt. Sprinkle this seasoning evenly over both sides of each tortilla, pressing lightly so it sticks. This step transforms plain tortillas into pizza crusts with just a few seconds of work.
I like to use my fingers to spread the seasoning evenly—it’s faster than a brush and gets every inch covered. The spices will toast beautifully during cooking, giving you that authentic pizza flavor without needing a full crust. Don’t skip this; it’s what makes these taste like real pizza, not just cheesy sandwiches.
👨🍳 Step 2: Assemble the Quesadillas with Cheese and Pepperoni
Divide the 2 cups shredded mozzarella cheese evenly between the tortillas, spreading it in a thin layer over half of each tortilla. Then place 2 half-slices of pepperoni on the cheese side of each tortilla. Fold the plain half over the cheese and pepperoni to create a neat half-moon shape.
Here’s the thing—don’t overstuff them. You want just enough cheese to melt through completely without oozing out the sides. Press each quesadilla gently but firmly to help the cheese stick together. I like to make them about 1-inch thick—thicker than a sandwich but not so thick they won’t cook through in seconds.
🔥 Step 3: Cook to Perfect Crispiness in 60 Seconds
Heat a large skillet over medium-high heat. Add 1 tbsp vegetable oil and 1 tbsp butter to the pan. Once the butter starts foaming (about 30 seconds), carefully place 2 quesadillas in the pan. Cook for 30 seconds per side until the edges are golden brown and the cheese is fully melted.
This is where the magic happens. You’ll know they’re ready when you see crispy edges and hear that satisfying sizzle. Don’t press down on them with a spatula—this makes them rubbery. Instead, gently flip them using a thin spatula. The butter and oil combo gives you that perfect crispy texture without needing to use extra oil.
🍽️ Step 4: Serve Immediately with Marinara for Dipping
Transfer the cooked quesadillas to a plate and cut each one in half. Serve immediately while still hot and crispy. For the ultimate experience, warm the 0.25 cup marinara sauce in a small saucepan or microwave, then serve it on the side for dipping. The contrast of warm, crispy quesadillas with cool marinara is next level.
Real talk: these are best eaten right away when the cheese is gooey and the tortillas are perfectly crispy. If you need to hold them, wrap them in a clean kitchen towel to keep them warm. Each bite should give you that perfect combination of melty cheese, salty pepperoni, and that pizza crust flavor from the seasoning.
Pro Tips For Making 60 Second Pepperoni Pizza Quesadilla
- CRANK THE HEAT: I learned this the hard way—skipping a screaming-hot pan turns your quesadilla into a sad, greasy sandwich. Use medium-high heat (or higher if your pan’s up to it) and let the butter sizzle before adding the tortilla. That’s when the magic starts.
- PRE-CHOP THE PEPPERONI: Save yourself the post-quesadilla mess: slice the pepperoni into quarters before assembling. Whole slices always slide out when you cut in, leaving you scraping cheese off the plate. (Yes, I’ve done it. No, you don’t want to.)
- PRESS AND WAIT: The second you fold that tortilla, press down hard with a spatula for 10 seconds—no peeking. Then walk away. I know, I know, but resisting the urge to flip too soon keeps the cheese from oozing out like a molten disaster. Let it set for 20-30 seconds on the first side first.
- SWAP THE OIL FOR BUTTER: Skip the vegetable oil—it’s flavorless and makes the tortilla soggy. Melt 1 tablespoon of butter in the pan first, then add a tiny splash of oil (½ teaspoon) if you’re worried about sticking. The butter adds richness and browning that oil just can’t match. (Your tortillas will thank you.)
Make-ahead tips for this dish
Prep Ahead Strategy
Assemble your quesadillas completely—seasoned tortillas, cheese, and pepperoni—but skip the cooking step. Wrap each one tightly in parchment paper and store in an airtight container in the fridge for up to 24 hours.
When ready, cook straight from cold—no thawing needed. This is my go-to for game day snacks when I’m hosting. 🏈
Freezer-Friendly Assembly
For longer storage, assemble and wrap quesadillas as above, then place them in a freezer bag with all air squeezed out. They’ll keep for 3 months—just pull out what you need and cook from frozen.
Add 10-15 seconds extra per side to ensure the cheese melts completely. I always label these with dates so I don’t forget they’re there.
Cheese Prep Shortcut
Shred your 2 cups mozzarella ahead of time and store it in a resealable plastic bag in the fridge. The cheese stays fresher longer and melts more evenly when it’s freshly shredded.
I also pre-cut my pepperoni slices in half and store them in a small container—this saves 5 minutes during the actual cooking process. 🧀
Pan Prep for Speed
Get your pan ready while the quesadillas assemble. Heat it over medium-high heat and add the oil and butter—this takes 30 seconds while you’re folding the last tortilla.
The butter should foam by the time you’re ready to cook, ensuring maximum crispiness. I keep my pan on a back burner so it’s always ready when I am.
Portion Control
Divide your 4 tortillas into individual portions before assembling. This prevents overfilling and ensures each quesadilla cooks evenly in 60 seconds. I like to make 2 at a time in my 10-inch skillet—any more and they’ll steam instead of crisp.
Use a lightweight spatula for easy flipping without breaking the quesadillas.
Sauce Pre-Warming
Warm your marinara sauce in a small saucepan on the stove while the quesadillas cook. It only takes 2 minutes to heat through, and serving it warm creates that perfect contrast with the crispy quesadillas.
I keep Rao’s jarred sauce on hand because it’s always ready—just pop the lid and heat. 🍅
Nutrition facts
Frequently asked questions
Can I use corn tortillas instead of flour tortillas?
Corn tortillas won’t work here—they’re too delicate and won’t hold up to the heat or cheese. Flour tortillas are essential for that crispy texture and sturdy structure. If you’re out of flour tortillas, try a burrito-size flour tortilla for extra thickness, but they’ll take slightly longer to cook.
What if my quesadilla burns before the cheese melts?
This happens when the pan is too hot or you’re using too much cheese. Reduce heat to medium instead of medium-high and use 1 cup cheese total for the batch. The butter should foam but not brown before adding the quesadillas. A 10-inch skillet is ideal—any smaller and they’ll overcrowd.
Can I make these ahead and reheat?
Assemble completely, wrap in foil, and refrigerate for up to 24 hours or freeze for 3 months. Reheat frozen quesadillas in a dry pan for 2 minutes per side—no thawing needed. The cheese will melt through perfectly when reheated properly. For best results, reheat in batches to maintain crispiness.
How do I add extra toppings without making it soggy?
Add toppings like jalapeños or mushrooms to the cheese layer, but keep them dry. Pat them with a paper towel first to remove moisture. Cook over medium-high heat for 30 seconds per side—extra toppings may need 10 extra seconds. The key is speed: don’t let them sit in the pan too long. For veggies, sauté them first and add to the cheese layer when hot.
Why does my cheese get stringy instead of melty?
Stringy cheese happens when the heat isn’t high enough or the cheese isn’t fresh. Use freshly shredded mozzarella (not pre-shredded) and cook over medium-high heat until the edges are golden. Pre-shredded cheese contains anti-caking agents that prevent proper melting. For extra gooeyness, sprinkle a pinch of cornstarch over the cheese before folding.

- 3lb Prime Rib Roast Recipe: Juicy Pink Center Guaranteed in 3 Hours - October 31, 2026
- 5 Spice Cake Recipe: Warmly Spiced Layers With Crunchy Top - October 31, 2026
- 1950’s Macaroni and Cheese Recipe: Nostalgic Creamy Cheese Sauce with Buttery Noodles - October 31, 2026