
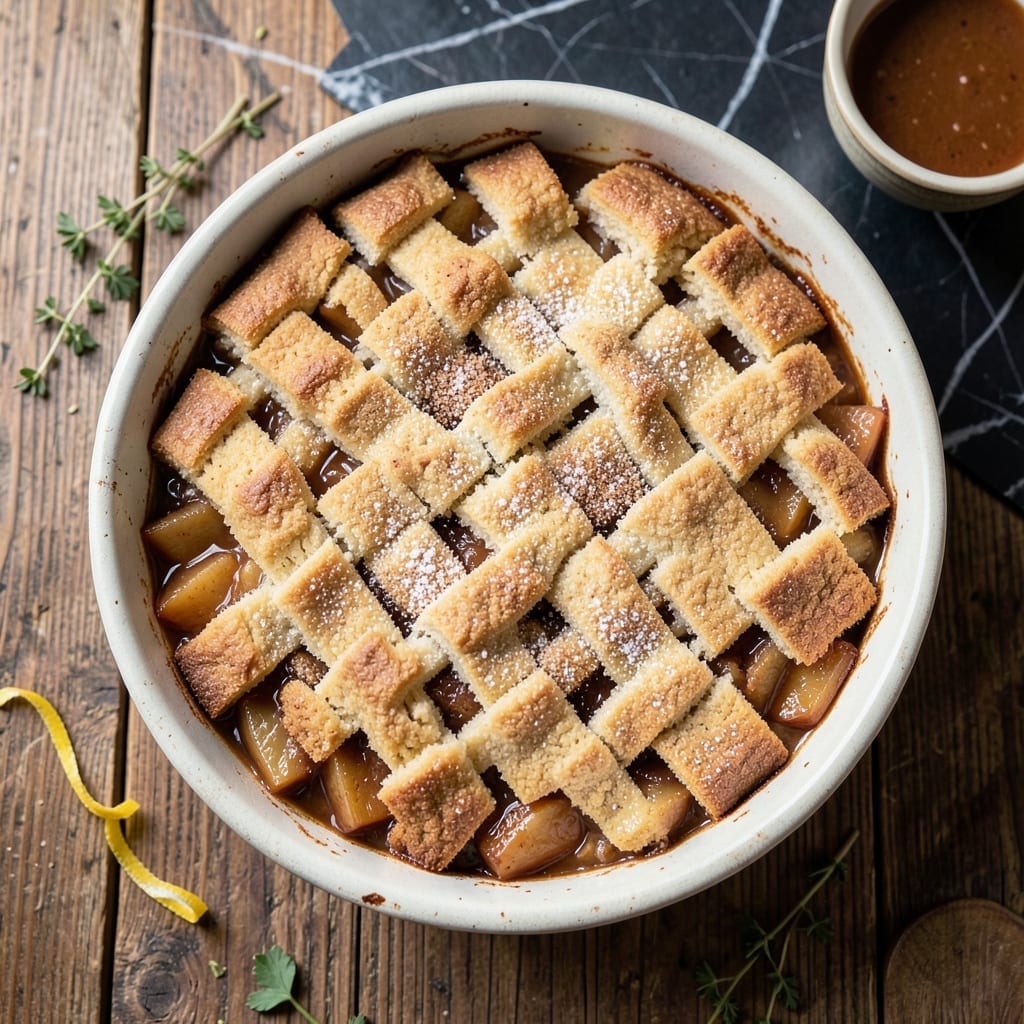
This cobbler delivers warm, spiced apples under a golden, buttery biscuit topping with minimal effort. The canned apples save time while maintaining that classic homemade taste and texture.
I developed this method to create a foolproof dessert that works every time. The biscuit topping bakes up light and fluffy, soaking up the sweet apple juices as it cooks.
You’ll get tender apple filling with just the right amount of cinnamon spice, all crowned with a perfectly crispy yet soft biscuit layer. It’s comfort food at its most reliable.
Serve warm with vanilla ice cream or whipped cream. This is the kind of dessert that makes any meal feel special.
Ingredients for Apple Cobbler Recipe with Canned Apples
Warm spiced apples and buttery biscuits come together with canned shortcuts for easy comfort.
| Ingredient | Amount | Notes |
|---|---|---|
| Canned Apple Pie Filling 🍎 | 2 cans | 21 oz cans, undrained |
| All-Purpose Flour 🌾 | 2 cups | Spoon and level for accuracy |
| Granulated Sugar 🍚 | ¾ cup | For biscuit topping |
| Baking Powder 🧂 | 2 tsp | Ensures fluffy texture |
| Salt 🧂 | ½ tsp | Balances sweetness |
| Ground Cinnamon 🌿 | 1 tsp | For apple filling warmth |
| Unsalted Butter 🧈 | ¾ cup | Cold, cubed for topping |
| Whole Milk 🥛 | ⅔ cup | Or sub buttermilk |
| Vanilla Extract 🌿 | 1 tsp | Pure for best flavor |
| Brown Sugar 🟤 | ¼ cup | For caramelized topping |
| Vanilla Ice Cream 🍦 | 4 cups | For serving (optional) |
The canned apples are the time-saver here. Look for pie filling (not just sliced apples)—it’s already spiced and syrupy. Comstock or Lucky Leaf brands work perfectly. If you’re feeling fancy, drain one can and add fresh cinnamon, but honestly the pre-spiced version tastes great. The biscuit topping needs cold butter—cut it into small cubes before mixing into the flour.
No pie filling? Use 2 cans of apple slices plus extra sugar and cinnamon (about 1/4 cup sugar and 1 tsp cinnamon). Out of buttermilk? Milk plus 1 tsp vinegar does the trick. Want a crunchier topping? Sprinkle turbinado sugar on top before baking. The ice cream is optional but highly recommended (vanilla or caramel swirl).
Baked cobbler keeps at room temp for 2 hours, then refrigerate for up to 3 days. Reheat in the oven—microwave makes the biscuit soggy. Leftovers? Not a chance—this disappears fast.
Why You’ll Love This Recipe
- No-Peel Shortcut: I skip peeling and chopping entirely—canned apple pie filling does all the work.
- Warm Spiced Comfort: That buttery crust with cinnamon-kissed apples? Honestly, it tastes like fall in a pan.
- Feeds Last-Minute Guests: I’ve served this to surprise visitors with zero stress, and they always ask for the recipe.
- Budget-Friendly Crowd Pleaser: A can of filling and pantry staples stretch to feed six, and leftovers taste even better the next day.
Step-by-Step Instructions for Apple Cobbler With Canned Apples
Here’s the method that works every time for warm, buttery perfection.
Step 1: Prep the Apple Filling
Empty the 2 cans Canned Apple Pie Filling into a 9×13-inch baking dish. Spread it evenly across the bottom—this creates a consistent layer for the biscuit topping to bake over. The filling is already sweetened and spiced, so no extra prep is needed.
Sprinkle the 1 tsp Ground Cinnamon evenly over the apples. This adds warmth and depth to the filling’s flavor. Don’t stir it in—just let it rest on top so it blends naturally as it bakes.
Step 2: Make the Biscuit Topping
In a large bowl, whisk together the 2 cups All-Purpose Flour, 0.75 cup Granulated Sugar, 2 tsp Baking Powder, and 0.5 tsp Salt. This dry mix is the base for your biscuit topping, so ensure it’s well combined with no lumps.
Cut in the 0.75 cup Unsalted Butter (cold and cubed) using a pastry cutter or your fingers. Work quickly so the butter doesn’t melt—you want pea-sized crumbs. This creates flaky layers in the biscuit topping.
Step 3: Add Wet Ingredients and Mix
Pour in the 0.66 cup Whole Milk and 1 tsp Vanilla Extract. Stir gently with a wooden spoon just until the dough comes together. It’ll look shaggy and slightly sticky—that’s perfect. Over-mixing makes the biscuit topping tough instead of tender.
Dollop spoonfuls of the dough evenly over the apple filling. Don’t worry about spreading it out—it’ll expand as it bakes. Sprinkle the 0.25 cup Brown Sugar over the top for a caramelized, crunchy finish.
Step 4: Bake Until Golden and Bubbly
Preheat your oven to 375°F. Bake the cobbler for 35-40 minutes, or until the topping is golden brown and the filling is bubbling around the edges. This visual cue means the biscuit is fully cooked and the apples are heated through.
If the topping starts browning too quickly, tent the dish loosely with foil. Let it cool for 10 minutes before serving—this lets the filling thicken slightly so it doesn’t run all over the plate.
Step 5: Serve Warm with Ice Cream
Scoop portions into bowls while still warm. The biscuit topping should be crisp on the edges and soft in the middle, with the spiced apple filling peeking through. For the ultimate experience, top each serving with a scoop of Vanilla Ice Cream.
The contrast of warm cobbler and cold ice cream is irresistible. Each bite should deliver buttery biscuit, sweet-tart apples, and creamy vanilla—simple but unforgettable.
Pro Tips For Making Apple Cobbler Recipe With Canned Apples
- Drain the Apples: Pour the canned apple pie filling into a strainer for 5 minutes to remove excess syrup—I learned this the hard way when my first cobbler turned into a soupy mess.
- Preheat the Pan: Always start with a hot baking dish (I pop mine in the oven for 5 minutes while mixing the batter) so the bottom gets crispy instead of soggy.
- Skip the Overmixing: Stir the batter just until the flour disappears—after burning three batches, I finally figured out tough cobbler comes from overworking the dough.
- Boost the Topping: Sprinkle 1 tablespoon of sugar mixed with ½ teaspoon cinnamon over the batter before baking; sounds weird, but it works and adds that classic cobbler crunch.
Health Benefits of This Dish
Fiber-Rich Comfort
Canned apple pie filling retains much of the fruit’s natural fiber—about 4 grams per serving—which supports healthy digestion. The soluble fiber in apples helps regulate blood sugar levels, making this dessert a slightly better option than many others. 💪
Vitamin C Boost
Each serving provides a modest dose of vitamin C, with the apples contributing about 10% of your daily needs. While not a superfood, this adds nutritional value beyond just empty calories. I appreciate getting some nutrients with my treat.
Quick Energy Source
The natural sugars in apples combined with the biscuit’s carbohydrates create a quick energy source. This makes the dish a satisfying pick-me-up when you need something sweet. Just be mindful of portion sizes.
Calcium from Dairy
The milk and butter in the biscuit topping provide calcium, essential for strong bones and teeth. Using whole milk increases this benefit, though buttermilk would offer similar advantages with a tangy twist.
Antioxidant Properties
Apples contain quercetin, a powerful antioxidant that supports immune health. The cinnamon adds its own antioxidant properties, creating a dessert with some protective benefits. Every little bit helps, right? ✨
Moderation Matters
While this dish offers some nutritional perks, remember it’s still a dessert. The sugar content is higher than fresh fruit, so enjoy it as an occasional treat. I find one serving satisfies my sweet tooth perfectly.
Nutrition Facts
Frequently Asked Questions
Can I use regular canned apples instead of pie filling?
Yes, but drain them first and add 1/4 cup sugar and 1 tsp cinnamon to mimic pie filling flavor. The extra syrup in pie filling creates that perfect saucy texture.
Why did my biscuit topping turn out dense?
Overmixing the dough develops gluten, making it tough. Stir just until combined—lumps are fine! Also ensure your butter stays cold before baking.
How do I know when it’s done baking?
Look for a golden brown topping and bubbling filling at the edges. At 375°F, this takes about 35-40 minutes.
Can I make this ahead of time?
Bake as directed, then cool completely. Refrigerate up to 3 days and reheat in the oven at 350°F for 15 minutes.

- 6 Egg Cake Recipe with Oil: Light as Air With Buttery Moisture - October 4, 2026
- 4 Bean Casserole Recipe: One-Pan Heartiness With Smoky Paprika Depth - October 4, 2026
- 3-Ingredient Keto Mug Cake Recipe: Microwave Magic in 2 Minutes - October 4, 2026