
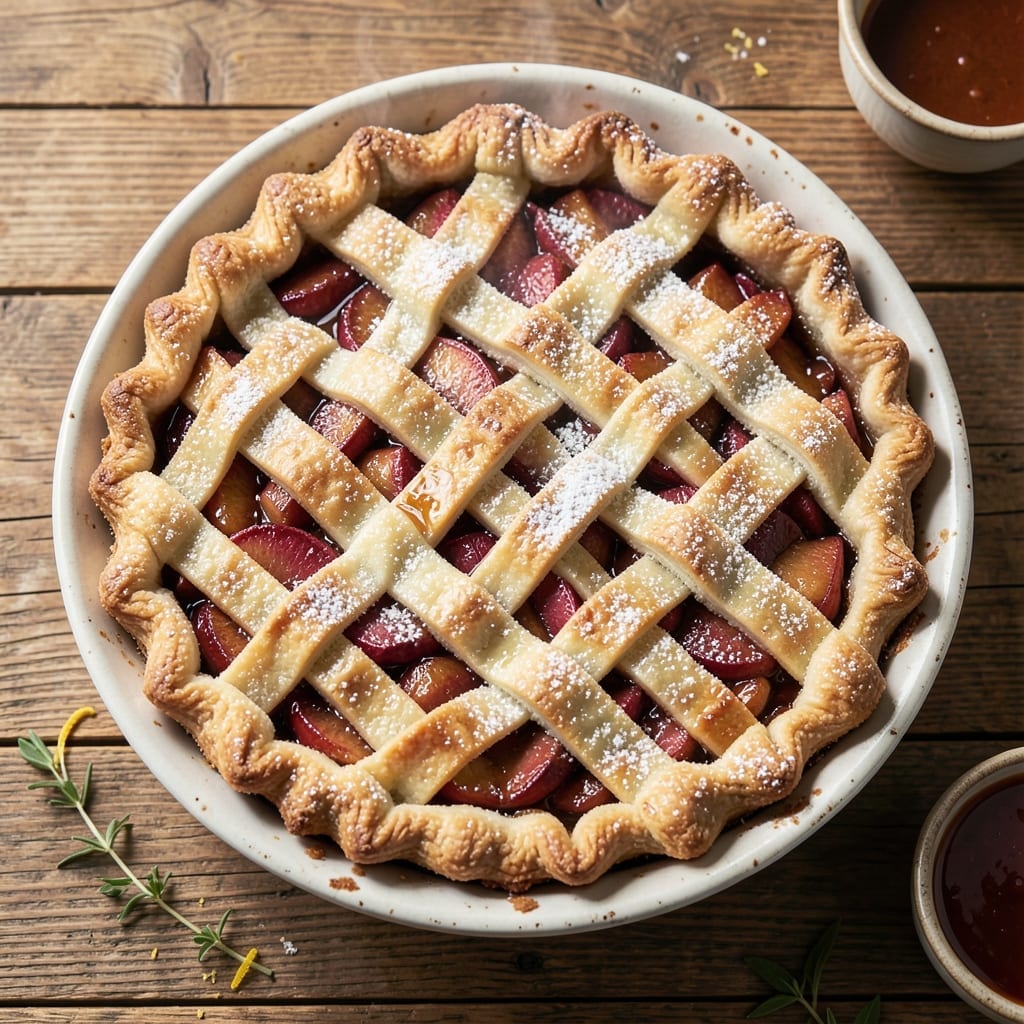
There’s a secret to achieving homemade apple pie without the hassle of peeling and slicing fruit. This recipe lets you create that classic comfort dessert using shortcuts that don’t compromise on taste or texture.
With a flaky crust and perfectly spiced filling, this pie delivers all the warmth of traditional apple pie. The canned filling maintains its shape and flavor, making assembly quick while still feeling special.
Ingredients for Apple Pie Recipe with Canned Pie Filling
Short list. Classic flavors. Homemade taste without the peel-and-slice work.
| Ingredient | Amount | Notes |
|---|---|---|
| All-Purpose Flour 🌾 | 2 ½ cups | Plus extra for dusting |
| Unsalted Butter 🧈 | 1 cup | Cold, cubed for crust |
| Ice Water 💧 | ⅓ cup | For pie dough |
| Granulated Sugar 🍚 | 1 tbsp | For crust sweetness |
| Salt 🧂 | ½ tsp | Divided for dough and filling |
| Canned Apple Pie Filling 🍎 | 2 cans | 21 oz cans, undrained |
| Ground Cinnamon 🌿 | 1 tsp | For enhanced spicing |
| Lemon Juice 🍋 | 1 tbsp | Freshly squeezed preferred |
| Vanilla Extract 💧 | 1 tsp | Pure extract recommended |
| Egg 🥚 | 1 whole | For egg wash finish |
| Coarse Sugar 🍚 | 1 tbsp | For sprinkling on crust |
The crust is where homemade shines. Cold unsalted butter is non-negotiable—it creates those flaky layers. I use King Arthur flour for consistency, but any all-purpose works. The canned filling is your shortcut, but quality matters: Comstock or Lucky Leaf hold their shape best. Don’t drain the syrup—that’s where the spiced flavor lives.
No all-purpose flour? Pastry flour at a 1:1 ratio works (just don’t overwork it). Out of butter? Vegetable shortening in the same amount gives a flakier texture. Want extra spice? Add one-eighth tsp each of nutmeg and allspice. The egg wash is optional, but it gives that golden bakery finish.
Assemble the pie, then chill it 30 minutes before baking—prevents shrinking. Store cooled pie at room temp 2 days, or refrigerate for 5 days. Freeze slices for up to 3 months (thaw overnight before serving).
Why You’ll Love This Recipe
- No-Fuss Crust: I roll out the buttery all-purpose flour crust in minutes—no peeling or chopping apples required.
- Warm Cinnamon Comfort: The canned filling bakes into that gooey, spiced sweetness I crave with every bite of flaky crust.
- Potluck Hero: I bring this to gatherings and it’s always the first dessert gone, yet it takes half the effort of from-scratch.
- Budget Baking: A can of filling and basic pantry staples mean I can make a showstopper pie for under five bucks.
Step-by-Step Instructions for Apple Pie With Canned Pie Filling
This method delivers homemade quality with minimal effort and maximum flavor.
Step 1: Prepare the Pie Dough
In a large bowl, combine the 2.5 cups All-Purpose Flour, 1 tbsp Granulated Sugar, and 0.25 tsp Salt. I always use a whisk for this—it breaks up clumps and aerates the flour for a flakier crust.
Add the 1 cup Unsalted Butter (cold and cubed) to the dry ingredients. Using a pastry cutter or your fingers, work the butter into the flour until the mixture resembles coarse crumbs with some pea-sized butter pieces remaining. This creates the flaky layers in your crust.
Gradually drizzle in the 0.33 cup Ice Water while mixing with a fork until the dough just comes together. You want it to hold when pressed but not be sticky. Divide the dough into two equal portions, flatten into discs, wrap in plastic, and refrigerate for 1 hour—this chills the butter and relaxes the gluten for easier rolling.
Step 2: Enhance the Canned Apple Pie Filling
In a large bowl, combine the 2 cans Canned Apple Pie Filling with the 1 tsp Ground Cinnamon, 1 tbsp Lemon Juice, and 1 tsp Vanilla Extract. The lemon juice brightens the sweetness, while vanilla adds depth.
Stir in the remaining 0.25 tsp Salt to balance the flavors. I let this mixture sit for 10-15 minutes while the dough chills—this allows the spices to meld with the filling. Don’t drain the filling; the syrup helps prevent a dry pie.
Step 3: Roll Out and Assemble the Pie
On a lightly floured surface, roll one dough disc into a 12-inch circle. Transfer it to a 9-inch pie dish, pressing gently into the bottom and up the sides. Trim the edges to leave a ½-inch overhang.
Pour the enhanced filling into the crust, mounding it slightly in the center. Roll out the second dough disc to the same size. You can create a full top crust or a lattice—either works. For a full crust, cut slits for steam to escape. For a lattice, weave strips over the filling.
Fold the bottom crust’s overhang over the top crust’s edges and crimp with your fingers or a fork. Brush the entire top with the 1 whole Egg (lightly beaten with a fork) and sprinkle with the 1 tbsp Coarse Sugar for a golden, crisp finish.
Step 4: Bake to Golden Perfection
Place the pie on a baking sheet (to catch drips) and bake in a preheated 375°F oven for 45-50 minutes. I bake it on the lowest oven rack to ensure the bottom crust gets crisp and golden.
You’ll know it’s done when the crust is deep golden brown and the filling is bubbling through the vents. If the edges brown too quickly, cover them with foil or a pie shield. The filling should be thick and bubbly, not runny.
Let the pie cool on a wire rack for at least 2 hours before slicing. This allows the filling to set properly—cutting too soon will give you a soupy slice. The crust should be flaky and crisp, with a beautiful golden sheen from the egg wash and coarse sugar.
Pro Tips For Making Apple Pie Recipe With Canned Pie Filling
- Chill the Dough: Keep your butter cold and work quickly—after ruining a few pies with tough crust, I now rest the dough 30 minutes in the fridge before rolling it out.
- Drain the Filling: I learned this the hard way: strain the canned pie filling in a colander for 10 minutes to avoid a soggy bottom crust.
- Vent the Top: Cut 4-5 slits in the top crust—sounds simple, but it prevents the filling from bubbling over and making a mess in your oven.
- Brush with Sugar: Right before baking, brush the crust with a little water and sprinkle granulated sugar on top for that bakery-style crunch.
Serving Suggestions for Leftovers
🍽️ Plating Styles
Present your apple pie with canned pie filling in a way that suits the occasion. For a casual gathering, serve slices directly on simple white plates with a dollop of whipped cream. A formal setting calls for elegant dessert plates, perhaps with a drizzle of caramel and a sprinkle of powdered sugar. If you’re hosting a buffet, place the whole pie on a decorative stand with a slicing knife for easy self-serving.
🎨 Garnishing Techniques
Enhance the visual appeal with garnishing techniques like a dusting of cinnamon or a scoop of vanilla ice cream. For a fresh touch, add a few thin apple slices or mint leaves on top. A warm caramel or butterscotch sauce can also elevate the flavors, while a lattice crust already adds a beautiful, rustic charm.
🍴 Portion Sizes
Decide between individual servings or family-style based on your crowd. For a cozy dinner, serve generous slices straight from the pie dish. For a larger group, pre-cut smaller portions to make sharing easier. If you’re serving kids, consider mini hand pies using the same filling for a fun, bite-sized treat.
🌡️ Serving Temperature
Apple pie is best enjoyed warm, so let it rest for about 10-15 minutes after baking to set the filling. Serve it slightly cooled to avoid a runny texture. If reheating, warm slices in the oven at 300°F for 5-10 minutes to revive that fresh-baked taste. Pair it with a cold scoop of ice cream for a delightful contrast!
Nutrition Facts

- 6 Egg Cake Recipe with Oil: Light as Air With Buttery Moisture - October 4, 2026
- 4 Bean Casserole Recipe: One-Pan Heartiness With Smoky Paprika Depth - October 4, 2026
- 3-Ingredient Keto Mug Cake Recipe: Microwave Magic in 2 Minutes - October 4, 2026