
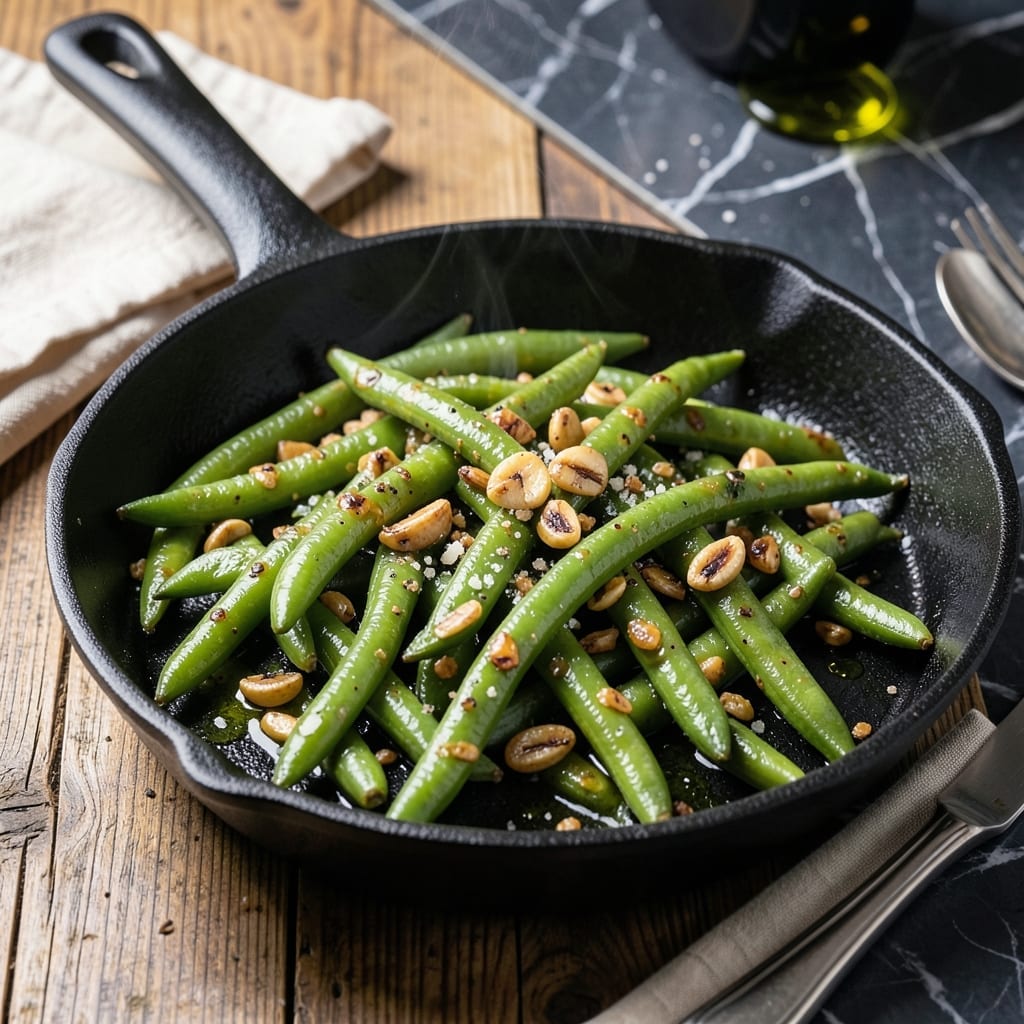
Recreating Applebee’s signature side at home is simpler than you’d think. This copycat version captures the restaurant’s perfect balance of garlic flavor and crisp-tender texture without complicated techniques.
The secret lies in a quick sauté method that cooks the beans just long enough to soften slightly while maintaining their bright green color. Fresh garlic, not powder, delivers that authentic savory bite Applebee’s is known for.
What you get is a side dish that pairs perfectly with any main course—vibrant, flavorful, and ready in under 15 minutes. The garlic infuses every bite without overpowering the natural sweetness of the beans.
Serve it alongside steak, chicken, or fish for a restaurant-quality meal at home. Here’s how to make this crowd-pleasing side.
Ingredients for Applebee’s Garlicky Green Beans
Fresh green beans and bold garlic make this copycat side pop in minutes.
| Ingredient | Amount | Notes |
|---|---|---|
| Fresh Green Beans 🌿 | 1 ½ lb | Trimmed, ends removed |
| Garlic Cloves 🧄 | 6 cloves | Minced for authentic flavor |
| Unsalted Butter 🧈 | 3 tbsp | Divided for sautéing and finishing |
| Olive Oil 🫒 | 1 tbsp | Extra-virgin for depth |
| Kosher Salt 🧂 | ½ tsp | Diamond Crystal preferred |
| Freshly Ground Black Pepper 🌶️ | ¼ tsp | Coarse grind for texture |
| Lemon Juice 🍋 | 1 tsp | Freshly squeezed for brightness |
| Red Pepper Flakes 🔥 | ¼ tsp | Optional for subtle heat |
| Chicken Stock 🍲 | ¼ cup | Low-sodium preferred |
| Fresh Parsley 🌿 | 2 tbsp | Chopped, for garnish |
Green beans are the star here, so grab the freshest you can find—Whole Foods or your local farmers market usually has the best selection. Look for bright green, firm pods (no wilt or brown spots). The garlic needs to be freshly minced—none of that jarred stuff. It’s doing all the heavy lifting for that Applebee’s signature savory bite. Costco sells pre-trimmed beans if you’re short on time, but I prefer trimming my own for consistent length.
No fresh garlic? Garlic powder at a pinch works but use half the amount—it’s more concentrated. Swap butter for olive oil if you’re avoiding dairy. Chicken stock can be vegetable stock (I use Better Than Bouillon for depth). Want a bit of crunch? Toss in some slivered almonds at the end. The lemon juice brightens everything up, so don’t skip it.
These keep 3-4 days in the fridge, but they’re best served fresh—same day if possible. Reheat gently in a skillet to keep the crisp-tender texture. Leftovers? Toss them into stir-fries or salads (they’re still tasty).
Why You’ll Love This Recipe
- One Pan Wonder: I just toss the green beans in a skillet with butter, olive oil, and minced garlic—no fancy techniques, just big flavor.
- Garlic Lover’s Dream: Honestly, the way the butter and garlic cling to every crisp-tender bean makes them irresistible.
- Pairs with Anything: I serve these with steak, chicken, or even as a snack straight from the pan.
- Budget Side Dish: Fresh green beans and pantry staples mean I can make this for pennies compared to takeout.
Step-by-Step Instructions for Garlicky Green Beans
This copycat method delivers that signature restaurant flavor with a perfect garlic punch.
Step 1: Prep and Blanch the Green Beans
First, trim the ends from the 1.5 lb Fresh Green Beans. I like to line them up and slice off both ends at once for efficiency. This step ensures even cooking and a polished presentation.
Bring a large pot of salted water to a boil. Add the green beans and blanch for exactly 2 minutes—they should turn bright green but remain crisp. Immediately shock them in ice water to stop the cooking process. Drain well and pat dry with a clean towel. This preserves their vibrant color and crisp-tender texture.
Step 2: Sauté Aromatics in Butter and Oil
In a large skillet, heat the 1 tbsp Olive Oil and 2 tbsp Unsalted Butter over medium heat until the butter melts and starts to foam. Add the 6 cloves Garlic Cloves (minced) and cook for 30-45 seconds, just until fragrant but not browned.
Here’s the thing—garlic burns fast. Keep it moving in the pan and pull it off the heat if it starts to darken. The goal is to infuse the fat with garlic flavor without bitterness. Sprinkle in the 0.5 tsp Kosher Salt, 0.25 tsp Freshly Ground Black Pepper, and 0.25 tsp Red Pepper Flakes for a subtle kick.
Step 3: Finish Cooking with Chicken Stock
Add the blanched green beans to the skillet, tossing to coat them in the garlicky butter. Pour in the 0.25 cup Chicken Stock and let it simmer for 2-3 minutes until most of the liquid has evaporated but the beans are still glossy.
This step builds flavor while keeping the beans crisp. The stock reduces into a light glaze that clings to every bite. Stir in the remaining 1 tbsp Unsalted Butter for extra richness, then drizzle with the 1 tsp Lemon Juice for brightness.
Step 4: Garnish and Serve Immediately
Taste and adjust seasoning if needed—though the salt from the blanching water and stock usually does the trick. Transfer the green beans to a serving dish and sprinkle with the 2 tbsp Fresh Parsley, chopped finely for even distribution.
Serve hot, while the garlic butter is still glossy and aromatic. The beans should be tender-crisp with a savory, slightly garlicky finish that’s unmistakably Applebee’s. This dish doesn’t wait well, so get it to the table fast for the best experience.
Pro Tips For Making Applebee’S Garlicky Green Beans
- Blanch First: Parboil the green beans for 2-3 minutes before sautéing to guarantee they stay crisp-tender. I learned this the hard way—raw beans in the pan just don’t cook evenly.
- Slice Garlic Thin: Cut the garlic into paper-thin slices instead of mincing so it cooks evenly without burning. After burning three batches, I finally figured out that thick pieces turn bitter fast.
- Skip Crowded Pans: Cook the green beans in batches if needed—overcrowding steams them instead of searing. Sounds weird, but it works: the butter and oil need space to do their job.
- Salt the Water: Use generously salted water for blanching, about 1 tablespoon of kosher salt per quart. My grandmother swore by this, and she was right: it seasons the beans from the start.
Pro Cooking Tips for This Recipe
Blanching Perfection
Use a 5-quart pot with 4 quarts water for even blanching. Add 2 tbsp kosher salt to the water—it should taste like the sea. Blanch the beans in batches if needed to avoid overcrowding, which can lead to uneven cooking. 💡
Garlic Timing
Mince the garlic just before cooking for maximum freshness. Cook it in the butter-oil mix for no more than 45 seconds on medium heat. If it browns, it’s already past its prime and will taste bitter. Pull the pan off heat if needed.
Stock Reduction
Use low-sodium chicken stock to control the saltiness. Let it reduce until it forms a thin glaze—about 2-3 minutes. If it evaporates too quickly, add a splash more stock. The glaze should lightly coat the beans without pooling.
Butter Finish
Add the final 1 tbsp butter off heat to prevent separation. Swirl the pan gently to emulsify the butter into the glaze. This creates that signature Applebee’s glossy finish that makes every bite rich and flavorful.
Texture Check
The beans should have a slight crunch when bitten. If they’re too firm, return them to the skillet with a splash of stock for 1-2 more minutes. If too soft, reduce the blanching time next round to 1.5 minutes. ✨
Serving Tip
Garnish with parsley right before serving to preserve its freshness. The residual heat from the beans will slightly wilt the parsley, releasing its aroma. Serve within 5 minutes for peak flavor and texture.
Nutrition Facts
Frequently Asked Questions
Can I use frozen green beans instead?
Yes, but thaw and pat them completely dry first. Skip blanching and sauté directly for 5-6 minutes to avoid mushiness. Fresh is ideal for the best texture though.
Why blanch the beans first?
Blanching for 2 minutes sets the color and starts cooking evenly. The ice bath stops the process, keeping them crisp for the final sauté. Without this, they may turn dull or overcook.
Can I make this ahead?
Best served fresh, but you can blanch beans 1 day ahead. Store uncooked in the fridge, then sauté with garlic just before serving. Reheating makes them soft.
How do I prevent bitter garlic?
Cook minced garlic on medium heat for only 30-45 seconds. Remove pan from heat if it starts browning. Burnt garlic turns bitter quickly.

- 6 Egg Cake Recipe with Oil: Light as Air With Buttery Moisture - October 4, 2026
- 4 Bean Casserole Recipe: One-Pan Heartiness With Smoky Paprika Depth - October 4, 2026
- 3-Ingredient Keto Mug Cake Recipe: Microwave Magic in 2 Minutes - October 4, 2026