
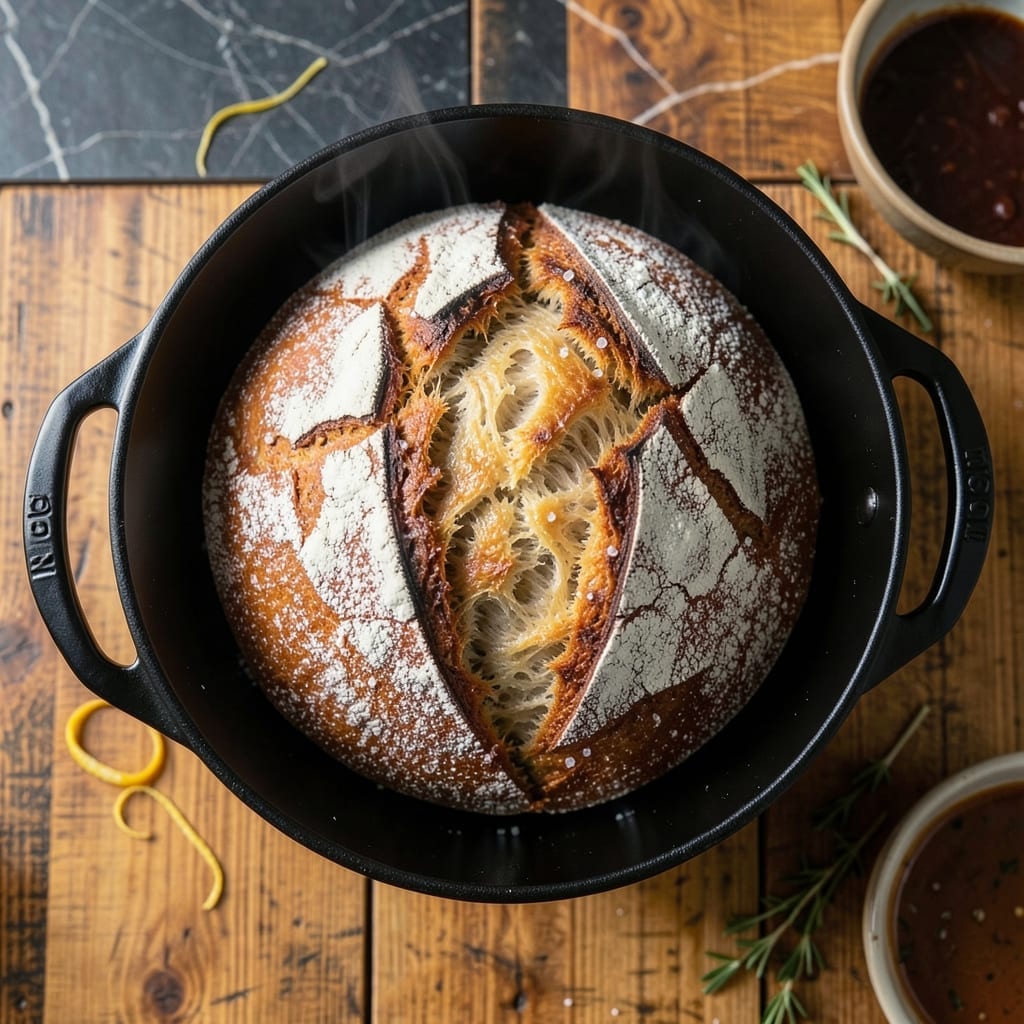
There’s nothing quite like pulling a golden, crusty loaf of artisan bread from your Dutch oven. This method delivers bakery-quality results with minimal hands-on time.
The Dutch oven traps steam, creating a perfect environment for a crisp crust and airy interior. With just four ingredients and a little patience, you’ll achieve professional results every time.
Ingredients for Artisan Bread Recipe Dutch Oven
Four humble ingredients transform into bakery-quality bread with minimal effort.
| Ingredient | Amount | Notes |
|---|---|---|
| Bread Flour 🌾 | 3 ½ cups | High-protein all-purpose works too |
| Water 💧 | 1 ½ cups | Filtered, at room temperature |
| Kosher Salt 🧂 | 2 tsp | Diamond Crystal preferred for consistency |
| Active Dry Yeast 🍞 | ½ tsp | Instant yeast acceptable as substitute |
The flour makes all the difference here. King Arthur Bread Flour is my go-to for its consistent protein content, but Gold Medal all-purpose also delivers excellent results if that’s what’s in your pantry. The yeast should be fresh—check the expiration date. Fleet Farm or Costco sell yeast in bulk if you bake often, but a single packet from the grocery store works perfectly for this recipe.
No bread flour? Use all-purpose at a one-to-one ratio. Instant yeast can replace active dry without proofing—just mix it straight into the flour. The water temperature matters: too hot kills yeast, too cold slows activation. Aim for 105-110°F (warm but not hot to touch). For salt, table salt works at half the amount but may affect texture slightly.
Store flour in a cool, dark place for up to 6 months. Yeast keeps for 2 years unopened in the pantry or 6 months opened in the fridge. This dough can rest overnight in the fridge if needed—just let it come to room temperature before shaping.
Why You’ll Love This Recipe
- One Bowl Wonder: I mix the flour, water, salt, and yeast in a single bowl—no fancy tools, just my hands and 10 minutes of effort.
- Crispy Crust Magic: That dutch oven turns out a golden, crackling crust with a soft, airy center every single time.
- Weeknight Hero: Honestly, I bake a loaf on Sundays and we’re set for sandwiches, toast, and soup dippers all week.
- Penny Pincher: Four ingredients, minimal cost, and it tastes better than the $7 bakery loaf I used to buy.
Step-by-Step Instructions for Artisan Bread Dutch Oven
This method delivers a bakery-quality loaf with a crisp crust and open crumb structure.
Step 1: Mix and Autolyse the Dough
In a large mixing bowl, combine the 3.5 cups Bread Flour with the 1.5 cups Water using a wooden spoon or your hands until no dry bits remain. The dough will be shaggy and sticky—that’s exactly what you want.
Let the dough rest uncovered for 30 minutes to begin the autolyse process. This allows the flour to fully hydrate and gluten to start developing without kneading. You’ll notice the dough becomes smoother and more elastic during this time.
Step 2: Incorporate Yeast and Salt
After the autolyse, sprinkle the 0.5 tsp Active Dry Yeast and 2 tsp Kosher Salt evenly over the surface of the dough. Use wet hands to dimple the dough and incorporate these ingredients completely.
This technique prevents overworking the dough. The salt will initially tighten the gluten, but as you fold it in, the dough will relax. You’re aiming for a uniform mixture with no visible streaks of flour or salt.
Step 3: Bulk Fermentation with Folds
Cover the bowl with a damp kitchen towel and let the dough rise at room temperature for 1 hour. Then perform the first set of stretch and folds: wet your hand, reach to the bottom of the bowl, pull up a section of dough, and fold it over itself. Rotate the bowl and repeat this 4 times.
Repeat this folding process every 30 minutes for a total of 3 sets. After the final fold, let the dough rest for another 1-2 hours until it’s increased in volume by about 50-75% and shows bubbles on the surface and sides of the bowl.
Step 4: Shape and Final Proof
Turn the dough out onto a lightly floured surface. Shape it into a tight boule by pulling the edges toward the center and pinching them together. Flip the dough seam-side down and use your hands to cup and rotate the dough, creating surface tension.
Place the shaped dough seam-side up in a floured banneton or a bowl lined with a heavily floured kitchen towel. Cover and let it proof at room temperature for 1-2 hours, or in the refrigerator for 8-12 hours for more developed flavor. The dough is ready when it springs back slowly when poked.
Step 5: Bake in Preheated Dutch Oven
Preheat your oven to 475°F with the Dutch oven inside for at least 45 minutes. This ensures the pot is screaming hot when the dough goes in—critical for that initial oven spring.
Turn the proofed dough onto parchment paper, score the top with a razor or sharp knife, then carefully transfer it to the hot Dutch oven. Bake covered for 20 minutes, then remove the lid and bake for an additional 20-25 minutes until the loaf is deep golden brown and the internal temperature reaches 205-210°F.
Transfer to a wire rack and let cool for at least 1 hour before slicing. This cooling period allows the crumb structure to set completely—cutting too soon will result in a gummy interior.
Pro Tips For Making Artisan Bread Recipe Dutch Oven
- Preheat the Dutch Oven: I learned this the hard way—put your empty Dutch oven in the oven for at least 30 minutes at 475°F before adding the dough. The screaming-hot surface is what gives you that crackly, bakery-style crust.
- Use Room-Temp Water: Sounds weird, but it works: use water that’s about 75-80°F (lukewarm to the touch). Too hot kills the yeast, too cold slows fermentation, and I’ve ruined loaves both ways.
- Skip the Over-Flouring: Resist the urge to dump extra flour on your work surface—just enough to prevent sticking. Too much toughens the dough and you’ll lose that airy, open crumb.
- Let It Rest Overnight: After shaping, let the dough proof in the fridge for 12-18 hours. This isn’t the prettiest method, but it develops flavor and makes the dough easier to handle.
Pro Cooking Tips for This Recipe
💡 Master the Heat
Preheat your Dutch oven for 30-45 minutes at 475°F (245°C) to ensure even heat distribution. This mimics a professional bread oven, creating a crisp crust. Place the oven rack in the middle for optimal airflow and consistent baking.
🌡️ Perfect the Steam
Steam is key for a glossy, crackly crust. After loading the dough, add 1 cup of boiling water to a preheated pan on the lower rack. Alternatively, spritz the dough with water just before baking. This keeps the surface moist during the initial bake.
✨ Timing is Everything
Bake covered for 20 minutes to trap steam, then uncover and bake for 20-25 minutes until deep golden brown. Use an instant-read thermometer to check for doneness—205-210°F (96-99°C) inside means it’s perfect.
🎯 Rest for the Best Texture
Resist the urge to slice immediately! Let the bread cool on a wire rack for at least 1 hour. This allows the crumb to set and the flavors to develop fully, ensuring a tender, airy interior.
Nutrition Facts

- 6 Egg Cake Recipe with Oil: Light as Air With Buttery Moisture - October 4, 2026
- 4 Bean Casserole Recipe: One-Pan Heartiness With Smoky Paprika Depth - October 4, 2026
- 3-Ingredient Keto Mug Cake Recipe: Microwave Magic in 2 Minutes - October 4, 2026