
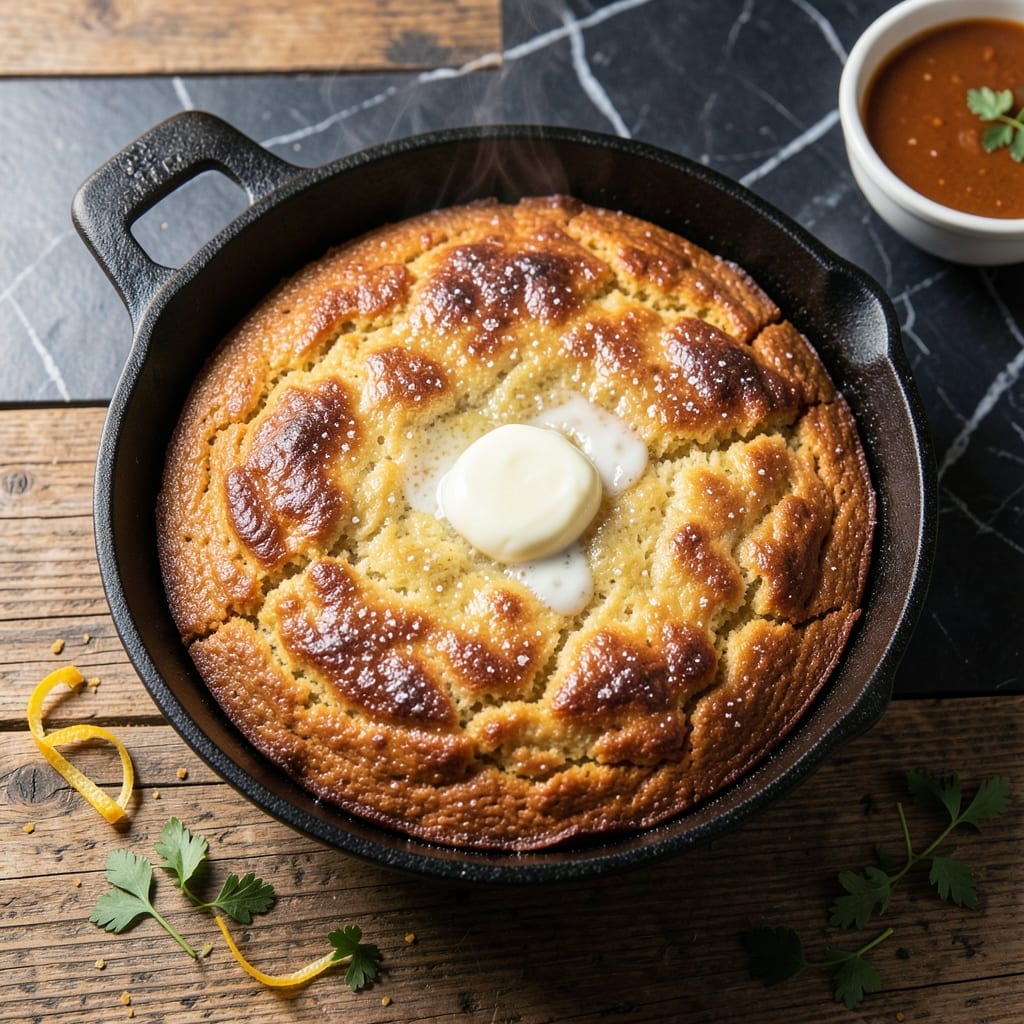
There’s something timeless about a warm batch of cornbread fresh from the oven, with its golden crust and tender, buttery crumb. This recipe relies on self-rising cornmeal for effortless preparation, ensuring consistent results every time.
The beauty of using self-rising cornmeal is its built-in leavening, eliminating the need for additional baking powder or soda. Just mix, pour, and bake for a fluffy texture that pairs perfectly with soups, stews, or as a standalone treat.
Baked at a high temperature, it develops a crisp, golden brown top while staying moist inside. The buttery flavor shines through, making it irresistible straight from the pan.
Simple, reliable, and delicious—this is cornbread as it should be.
Ingredients for Aunt Jemima Self Rising Cornbread
Self-rising cornmeal plus a few pantry staples create this timeless golden cornbread with tender crumb.
| Ingredient | Amount | Notes |
|---|---|---|
| Aunt Jemima Self-Rising Cornmeal Mix 🌽 | 2 cups | Yellow cornmeal variety preferred |
| All-Purpose Flour 🌾 | ½ cup | For lighter texture |
| Granulated Sugar 🍚 | 2 tbsp | Adjust for sweetness preference |
| Large Eggs 🥚 | 1 whole | Room temperature for best rise |
| Whole Milk 🥛 | 1 cup | 2% or whole for richness |
| Unsalted Butter 🧈 | 4 tbsp | Melted, plus extra for greasing |
| Salt 🧂 | ½ tsp | Fine sea salt preferred |
| Buttermilk 🥛 | ½ cup | For tangy flavor depth |
| Baking Powder 🧂 | 1 tsp | Ensures extra lift despite self-rising mix |
| Honey 🍯 | 1 tbsp | Optional for added sweetness |
| Vegetable Shortening 🧈 | 2 tbsp | For crisp crust (alternative to butter) |
The cornmeal is key here. Aunt Jemima Self-Rising Cornmeal Mix (yellow variety) delivers consistent results. Whole Foods or Walmart carry it, but any self-rising mix works. For best texture, use fresh cornmeal—older bags lose leavening power. The flour lightens the crumb; all-purpose is standard, but White Lily (Southern brand) makes it extra tender.
No buttermilk? Milk plus 1 tsp vinegar gets you close. Swap honey for maple syrup if needed. For a dairy-free version, use almond milk and coconut oil instead of butter. The baking powder is optional (self-rising has leavening), but adds insurance for a taller rise. Shortening can replace butter for extra crisp edges.
Store cornmeal in an airtight container for 6-12 months. Baked cornbread stays fresh 2-3 days wrapped at room temperature. Freeze leftovers for 3 months—reheat in foil at 350°F to restore moisture.
Why You’ll Love This Recipe
- One Bowl Wonder: I just dump the Aunt Jemima mix, a little flour, sugar, eggs, and milk into one bowl—no measuring cup gymnastics, no extra dishes.
- Golden, Buttery Crust: The self-rising cornbread mix gives it that perfect crisp edge with a tender, slightly sweet center that’s impossible to resist.
- Feeds a Crowd: I make a double batch for potlucks and it’s always the first thing gone—great with chili, soup, or just slathered in butter.
- Budget Stretcher: A bag of Aunt Jemima mix costs pennies per serving, and I usually have the rest of the ingredients on hand already.
Step-by-Step Instructions for Cornbread With a Fluffy Golden Crust
This method ensures a perfect rise and that signature buttery crumb every time.
Step 1: Preheat and Prepare the Baking Pan
Preheat your oven to 425°F. While it heats, place the 2 tbsp vegetable shortening in a 9-inch cast-iron skillet or similar oven-safe pan and put it in the oven to melt. This step is non-negotiable—hot fat creates that crisp, golden crust we’re after.
I always use cast iron for this; it retains heat better than any other material and gives the cornbread that classic texture. Once the shortening is fully melted and shimmering, carefully remove the pan from the oven and swirl to coat the bottom and sides evenly.
Step 2: Combine Dry Ingredients for Structure
In a large mixing bowl, whisk together the 2 cups Aunt Jemima Self-Rising Cornmeal Mix, 0.5 cup All-Purpose Flour, 2 tbsp Granulated Sugar, 0.5 tsp Salt, and 1 tsp Baking Powder. The self-rising mix already contains leavening, but the extra baking powder ensures a higher rise, especially with the added flour.
Whisk vigorously for 30 seconds to break up any lumps in the cornmeal and distribute the ingredients evenly. This prevents dense spots in your finished cornbread. The mixture should look uniform and slightly aerated—this is your foundation for fluffiness.
Step 3: Incorporate Wet Ingredients with Precision
In a separate bowl, beat the 1 whole Large Egg lightly, then whisk in the 1 cup Whole Milk, 0.5 cup Buttermilk, 4 tbsp Unsalted Butter (melted and cooled slightly), and 1 tbsp Honey. The buttermilk adds tang and tenderness, while the butter enriches the flavor and texture.
Pour the wet mixture into the dry ingredients and fold gently with a spatula just until the batter comes together. You’ll see a few lumps—that’s fine. Overmixing develops gluten, which leads to tough cornbread. The batter should be thick but pourable, like pancake batter with a bit more body.
Step 4: Bake to Golden Perfection
Immediately pour the batter into the prepared hot skillet—you should hear a satisfying sizzle as it hits the shortening. This is the secret to that crispy, buttery crust. Smooth the top with your spatula and return the skillet to the 425°F oven.
Bake for 20-25 minutes until the top is deep golden brown and a toothpick inserted in the center comes out clean. The edges should pull away slightly from the sides of the pan, and the center should spring back when lightly pressed. Don’t underbake—cornbread can look done before it actually is.
Step 5: Cool Slightly and Serve Warm
Remove the skillet from the oven and let the cornbread rest for 5 minutes before slicing. This brief rest allows the structure to set so it doesn’t crumble when you cut into it. The internal temperature will continue to rise slightly, ensuring it’s fully cooked through.
Use a sharp knife to cut into wedges directly in the skillet. Serve warm, with the crispy crust still sizzling from the residual heat. The contrast between the golden, slightly crunchy exterior and the fluffy, moist interior is what makes this cornbread exceptional. Any leftovers can be reheated in the skillet for a few minutes to revive the texture.
Pro Tips For Making Aunt Jemima Self Rising Cornbread
- Preheat the Pan: I learned this the hard way—always heat your skillet or baking dish in the oven for 5 minutes before adding batter. It guarantees a crispy golden crust on the bottom.
- Use Room-Temp Eggs: Sounds weird, but it works: pull your eggs out 30 minutes before mixing. They incorporate better into the batter and create a lighter texture.
- Skip Overmixing: After burning three batches, I finally figured out that stirring just until the flour disappears keeps the cornbread tender. Lumps are fine—overworking makes it dense.
- Add a Spoon of Sugar: My grandmother swore by this, and she was right: toss in an extra tablespoon of granulated sugar for a touch more sweetness and a deeper golden color.
Common Mistakes When Making Perfect Results
Overmixing the Batter
Fold wet and dry ingredients just until combined—8-10 stirs is plenty. Overmixing develops gluten, turning your cornbread dense and tough instead of light and fluffy. Those lumps are fine; they’ll disappear during baking. 💡
Skipping the Hot Pan
Always heat your 9-inch cast-iron skillet with 2 tbsp shortening in the oven first. Pouring batter into a cold pan means no crispy crust. The sizzle you hear when adding batter confirms you’re on the right track.
Using Cold Ingredients
Take your 1 cup milk, 0.5 cup buttermilk, and 1 egg out of the fridge 30 minutes before starting. Cold ingredients can seize the melted butter, creating a greasy texture instead of a smooth, tender crumb.
Incorrect Oven Temperature
Bake at 425°F—any lower and your cornbread won’t rise properly or develop that golden crust. Use an oven thermometer to verify; many home ovens run 25-50°F off. High heat is key for the perfect texture.
Slicing Too Soon
Let the cornbread rest in the skillet for 5 minutes after baking. Cutting immediately causes crumbling. This short wait lets the structure set, so you get clean, perfect wedges every time.
Serve warm for the best flavor and texture. 🔥
Nutrition Facts
Frequently Asked Questions
Can I use regular cornmeal instead of self-rising?
Yes, but you’ll need to add 1 tbsp baking powder and 0.5 tsp salt per 1 cup of cornmeal. Self-rising already contains these, so using regular requires adjustment for the same lift.
Why did my cornbread turn out dense?
This usually happens from overmixing or using cold ingredients. Fold the batter just until combined and ensure all liquids are room temperature. A hot pan also helps create a lighter texture.
Can I bake this in a regular pan instead of cast iron?
You can, but the crust won’t be as crispy. Use a 9-inch metal pan, preheat it with the shortening, and expect slightly less golden edges. Cast iron is ideal for even heat.
How do I store leftovers?
Wrap tightly in foil or plastic at room temperature for 2-3 days. For longer storage, freeze for up to 3 months and reheat in a 350°F oven wrapped in foil.

- 6 Egg Cake Recipe with Oil: Light as Air With Buttery Moisture - October 4, 2026
- 4 Bean Casserole Recipe: One-Pan Heartiness With Smoky Paprika Depth - October 4, 2026
- 3-Ingredient Keto Mug Cake Recipe: Microwave Magic in 2 Minutes - October 4, 2026