
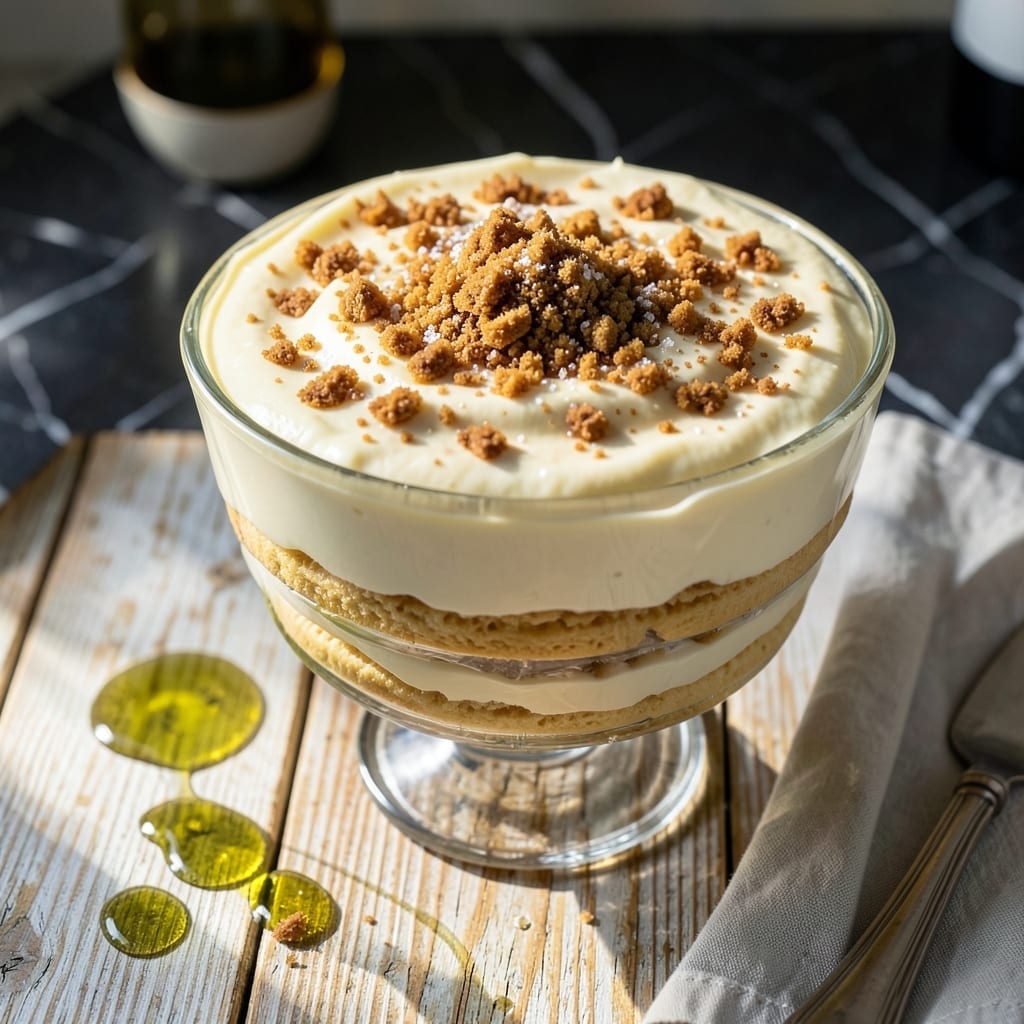
This layered dessert delivers all the comfort of classic banana pudding without a single banana in sight.
Vanilla wafers and creamy custard come together in perfect harmony, creating a texture that’s rich yet light. The layers soften slightly as they sit, but maintain enough structure to hold their shape.
What makes this version special is the balance—sweet vanilla wafers complement the smooth custard without overpowering it. It’s a crowd-pleaser that’s as easy to assemble as it is to devour.
Serve chilled for the best texture. Here’s how to make it.
Ingredients for Banana Cookie Pudding Recipe Without Bananas
A few pantry staples and dairy basics create this layered dessert with ease.
| Ingredient | Amount | Notes |
|---|---|---|
| Vanilla Wafers 🍪 | 12 oz | Classic round variety preferred |
| Whole Milk 🥛 | 2 cups | Full-fat for creaminess |
| Granulated Sugar 🧂 | ¾ cup | Divided for custard and layers |
| All-Purpose Flour 🌾 | ¼ cup | For custard thickening |
| Large Eggs 🥚 | 3 whole | Room temperature preferred |
| Vanilla Extract 🌿 | 2 tsp | Pure extract for best flavor |
| Salt 🧂 | ¼ tsp | Balances sweetness |
| Unsalted Butter 🧈 | 2 tbsp | For custard richness |
| Heavy Cream 🥛 | 1 cup | Whipped for topping |
| Vanilla Bean 🌿 | 1 whole | Seeds scraped, optional |
| Ground Cinnamon 🌶️ | ¼ tsp | For dusting layers |
The vanilla wafers are non-negotiable—Nilla brand is the gold standard, but any classic round vanilla wafer works. Look for them in the cookie aisle at Walmart or Target. For the custard, whole milk is key for that creamy texture (don’t skimp with 2%). The vanilla? Pure extract over imitation every time. A vanilla bean takes it up a notch if you’re feeling fancy.
No vanilla wafers? Shortbread cookies work in a pinch (crush them slightly). Swap whole milk for half-and-half if you want it extra rich. Out of heavy cream? Cooled whipped topping can stand in, though the texture won’t be quite as luscious. The eggs are essential for structure—no good substitutes here. Cinnamon can be skipped, but it adds a nice warmth to the layers.
Assemble this up to 8 hours ahead—it actually gets better as it sits. Store covered in the fridge for 3-4 days. The wafers will soften completely if left too long, so aim to serve within 2 days for that perfect texture balance. Freezing isn’t recommended.
Why You’ll Love This Recipe
- One Bowl Wonder: I just dump everything in—no fancy tools, and the vanilla wafers soften into this creamy dream.
- Old-School Comfort: That warm vanilla and egg custard with the cookies? Honestly, it tastes like my grandma’s kitchen.
- Feeds a Crowd: I made it for a potluck and came home with an empty dish—no leftovers, ever.
- Budget Friendly: Five ingredients I already have, and it feels like a million bucks.
Step-by-Step Instructions for Vanilla Wafer Layers With Creamy Custard
Here’s the method. Straightforward, tested, works every time.
Step 1: Prepare the Custard Base
In a medium saucepan, whisk together the 2 cups Whole Milk, 0.75 cup Granulated Sugar, and 0.25 cup All-Purpose Flour until smooth. Place the pan over medium heat and cook, stirring constantly with a wooden spoon, for 5-7 minutes until the mixture thickens to the consistency of pudding.
This step is where the magic happens—the flour cooks out and the mixture transforms from thin milk to a rich, velvety base. Watch for the first gentle bubbles around the edges; that’s your sign the custard is beginning to thicken. Keep stirring to prevent lumps from forming.
Step 2: Temper and Thicken the Custard with Eggs
In a separate bowl, whisk the 3 whole Large Eggs until well combined. Slowly pour about 1 cup of the hot milk mixture into the eggs while whisking continuously—this tempers the eggs and prevents them from scrambling when added to the hot pan.
Pour the tempered egg mixture back into the saucepan and continue cooking over medium heat for another 3-4 minutes, stirring constantly. The custard should coat the back of a spoon and leave a clean line when you run your finger through it. Remove from heat once it reaches this stage.
Step 3: Add Flavorings and Cool the Custard
Stir in the 2 tbsp Unsalted Butter, 2 tsp Vanilla Extract, and 0.25 tsp Salt until the butter is completely melted and the mixture is smooth. If using the 1 whole Vanilla Bean, scrape the seeds into the custard and stir to distribute evenly.
Transfer the custard to a heatproof bowl and cover the surface directly with plastic wrap to prevent a skin from forming. Let it cool at room temperature for 30 minutes, then refrigerate for 1 hour or until fully chilled. This step ensures the custard sets properly and develops a creamy texture.
Step 4: Assemble the Vanilla Wafer Layers
In a 9×9-inch baking dish, create a single layer of 12 oz Vanilla Wafers, arranging them neatly to cover the bottom. Lightly sprinkle 0.25 tsp Ground Cinnamon over the wafers for a subtle warmth. Spread half of the chilled custard evenly over the wafers.
Repeat with another layer of vanilla wafers, a light dusting of cinnamon, and the remaining custard. Smooth the top with a spatula to ensure even layers. The wafers will soften as they absorb the custard, creating a delightful texture contrast.
Step 5: Top with Whipped Cream and Chill
In a chilled bowl, whip the 1 cup Heavy Cream until soft peaks form. Spread or pipe the whipped cream over the top layer of custard. Lightly dust with additional cinnamon if desired.
Cover the dish and refrigerate for at least 4 hours or overnight to allow the vanilla wafers to fully soften and the flavors to meld. Serve chilled, scooping portions to reveal the beautiful layers. Each bite will deliver creamy custard and tender, cinnamon-kissed vanilla wafers.
Pro Tips For Making Banana Cookie Pudding Recipe Without Bananas
- Chill the Pudding: After cooking, let the pudding cool for at least 2 hours in the fridge—I learned this the hard way when my first batch was too runny to hold the vanilla wafers upright.
- Toast the Wafers: Lightly toast the vanilla wafers in the oven for 3-4 minutes at 350°F to prevent them from turning soggy too quickly in the pudding layers.
- Temper the Eggs: Slowly whisk the hot milk mixture into the eggs, about a tablespoon at a time, or you’ll end up with scrambled eggs in your pudding—yes, I’ve done this.
- Use Full-Fat Milk: Skip the skim milk; whole milk gives the pudding a richer texture that actually holds up to the wafers without turning watery.
Essential Equipment for banana cookie pudding recipe without bananas
Mixing Tools
A sturdy whisk is essential for the custard base—I use a 10-inch silicone-coated whisk from OXO for smooth mixing without scratching my pans. A medium saucepan with a heavy bottom prevents scorching during the custard cooking process.
Measuring Essentials
For dry ingredients, use nested measuring cups and measuring spoons for accuracy. I prefer metal ones from Cuisinox—they’re durable and easy to clean. A liquid measuring cup with a spout makes pouring the milk and cream mess-free.
Chilling Equipment
A 9×9-inch baking dish is perfect for layering—I like Pyex glass because it’s oven-safe and lets you see the beautiful layers. For whipping cream, a chilled metal bowl and hand mixer work best for quick, fluffy results. 💪
Layering Helpers
An offset spatula helps spread custard evenly without disturbing the vanilla wafers. I use a 9-inch Ateco—it’s flexible and precise. A fine-mesh sieve dusts cinnamon evenly across layers for professional presentation.
Serving Supplies
A sharp knife or serving spoon ensures clean portions. I prefer a Wüsthof 8-inch chef’s knife for slicing. Small dessert bowls or ramekins make individual servings feel special. 🍽️
Storage Solutions
Use airtight containers for leftovers—Rubbermaid Brilliance is my go-to. The clear design lets you admire the layers even in the fridge. Plastic wrap directly on the custard surface prevents a skin from forming during chilling.
Nutrition Facts
Frequently Asked Questions
Can I use a different cookie instead of vanilla wafers?
Yes! Shortbread cookies work well as a substitute. Crush them slightly for better layering. Avoid chocolate cookies, as they can overpower the custard flavor.
How long can I store this in the fridge?
It stays fresh for 3-4 days covered in the fridge. For best texture, serve within 2 days so the wafers don’t get too soft.
Why did my custard turn lumpy?
Lumps usually mean the eggs weren’t tempered properly or the mixture wasn’t stirred enough. Cook over medium heat and whisk constantly.
Can I make this ahead of time?
Assemble up to 8 hours ahead. The flavors meld better with time, and the wafers soften perfectly.

- 6 Egg Cake Recipe with Oil: Light as Air With Buttery Moisture - October 4, 2026
- 4 Bean Casserole Recipe: One-Pan Heartiness With Smoky Paprika Depth - October 4, 2026
- 3-Ingredient Keto Mug Cake Recipe: Microwave Magic in 2 Minutes - October 4, 2026