
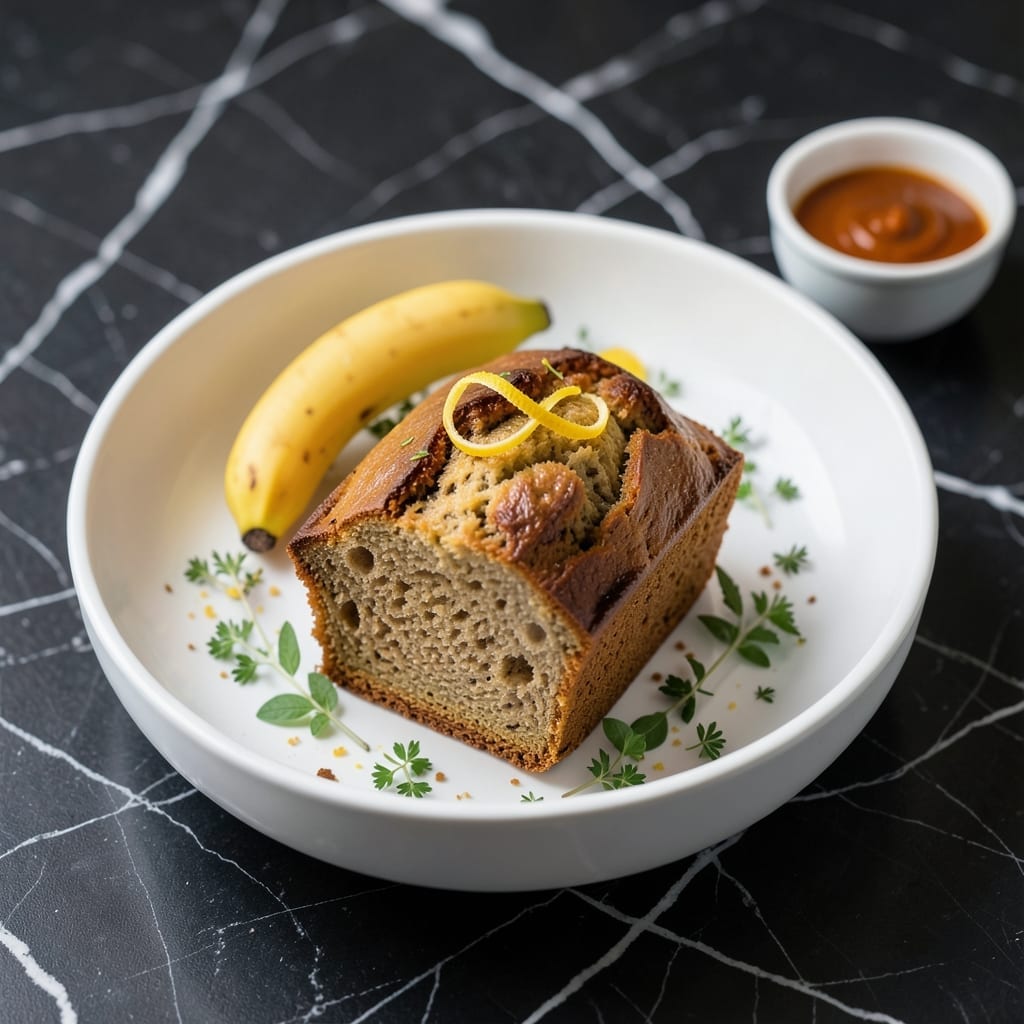
This banana loaf delivers a moist crumb and perfect texture using just two ripe bananas.
With minimal effort and no mixer required, you get a tender, flavorful loaf that’s ideal for breakfast or snack time.
Ingredients for Banana Loaf Recipe with 2 Bananas
Just ten ingredients for a perfectly moist loaf with minimal effort and maximum flavor.
| Ingredient | Amount | Notes |
|---|---|---|
| Ripe Bananas 🍌 | 2 whole | Heavily speckled, about 1 cup mashed |
| All-Purpose Flour 🌾 | 1 ½ cups | Spoon and level, not scooped |
| Granulated Sugar 🍚 | ¾ cup | White or light brown works |
| Large Eggs 🥚 | 2 whole | Room temperature preferred |
| Vegetable Oil 🫒 | ½ cup | Canola or melted coconut oil |
| Vanilla Extract 💧 | 1 tsp | Pure extract, not imitation |
| Baking Soda 🧂 | 1 tsp | Ensures proper rise |
| Salt 🧂 | ½ tsp | Fine grain table salt |
| Ground Cinnamon 🌿 | 1 tsp | Optional but recommended |
| Chopped Walnuts 🥜 | ½ cup | Toasted, optional for crunch |
The bananas are everything here. Use the spottiest ones you can find—the more black speckles, the sweeter and more flavorful your loaf. Most grocery stores discount overripe bananas, which are perfect (I grab mine from Whole Foods or Trader Joe’s when they’re on clearance). If your bananas aren’t ripe enough, bake them at 300°F for 15 minutes to soften and sweeten.
No walnuts? Pecans or chocolate chips work just as well. Short on bananas? Applesauce at a 1:1 ratio keeps the moisture without changing flavor much. The oil can be swapped for melted butter (use the same amount), but stick with neutral oils—olive oil’s flavor can be overpowering here. For a whole-grain twist, swap half the all-purpose for white whole wheat flour.
This loaf stays fresh at room temperature for 2-3 days (wrap it tight). For longer storage, slice and freeze for up to 3 months. The texture actually improves after a day—great for making ahead. Just bring slices to room temp before serving.
Why You’ll Love This Recipe
- Minimal Effort: I just dump, mix, and bake—no fancy tools, just a bowl and those two ripe bananas.
- Moist & Sweet: The oil keeps it tender for days, and the sugar caramelizes just enough to make every bite worth it.
- Breakfast or Snack: I slice it thick for morning toast or pack a piece for my kid’s lunchbox.
- Budget Friendly: Two bananas, pantry staples, and one loaf that stretches through the week. Honestly, it’s a steal.
Step-by-Step Instructions for Banana Loaf
Here’s my no-fail method for a tender, flavorful loaf that comes together in minutes.
Step 1: Mash the Ripe Bananas
In a large mixing bowl, mash the 2 whole Ripe Bananas with a fork until mostly smooth with just a few small lumps remaining. I like to leave it slightly chunky for texture—it gives the finished loaf little bursts of banana flavor.
You’ll get about 1 cup of mashed banana from these. The bananas should be heavily speckled or even black-spotted for maximum sweetness and moisture. This is the foundation of your loaf’s moist crumb, so don’t skimp on ripeness.
Step 2: Combine Wet Ingredients
To the mashed bananas, add the 0.75 cup Granulated Sugar, 2 whole Large Eggs, 0.5 cup Vegetable Oil, and 1 tsp Vanilla Extract. Whisk vigorously until the mixture is uniform and slightly pale in color, about 1-2 minutes.
I always use room temperature eggs here—they emulsify better with the oil for a smoother batter. The sugar should dissolve completely, and you’ll notice the mixture lighten as you whisk. This step builds structure while keeping the crumb tender.
Step 3: Fold in Dry Ingredients
In a separate bowl, whisk together the 1.5 cups All-Purpose Flour, 1 tsp Baking Soda, 0.5 tsp Salt, and 1 tsp Ground Cinnamon. Pour this into the wet ingredients and fold gently with a silicone spatula until just combined—you should see a few flour streaks still visible.
Overmixing develops gluten, which would make your loaf tough instead of tender. The batter will be thick but pourable. If using, fold in the 0.5 cup Chopped Walnuts at this stage, reserving a handful for topping if desired.
Step 4: Bake to Golden Perfection
Pour the batter into a greased 8×4-inch loaf pan and smooth the top with your spatula. If using walnuts, sprinkle the reserved amount over the surface for a nice crunch. Bake in a preheated 350°F oven for 50-60 minutes.
You’ll know it’s done when a toothpick inserted in the center comes out clean or with just a few moist crumbs attached. The loaf should pull away slightly from the sides of the pan, and the top should be deep golden brown with a slight dome. Real talk: if the top browns too quickly, tent with foil for the last 15-20 minutes.
Step 5: Cool Completely Before Slicing
Let the loaf cool in the pan for 10 minutes, then transfer it to a wire rack to cool completely, about 1 hour. I know it’s hard to wait when it smells this good, but slicing too soon will make it crumbly.
The texture actually improves as it cools—the flavors meld and the crumb sets. When you do slice, use a serrated knife for clean cuts. Each piece should have a moist, tender interior with a slightly crisp top, and that unmistakable banana-cinnamon aroma.
Pro Tips For Making Banana Loaf Recipe With 2 Bananas
- Mash bananas well: Don’t just roughly break them up—spend a full minute mashing until smooth, especially with only 2 bananas. Lumps mean uneven moisture in your loaf.
- Check oven early: I learned this the hard way—start testing for doneness at 45 minutes with a toothpick. Two bananas make a denser batter that can overbake fast.
- Use very ripe bananas: Skip the yellow ones; go for black-spotted peels. With just two bananas, maximum sweetness and softness are non-negotiable.
- Swap oil for melted butter: Sounds weird, but it works: replacing vegetable oil with melted butter adds a richer flavor that complements the banana. I was skeptical until I tried it.
Storing and Reheating Leftovers
🍳 Refrigerator Storage
To keep your banana loaf fresh for a few days, store it in an airtight container at room temperature for up to 2 days or in the refrigerator for 3-4 days. This prevents it from drying out while maintaining its moist texture. If your loaf has a glaze or frosting, refrigeration is recommended to preserve its consistency.
❄️ Freezer Storage
For longer storage, wrap individual slices or the whole loaf tightly in plastic wrap and place them in a freezer-safe bag. Your banana loaf will stay fresh in the freezer for 2-3 months. Slicing before freezing makes it easy to thaw only what you need.
🔥 Reheating Methods
To revive your loaf, use the oven at 300°F (150°C) for 10-15 minutes for a warm, freshly baked feel. For a quick fix, microwave a slice for 20-30 seconds, but watch closely to avoid sogginess. If you’re feeling adventurous, try reheating in a smoker at 225°F (107°C) for 15-20 minutes to add a smoky depth to the flavor.
💡 Quality Preservation
To retain moisture, avoid storing the loaf uncovered or in direct sunlight. When thawing frozen slices, leave them at room temperature for 1-2 hours or overnight in the fridge. For extra freshness, lightly brush the loaf with a simple syrup before storing to lock in moisture. Pro tip: Add a slice of bread to the storage container—it’ll absorb excess moisture and keep your loaf perfectly tender!
Nutrition Facts

- 6 Egg Cake Recipe with Oil: Light as Air With Buttery Moisture - October 4, 2026
- 4 Bean Casserole Recipe: One-Pan Heartiness With Smoky Paprika Depth - October 4, 2026
- 3-Ingredient Keto Mug Cake Recipe: Microwave Magic in 2 Minutes - October 4, 2026