
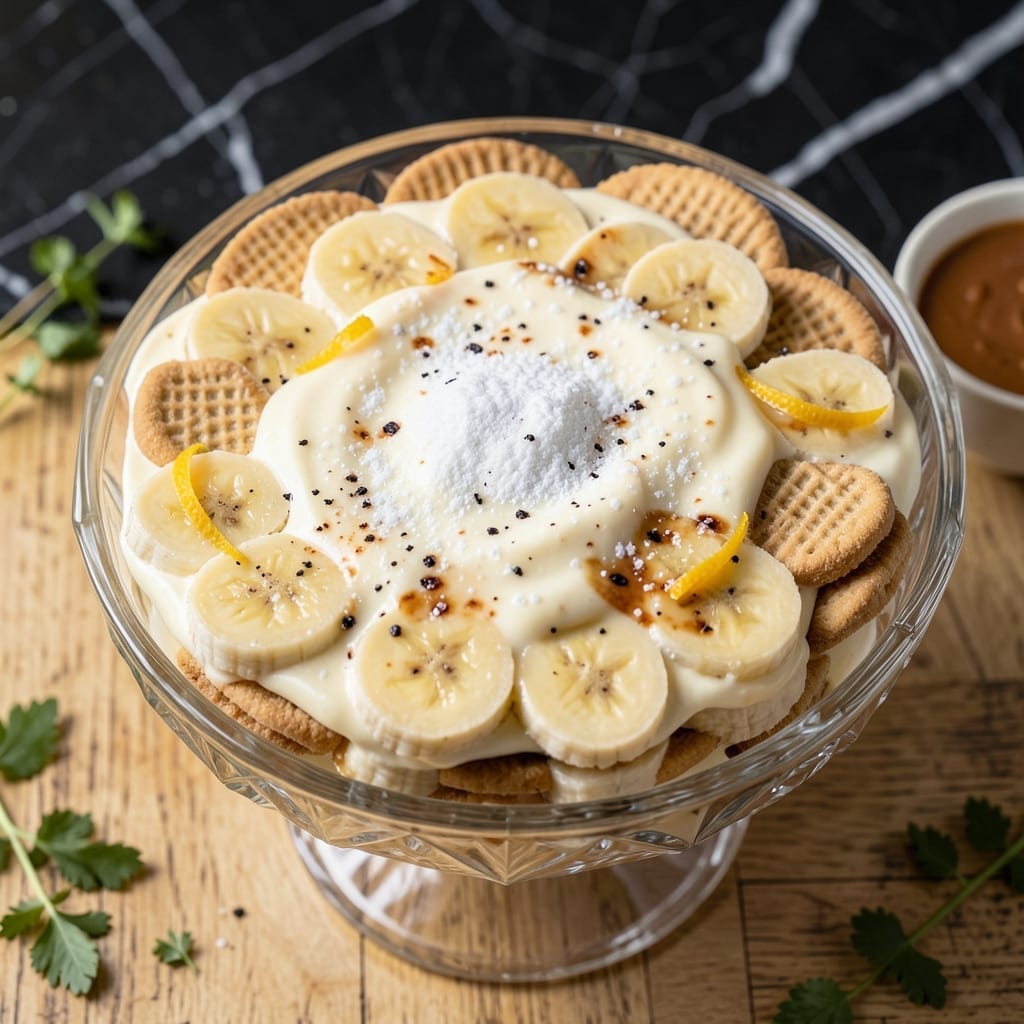
There’s nothing quite like the creamy, comforting layers of homemade banana pudding to bring back childhood memories. This from-scratch version elevates a classic with real vanilla, fresh bananas, and a velvety custard that sets the standard.
The secret lies in cooking the custard low and slow to achieve a smooth, rich texture that clings perfectly to the wafers. Layering while the custard is still warm ensures the vanilla wafers soften just enough without turning mushy.
Each bite delivers the perfect balance of sweet bananas, buttery wafers, and luscious custard. It’s a dessert that tastes even better the next day, as the flavors meld together.
Whether served in a large dish or individual cups, this pudding is a timeless crowd-pleaser.
Ingredients for Banana Pudding Recipe from Scratch
Simple ingredients create layers of creamy custard, fresh bananas, and buttery wafers.
| Ingredient | Amount | Notes |
|---|---|---|
| Granulated Sugar 🍚 | 1 ½ cups | Divided for custard and meringue |
| All-Purpose Flour 🌾 | ¼ cup | For thickening custard |
| Salt 🧂 | ¼ tsp | Balances sweetness |
| Large Eggs 🥚 | 4 whole | Separated for custard and meringue |
| Whole Milk 🥛 | 2 cups | Full-fat for creaminess |
| Pure Vanilla Extract 🌿 | 1 tbsp | Real vanilla for depth |
| Unsalted Butter 🧈 | 2 tbsp | For richness in custard |
| Ripe Bananas 🍌 | 6 whole | Sliced just before layering |
| Vanilla Wafers 🍪 | 12 oz | One 12-oz box |
| Heavy Cream 🥛 | ½ cup | Optional, for whipped topping |
The custard hinges on quality dairy. Whole milk and real vanilla make a noticeable difference—skip the imitation stuff. I use Nielsen-Massey vanilla when I can find it, but store-brand pure extract works fine. For the wafers, Nilla is the classic choice (that buttery crunch is unmistakable). Bananas should be ripe but firm—yellow with just a few brown speckles.
No whole milk? Half-and-half thinned with water (1:1 ratio) gets you close. Out of vanilla wafers? Shortbread cookies or graham crackers work in a pinch, though the texture changes slightly. Heavy cream is optional, but skip it entirely if you want a lighter pudding. The flour can be swapped for cornstarch at half the amount for a gluten-free version.
Assemble in a glass dish so you can see the layers. Keeps 3-4 days in the fridge (the wafers will soften more over time). The meringue (if using) is best eaten fresh—add it just before serving. Bananas slice best right before layering to prevent browning.
Why You’ll Love This Recipe
- One-Bowl Wonder: I love that I can mix the sugar, flour, eggs, and milk right in one bowl—no fancy equipment, just a whisk and a little elbow grease.
- Vanilla-Kissed Cream: The custard base with whole milk and eggs creates this rich, velvety texture that clings to the bananas and vanilla wafers in the best way.
- Potluck MVP: I’ve brought this to picnics, Sunday dinners, and even a last-minute office party. It’s always the first dish to disappear.
- Pennywise Comfort: Honestly, it’s cheaper than the boxed version when you use basic pantry staples like flour and sugar, and it tastes a million times better.
Step-by-Step Instructions for Banana Pudding From Scratch
This classic method ensures creamy custard and perfectly layered textures every time.
Step 1: Create the Vanilla Custard Base
In a medium saucepan, whisk together 1 cup Granulated Sugar, 0.25 cup All-Purpose Flour, and 0.25 tsp Salt. Gradually whisk in 2 cups Whole Milk until smooth—this prevents lumps from forming.
Place the saucepan over medium heat and cook, stirring constantly with a wooden spoon, until the mixture thickens and comes to a gentle boil. This should take about 8-10 minutes. Watch for the mixture coating the back of your spoon.
Reduce heat to low and cook for an additional 2 minutes, still stirring constantly. Remove from heat and stir in 2 tbsp Unsalted Butter and 1 tbsp Pure Vanilla Extract until the butter melts completely. The custard should be thick enough to leave a clear path when you draw a finger through it on the spoon.
Step 2: Temper and Cook the Egg Yolks
Separate 4 whole Large Eggs, placing the yolks in a medium bowl. Slowly pour about 1 cup of the hot custard mixture into the yolks while whisking vigorously—this tempers the eggs so they don’t scramble when added to the hot mixture.
Return the egg mixture to the saucepan with the remaining custard. Cook over medium-low heat for 3-4 minutes, stirring constantly, until the custard thickens enough to mound slightly when dropped from a spoon. You’ll notice it becomes glossy and smooth.
Step 3: Assemble the Layers
Line the bottom of a 9×13-inch baking dish with a layer of 12 oz Vanilla Wafers. Slice 6 whole Ripe Bananas just before layering to prevent browning, and arrange a single layer of banana slices over the wafers.
Pour half of the warm custard over the bananas, spreading it evenly. Repeat with another layer of vanilla wafers, remaining banana slices, and the rest of the custard. Press down gently to ensure the wafers absorb some of the custard.
Step 4: Optional Whipped Cream Topping
In a chilled bowl, whip 0.5 cup Heavy Cream until soft peaks form. Spread or pipe the whipped cream over the top layer of custard for a light, airy finish. This step is optional but adds a delightful contrast to the rich custard.
Chill the dish for at least 4 hours (or overnight) before serving. The wafers will soften perfectly, and the layers will set, creating that nostalgic texture with every spoonful.
Pro Tips For Making Banana Pudding Recipe From Scratch
- Temper the Eggs: Slowly whisk about 1/2 cup of the hot milk mixture into the beaten eggs before combining—sounds tedious, but it prevents scrambled eggs in your pudding. I learned this the hard way after ruining two batches.
- Use Ripe Bananas: The spottier the bananas, the sweeter and more flavorful your pudding will be. I skip the green ones now—after tasting the difference, there’s no going back.
- Simmer, Don’t Boil: Keep the heat at a gentle simmer when thickening the custard. After burning one batch, I finally figured out that high heat turns it into lumpy, sad pudding.
- Strain the Custard: Run the finished custard through a fine-mesh sieve before chilling. My grandmother swore by this, and she was right—it removes any stray cooked bits for silky-smooth pudding every time.
Troubleshooting This Recipe
Lumpy Custard Fix
If your custard develops lumps during cooking, immediately remove it from heat. Use a whisk to vigorously beat the mixture until smooth. For stubborn lumps, press the custard through a fine-mesh sieve before adding egg yolks. 💡
Thin Custard Solution
If your custard is too thin after cooking, return it to medium-low heat and cook for another 2-3 minutes, stirring constantly. If it still won’t thicken, mix 1 tbsp cornstarch with 1 tbsp cold milk and whisk into the custard until it reaches desired consistency.
Preventing Soggy Wafers
To avoid mushy wafers, layer them with custard that’s just warm, not piping hot. Use Nilla Wafers for their sturdy texture. If assembling ahead, add a thin layer of banana slices between wafers and custard to act as a barrier.
Separated Custard
If your custard separates or curdles, it likely got too hot. Immediately transfer to a blender and pulse until smooth. To prevent this, keep heat at medium-low and stir constantly. A double boiler can help maintain even, gentle heat.
Banana Browning
Prevent browning by slicing bananas just before layering. Toss slices in 1 tbsp lemon juice to slow oxidation. For extra protection, place a layer of plastic wrap directly on the pudding’s surface before refrigerating. ❄️
Meringue Troubles
If your meringue weeps, ensure egg whites are at room temperature and completely free of yolk. Add ¼ tsp cream of tartar for stability. Bake at 325°F for 15 minutes to set properly.
Nutrition Facts
Frequently Asked Questions
How do I keep the vanilla wafers from getting too soft?
Layer them with warm (not hot) custard and assemble just before chilling. Using Nilla Wafers helps—they hold up better than generic brands.
Can I make this without eggs?
Yes! Swap the eggs for 3 tbsp cornstarch mixed with 3 tbsp cold milk. Cook the custard until it thickens, then proceed with layering as usual.
How long does it need to chill?
Chill for at least 4 hours, but overnight is best. This lets the flavors meld and the wafers soften perfectly without turning mushy.
Why did my custard turn lumpy?
Lumps often form if the mixture isn’t whisked constantly or boils too rapidly. If this happens, strain it through a fine-mesh sieve or blend it smooth.

- 6 Egg Cake Recipe with Oil: Light as Air With Buttery Moisture - October 4, 2026
- 4 Bean Casserole Recipe: One-Pan Heartiness With Smoky Paprika Depth - October 4, 2026
- 3-Ingredient Keto Mug Cake Recipe: Microwave Magic in 2 Minutes - October 4, 2026